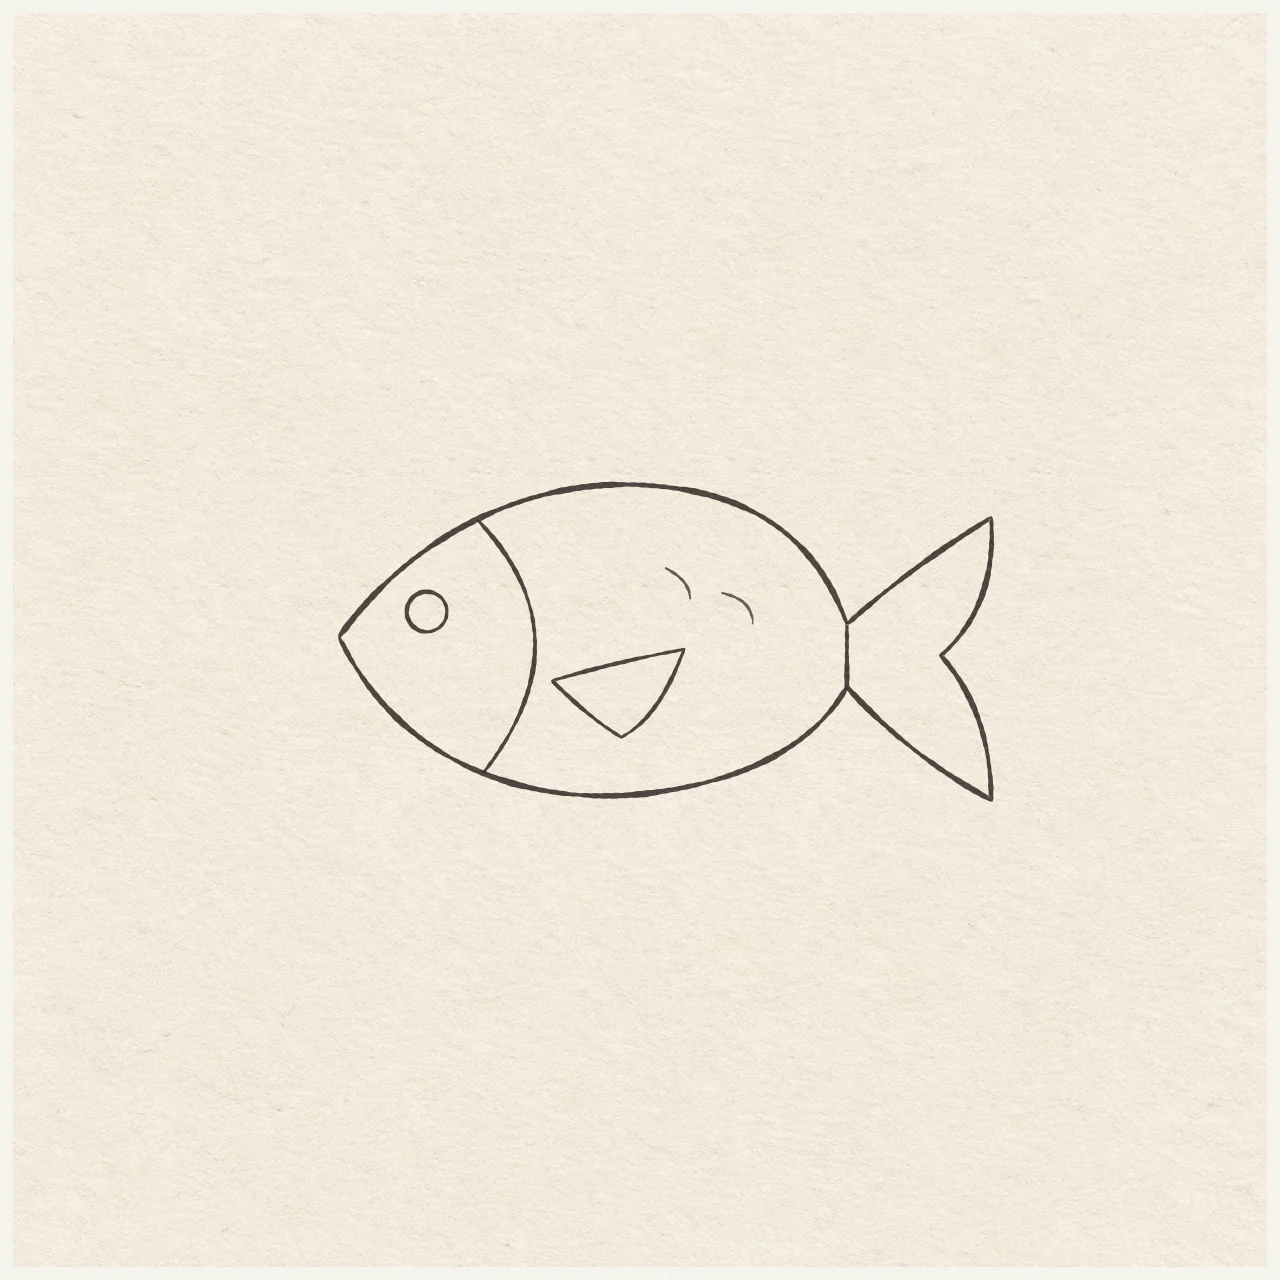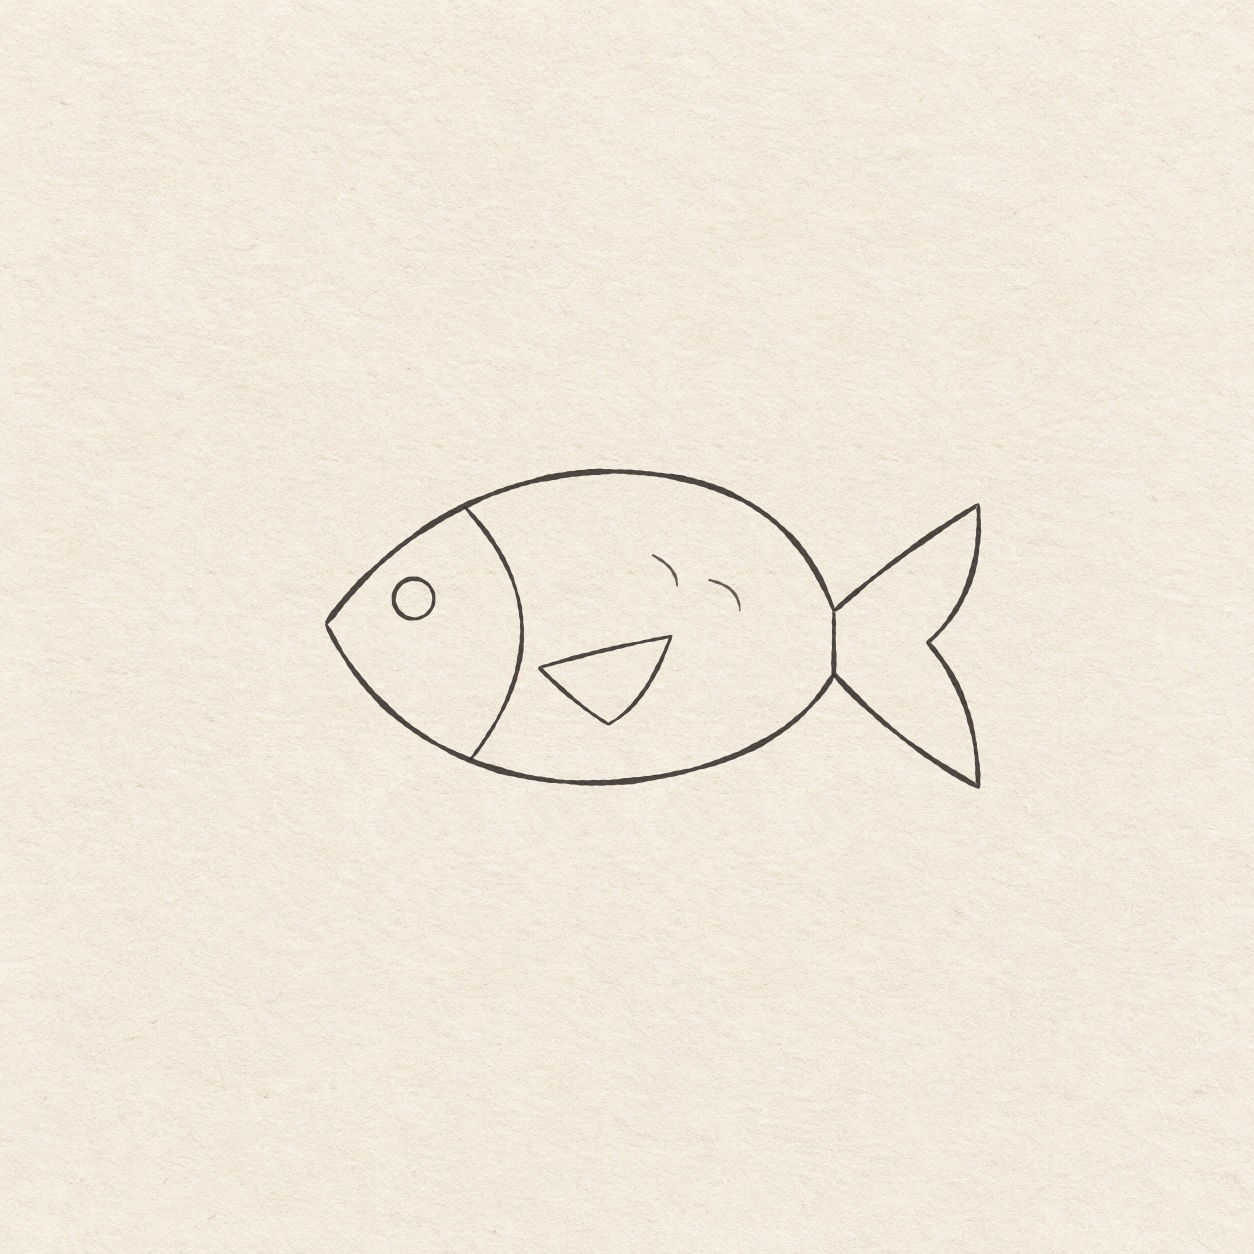
Fineliner drawing of a fish in side view with a forked tail, a round eye, one side fin and two small scale arcs.
Drawing referenceAbout reference use

Fork-tailed fish

Round the back and belly, build a forked tail and add a curved gill and one side fin.

AnimalsEasyFinelinerReference practice: about 23 min
Save reference

Follow the drawing tutorial

Round the back and belly, build a forked tail and add a curved gill and one side fin.

Start the 6-step tutorial

A small thing to tryIn pencil, leave 1 cm between the root dots. Aim the upper and lower tail edges toward their own dot.

Draw it, one step at a time

Draw a fork-tailed fish

Round the back and belly, build a forked tail and add a curved gill and one side fin.

6 illustrated steps Full tutorial: about 23 minutes, at your pace

What you’ll need

  • HB pencil
  • Eraser
  • Ruler
  • Scrap of paper with a square corner
  • Drawing compass
  • Fine black pen
  • Drawing paper

Before you start

This example is about 10.5 cm wide and 5.1 cm high. Choose the height of the nose wherever there is room to draw the fish toward the right.
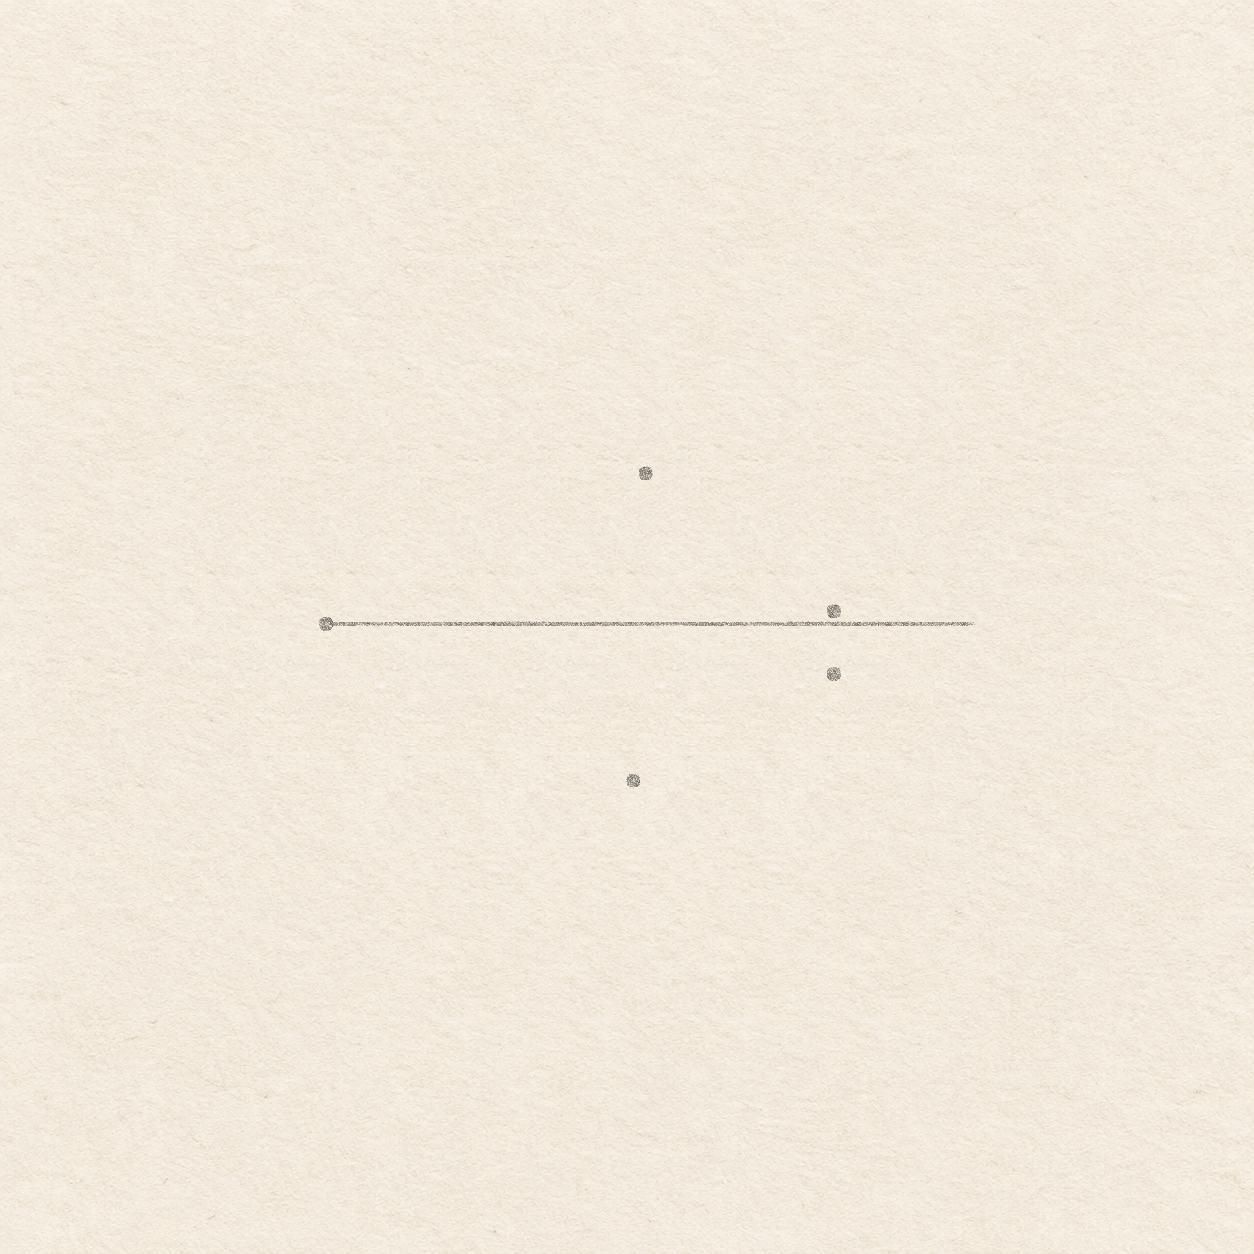
  1. A light measuring line marks the nose, two body extremes and two tail-root dots.
    Drawing 1 — Set the head, back and belly stopsView larger
    Pencil

    Set the head, back and belly stops

    Instructions for Drawing 1 — Set the head, back and belly stops
    1. Put a small dot where you want the nose. Leave 11 cm to the right and 3 cm above and below, plus a margin. Move it before drawing if the tail would crowd the paper edge.
    2. Rule a faint horizontal line 10.4 cm to the right from the nose dot. Use it only for measuring and erase it after inking.
    3. Set one edge of the square corner along the ruler line. From the nose, mark the back 5.1 cm right and 2.4 cm up, then the belly 4.9 cm right and 2.5 cm down. At 8.1 cm right from the nose, mark two tail-root dots: 2 mm above and 8 mm below the line.
    Next step
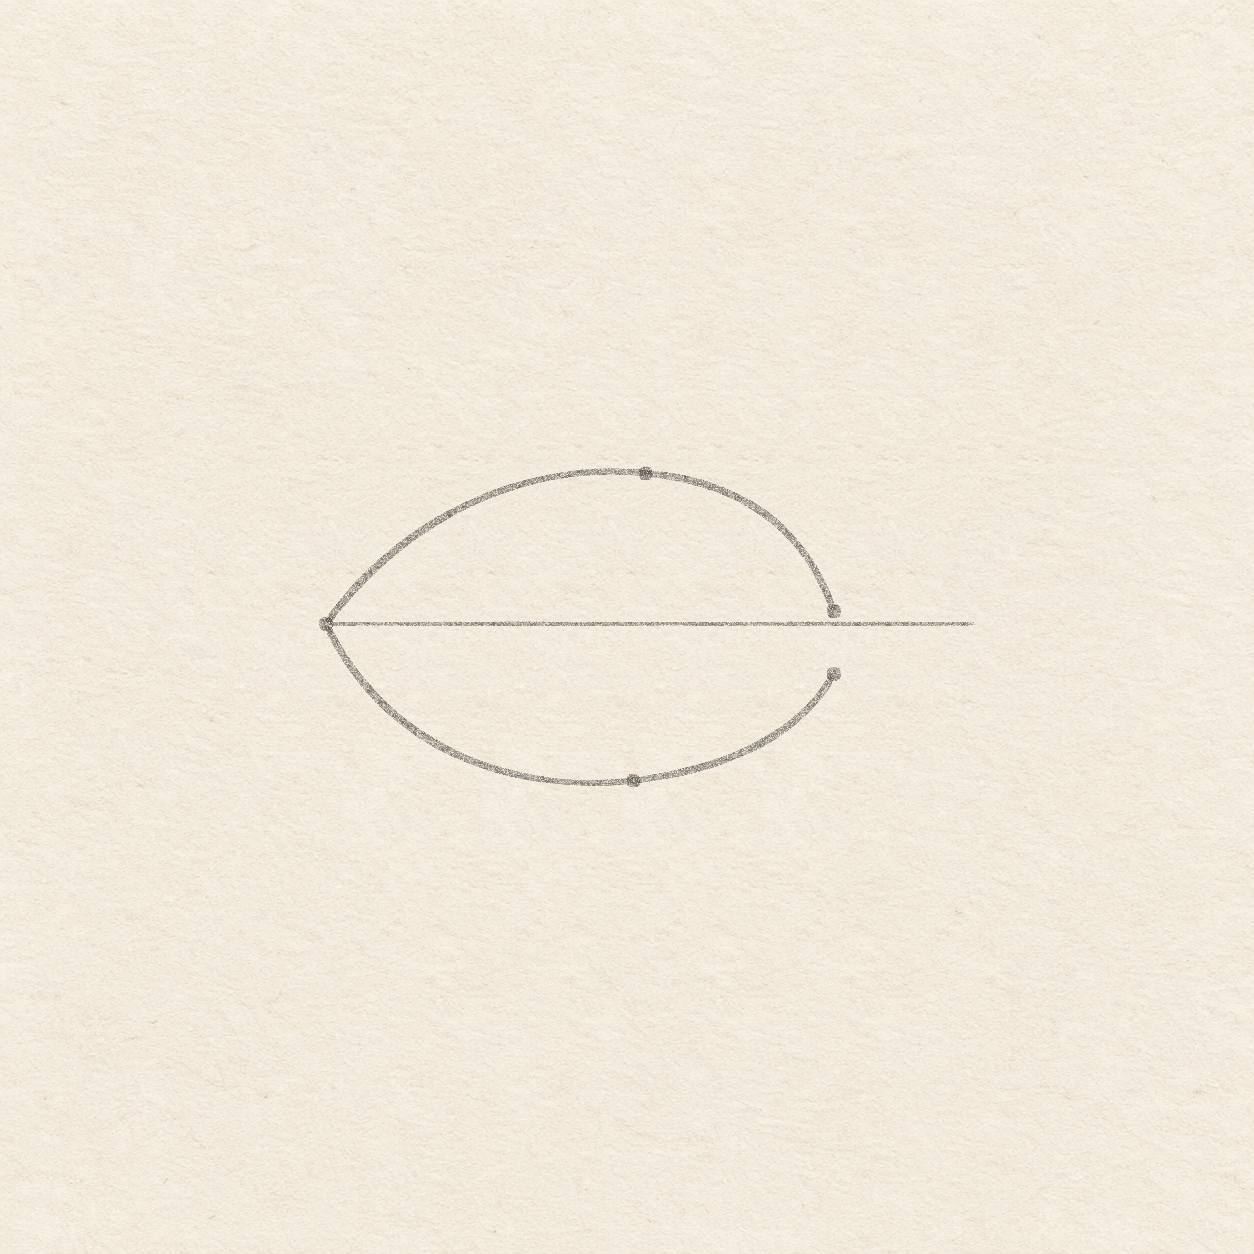
  2. Two long pencil curves run from the nose to separate dots at the tail root.
    Drawing 2 — Sweep the fish’s back and bellyView larger
    Pencil

    Sweep the fish’s back and belly

    Instructions for Drawing 2 — Sweep the fish’s back and belly
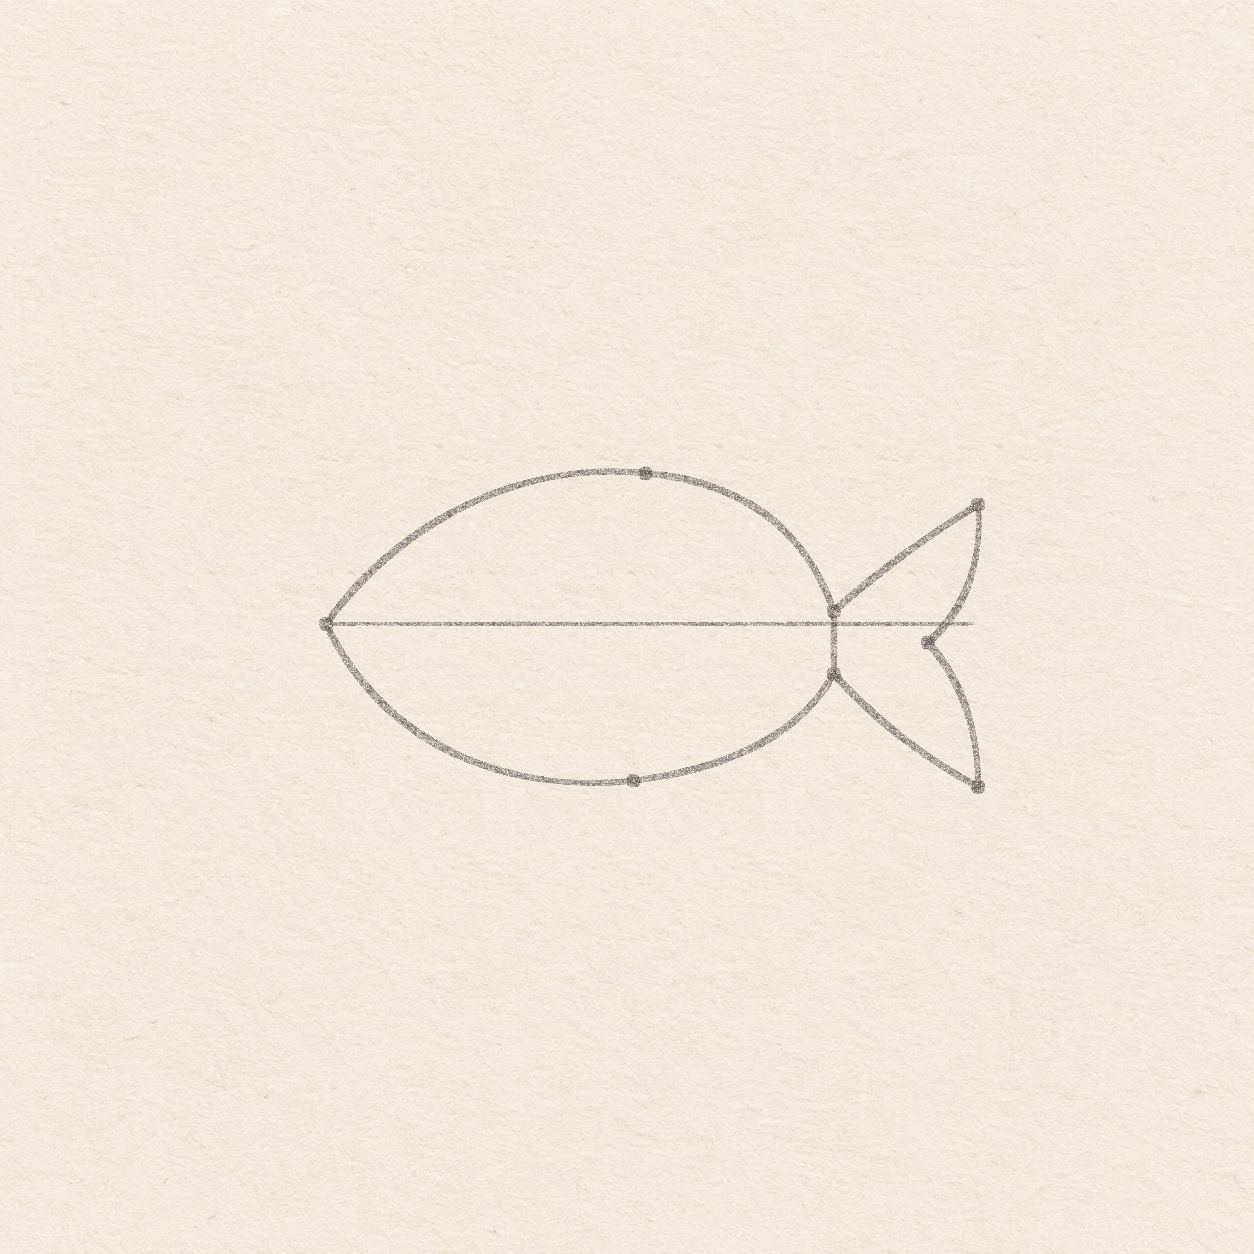
    1. Freehand from the nose up and right, curve through the high back dot and descend to the upper tail root. Start again at the nose and sweep down and right through the belly dot, then up to the lower root. Keep the back and belly round and leave the gap open between their ends.
    Next step
  3. Two tapering tail lobes meet at an inward notch and a short vertical root.
    Drawing 3 — Make the forked tailView larger
    Pencil

    Make the forked tail

    Instructions for Drawing 3 — Make the forked tail
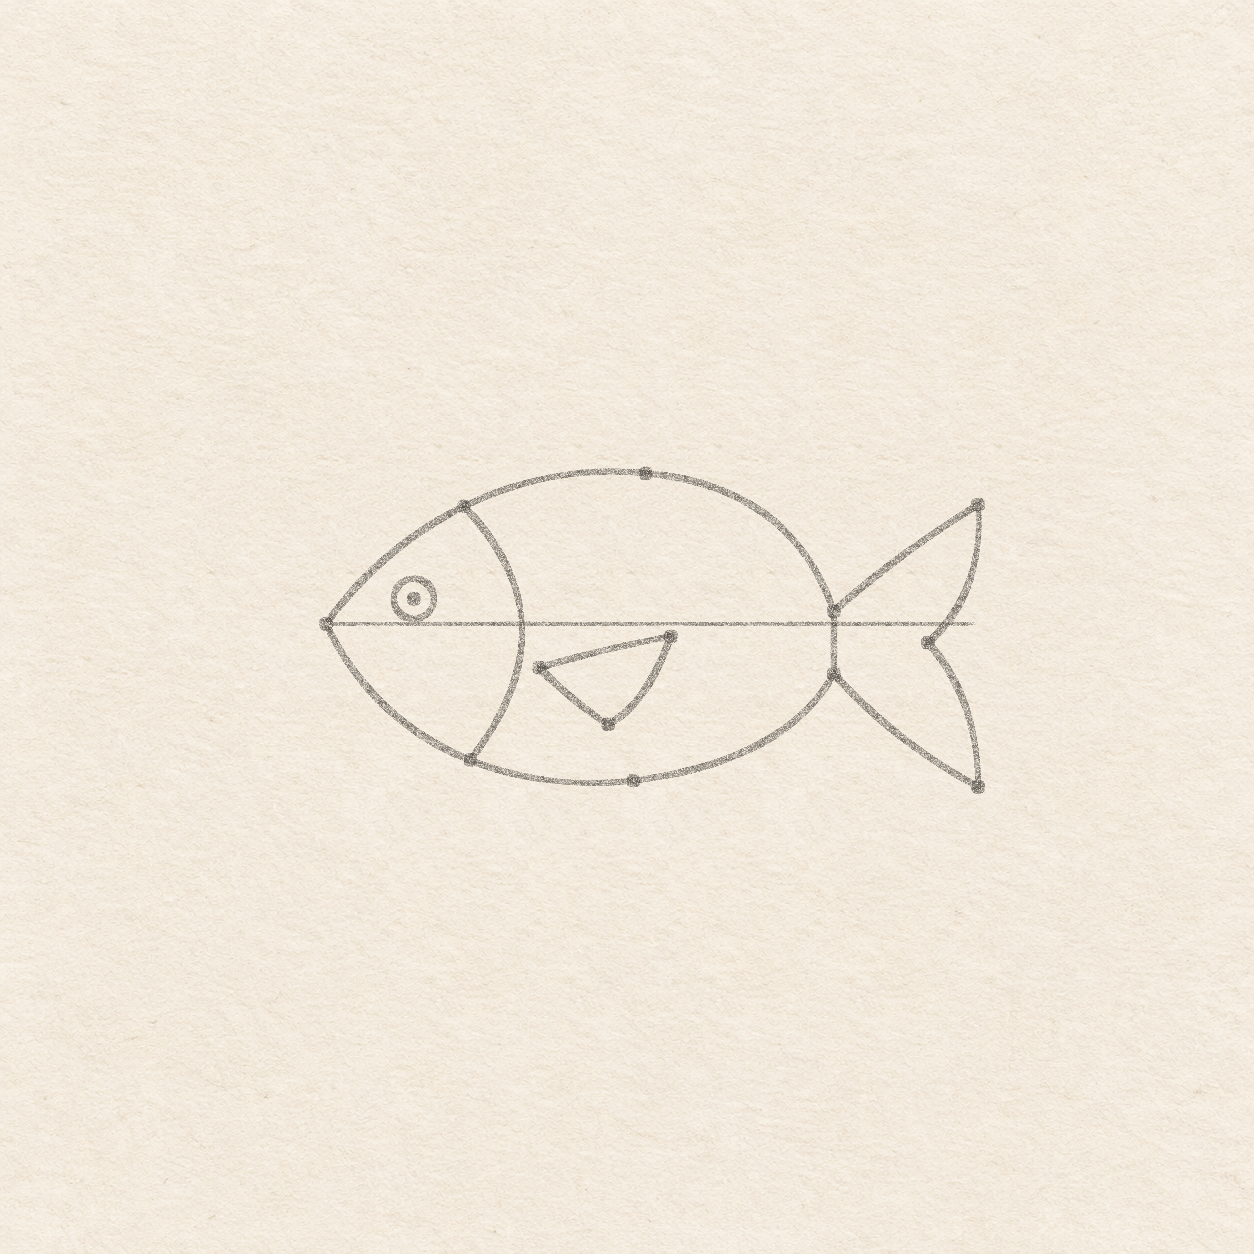
    1. From the nose measure 10.4 cm along the line. Use the square corner to put one dot 1.9 cm up and one 2.6 cm down. For the inner notch, mark a third dot 9.6 cm right of the nose and 3 mm below the line.
    2. Freehand from the upper tail root up and right to the upper tip. Curve down and left to the notch, then down and right toward the lower tip. Return up and left to the lower tail root. Rule between the two root dots to close the tail. Keep its notch and both tips distinct.
    Next step
  4. The head has a bowed gill and a small round eye, with a closed fin behind it.
    Drawing 4 — Place the gill, eye and side finView larger
    Pencil

    Place the gill, eye and side fin

    Instructions for Drawing 4 — Place the gill, eye and side fin
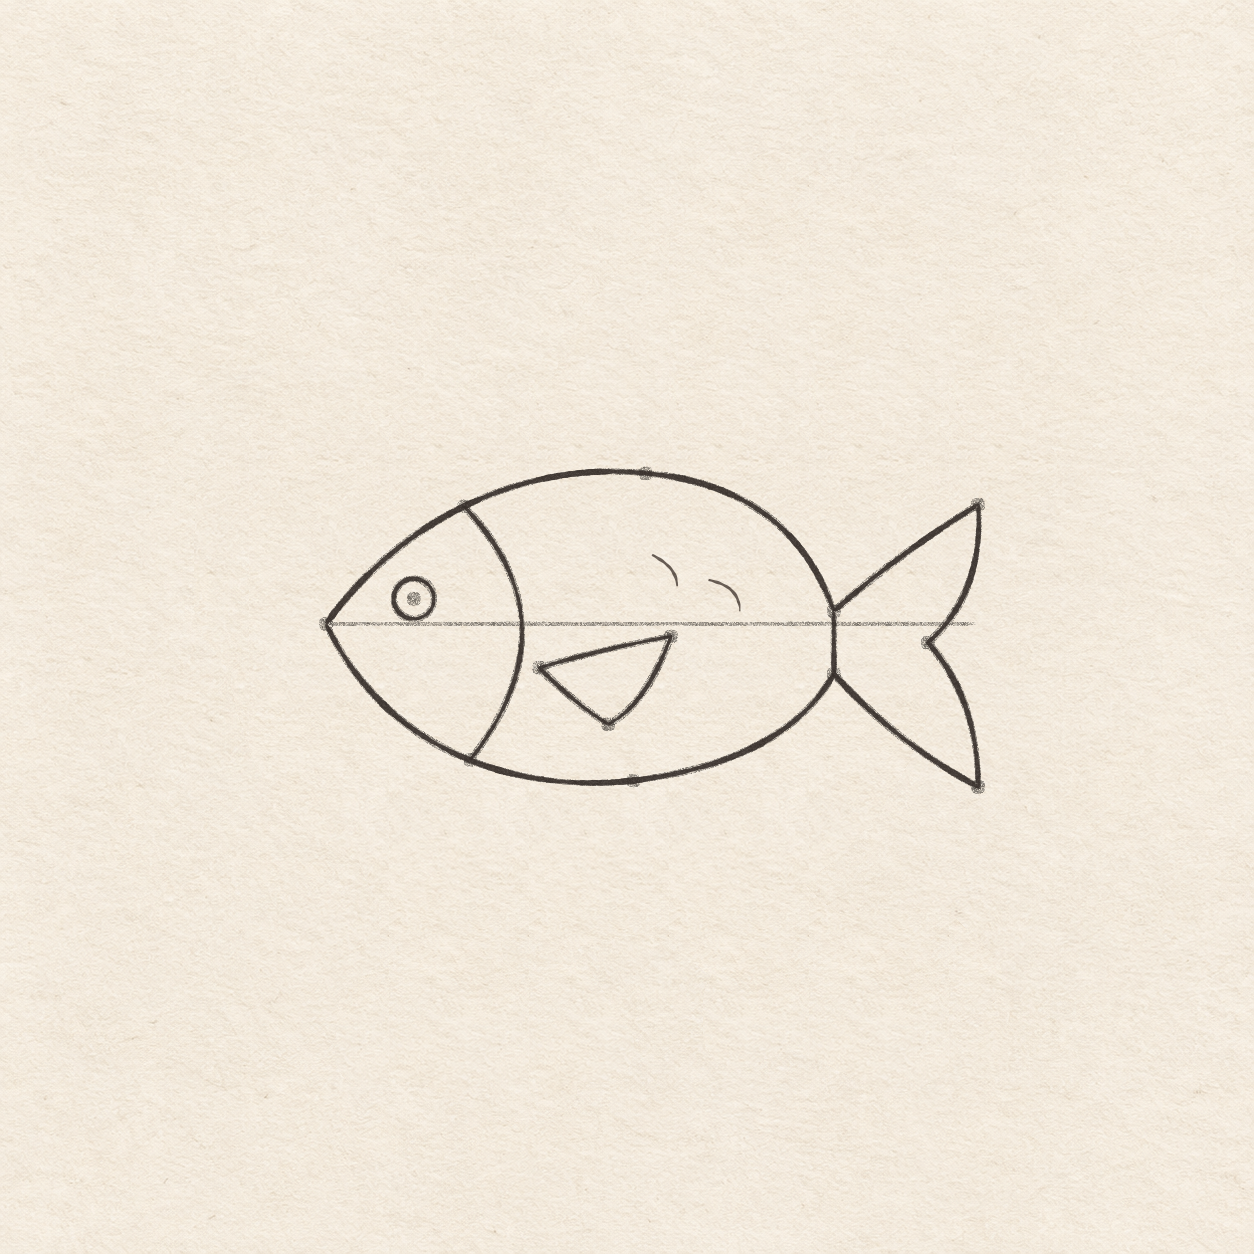
    1. From the nose, go 1.4 cm right along the line and put an eye dot 4 mm up. At 2.2 cm right, hold the ruler upright and mark where it crosses the actual back. Move the ruler 1 mm right and mark its crossing with the actual belly. These last two dots are the ends of the gill.
    2. Freehand from the upper gill dot down and right toward the middle of the face. Bow back to the lower gill dot. Keep the eye space open on the left and leave room for the small circle.
    3. Set the compass 3.2 mm open. Plant the needle on the eye dot and sweep a small circle. Keep the eye outline clear of both the nose and the curved gill line.
    4. From the nose, use the square corner to put three dots below the measuring line. Place them 3.4 cm right and 7 mm down, 5.5 cm right and 2 mm down, and 4.5 cm right and 1.6 cm down. Keep the three stops clear of the gill and the belly.
    5. Freehand a small bow up and right from the left fin dot to the right dot. Curl down and left through the low dot and then back to the first dot. Close the fin and keep open paper between it and the belly.
    Next step
  5. The inked fish has an outlined eye, bowed gill, closed side fin and two short detached arcs.
    Drawing 5 — Ink the fish and add two scale curvesView larger
    Ink

    Ink the fish and add two scale curves

    Instructions for Drawing 5 — Ink the fish and add two scale curves
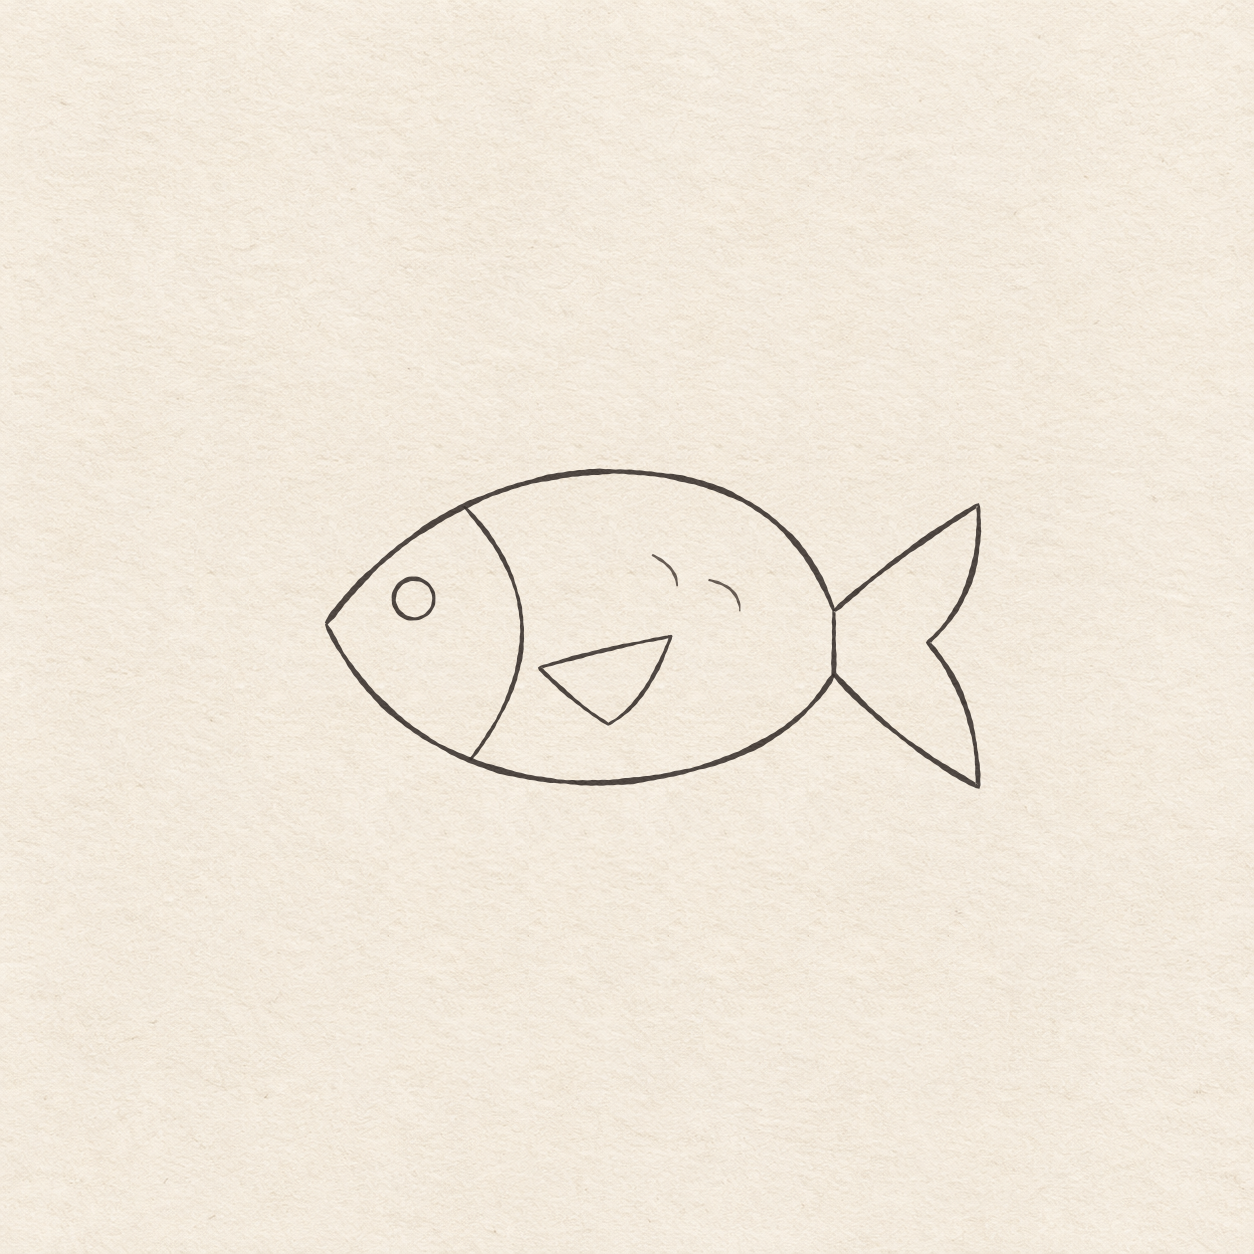
    1. Trace both outlines from the nose toward the tail roots. Let the back and belly meet at the nose.
    2. Follow both tail tips, the notch and the short root line in pen. Stop the sides at their own body contacts.
    3. Ink the curve from the back to the belly. Lift at the actual outline on both ends so the gill keeps a clean contact.
    4. Ink the small pencil circle with the point of the pen. Leave its middle open. Lift the point once the small ring closes.
    5. Ink all the way around the three sides of the small fin, starting and stopping at its left point. Join at the first point and keep the fin clear of the outline.
    6. Freehand two short bent strokes within the upper-right part of the body. Start each with a small rightward curve and turn it downward. Keep the ends separate and clear of the fin and back.
    Next step
  6. The finished fish has a two-lobed tail, rounded body and two light scale arcs.
    Drawing 6 — Erase the dry pencil guidesView larger
    Cleanup

    Erase the dry pencil guides

    Instructions for Drawing 6 — Erase the dry pencil guides

    1. Fill a small patch on a scrap of the same paper with the same pen. Rub the patch gently with your eraser. If it smears, wait and test again. Once the patch stops smearing, erase the measuring line, all placement dots and any remaining pencil marks beside the dry ink.
    Back to the steps

If something looks off

If the tail looks pinched at its root

In pencil, leave 1 cm between the root dots. Aim the upper and lower tail edges toward their own dot.