FinelinerEasy

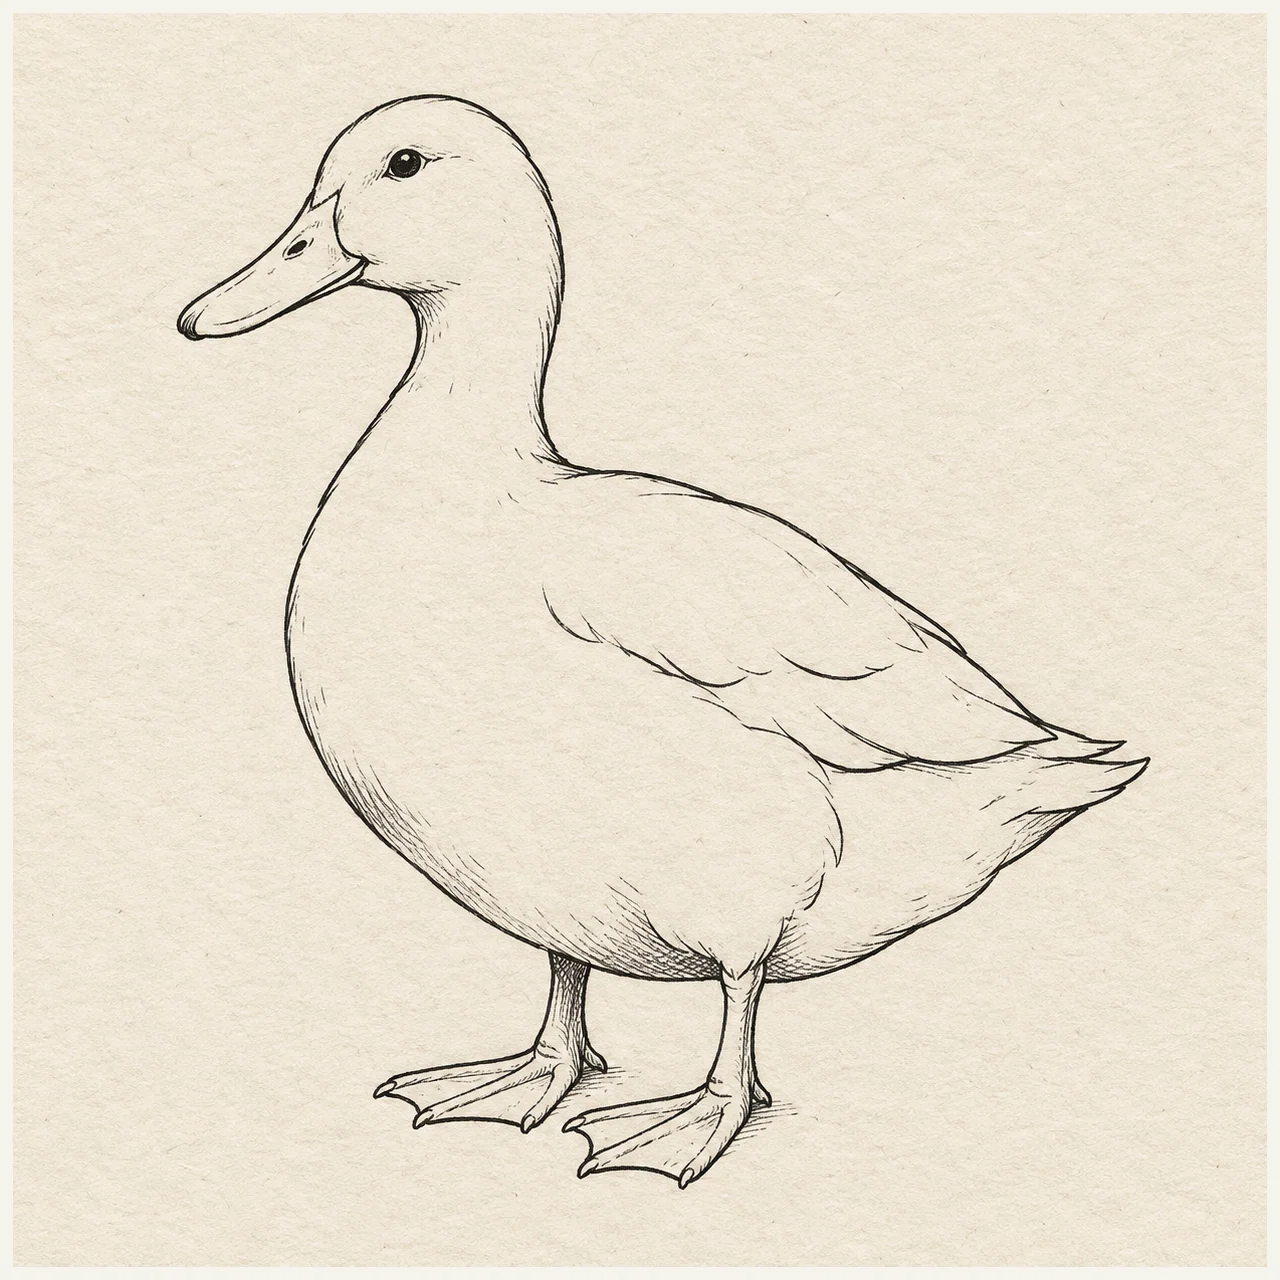
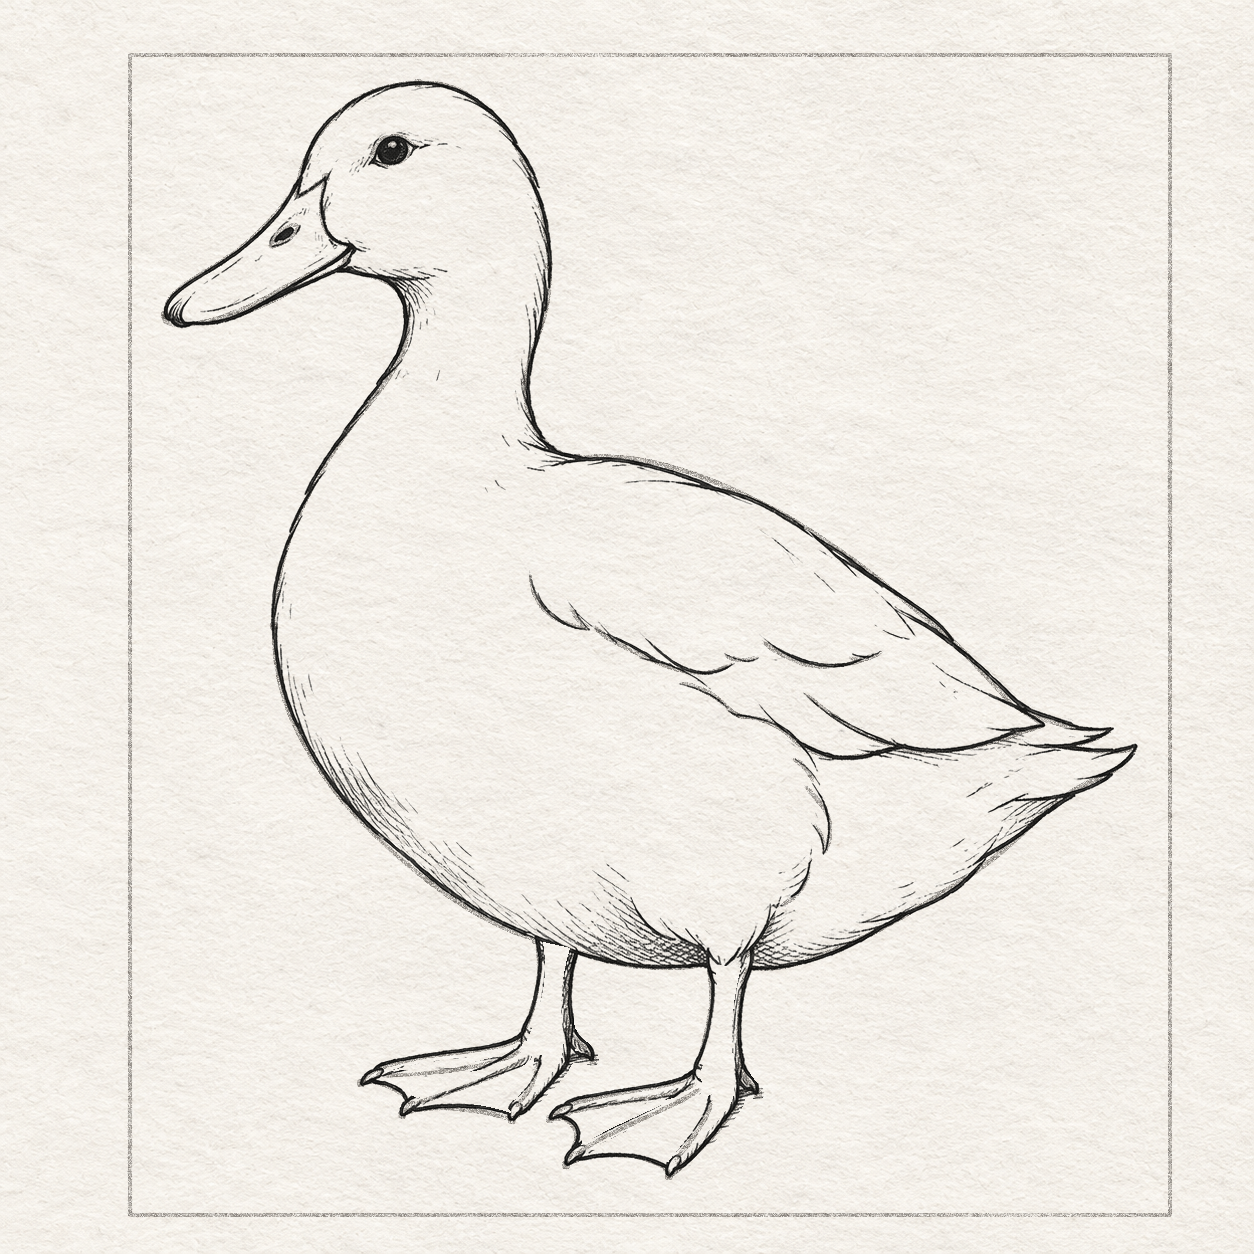
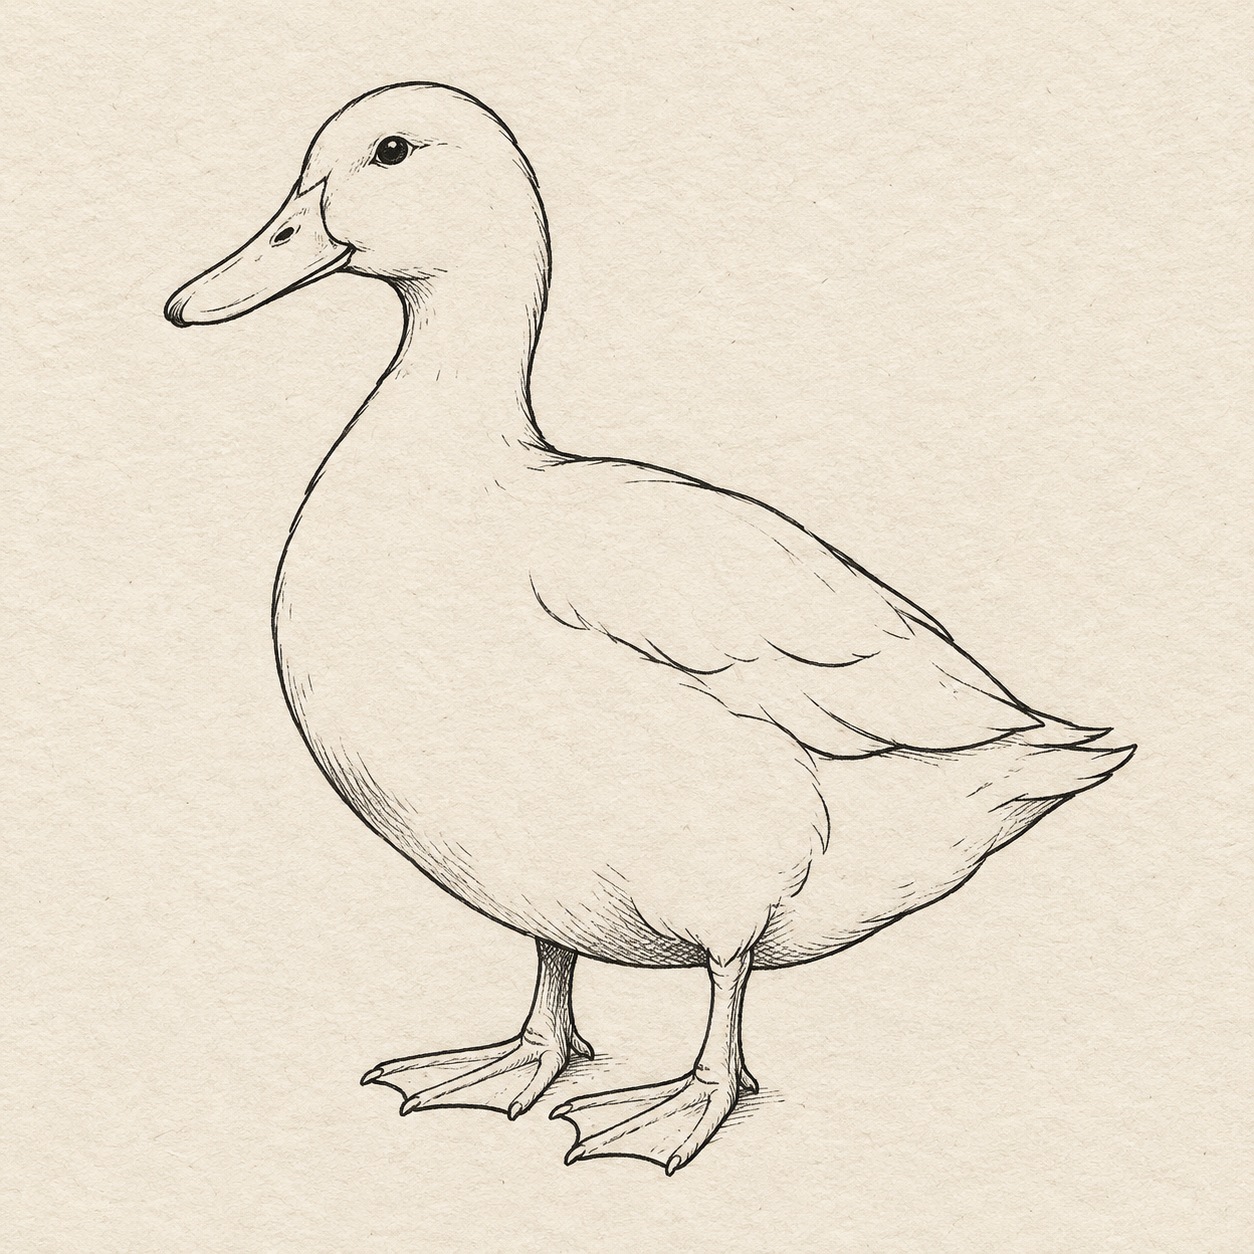
Duck fine ink study
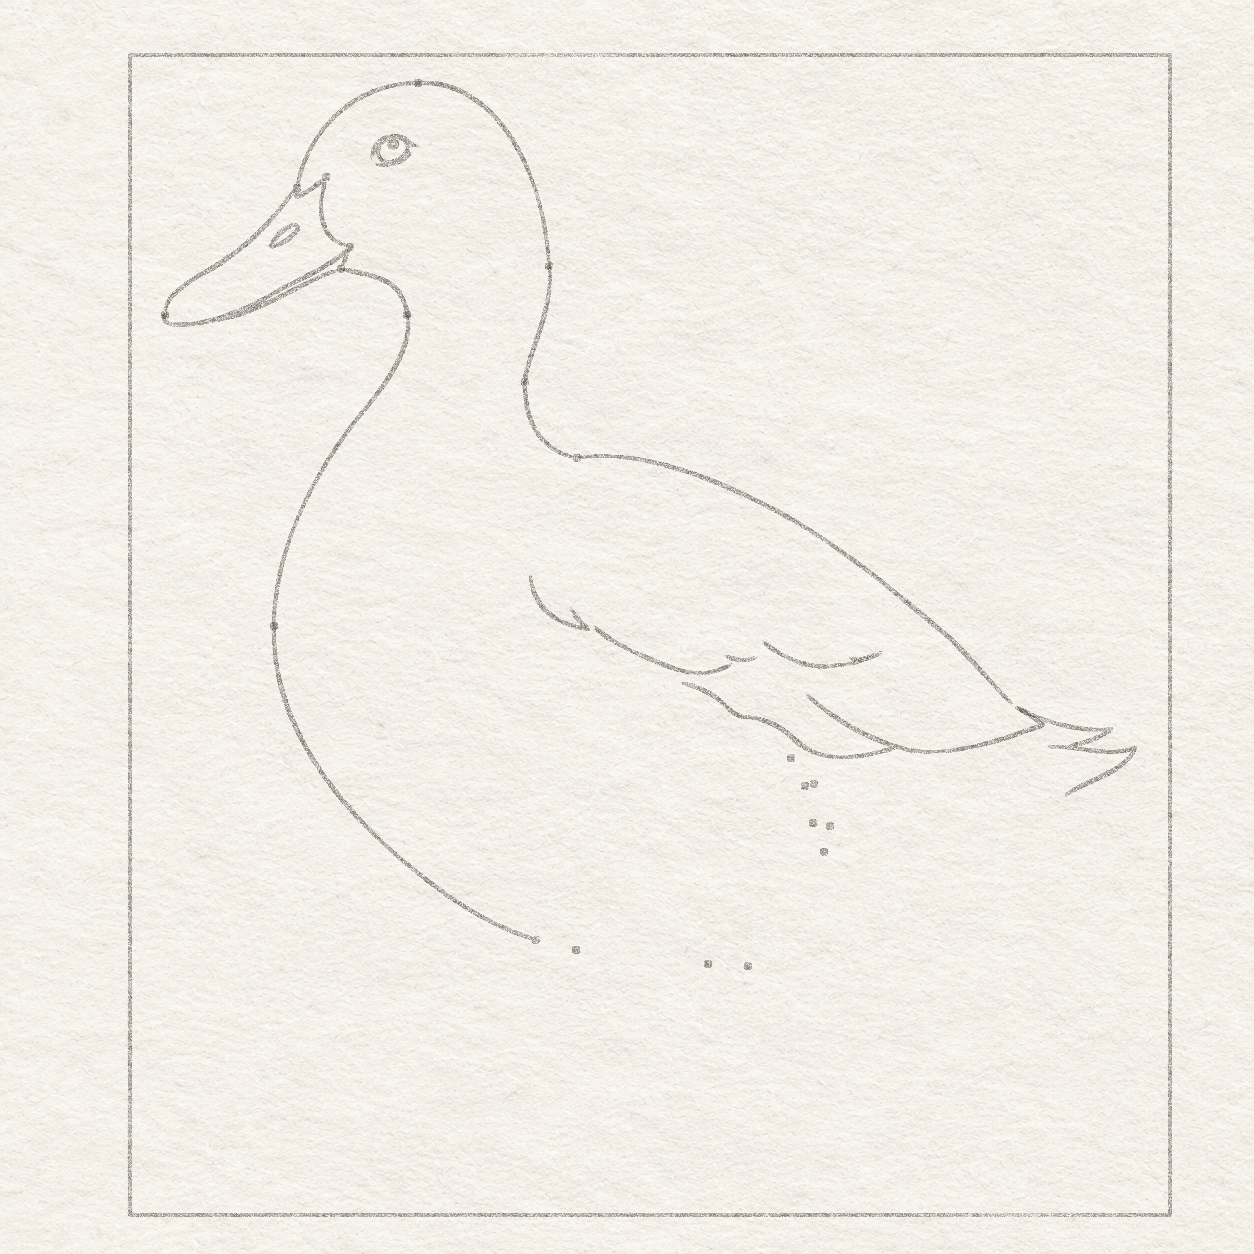
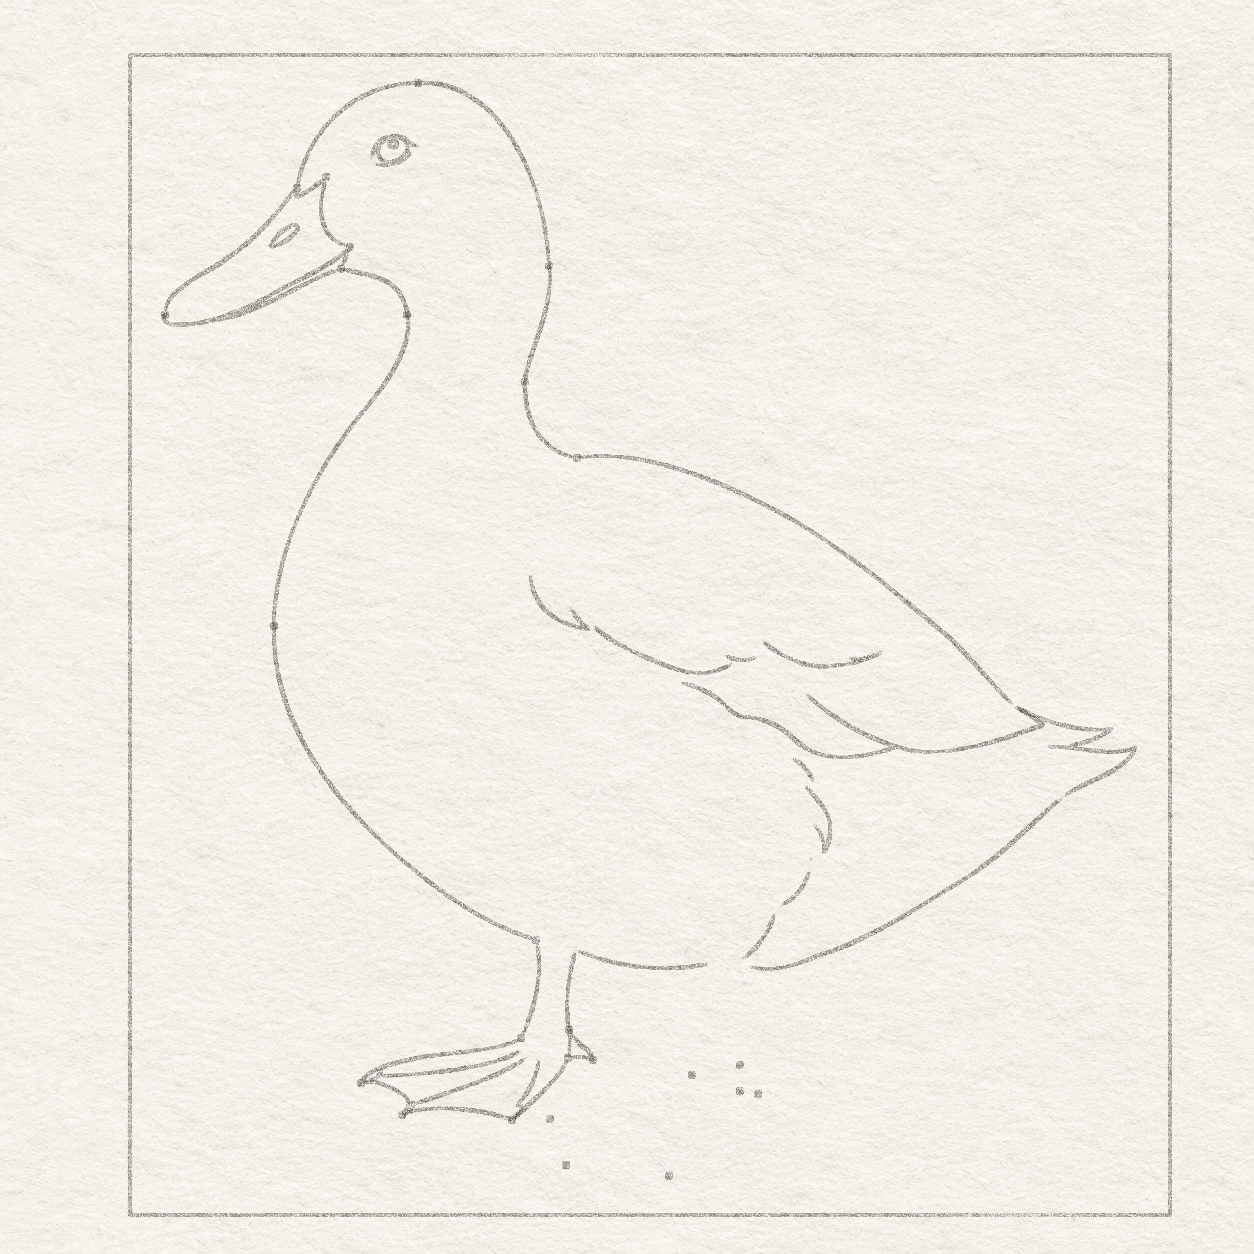
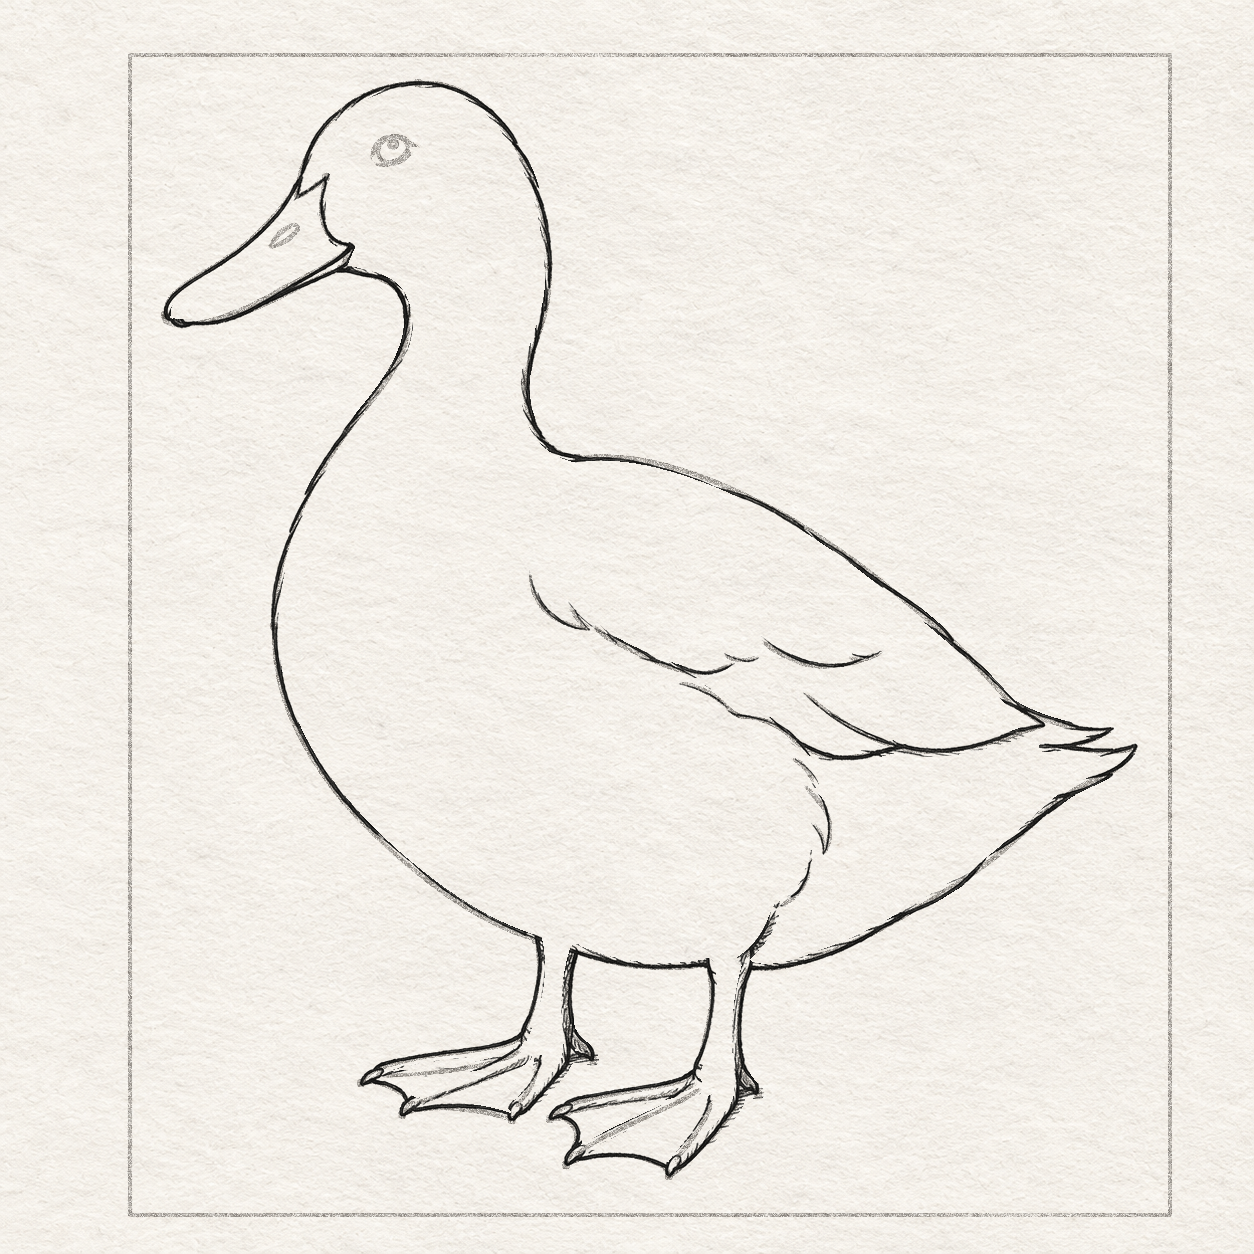
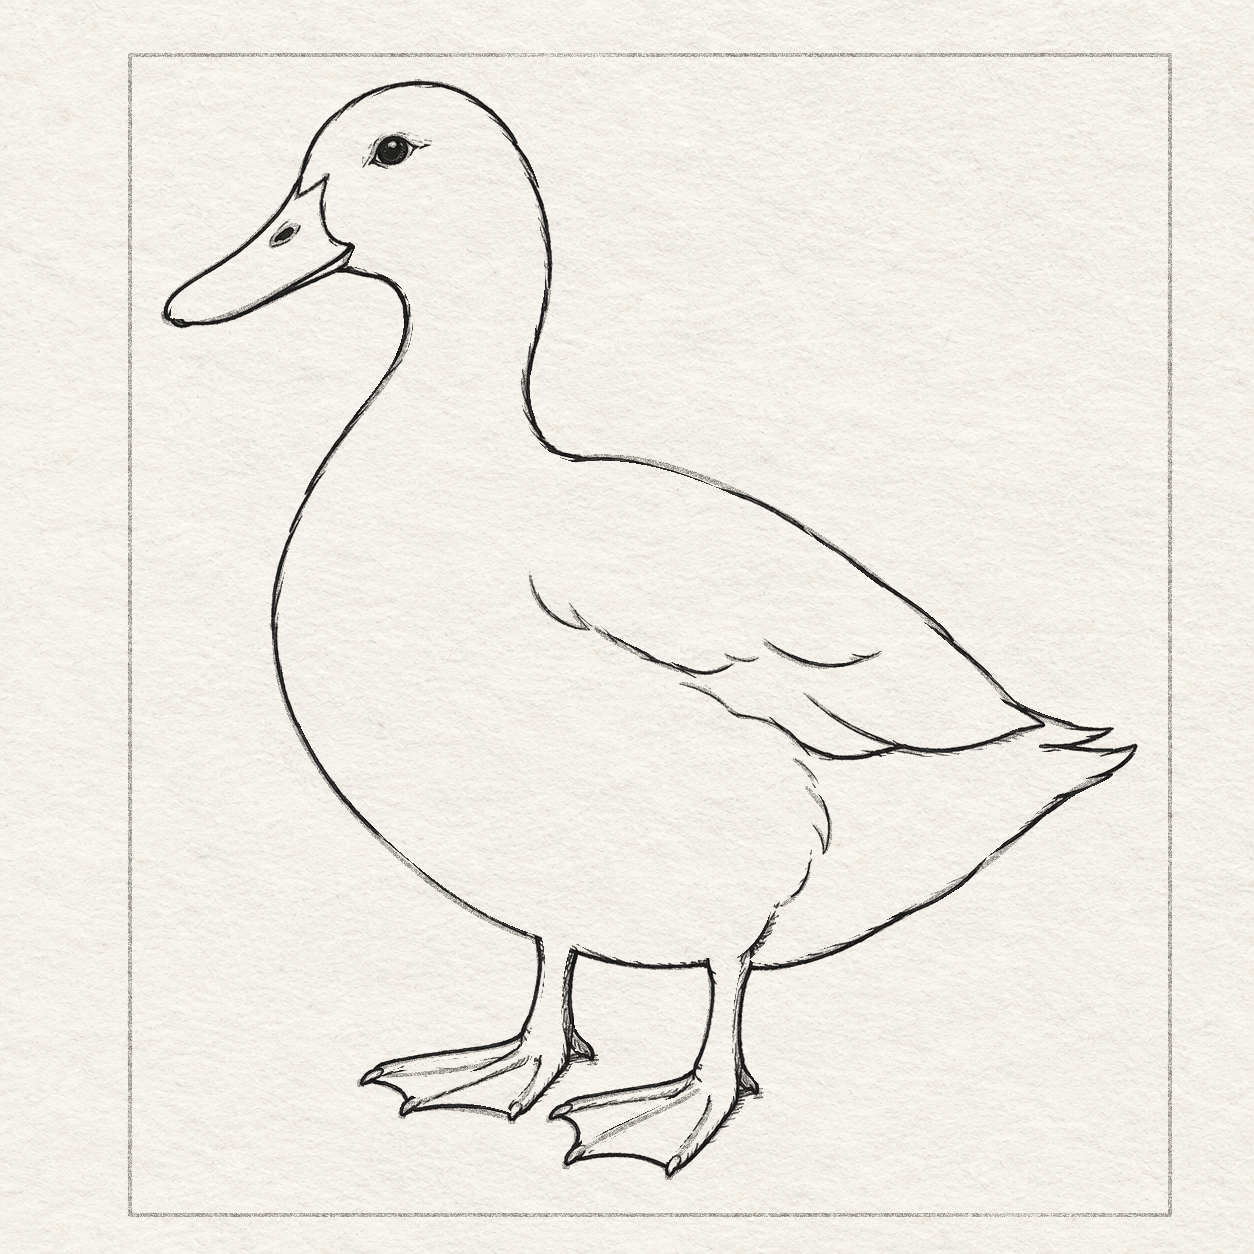
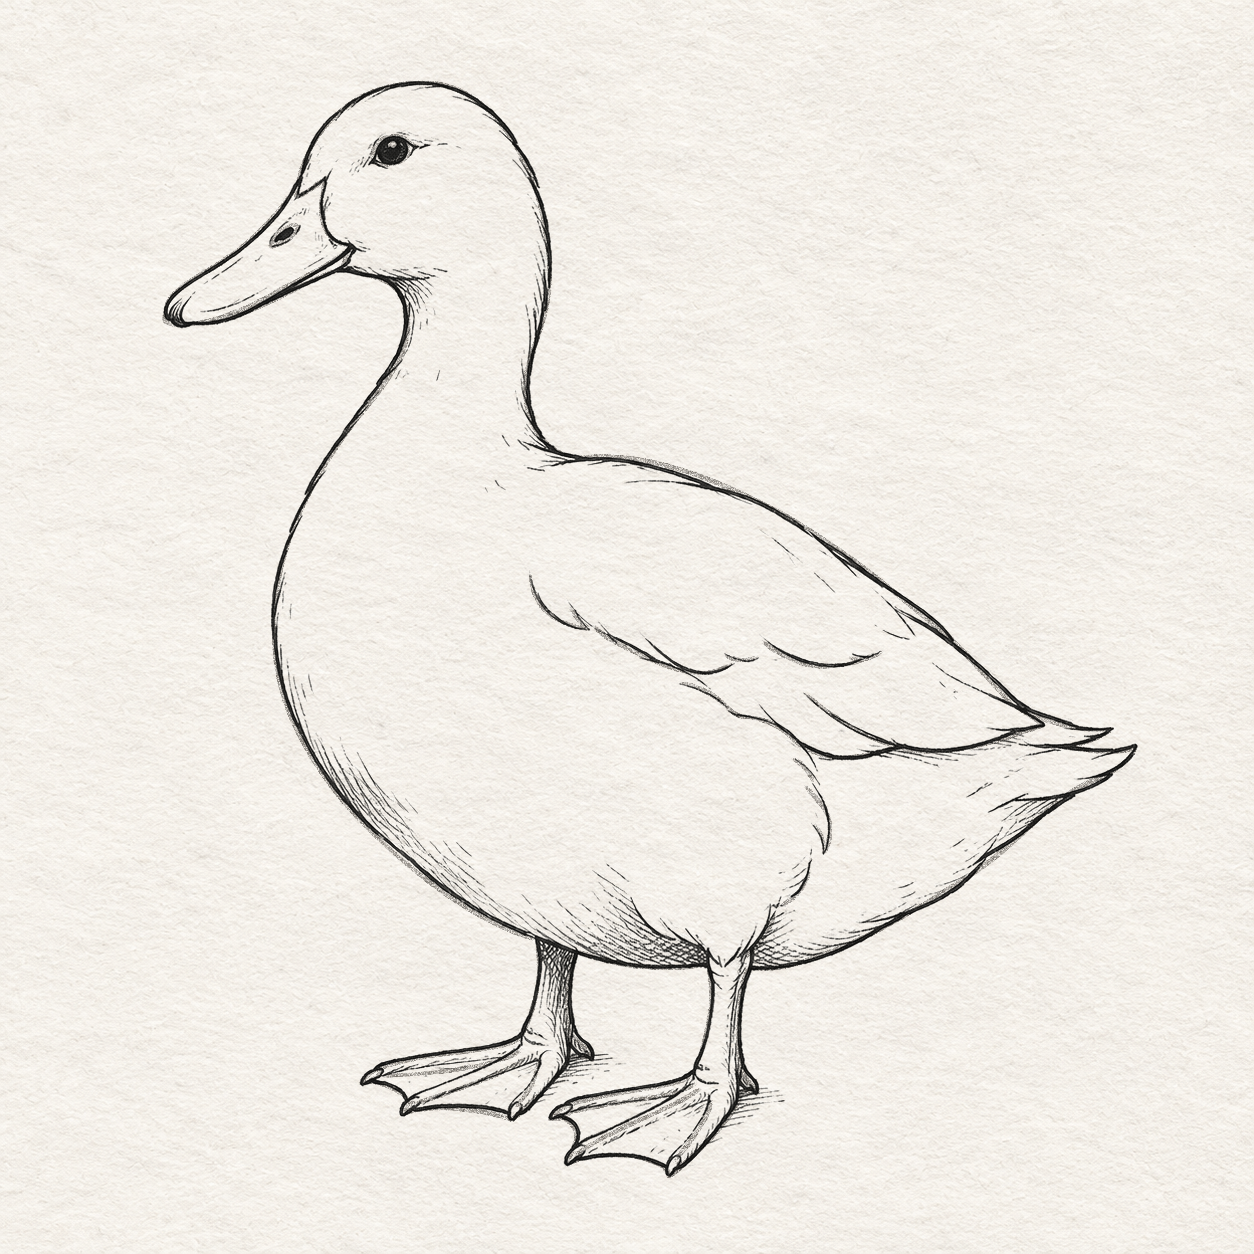
A standing duck in side view, rounded body, folded wing, broad bill and two webbed feet. Practice clear contours and a few local shadows in fine ink.
Follow the drawing tutorial
Plot a left-facing duck in pencil. Shape its bill, wings and webbed feet before tracing and shading with a fine pen.
Start the 15-step tutorialA small thing to tryKeep the wing inside the body silhouette.
Draw it, one step at a time
Draw a duck in fineliner
Plot a left-facing duck in pencil. Shape its bill, wings and webbed feet before tracing and shading with a fine pen.
What you’ll need
- HB pencil
- Eraser
- Ruler
- Spare sheet with a square corner
- Fine black pen
- Drawing paper
Before you start
Pick a spot for a 13 cm wide, 14.5 cm tall working box and leave a little room around it. Centre it if you wish. Use a ruler and the square corner of a spare sheet to place the marks. Keep the pencil strokes light enough to lift later.
Each numbered step is one drawing task. Follow its A/B/C drawings and continuous action numbers in order. Take a break between steps or chapters whenever you need one.
Chapter 1 — Place the duck
2 steps · 3 progress drawings · Pencil
Step 1 of 15 · Pencil
Place the duck on your paper

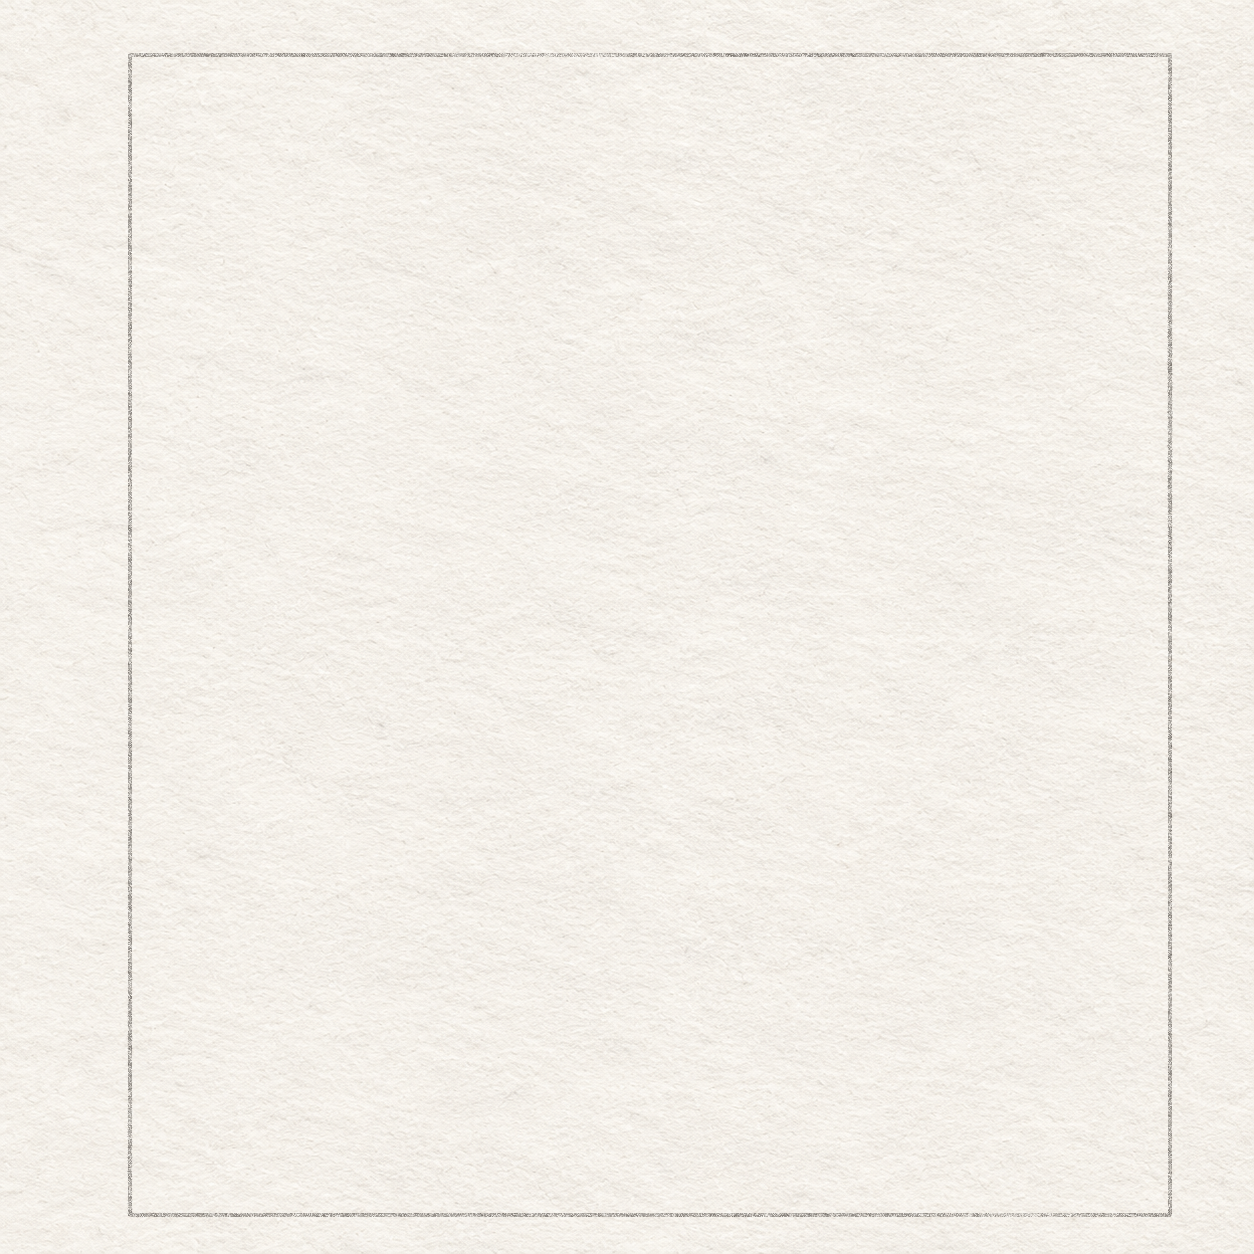
Drawing 1A — Drawing 1 — Place the duck’s working boxView larger Instructions for Drawing 1A — Drawing 1 — Place the duck’s working box
- Choose where the whole duck will sit on the page. Leave spare paper on every side, then draw a light ruled box 13 cm wide and 14.5 cm tall there. Draw the top edge first. Put a spare sheet’s square corner against that edge and use its side to keep each upright edge square. Join their lower ends with a line parallel to the top.
- Compare opposite sides with your ruler. Leave clear paper around the box and keep the whole duck, including the bill, tail and feet, inside it.
Step 2 of 15 · Pencil
Shape the head, neck and breast

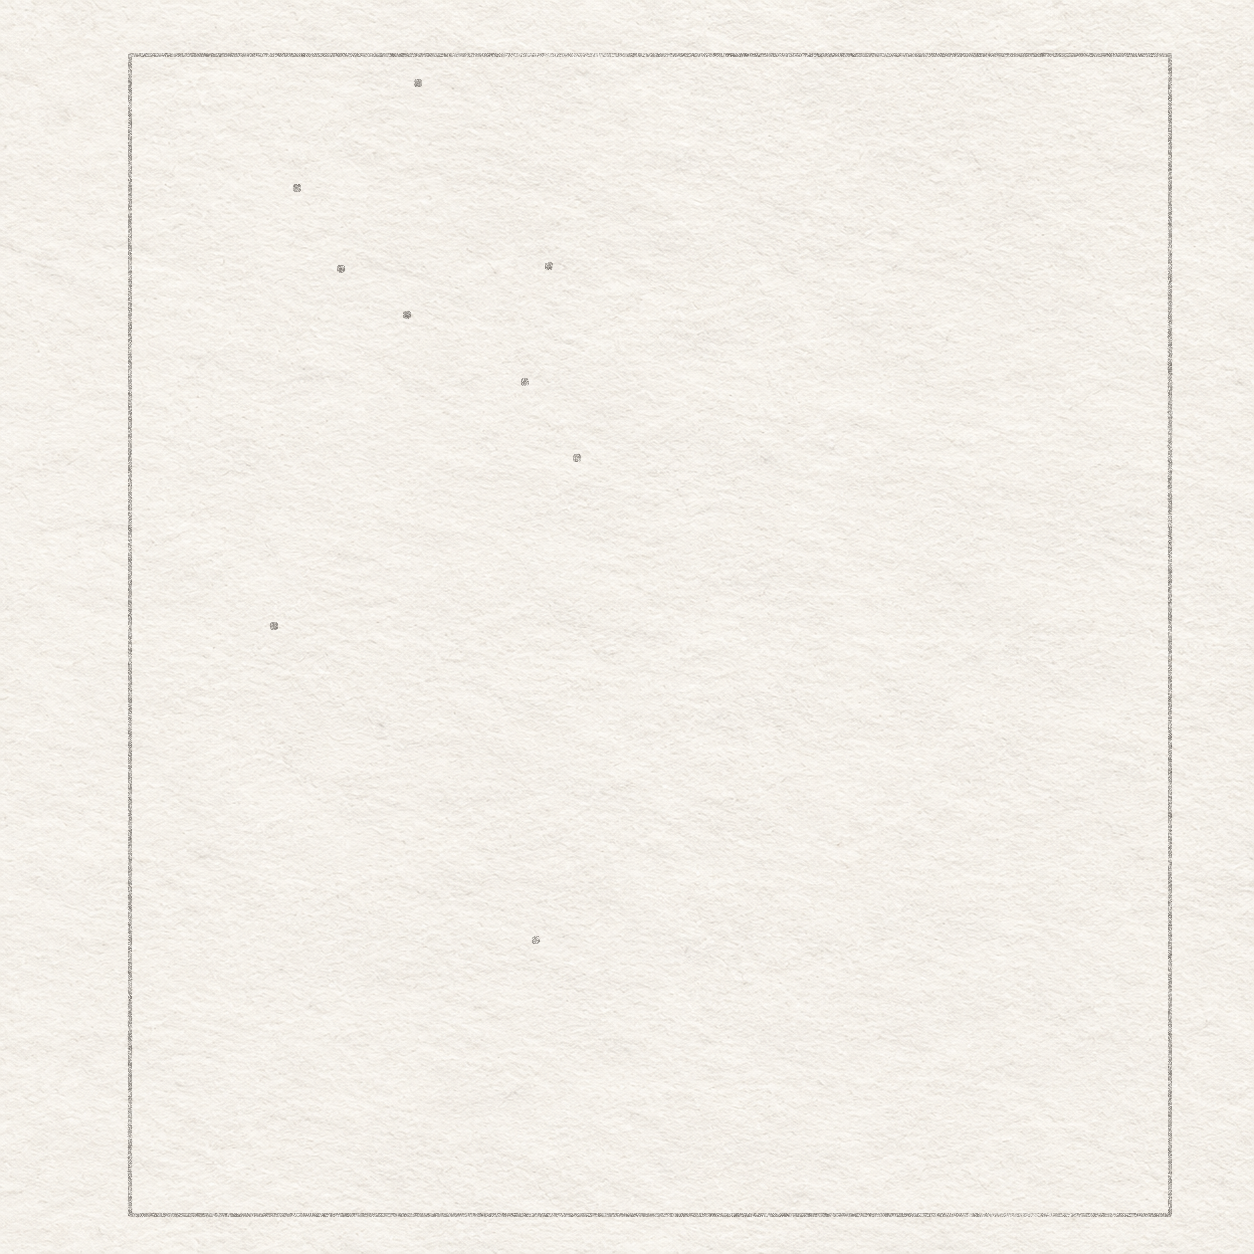
Drawing 2A — Drawing 2 — Locate the crown, neck and breastView larger Instructions for Drawing 2A — Drawing 2 — Locate the crown, neck and breast
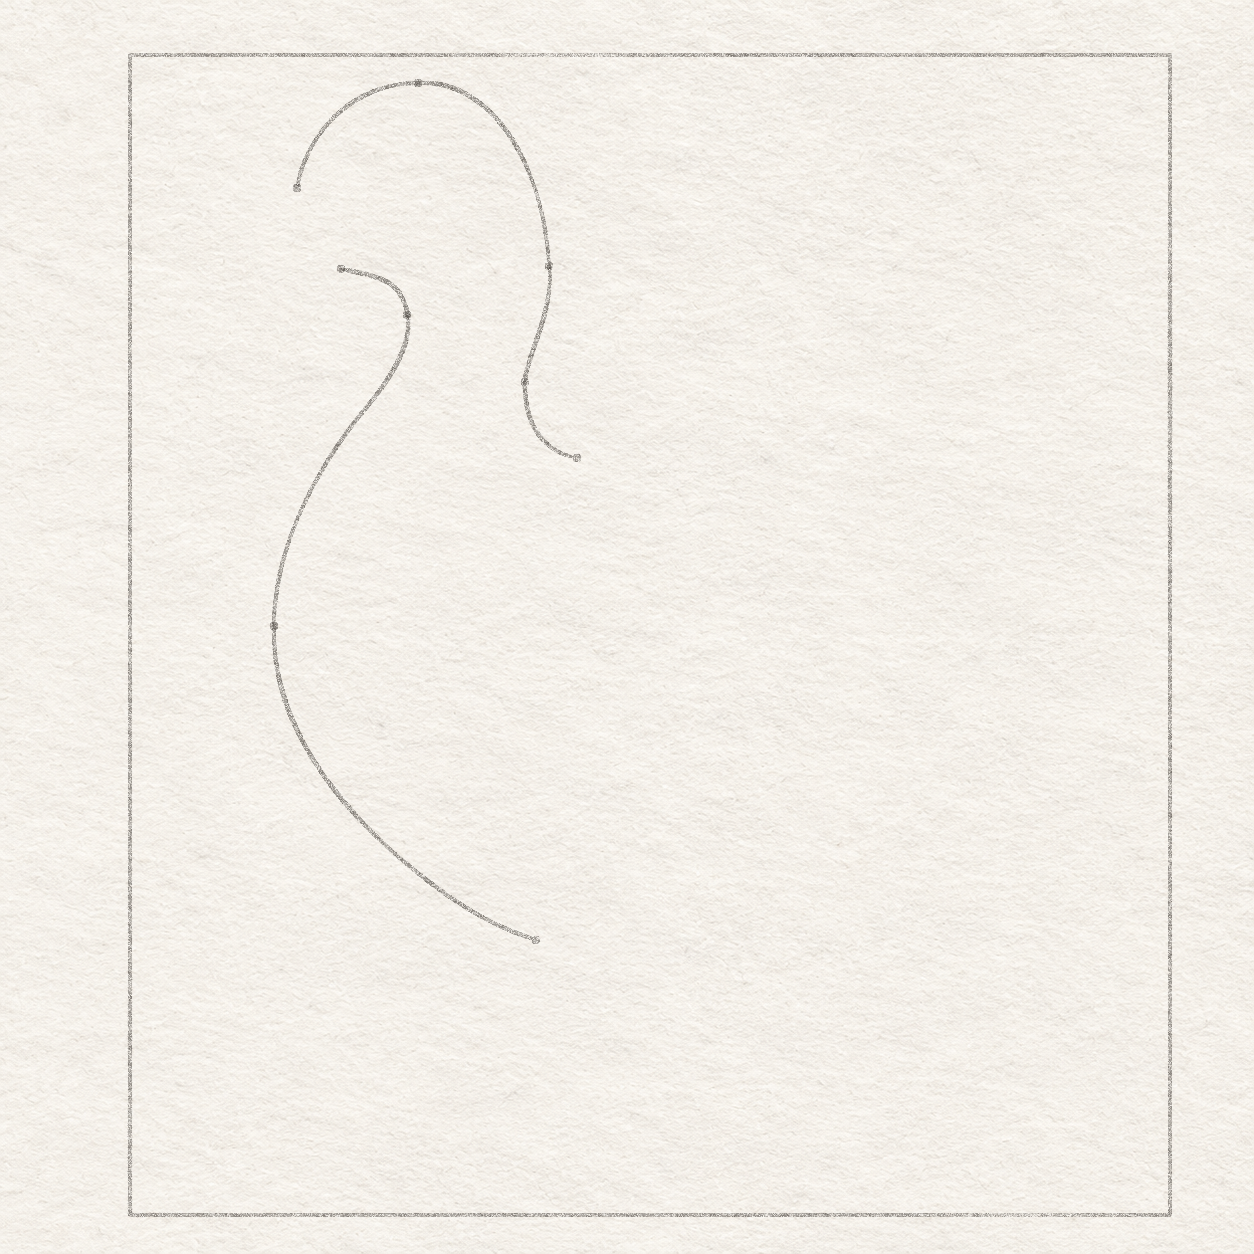
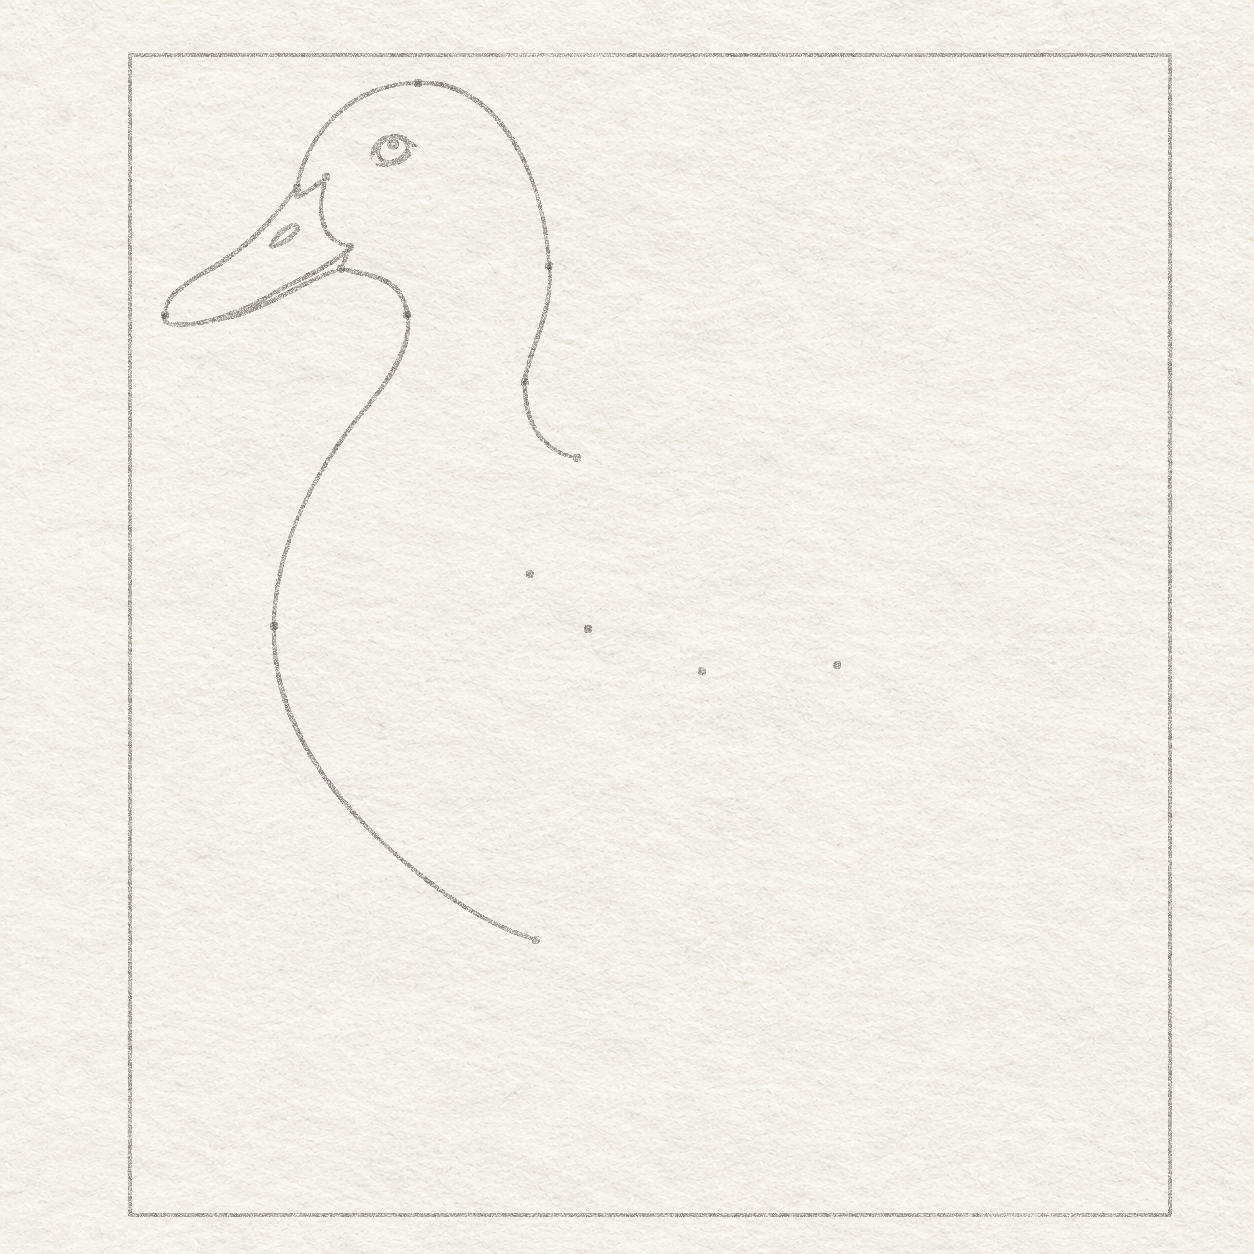
- For each dot, measure across along the top edge from the box’s top-left corner. Put the spare sheet’s square corner at that measurement, with one side on the top edge. Hold the ruler against the side pointing down and measure from the corner. Put a small light dot at the lower end of the measurement and lift the ruler. Mark the forehead contact at about 2.1 cm across and 1.7 cm down. Mark the crown at about 3.6 cm across and 0.3 cm down. Mark the back of the head at about 5.2 cm across and 2.6 cm down. Mark the back-neck bend at about 4.9 cm across and 4.1 cm down. Mark the start of the back at about 5.6 cm across and 5 cm down. Mark the throat contact at about 2.6 cm across and 2.7 cm down. Mark the inside neck turn at about 3.5 cm across and 3.3 cm down. Mark the widest breast at about 1.8 cm across and 7.1 cm down. Mark the left body exit for the far leg at about 5.1 cm across and 11.1 cm down.
- Recheck the two distances from the box’s top-left corner before drawing the curve.

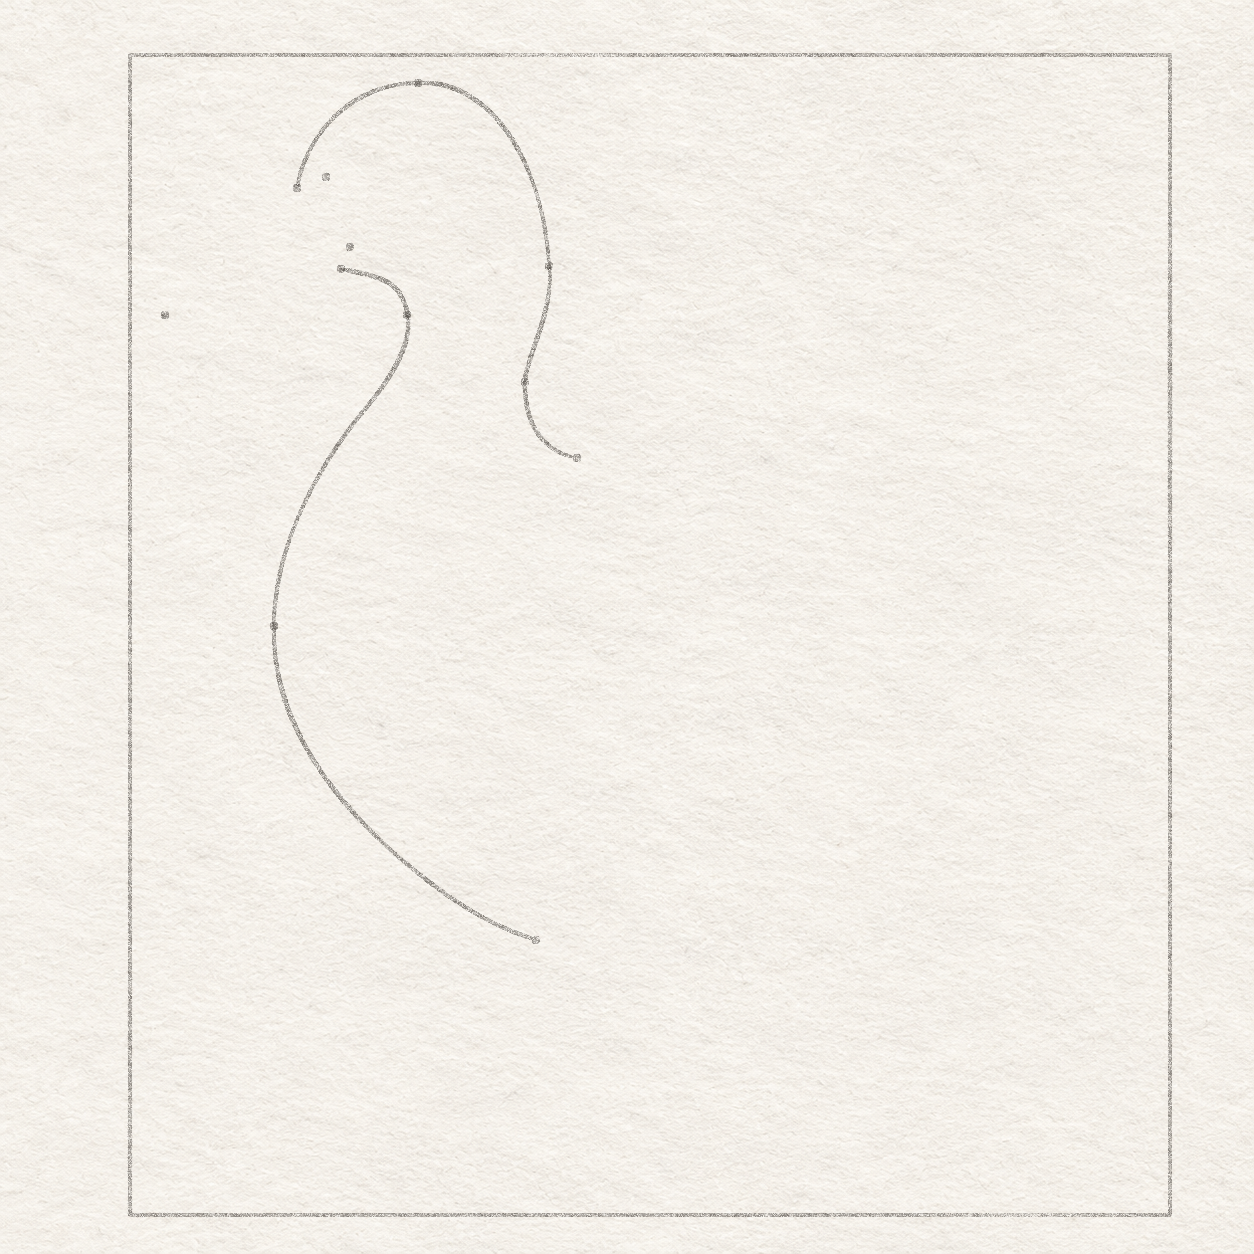
Drawing 2B — Drawing 3 — Shape the head and the breastView larger Instructions for Drawing 2B — Drawing 3 — Shape the head and the breast
- Work freehand in light pencil. Begin at the forehead contact. Round up and right through the crown. Swing down and right to the back-of-head dot, then ease down and slightly left to the narrow back-neck bend. Turn down and right again to the start-of-back dot. Draw the turns lightly and use the dots to hold their positions.
- Work freehand in light pencil. Begin at the throat dot. Bow right into the inside neck turn and then sweep down and left into the widest-breast dot. Curve down and right through the breast to the left edge of the far-leg opening. Keep this one light continuous contour.
- Adjust the curve, rather than moving a correct dot, if a bend misses its mark. The upper throat bends inward first. If it makes a corner above the breast, soften that turn while keeping the ruling marks.
Chapter 2 — Draw the bill and face
4 steps · 9 progress drawings · Pencil
Step 3 of 15 · Pencil
Draw the outer bill

Drawing 3A — Drawing 4 — Locate the bill tip and cheek cornersView larger Instructions for Drawing 3A — Drawing 4 — Locate the bill tip and cheek corners
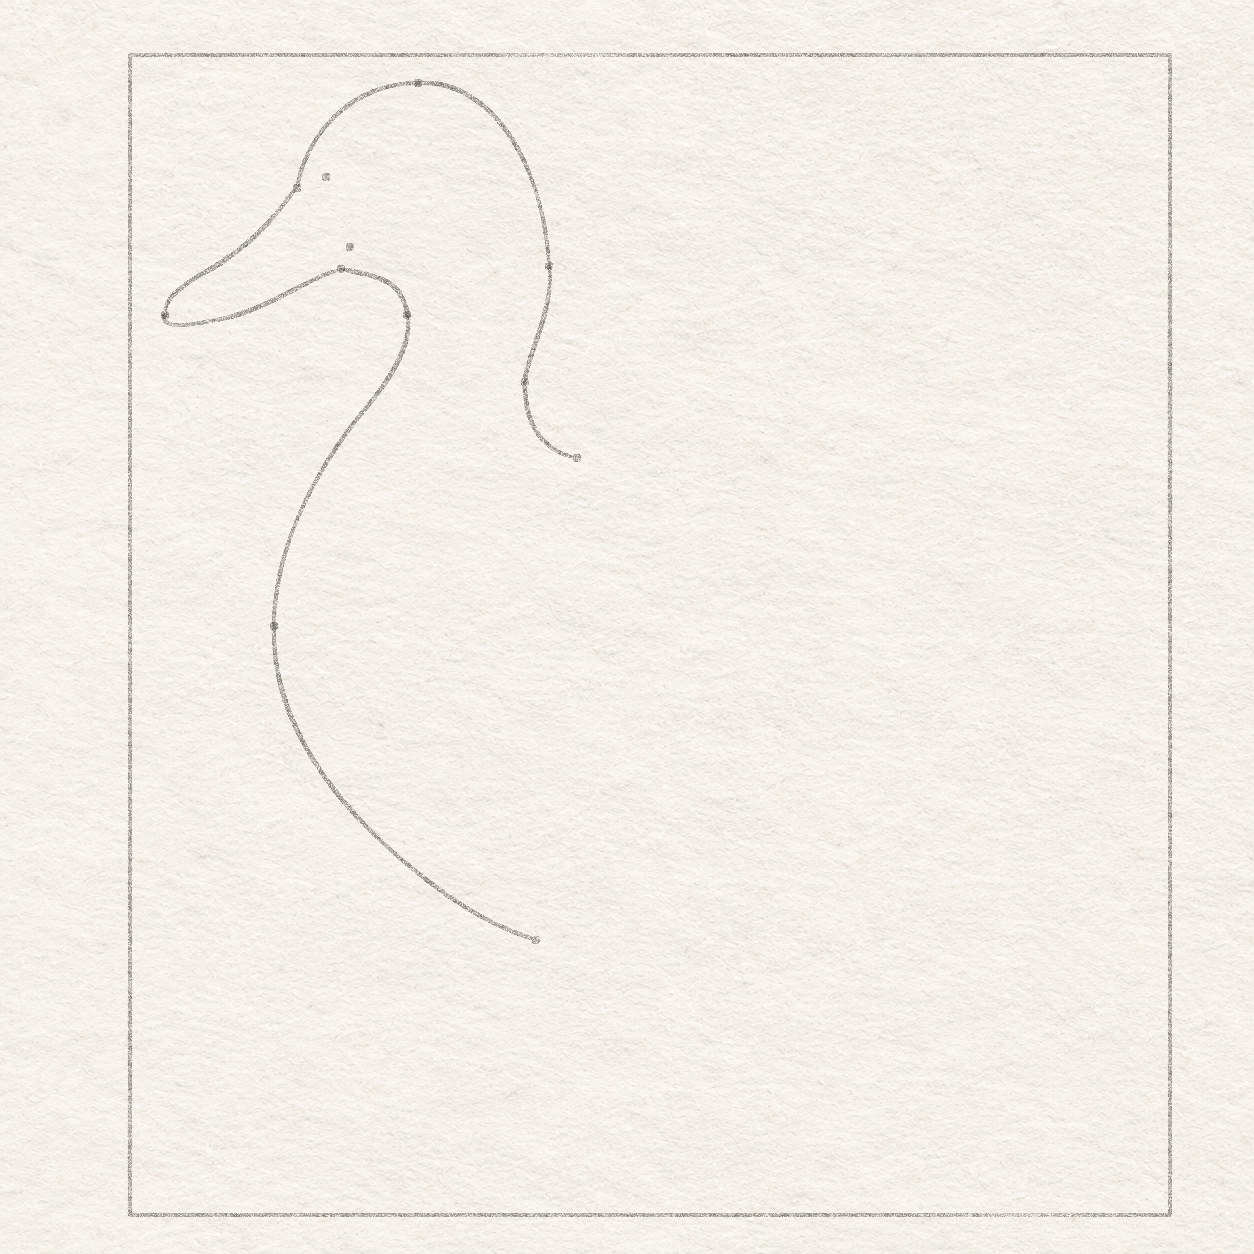
- For each dot, measure across along the top edge from the box’s top-left corner. Put the spare sheet’s square corner at that measurement, with one side on the top edge. Hold the ruler against the side pointing down and measure from the corner. Put a small light dot at the lower end of the measurement and lift the ruler. Mark the far-left bill tip at about 0.4 cm across and 3.3 cm down. Mark the upper bill corner at about 2.5 cm across and 1.5 cm down. Mark the lower cheek corner at about 2.8 cm across and 2.4 cm down.
- Recheck the two distances from the box’s top-left corner before drawing the curve.

Drawing 3B — Drawing 5 — Draw the outer billView larger Instructions for Drawing 3B — Drawing 5 — Draw the outer bill
- Work freehand in light pencil. From the forehead contact, curve down and left to the bill-tip dot. Round the tip, then sweep right along the bottom of the bill and curve up gently to meet the already drawn throat. Keep the end on the throat separate from the lower cheek corner above.
- Keep the nose round and the bottom end on the throat. Soften a pointed turn in light pencil.
Step 4 of 15 · Pencil
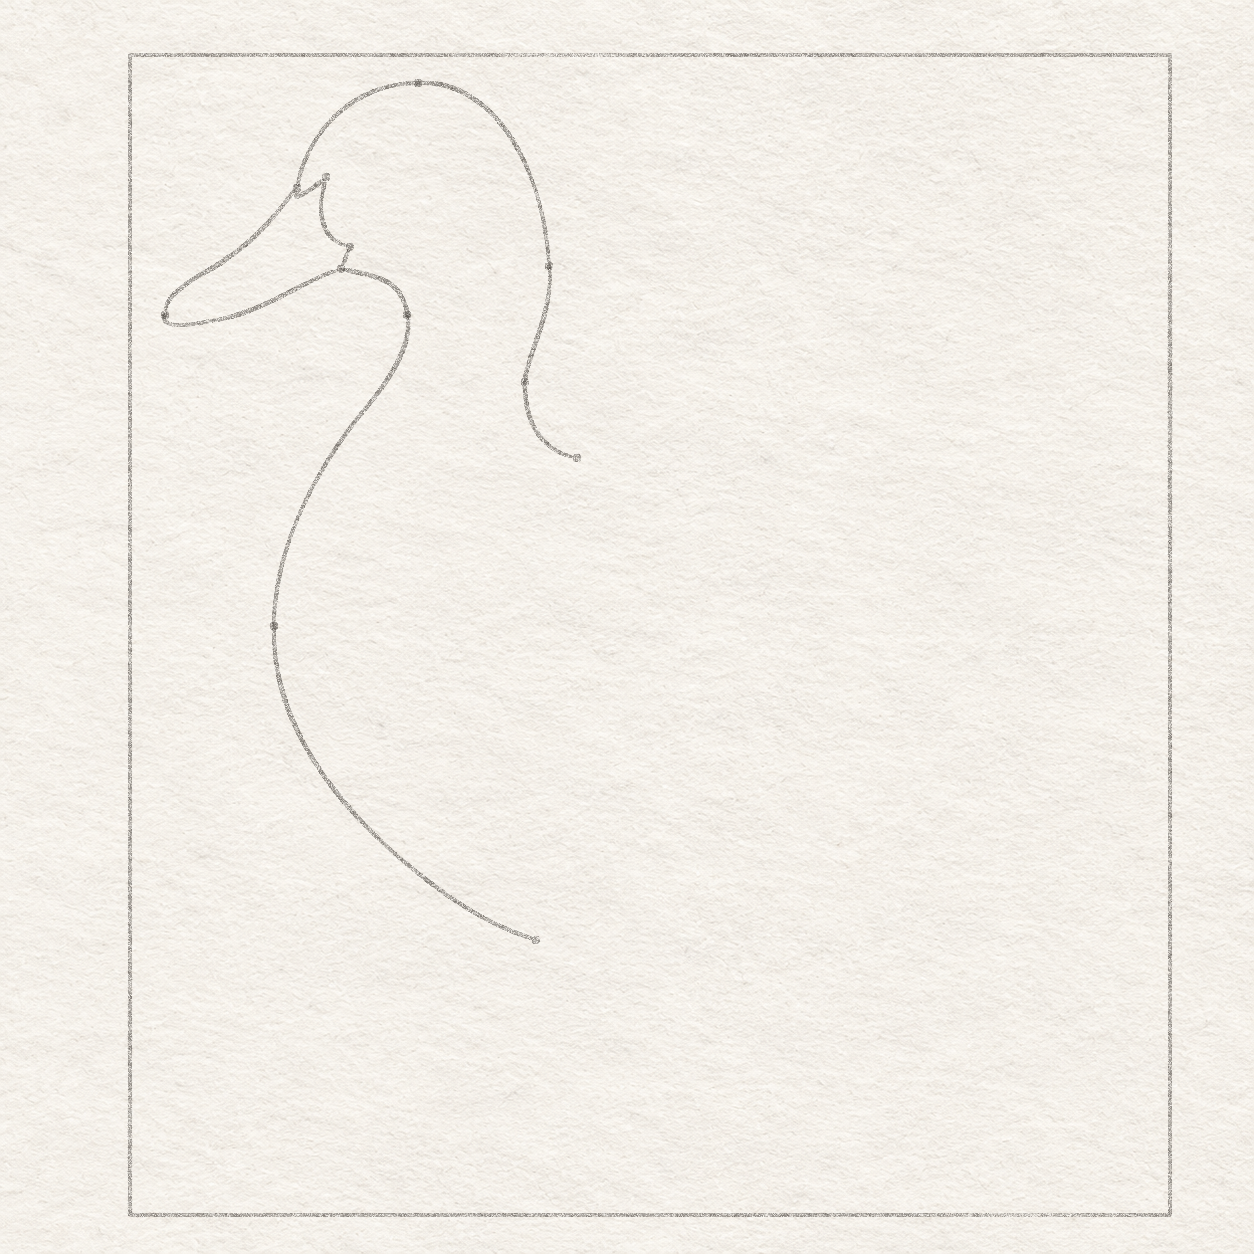
Connect the cheek and add the bill line

Drawing 4A — Drawing 6 — Close the bill at the cheekView larger Instructions for Drawing 4A — Drawing 6 — Close the bill at the cheek
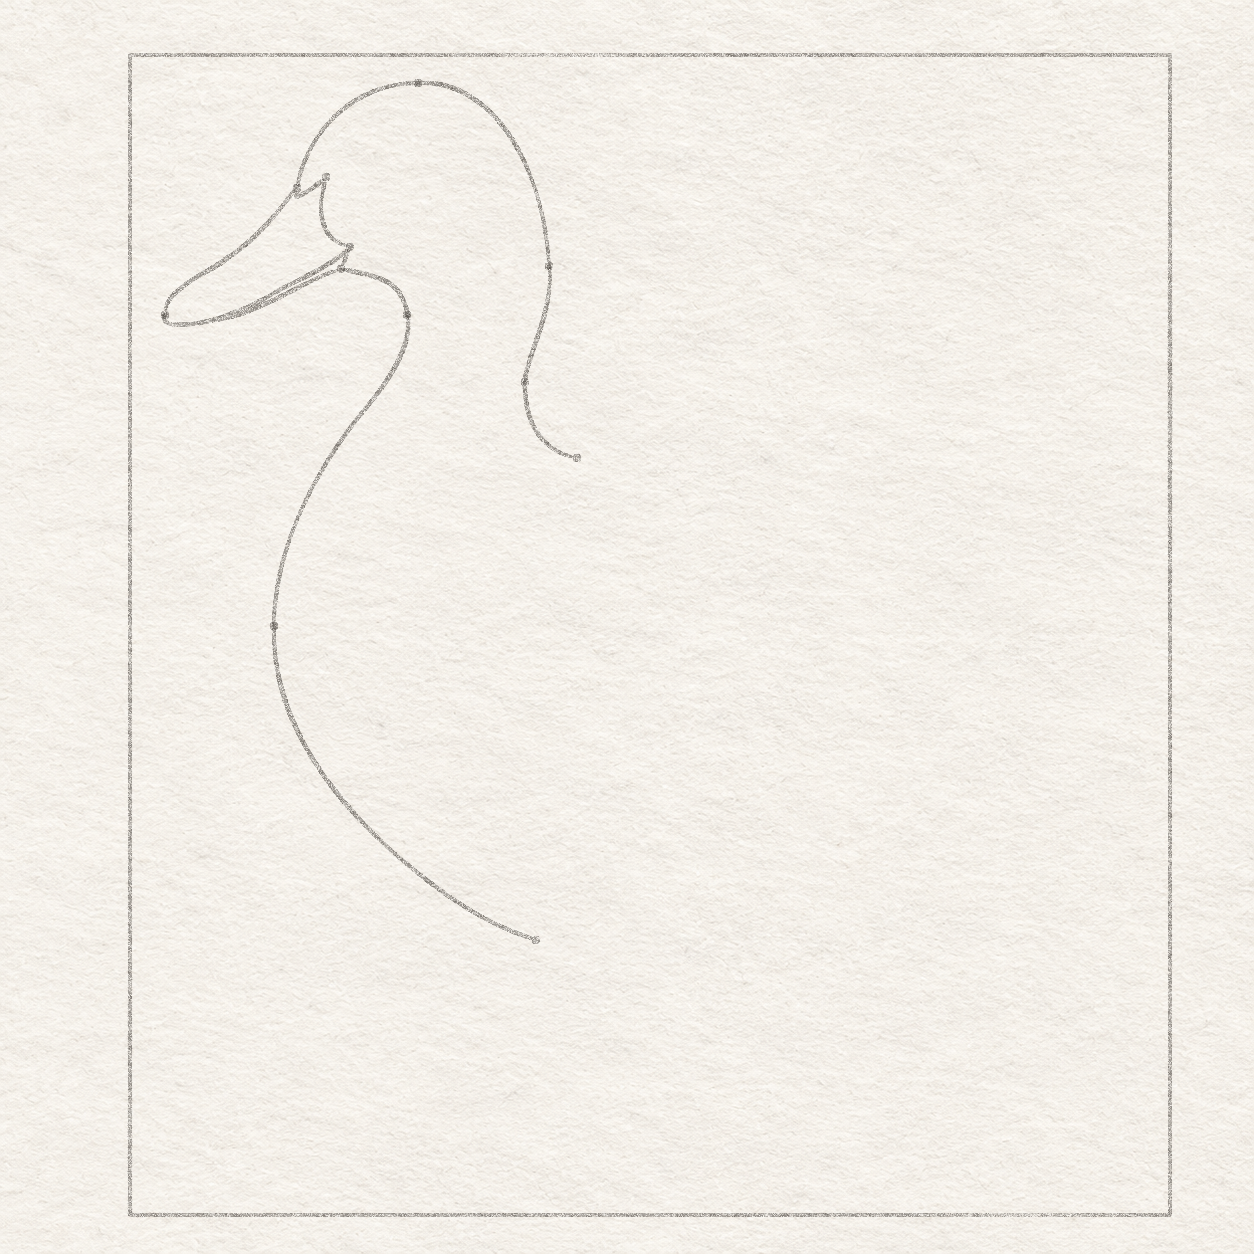
- Work freehand in light pencil. From the point where the upper bill meets the forehead, dip about 1 mm down along the inside edge of the forehead. Then turn up and right in a short stroke to the upper bill corner. Keep the corner small and clear.
- Work freehand in light pencil. At the upper bill corner, turn into a bowed cheek line. Bend it down and a little left first, then curve right to the lower cheek corner. Keep the two corners distinct.
- Work freehand in light pencil. From the lower cheek corner, curve down and slightly left to the existing throat contact. Keep this small return separate from the long line across the bill.
- At the upper bill corner the cheek will turn down. Lift and shorten a slant that passes the dot. If the cheek is ruler-straight, ease the small inward bow while holding both endpoints. Check that the return touches both existing lines. Keep the paper just to its left clear for the narrow bill edge.

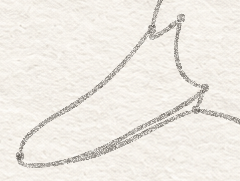
Drawing 4B — Drawing 7 — Leave a narrow strip under the bill seamView larger 
Detail 4B.1 — Two bill joinsFollow the inner line around the bill and keep the little curved cheek return and the throat meeting visible. Instructions for Drawing 4B — Drawing 7 — Leave a narrow strip under the bill seam
- Starting just around the rounded tip, draw a freehand line inside the lower bill edge. Sweep up and right to the lower cheek corner. Leave a slim strip of paper below this line until it reaches the small cheek return.
- If the two long lines merge, lift only the inner one and leave a little paper between them.
Step 5 of 15 · Pencil
Place and shape the eye

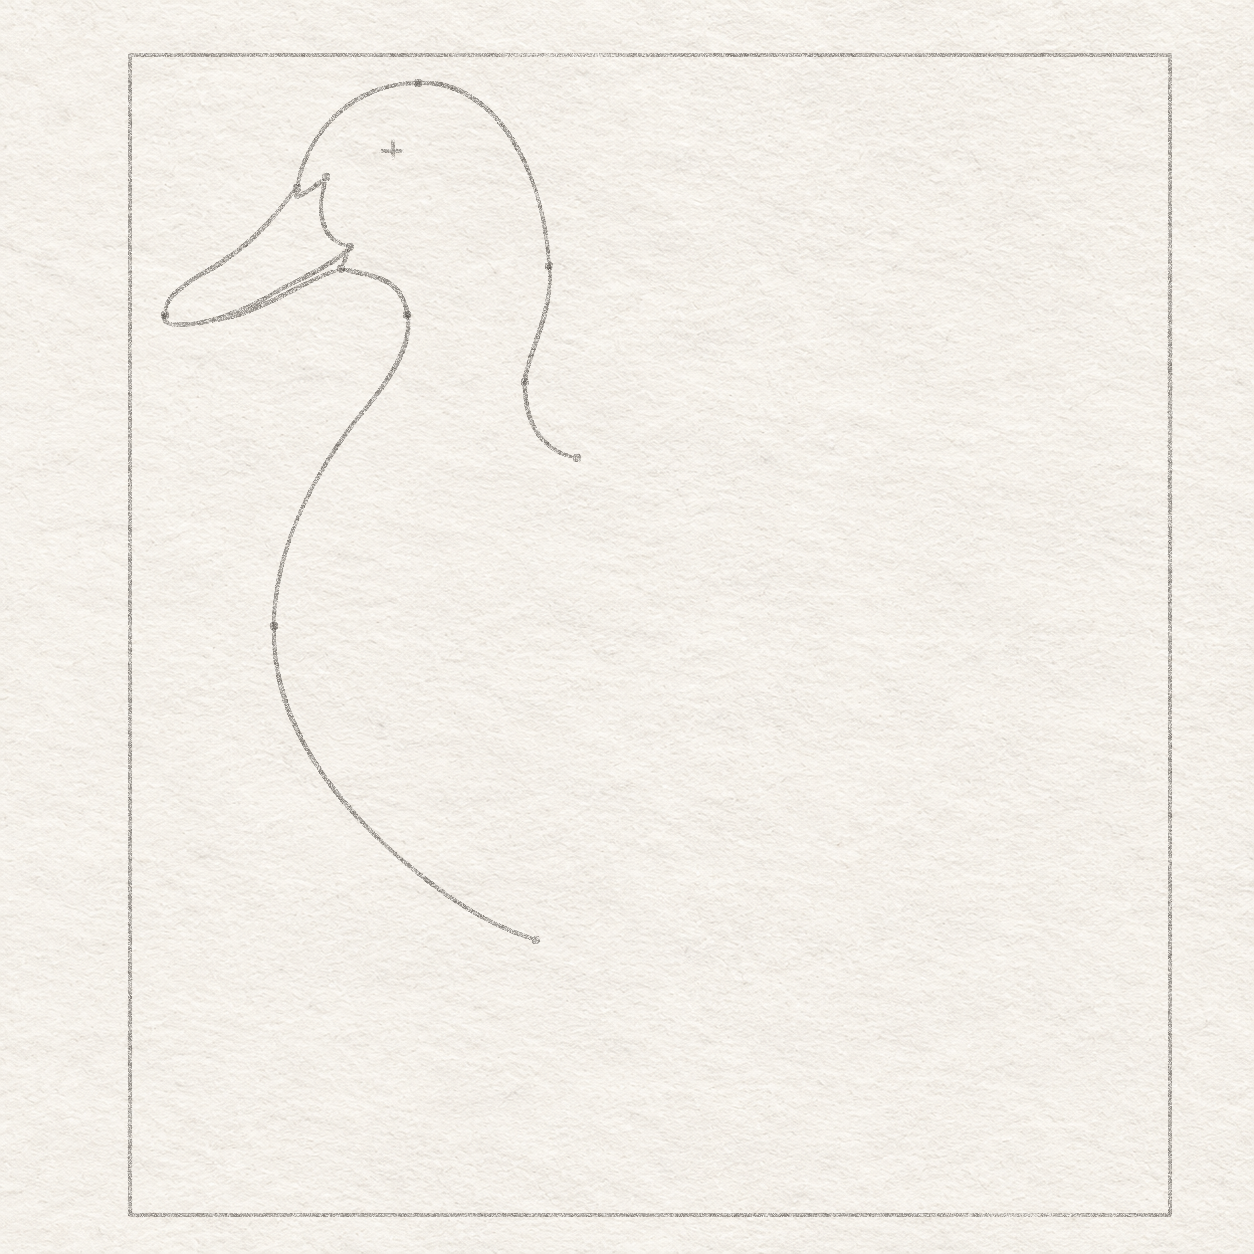
Drawing 5A — Drawing 8 — Measure the eye openingView larger Instructions for Drawing 5A — Drawing 8 — Measure the eye opening
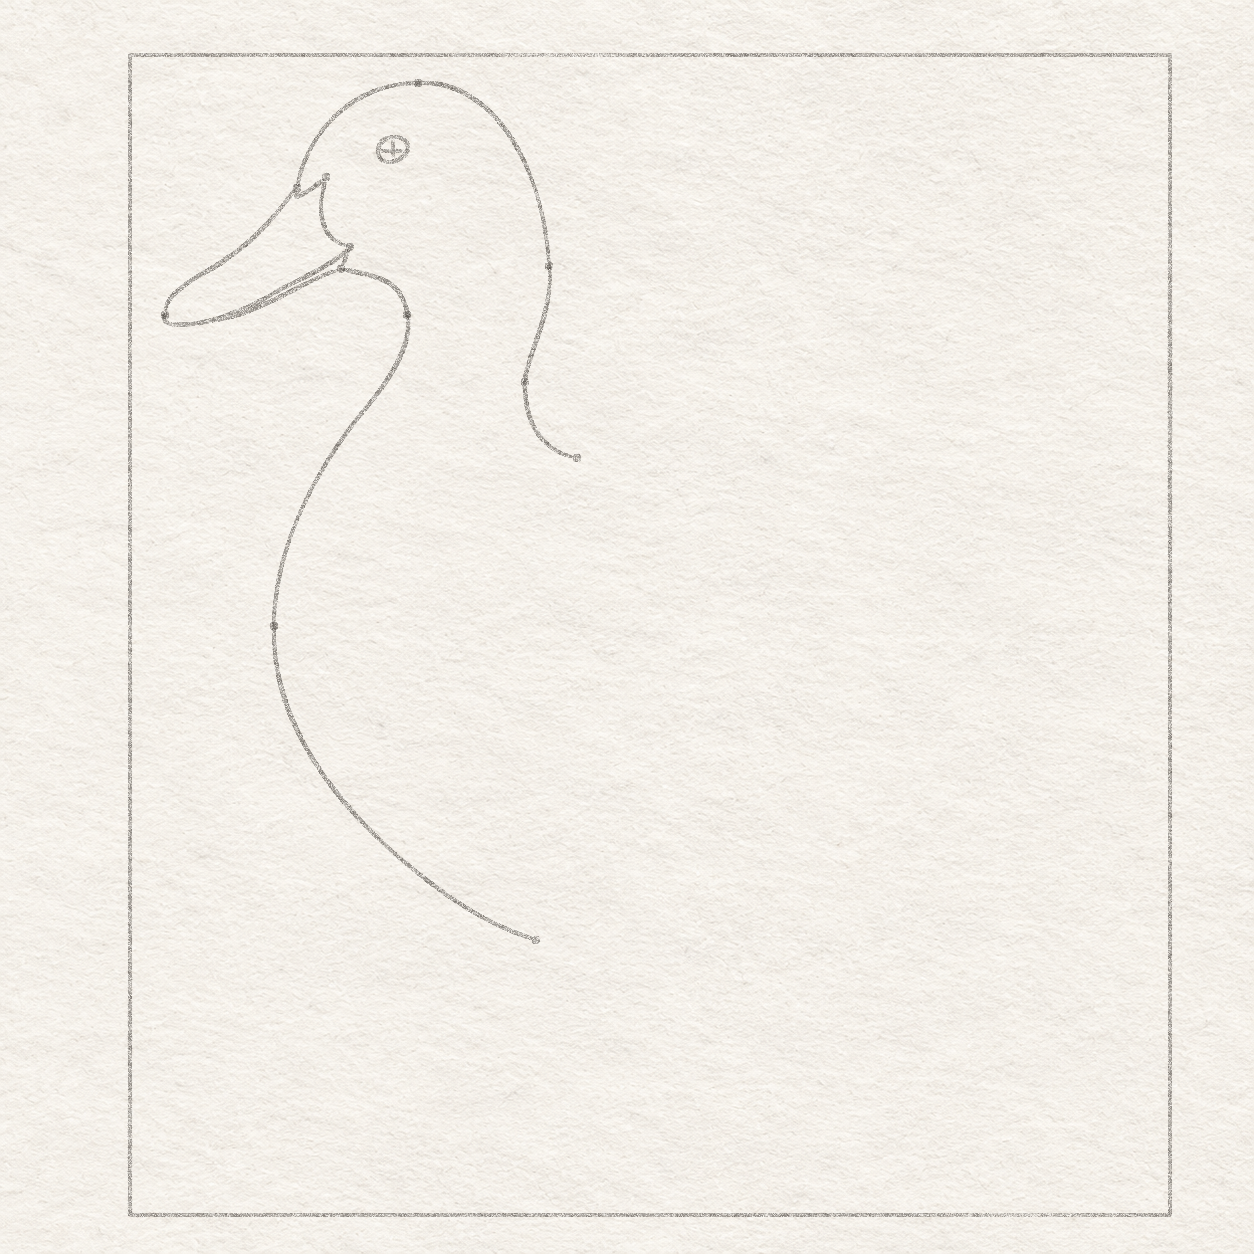
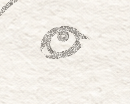
- Use the working box to find the eye centre, 3.3 cm across and 1.2 cm down from the upper-left corner. Through that point, draw a light 4 mm line sideways and a 3 mm line upright, with the same amount on either side of the centre. The four ends give you the width and height of the narrow opening.
- Compare the two measured lengths and check that the lines cross at their middle before outlining the eye.

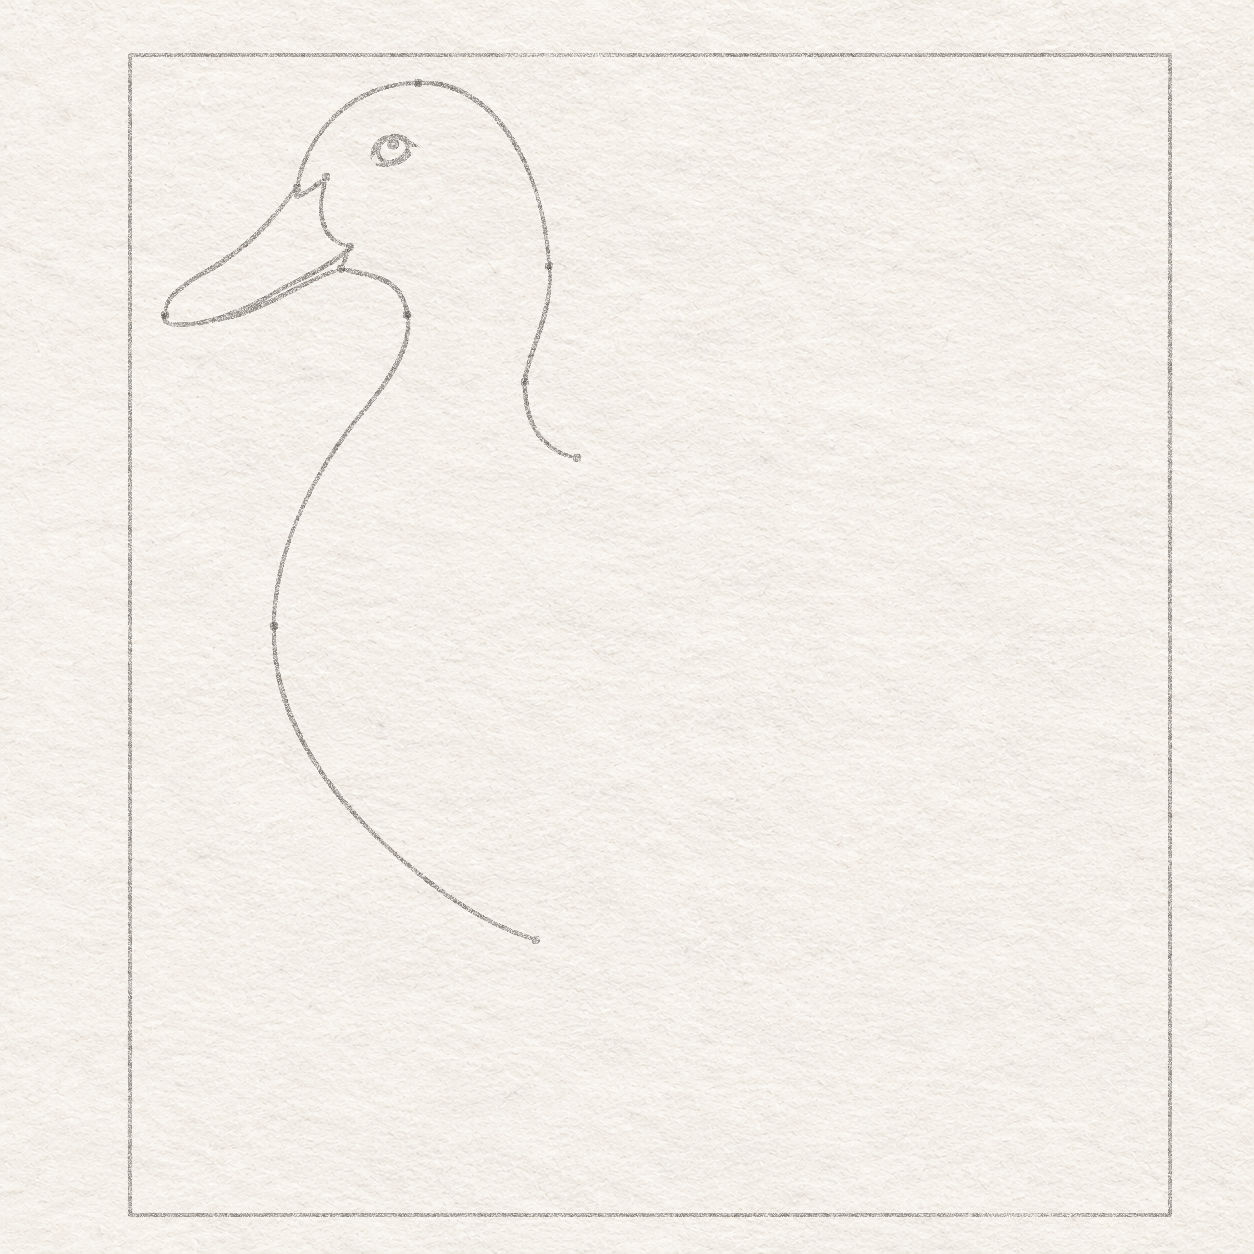
Drawing 5B — Drawing 9 — Shape the eye openingView larger Instructions for Drawing 5B — Drawing 9 — Shape the eye opening
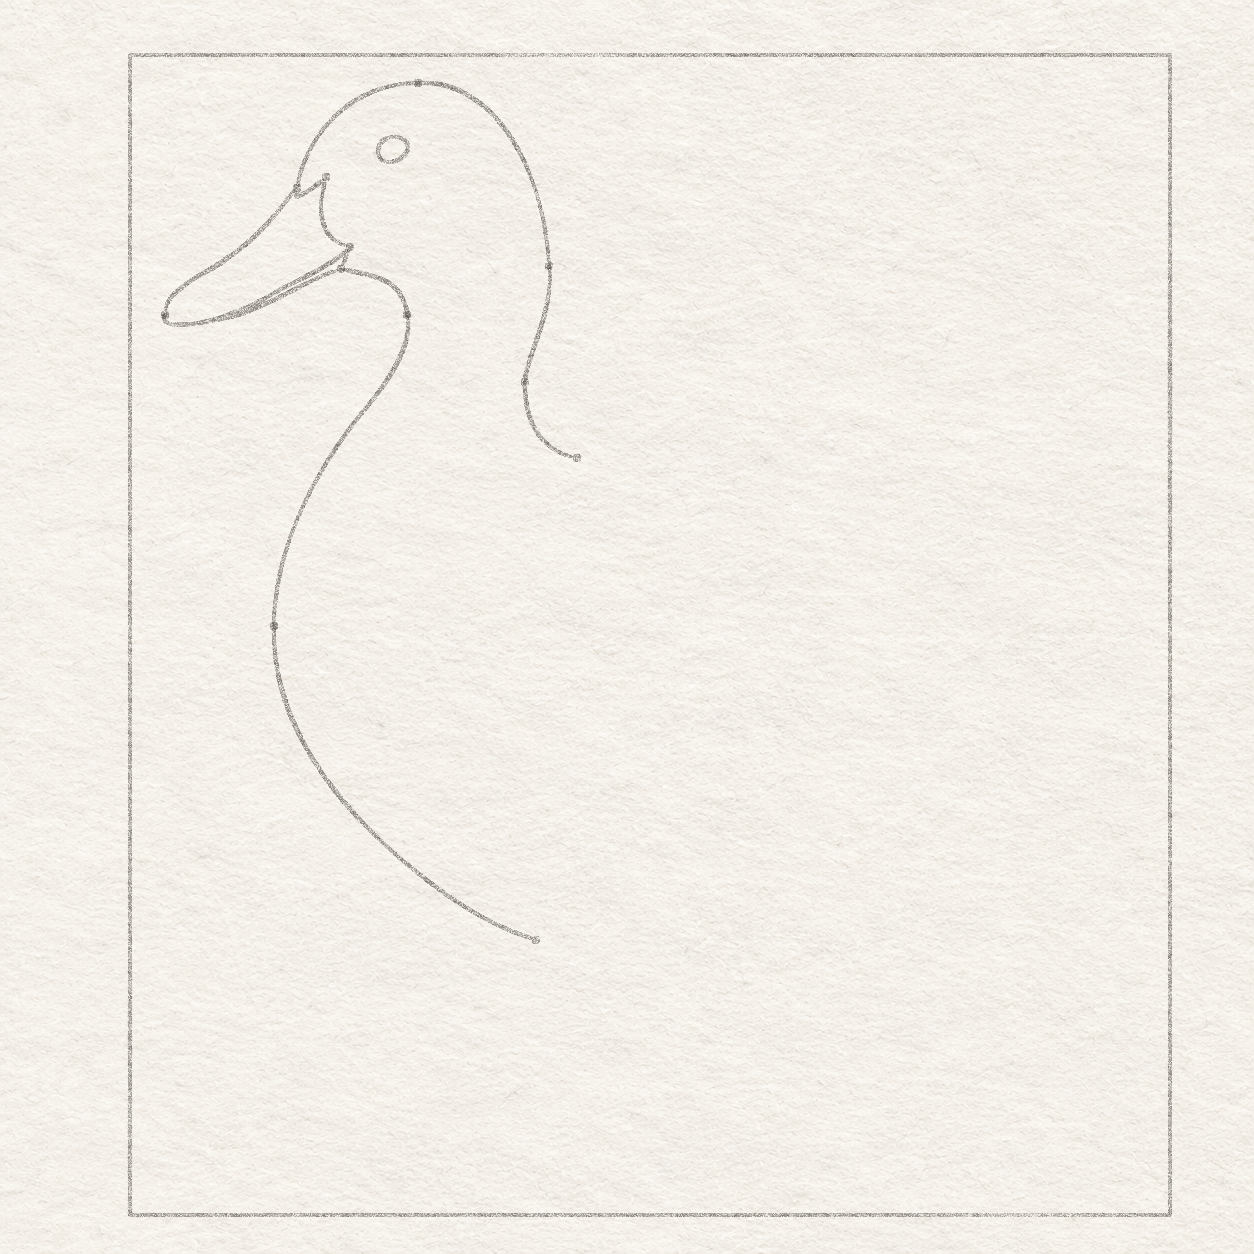
- Work freehand in light pencil. Draw a small rounded opening through the four ends of the guides. Round the top and bring the lower curve up slightly toward the right end.
- The curve should reach the guides on all four sides. Soften a corner now while the outline is still light.

Drawing 5C — Drawing 10 — Lift the eye guidesView larger Instructions for Drawing 5C — Drawing 10 — Lift the eye guides
- Lift the two short guide lines inside the opening with the corner of your eraser. Leave the eye outline in place.
- Look closely at the opening and leave its pencil outline visible on all four sides.
Step 6 of 15 · Pencil
Leave the tiny eye and bill details

Drawing 6A — Drawing 11 — Leave a rim and a white spotView larger 
Detail 6A.1 — Eye rim and highlightLeave a slim paper band around the opening and one tiny round shape clear inside it. Instructions for Drawing 6A — Drawing 11 — Leave a rim and a white spot
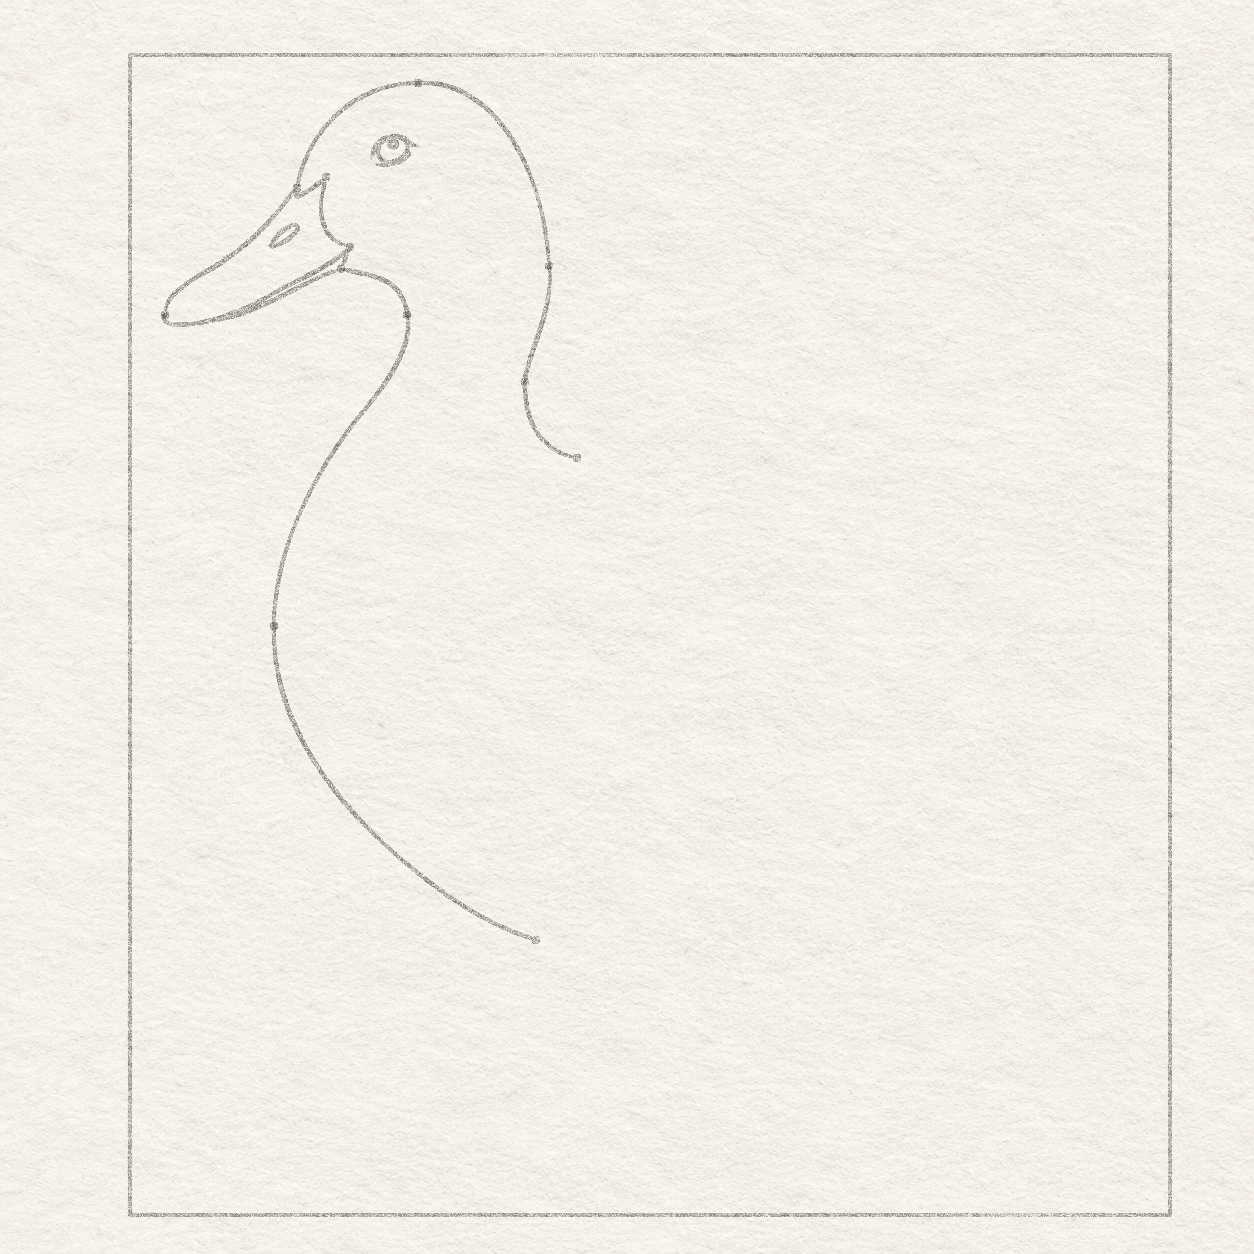
- Work freehand in light pencil. Draw two short lid curves outside the eye opening. Sweep the upper one over the opening and let it trail to the right. Follow the lower edge with the second curve. Leave a slim paper rim between the curves and the eye opening.
- Work freehand in light pencil. Inside the opening, outline a tiny round spot a little above the middle, with about 1 mm of width. Leave the spot white.
- Look for a slim band of clear paper between the lids and the opening. Lighten a lid that closes that band. Look for one small empty spot near the upper edge of the opening before moving on.

Drawing 6B — Drawing 12 — Outline the slant on the billView larger Instructions for Drawing 6B — Drawing 12 — Outline the slant on the bill
- Work freehand in light pencil. On the upper part of the bill, place the two ends of a short slanted oval. The lower-left end is about 1.8 cm across and 2.4 cm down from the upper-left corner of the box. Put the upper-right end 3.5 mm farther right and about 2.5 mm higher. Draw a shallow curve between the marks, then turn back along a second shallow curve to close it. Keep this small outlined slant clear of the edge of the bill.
- Keep a strip of blank paper along the bill edge. If the slant meets that edge, move the lighter curve before inking.
Chapter 3 — Draw the wing, tail and belly
3 steps · 10 progress drawings · Pencil
Step 7 of 15 · Pencil
Draw the row of upper wing feathers

Drawing 7A — Drawing 13 — Place four points for the upper feather rowView larger Instructions for Drawing 7A — Drawing 13 — Place four points for the upper feather row
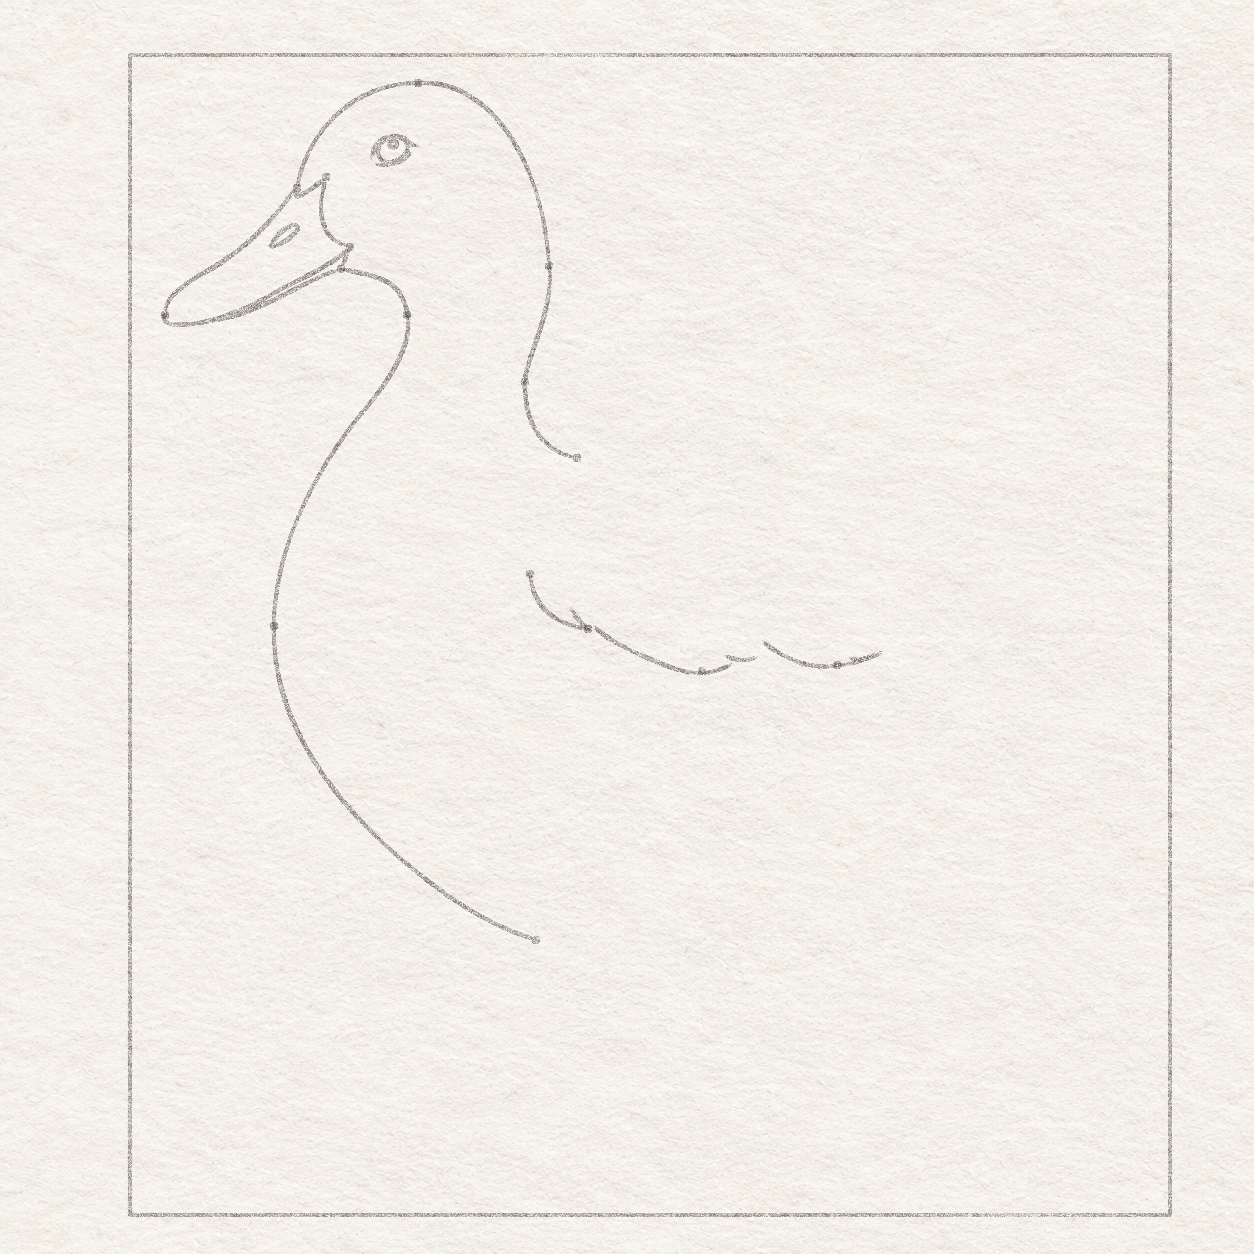
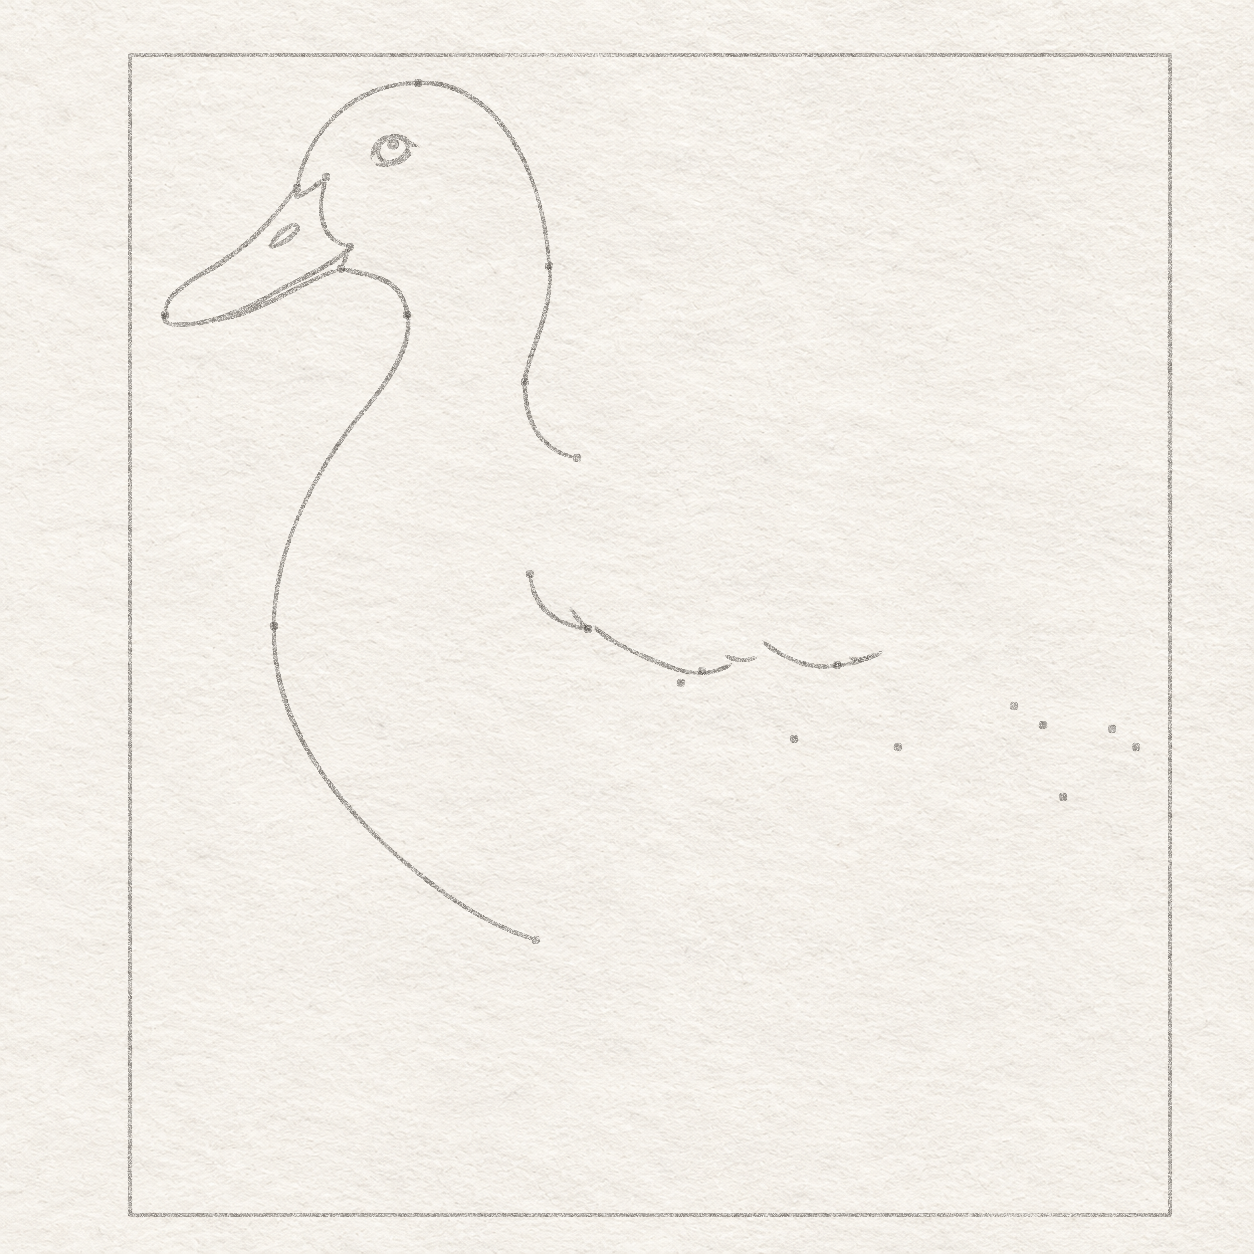
- For each dot, measure across along the top edge from the box’s top-left corner. Put the spare sheet’s square corner at that measurement, with one side on the top edge. Hold the ruler against the side pointing down and measure from the corner. Put a small light dot at the lower end of the measurement and lift the ruler. Mark the front of the upper wing row at about 5 cm across and 6.5 cm down. Mark the first low feather end at about 5.7 cm across and 7.2 cm down. Mark the deepest bend of the middle feather at about 7.2 cm across and 7.7 cm down. Mark the deepest bend of the last broad feather at about 8.8 cm across and 7.6 cm down.
- Recheck the two distances from the box’s top-left corner before drawing the curve.

Drawing 7B — Drawing 14 — Draw the uneven upper feather rowView larger 
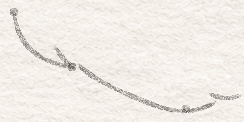
Detail 7B.1 — First short feather returnAt the first low point, turn back a short way. Leave a thin gap to the next, broader feather curve. Instructions for Drawing 7B — Drawing 14 — Draw the uneven upper feather row
- Work freehand in light pencil. Start at the foremost wing dot. Bow down and right into the first low end. At that end, turn into a short return that rises back and left just inside the first lobe. Keep this little pointed end distinct.
- In light pencil, start about 1 mm right of the first low dot and just above it. Draw freehand down and right through the middle bend dot. Then turn up and right. Stop about 4 mm right and 1 mm above the middle dot. Leave paper between this curve and the first feather.
- Find the last broad-feather dot. Start about 9.5 mm left and 3 mm above that dot, leaving paper between the start and the middle feather. Draw freehand down and right through the broad-feather dot. From that dot, curve about 5 mm farther right and rise about 1.5 mm to finish.
- Start the first short curve about 3 mm right and 2 mm above the middle bend dot. Draw it freehand about 4.5 mm to the right. Dip slightly, then lift the end. Leave a thin paper gap above the middle feather all the way. Start the second curve about 1.5 mm right and 1 mm above the broad-feather dot. Leave a gap at first. Let the curve dip gently, then turn up across the broad feather’s rising edge about 1.5 mm before its tip. Continue a little farther right and ease off the pencil so the end tapers.
- Compare the two arms of the first pointed end. Keep their pointed return distinct from the later curves. Keep the start separate from the first feather, and check that the finish sits about 4 mm right and 1 mm above its own bend dot. The broad feather starts left of its own bend dot and rises only a little after that dot. Keep paper between the two feathers. Keep the first short curve clear of the middle feather. The second crosses the rising edge of the broad feather once, near its tip.
Step 8 of 15 · Pencil
Connect the back, wing and tail

Drawing 8A — Drawing 15 — Place the lower feather and tail landmarksView larger Instructions for Drawing 8A — Drawing 15 — Place the lower feather and tail landmarks
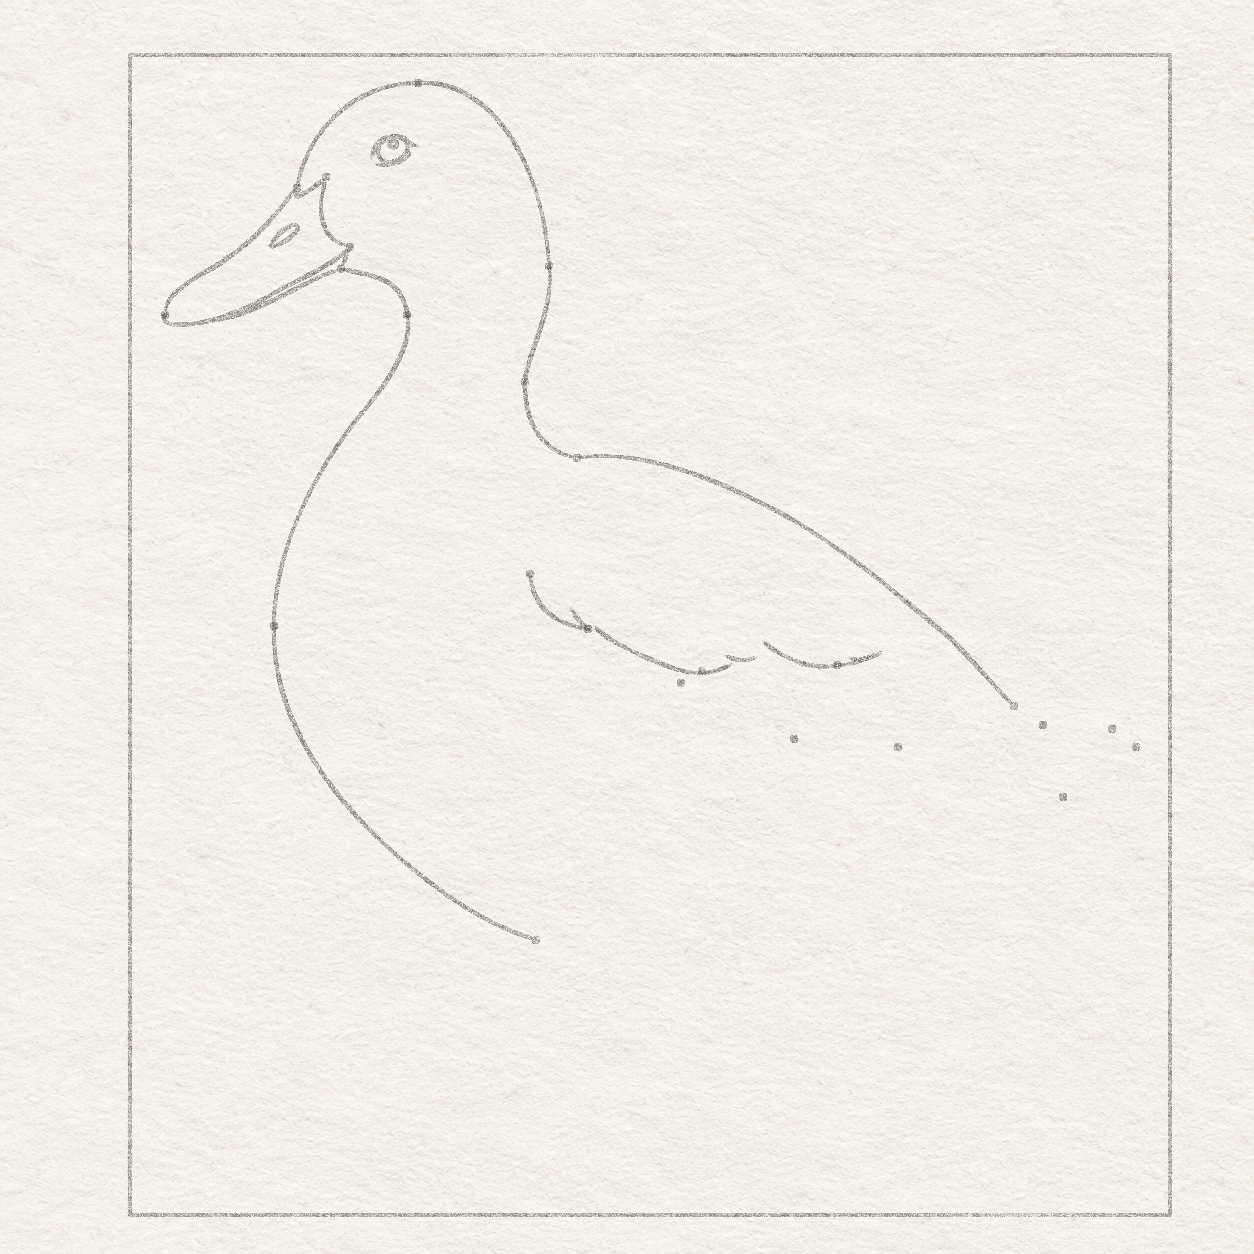
- For each dot, measure across along the top edge from the box’s top-left corner. Put the spare sheet’s square corner at that measurement, with one side on the top edge. Hold the ruler against the side pointing down and measure from the corner. Put a small light dot at the lower end of the measurement and lift the ruler. Mark the start of the left lower feather line at about 6.9 cm across and 7.8 cm down. Mark the bend of the left lower feather line at about 8.3 cm across and 8.6 cm down. Mark the meeting point of the two lower feather lines at about 9.6 cm across and 8.7 cm down. Mark the corner where the back divides at about 11.1 cm across and 8.1 cm down. Mark the point of the wing at about 11.4 cm across and 8.4 cm down. Mark the upper tail point at about 12.3 cm across and 8.4 cm down. Mark the farthest tail point at about 12.6 cm across and 8.7 cm down. Mark the tail-to-rump turn at about 11.7 cm across and 9.3 cm down.
- Recheck the two distances from the box’s top-left corner before drawing the curve.

Drawing 8B — Drawing 16 — Bring the back to its division above the wingView larger Instructions for Drawing 8B — Drawing 16 — Bring the back to its division above the wing
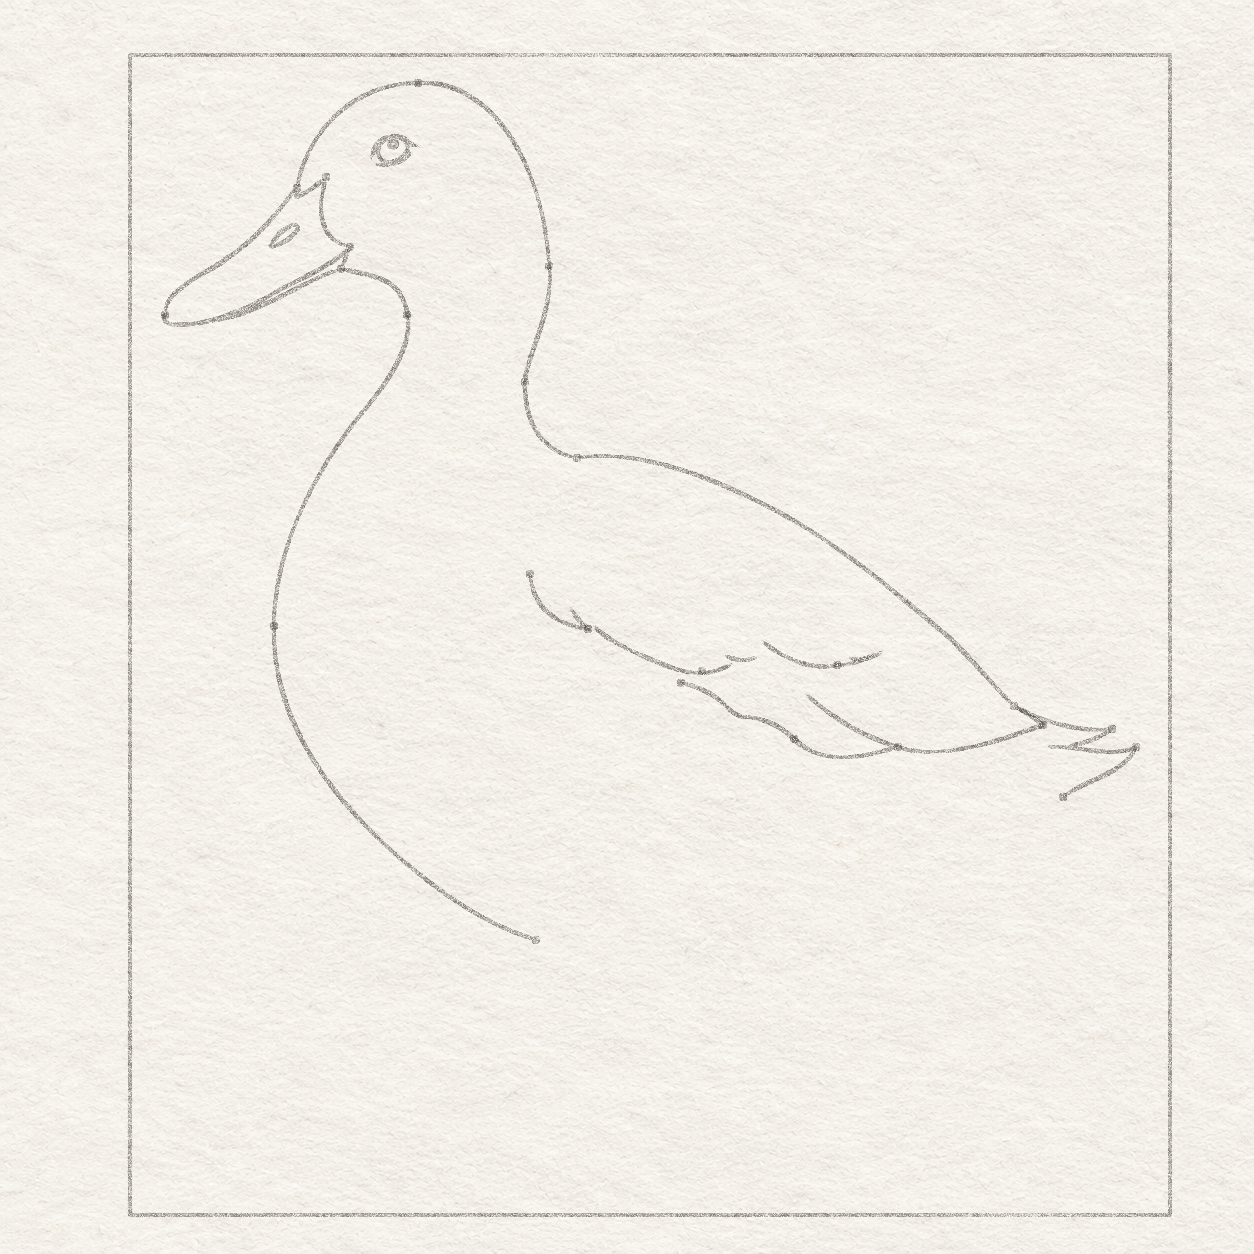
- Work freehand in light pencil. From the start of the back behind the neck, bow up slightly and then down and right. Make the descent gradual near the shoulder and steeper toward the dot where the back divides. Keep the line light so the tail can continue from that exact point.
- Keep the top of the back separate from the low wing-row dots.

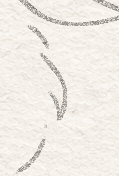
Drawing 8C — Drawing 17 — Separate the lower wing return and tail pointsView larger 
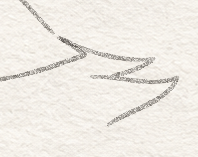
Detail 8C.1 — Three separate pointsCompare the wing point with the upper and far tail points. The return at each point follows its own edge. 
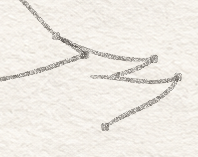
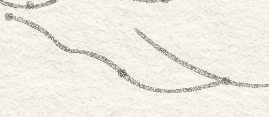
Detail 8C.2 — Where the lower feather curves meetThe left curve dips below the right one. Keep paper between them before they join. Instructions for Drawing 8C — Drawing 17 — Separate the lower wing return and tail points
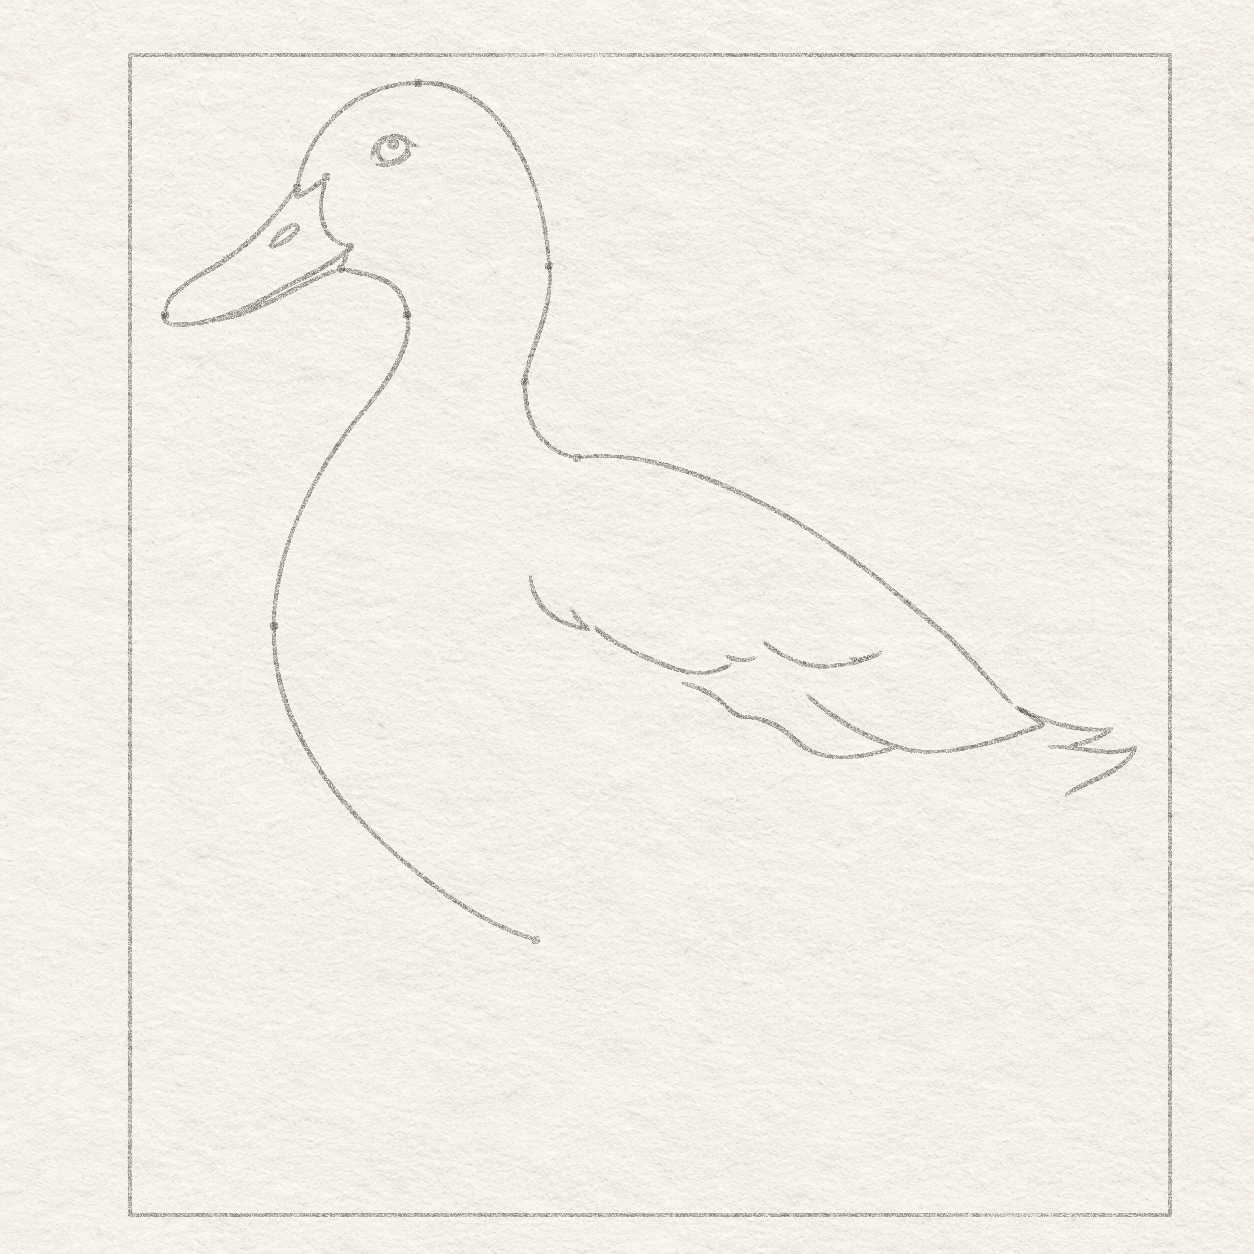
- Work freehand in light pencil. Start about 4 mm left and 3.5 mm down from the last broad-feather dot. Bow down and right through the marked meeting point for the two lower feather lines. Turn up to the wing point. Turn there and follow the short upper edge back to the dot where the back divides.
- Work freehand in light pencil. Start at the dot for the start of the left lower feather line. Sweep right and down through the marked bend of that same line. Round the base back up and right to meet the first lower line at the shared meeting dot. Leave paper between the two curves until they meet.
- Work freehand in light pencil. Continue from the back’s division to the upper tail dot, curving gently down before straightening at the point. Turn the point back and left with a short underside. Stop about 3 mm right and 3 mm below the wing point.
- Work freehand in light pencil. Start on the paper about 3 mm straight below the wing point. Bow gently right through the left end of the short upper-tail underside you just drew. Continue to the farthest tail dot. Turn down and left, then ease into the tail-to-rump dot.
- Check that the two wing edges turn at the wing point and that the short upper edge reaches the point where the back divides. Follow the left curve with your pencil tip. It should dip lower than the right curve before they meet. Check that the upper tail point sits farther right than the wing point and still sits above the last tail point. Keep the two outer tips and the wing point distinct. Lift an extra line that would fill the gap between them.

Drawing 8D — Drawing 18 — Lift the wing and tail dotsView larger 
Detail 8D.1 — Clean wing and tail tipsWith the guide dots lifted, check that the three ends keep their own shape and their thin gaps. Instructions for Drawing 8D — Drawing 18 — Lift the wing and tail dots
- After the wing and both tail points are drawn, use the corner of your eraser to lift the little guide dots. Tap the dots at the tips lightly and leave each pencil edge and short return in place.
- Look at all three sharp ends. Brush away stray eraser crumbs so you can see the short pencil returns.
Step 9 of 15 · Pencil
Finish the belly and small inner feathers

Drawing 9A — Drawing 19 — Locate the inner feather point and leg exitsView larger Instructions for Drawing 9A — Drawing 19 — Locate the inner feather point and leg exits
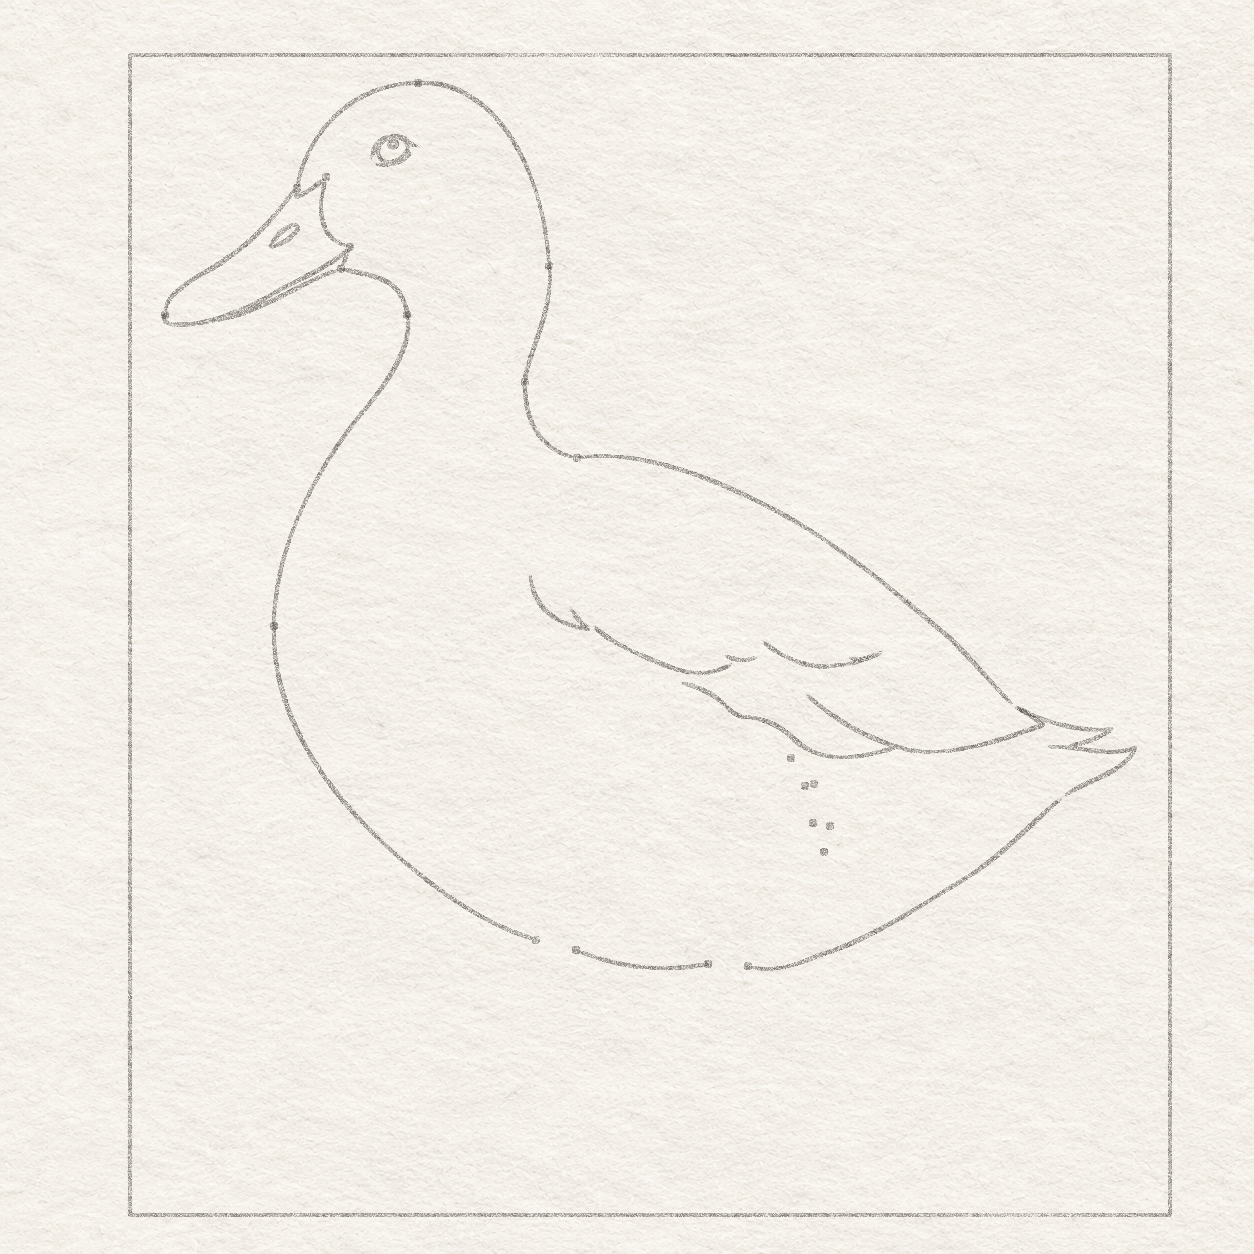
- For each dot, measure across along the top edge from the box’s top-left corner. Put the spare sheet’s square corner at that measurement, with one side on the top edge. Hold the ruler against the side pointing down and measure from the corner. Put a small light dot at the lower end of the measurement and lift the ruler. Mark the upper end of the small feather stroke at about 8.3 cm across and 8.8 cm down. Mark the lower end of the small feather stroke at about 8.6 cm across and 9.1 cm down. Mark the start of the inner lower feather at about 8.4 cm across and 9.1 cm down. Mark the outer bend of the lower feather at about 8.8 cm across and 9.6 cm down. Mark the narrow inner-feather point at about 8.7 cm across and 10 cm down. Mark the start of the short inward return at about 8.5 cm across and 9.6 cm down. Mark the right body exit for the far leg at about 5.6 cm across and 11.2 cm down. Mark the left body exit for the near leg at about 7.2 cm across and 11.4 cm down. Mark the right body exit for the near leg at about 7.7 cm across and 11.4 cm down.
- Recheck the two distances from the box’s top-left corner before drawing the curve.

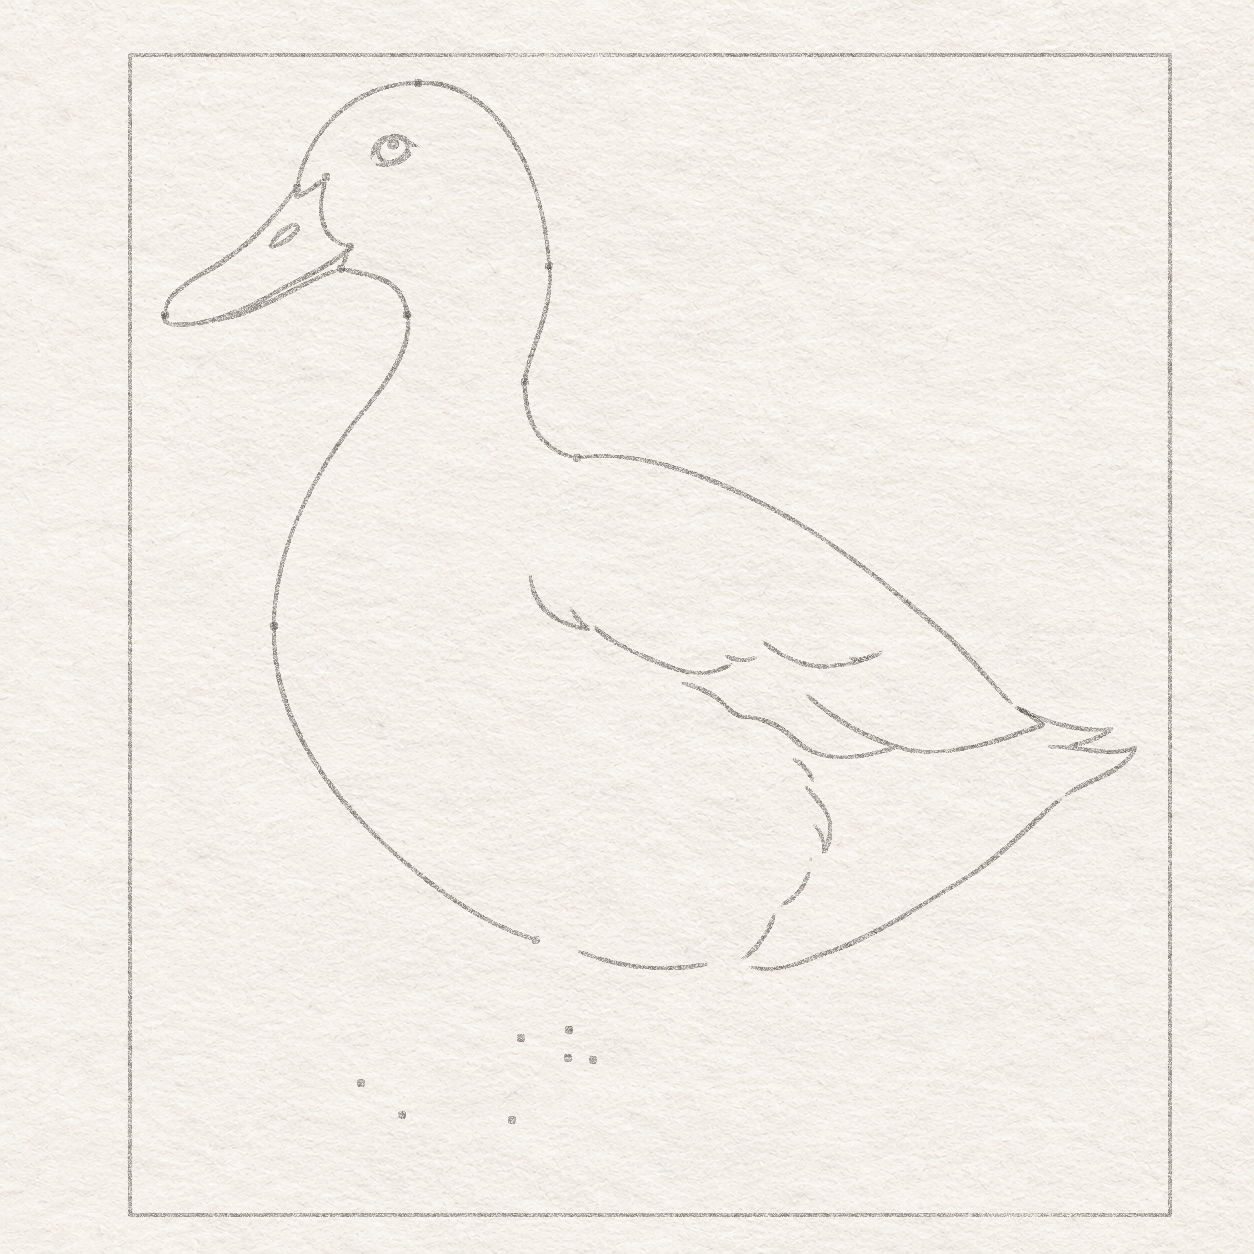
Drawing 9B — Drawing 20 — Leave two openings for the legsView larger Instructions for Drawing 9B — Drawing 20 — Leave two openings for the legs
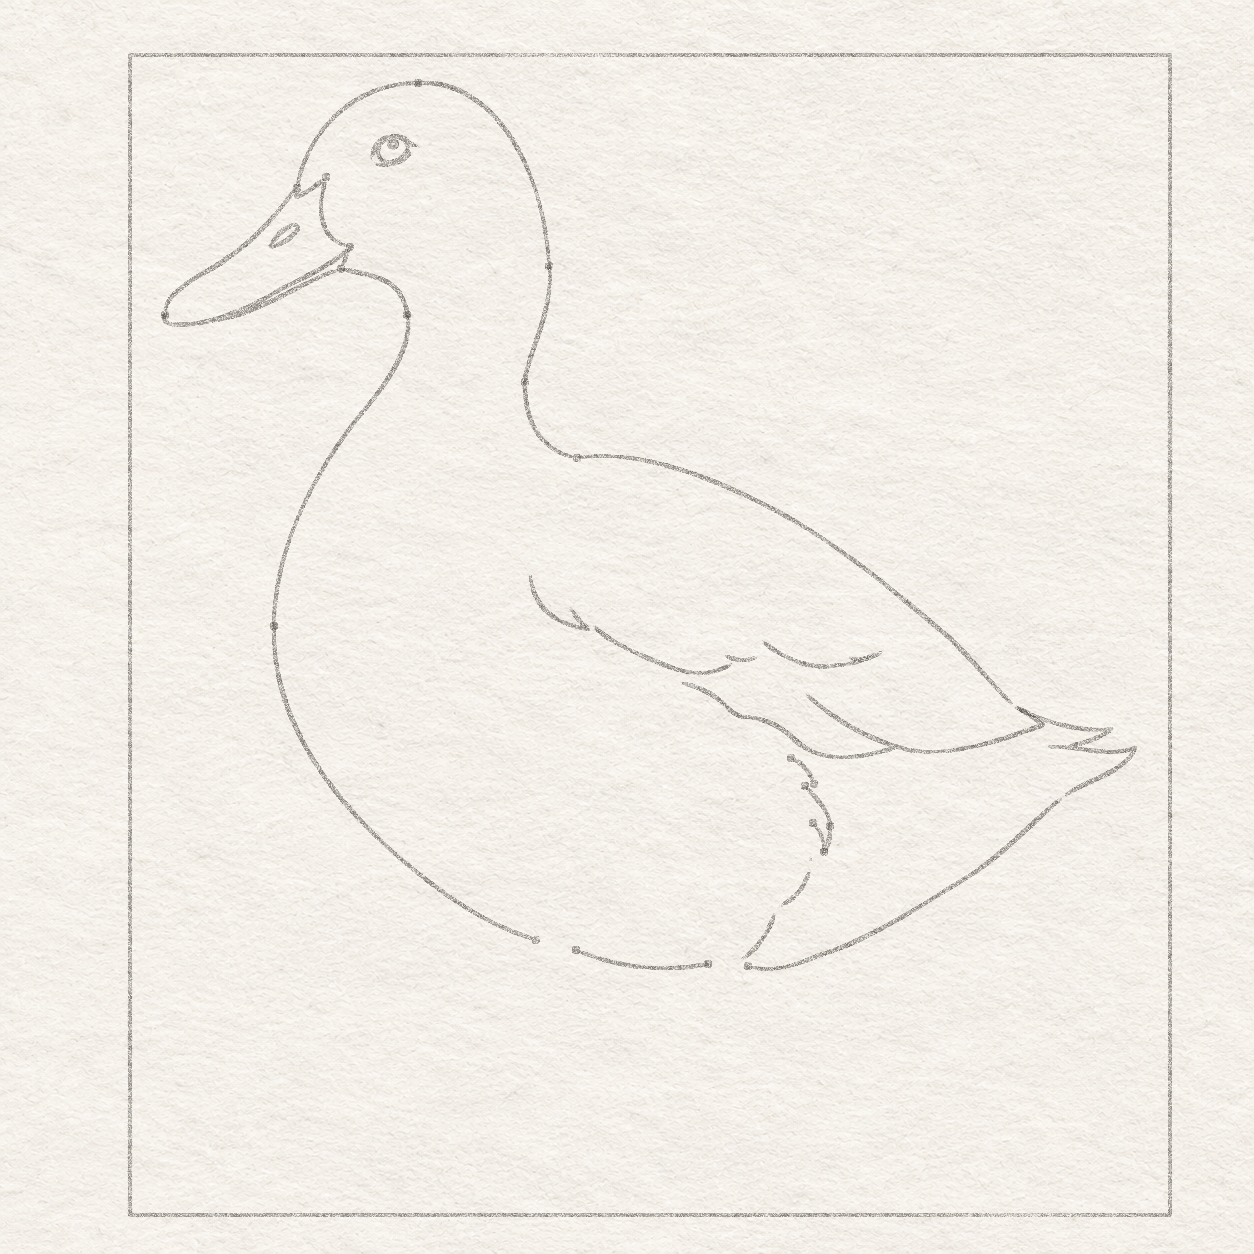
- Work freehand in light pencil. From the tail-to-rump mark, curve down and left around the rear belly to the right edge of the near-leg opening. Lift the pencil there. Draw the separate short belly stretch between the left edge of the near-leg opening and the right edge of the far-leg opening. Leave each leg opening clear.
- Point to both ends of each opening. Lift any line that runs across an opening.

Drawing 9C — Drawing 21 — Draw both sides of the small inner feather pointView larger Instructions for Drawing 9C — Drawing 21 — Draw both sides of the small inner feather point
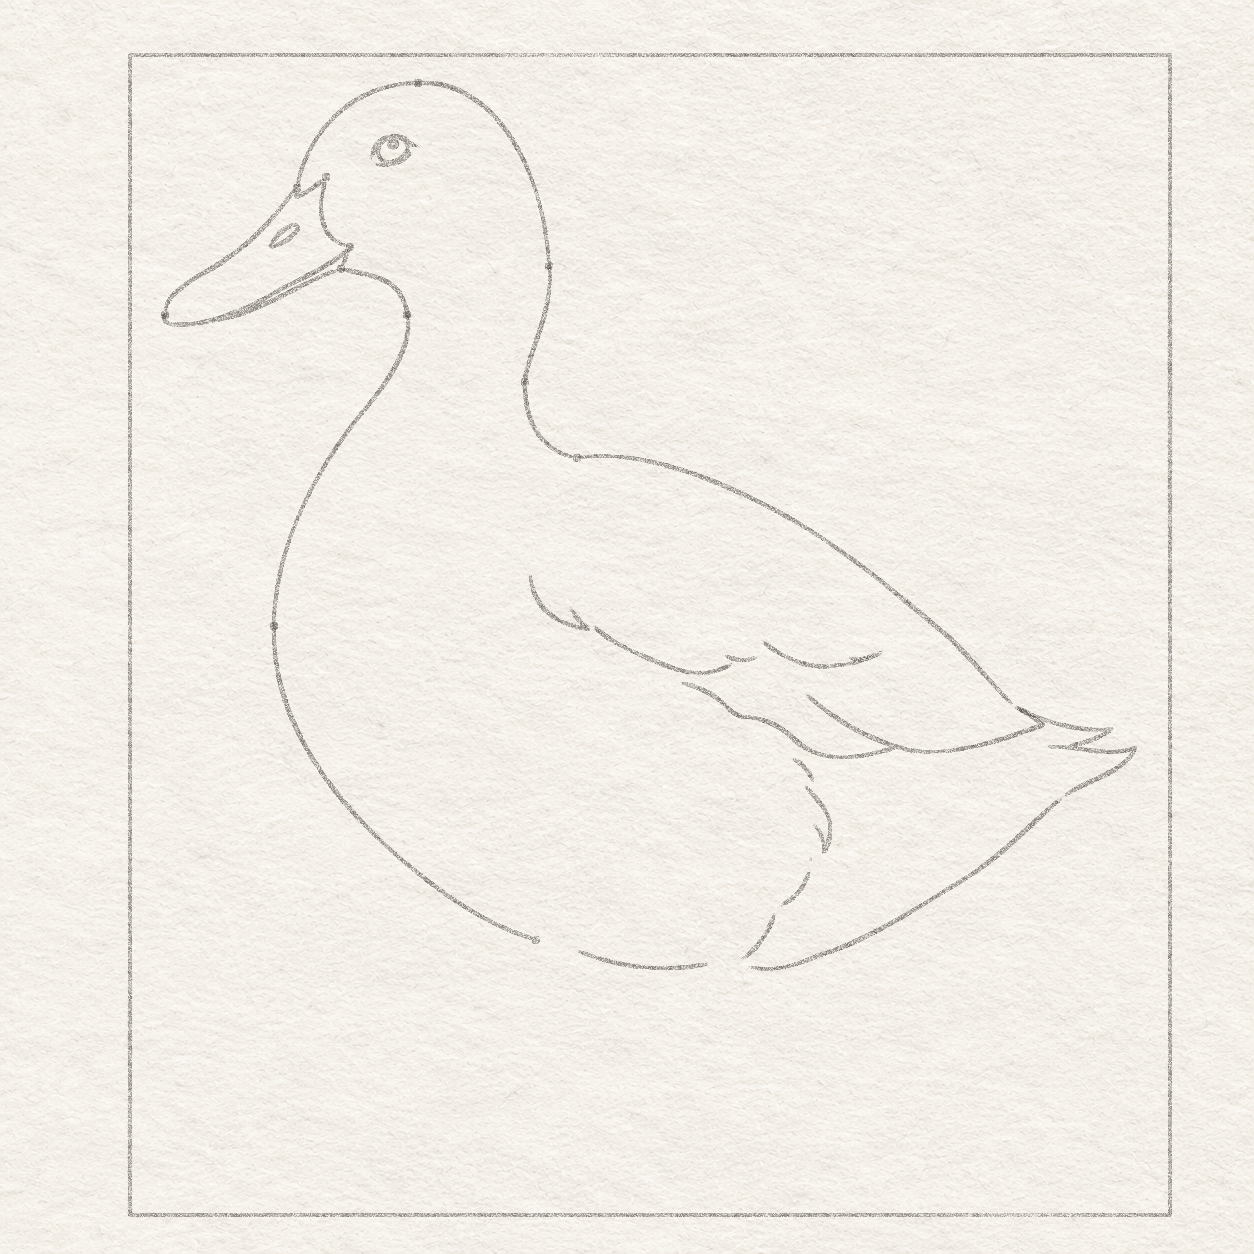
- Work freehand in light pencil. Start at the upper dot for the small feather stroke below the wing. Bow gently down and right to its lower dot and stop. Leave a small gap to the nearby start dot for the inner lower feather, just below and left.
- Work freehand in light pencil. Start at the inner-feather dot just below and left of the short stroke you drew. Bow down and right through the outer bend to the narrow point. Turn back up and a little left to the short return dot. Keep a narrow wedge of paper open between the two sides above the point.
- Use light pencil for three separate marks below the narrow inner-feather point. Start the tiny first mark about 1.5 mm left and just below the point, and draw it about 1 mm down. Start the middle curve about 2 mm left and 2 mm below the same point. Bend it freehand down and left, stopping about 6 mm left and 7 mm below that point. Start the last curve just below and left of that stop. Sweep it freehand down and left, ending about 1 mm left and just above the right edge of the near-leg opening. Keep paper between the three marks.
- Keep a gap between the short detached stroke above and the long pointed inner feather. Check that the two arms of the long inner feather meet at its narrow point, with a thin wedge of paper between those arms above it. Keep the broken return below the inner feather separate from its point. Leave paper between the three pieces of the broken return.

Drawing 9D — Drawing 22 — Lift the belly and feather dotsView larger 
Detail 9D.1 — Narrow feather pointThe small stroke above the long feather return stays detached. Leave a slim gap between the two sides above the point. Instructions for Drawing 9D — Drawing 22 — Lift the belly and feather dots
- With the corner of the eraser, lift the dots you drew for the short feather stroke and the long pointed feather. At the leg openings, lift the dot at the right end of the far opening and the two dots at the near opening. Keep the earlier dot at the left end of the far opening. Leave the feather curves and the ends of both openings in place.
- Check the narrow wedge between the arms of the long pointed feather and the two open gaps under the belly.
Chapter 4 — Draw both webbed feet
2 steps · 8 progress drawings · Pencil
Step 10 of 15 · Pencil
Build the farther webbed foot

Drawing 10A — Drawing 23 — Locate the far ankle and three toe tipsView larger Instructions for Drawing 10A — Drawing 23 — Locate the far ankle and three toe tips
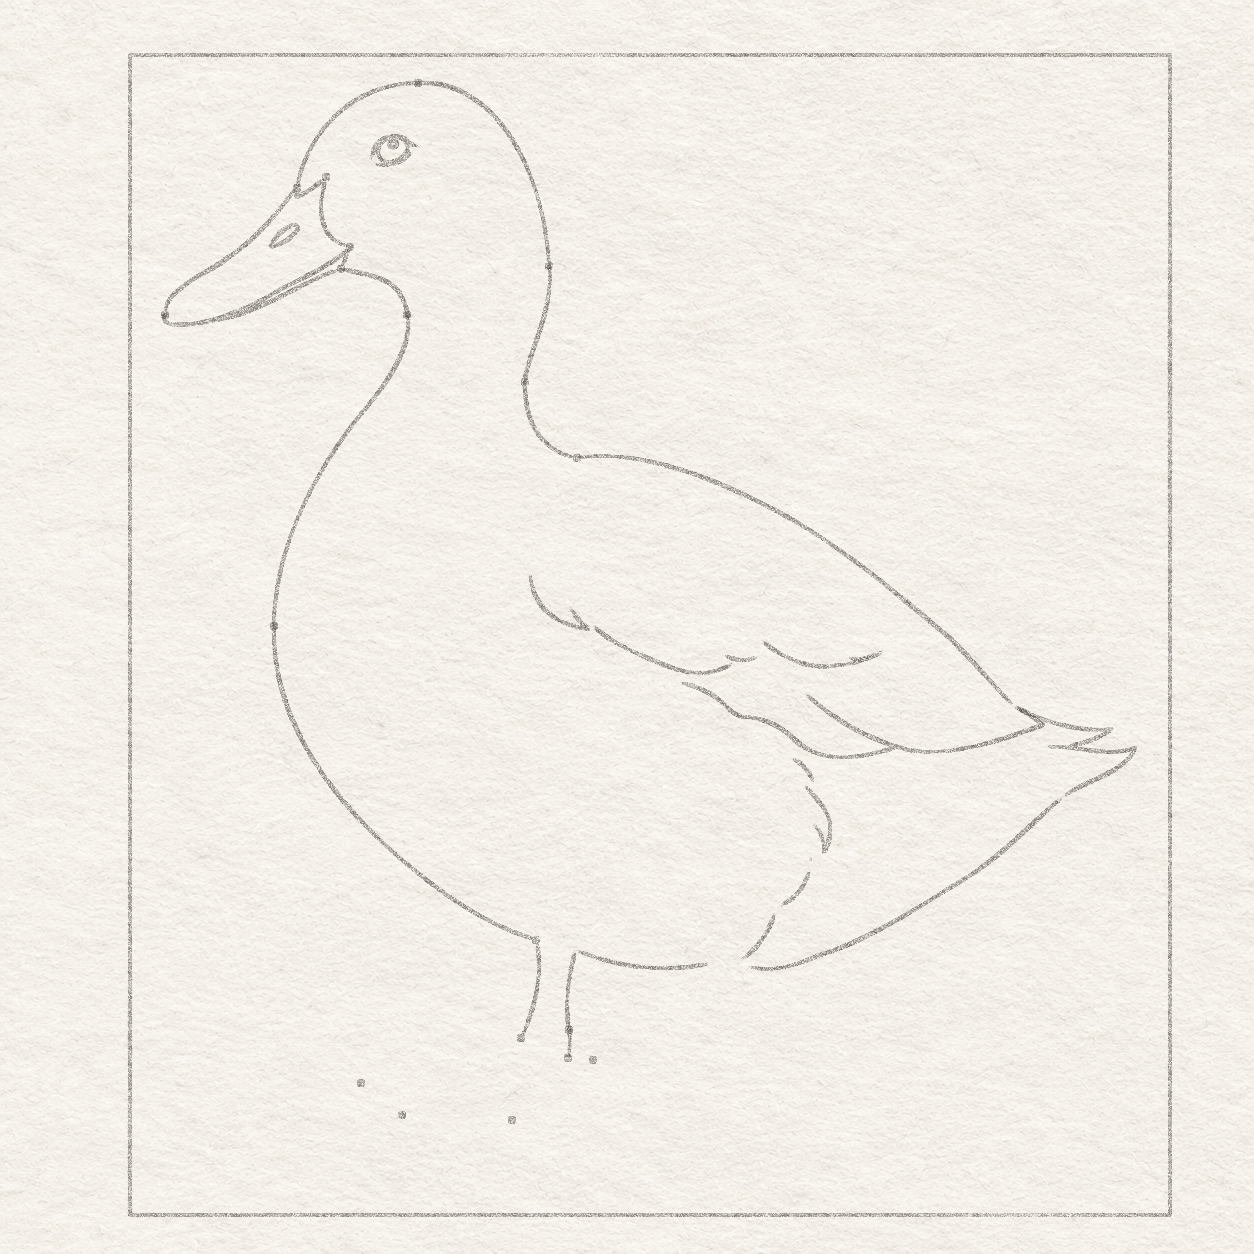
- For each dot, measure across along the top edge from the box’s top-left corner. Put the spare sheet’s square corner at that measurement, with one side on the top edge. Hold the ruler against the side pointing down and measure from the corner. Put a small light dot at the lower end of the measurement and lift the ruler. Mark the far ankle’s front bend at about 4.9 cm across and 12.3 cm down. Mark the far ankle’s back bend at about 5.5 cm across and 12.5 cm down. Mark the far ankle’s upper rear-branch contact at about 5.5 cm across and 12.2 cm down. Mark the far foot’s small rear point at about 5.8 cm across and 12.6 cm down. Mark the far foot’s left toe tip at about 2.9 cm across and 12.8 cm down. Mark the far foot’s middle toe tip at about 3.4 cm across and 13.3 cm down. Mark the far foot’s right toe tip at about 4.8 cm across and 13.3 cm down.
- Recheck the two distances from the box’s top-left corner before drawing the curve.

Drawing 10B — Drawing 24 — Shape the far ankleView larger Instructions for Drawing 10B — Drawing 24 — Shape the far ankle
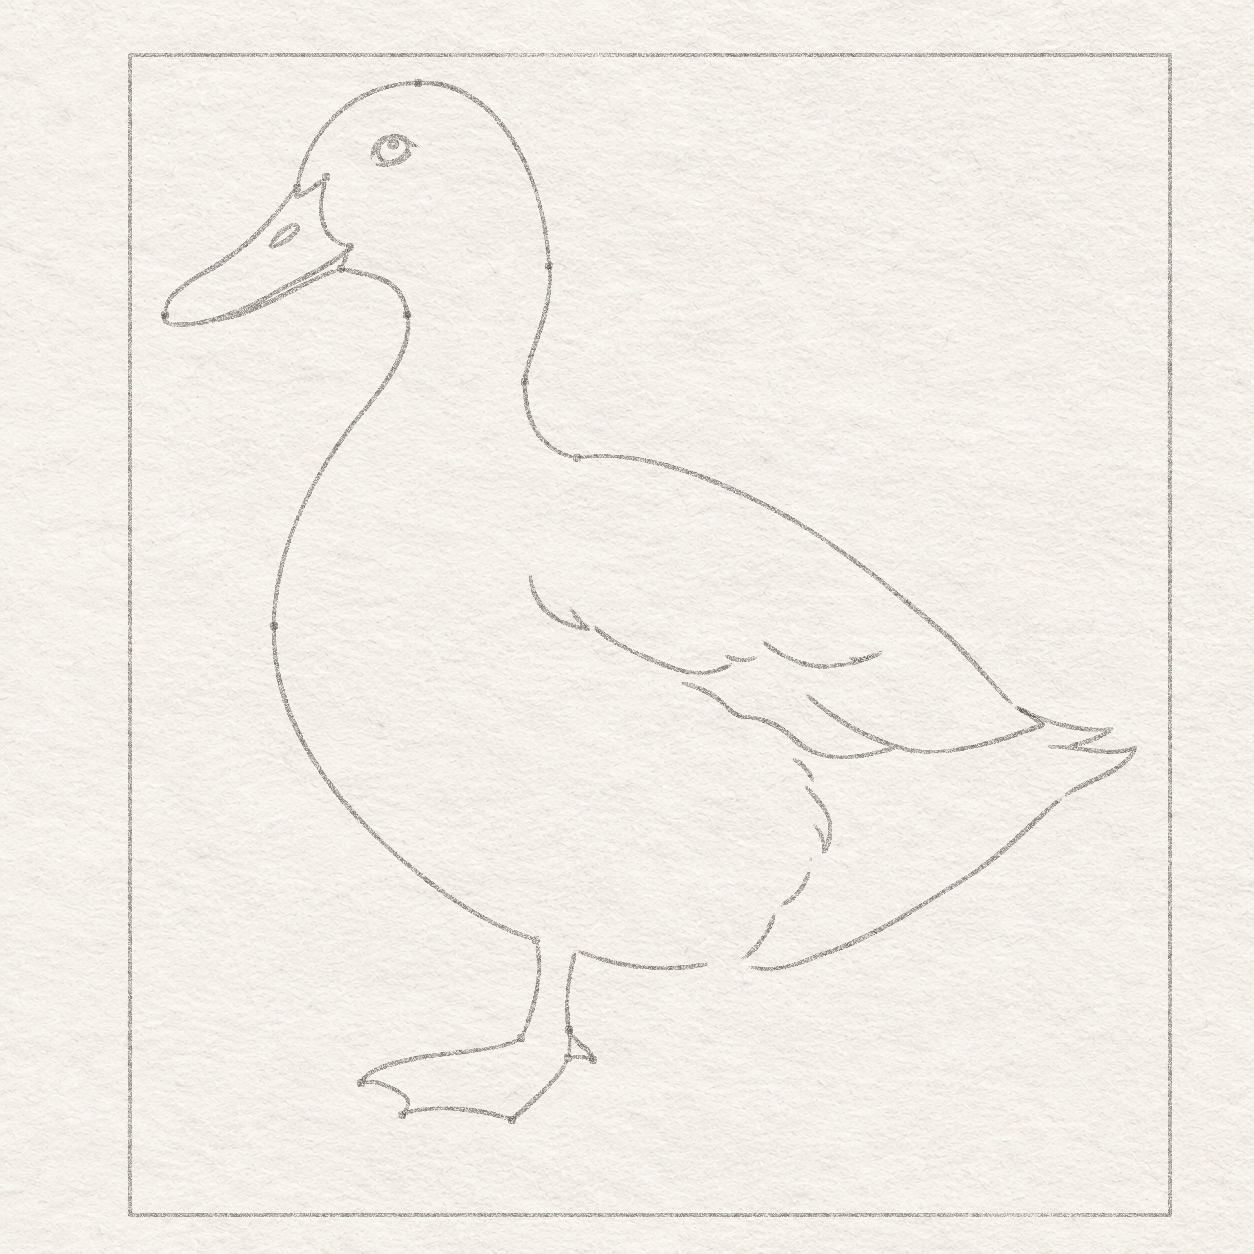
- Work freehand in light pencil. From the left edge of the opening for the far leg, bow slightly right just beneath the body, then back left to the front ankle dot. Keep the opening between the two leg sides clear.
- Work freehand in light pencil. From the right edge of that leg opening, bend slightly left as the leg narrows. Pass through the upper rear-branch dot, then ease into the back ankle dot.
- Check that the left ankle line reaches the front bend dot while the belly edge stays in place. Check that the right ankle line reaches the separate back bend dot. Leave the space between the ankle lines open.

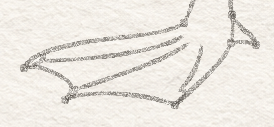
Drawing 10C — Drawing 25 — Connect the far ankle and toe fanView larger Instructions for Drawing 10C — Drawing 25 — Connect the far ankle and toe fan
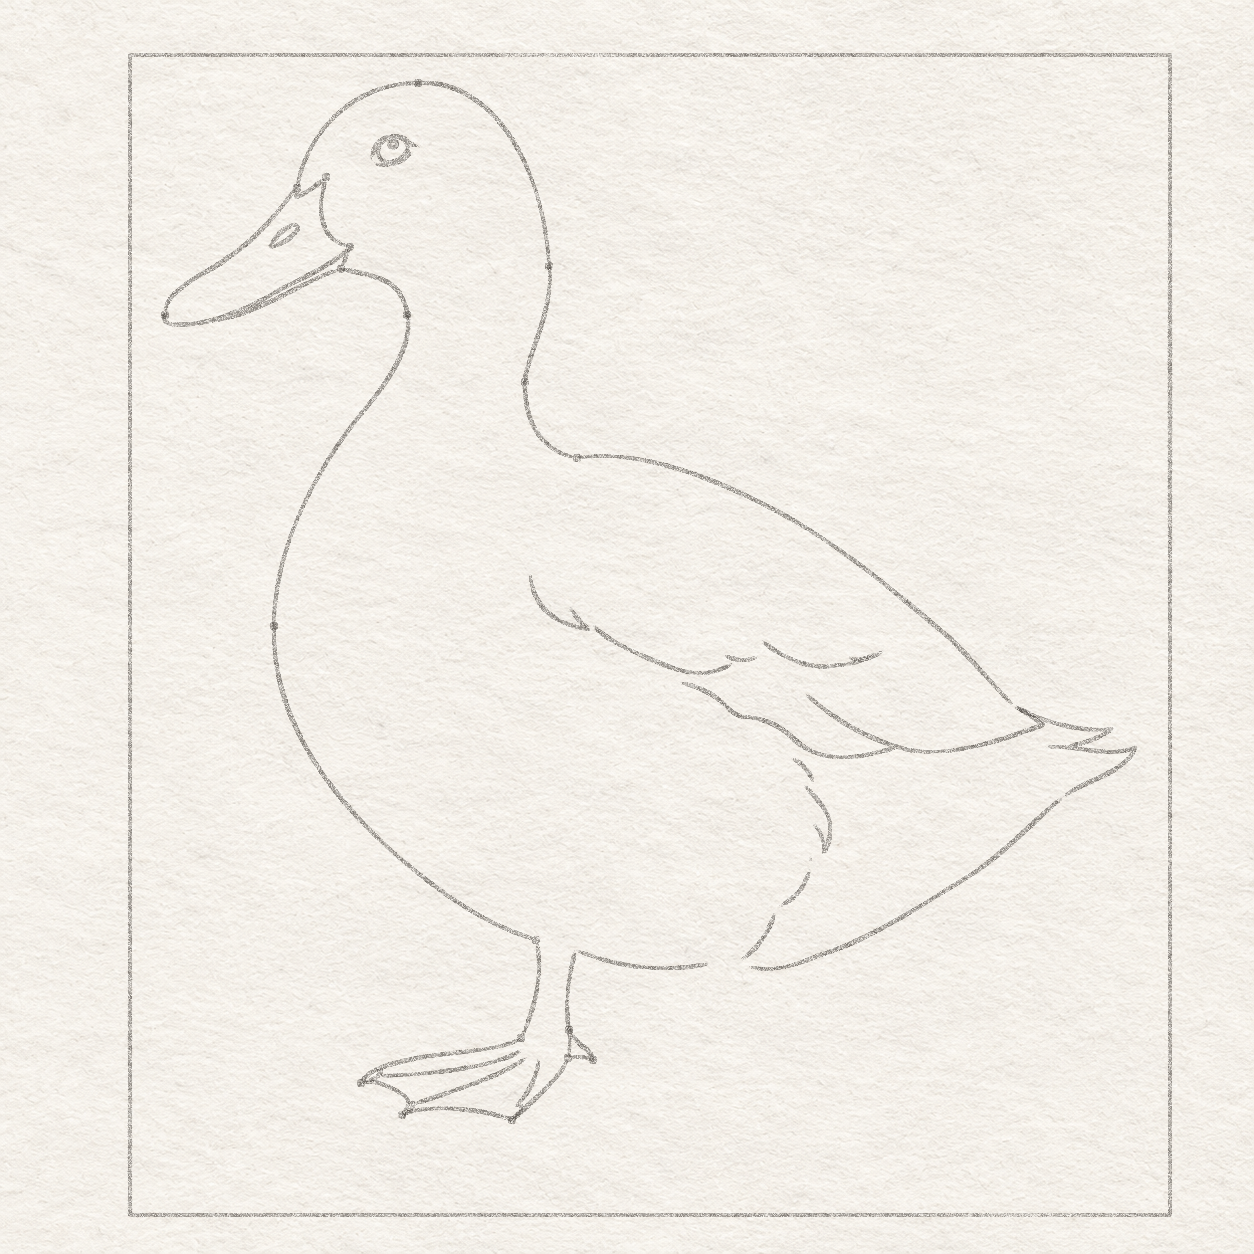
- Draw freehand from the far ankle’s front bend down and left to the left toe dot. Turn in toward the ankle to make the first scoop. At the deepest part, pass about 1 mm right and 1.5 mm above the middle toe dot before turning into that dot. Make the second scoop broader. Keep its middle about 1 mm above a straight line between the middle and right toe dots. Turn around the right toe dot and sweep up and right to the existing back ankle bend.
- Work freehand in light pencil. From the upper rear-branch contact on the far ankle, curve down and right to the small rear point. Turn there and bring the line left to the same back ankle bend as the outside foot edge.
- Check all three tips and both paper scoops. Lift a misplaced turn while it is still light pencil. Check that the outside edge of the web and the lower edge of the small rear point each reach the back ankle bend. Keep the upper edge of the small rear point attached at its separate higher contact.

Drawing 10D — Drawing 26 — Plan the far toe lines and pale tipsView larger 
Detail 10D.1 — Three pale far toe tipsThe fan lines stop inside the web. Keep each narrow outlined end pale when you reach the pen stage. Instructions for Drawing 10D — Drawing 26 — Plan the far toe lines and pale tips
- Place all three starts inside the far web using the front ankle bend. Start the first about 1.5 mm straight down from it. From that same bend, start the second about 1 mm right and 2.5 mm down and the third about 2 mm right and 2.5 mm down. Curve freehand from these starts toward the left, middle and right toe dots in that order. Stop the left line about 2.5 mm short of its tip. Stop the other two about 1.5 mm short of their own tips.
- At the left toe of the far foot, start just inside its upper edge about 1.5 mm back from the tip. Make a small freehand bow and bring it back to the toe point. Leave a narrow taper of unshaded paper between that arc and the outside edge.
- At the middle toe of the far foot, start just inside its upper edge about 1.5 mm back from the tip. Make a small freehand bow and bring it back to the toe point. Leave a narrow taper of unshaded paper between that arc and the outside edge.
- At the right toe of the far foot, start just inside its upper edge about 1.5 mm back from the tip. Make a small freehand bow and bring it back to the toe point. Leave a narrow taper of unshaded paper between that arc and the outside edge.
- Keep the three fan lines inside the web and leave them short of their own toe tips. Each pale cap should taper toward its own toe point. Lift and narrow a cap curve if its paper wedge is too broad.
Step 11 of 15 · Pencil
Build the nearer webbed foot

Drawing 11A — Drawing 27 — Locate the near ankle and three toe tipsView larger Instructions for Drawing 11A — Drawing 27 — Locate the near ankle and three toe tips
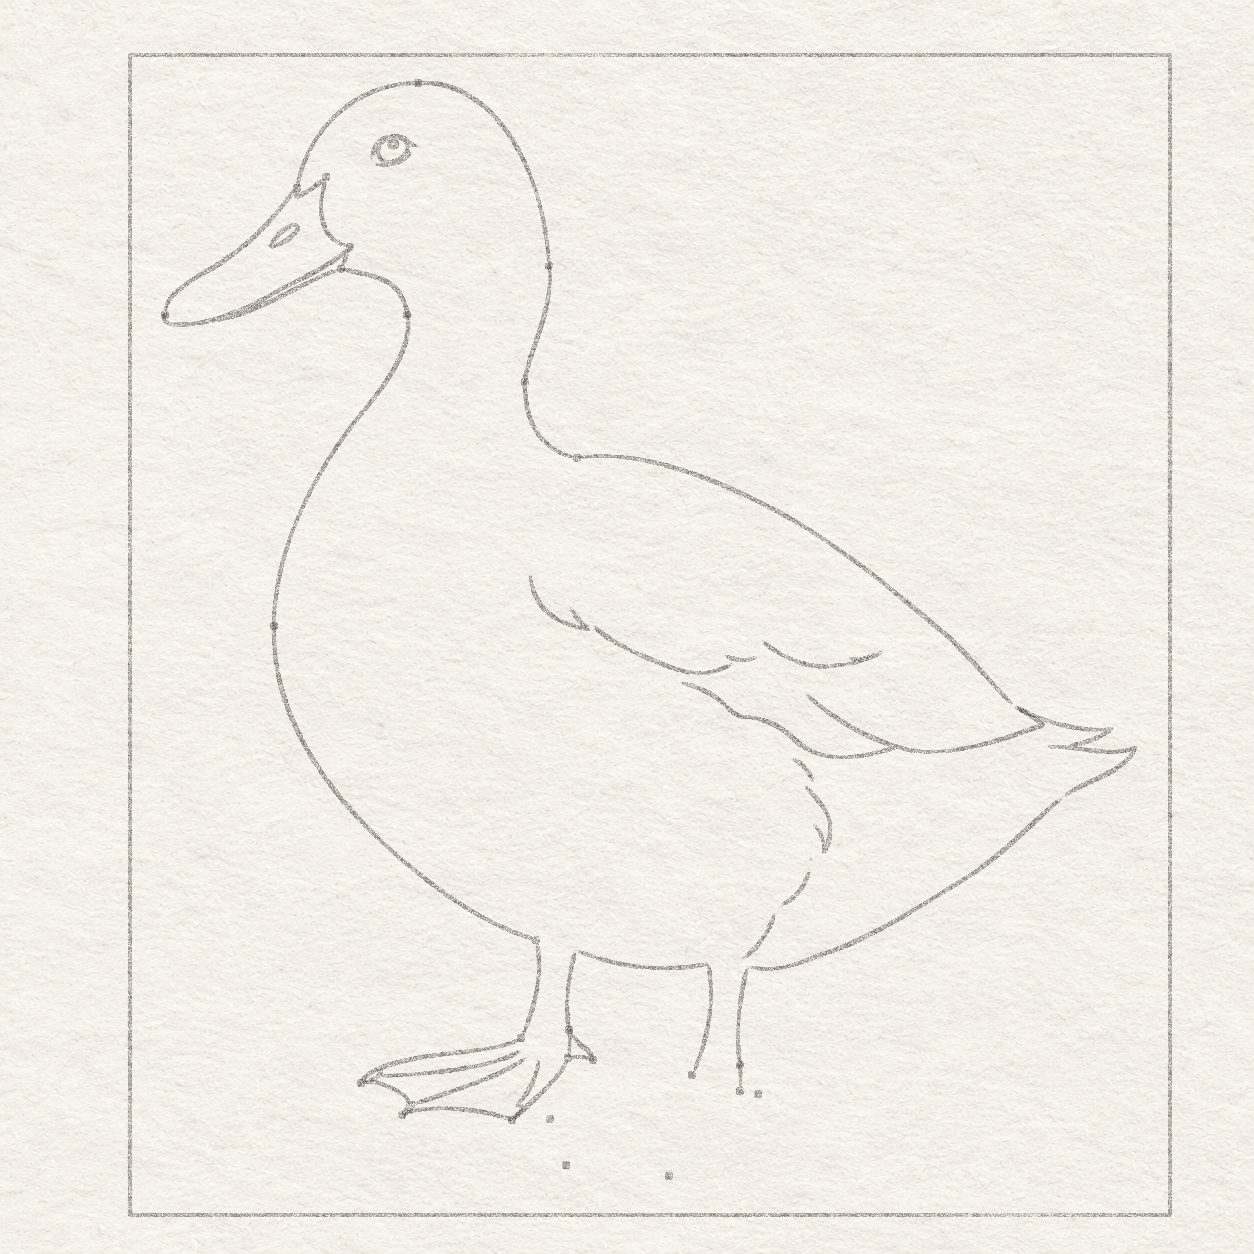
- For each dot, measure across along the top edge from the box’s top-left corner. Put the spare sheet’s square corner at that measurement, with one side on the top edge. Hold the ruler against the side pointing down and measure from the corner. Put a small light dot at the lower end of the measurement and lift the ruler. Mark the near ankle’s front bend at about 7 cm across and 12.8 cm down. Mark the near ankle’s back bend at about 7.6 cm across and 12.9 cm down. Mark the near ankle’s upper rear-branch contact at about 7.6 cm across and 12.6 cm down. Mark the near foot’s small rear point at about 7.8 cm across and 13 cm down. Mark the near foot’s left toe tip at about 5.3 cm across and 13.3 cm down. Mark the near foot’s middle toe tip at about 5.5 cm across and 13.9 cm down. Mark the near foot’s right toe tip at about 6.7 cm across and 14 cm down.
- Recheck the two distances from the box’s top-left corner before drawing the curve.

Drawing 11B — Drawing 28 — Shape the near ankleView larger Instructions for Drawing 11B — Drawing 28 — Shape the near ankle
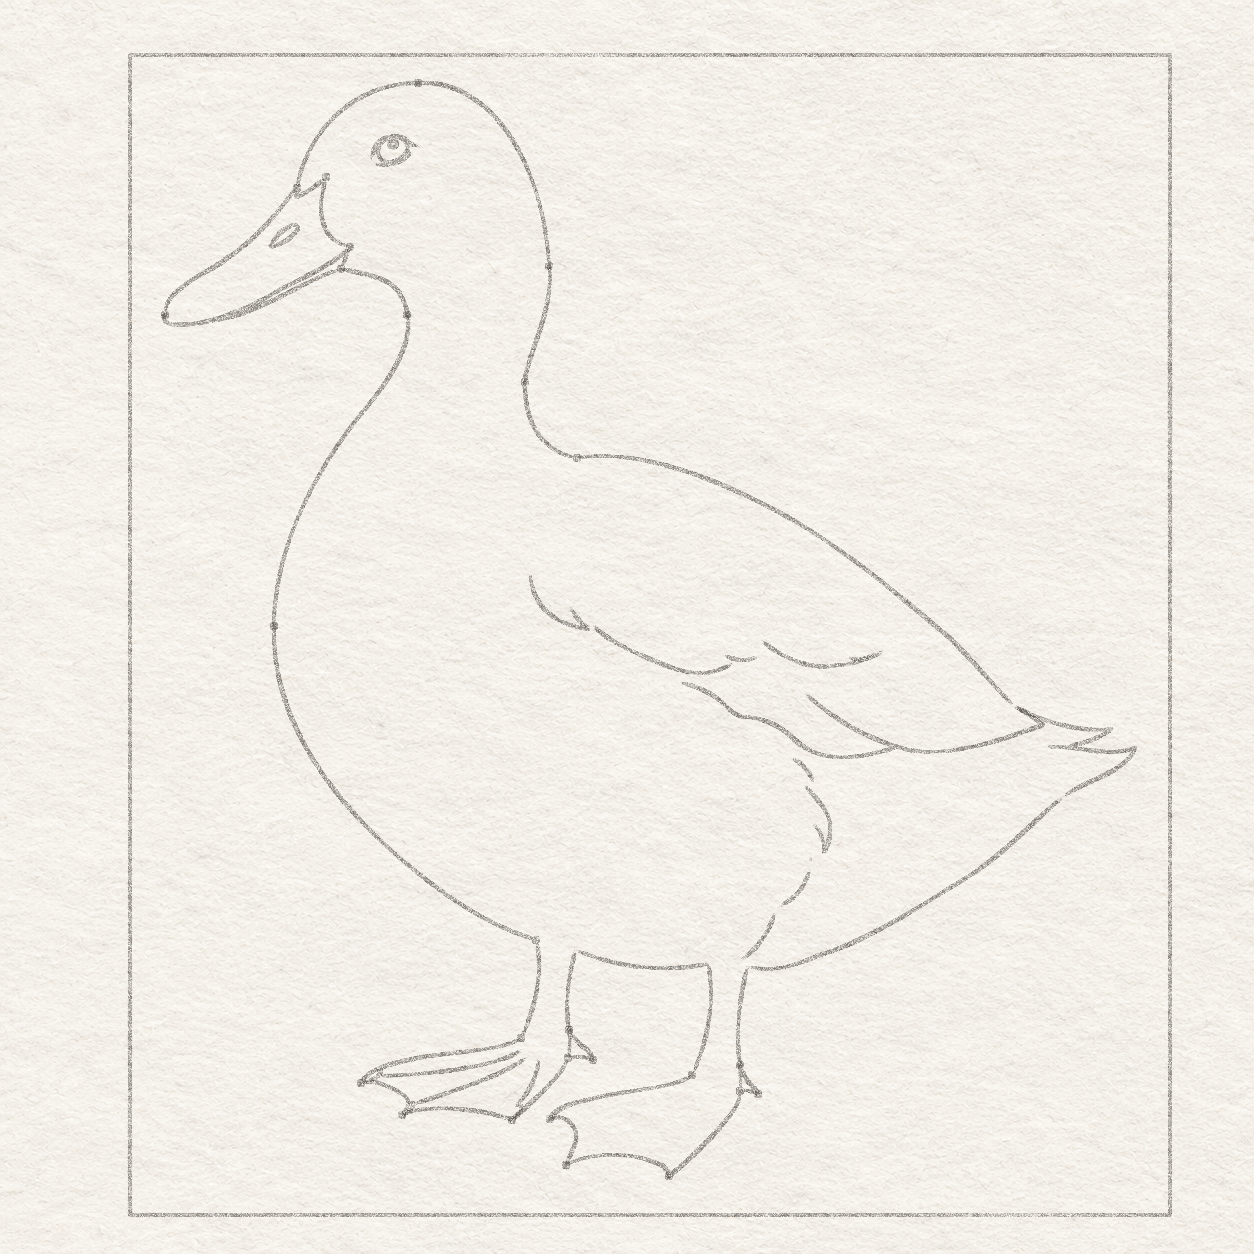
- Work freehand in light pencil. From the left edge of the opening for the near leg, bow slightly right just beneath the body, then back left to the front ankle dot. Keep the opening between the two leg sides clear.
- Work freehand in light pencil. From the right edge of that leg opening, bend slightly left as the leg narrows. Pass through the upper rear-branch dot, then ease into the back ankle dot.
- Check that the left ankle line reaches the front bend dot while the belly edge stays in place. Check that the right ankle line reaches the separate back bend dot. Leave the space between the ankle lines open.

Drawing 11C — Drawing 29 — Connect the near ankle and toe fanView larger Instructions for Drawing 11C — Drawing 29 — Connect the near ankle and toe fan
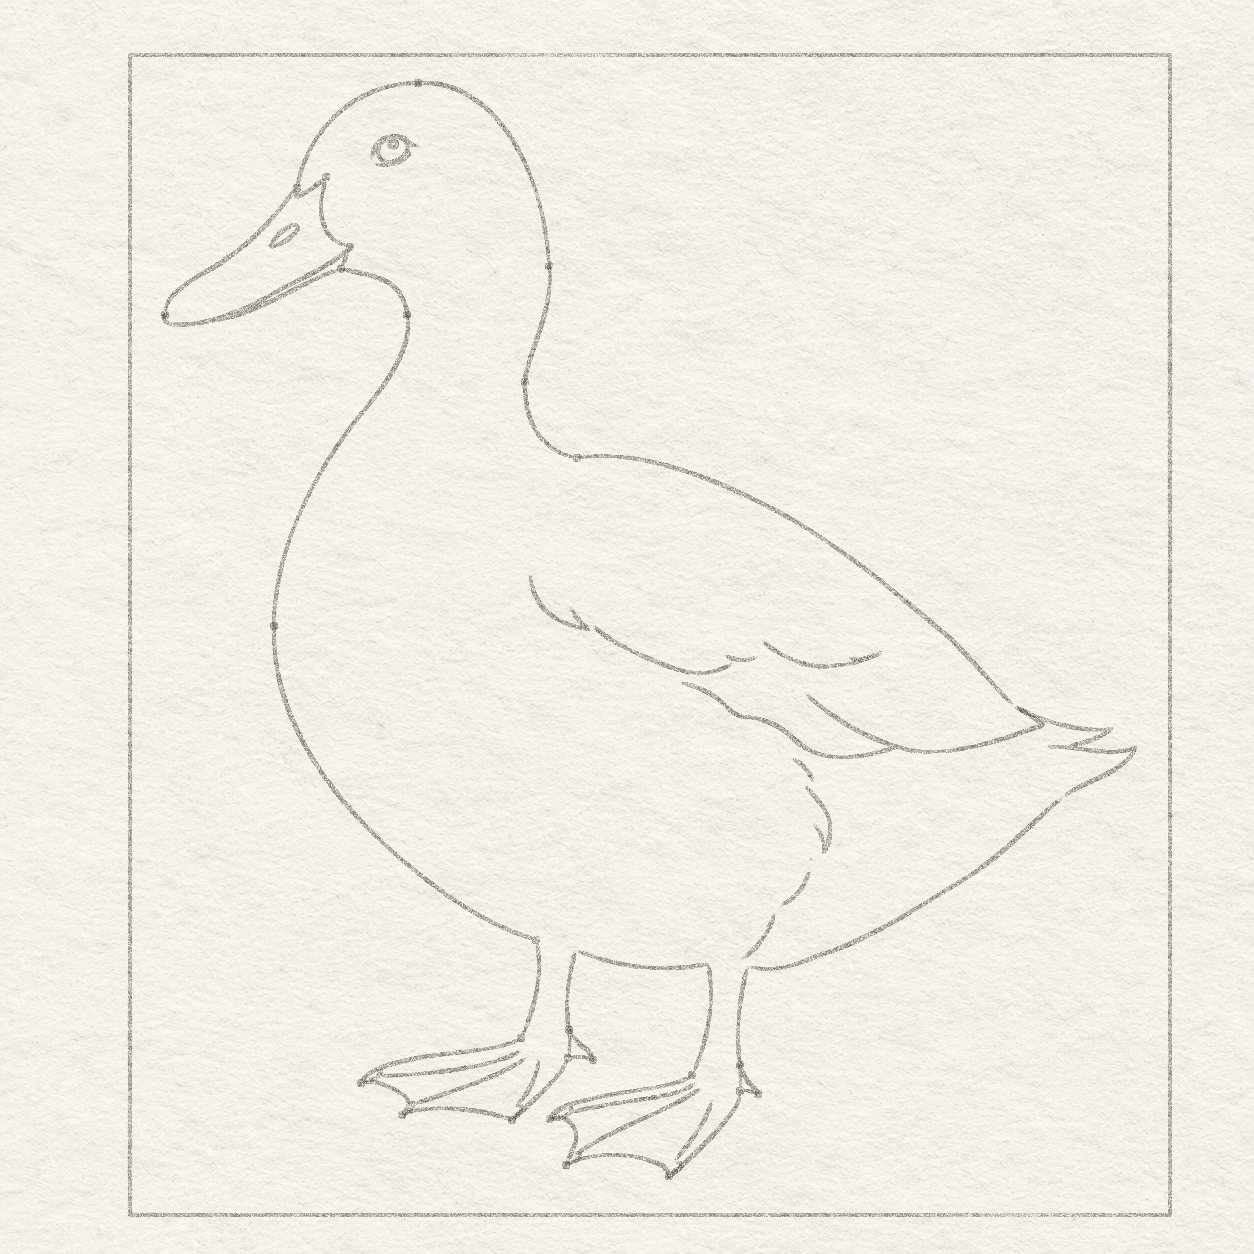
- Draw freehand from the near ankle’s front bend down and left to the left toe dot. Turn in toward the ankle to make the first scoop. At the deepest part, pass about 1 mm right and 3 mm above the middle toe dot before turning into that dot. Make the second scoop broader. Keep its middle about 2 mm above a straight line between the middle and right toe dots. Turn around the right toe dot and sweep up and right to the existing back ankle bend.
- Work freehand in light pencil. From the upper rear-branch contact on the near ankle, curve down and right to the small rear point. Turn there and bring the line left to the same back ankle bend as the outside foot edge.
- Check all three tips and both paper scoops. Lift a misplaced turn while it is still light pencil. Check that the outside edge of the web and the lower edge of the small rear point each reach the back ankle bend. Keep the upper edge of the small rear point attached at its separate higher contact.

Drawing 11D — Drawing 30 — Plan the near toe lines and pale tipsView larger 
Detail 11D.1 — Three pale near toe tipsThe near foot has deeper scoops and its own small point behind the ankle. Leave its three caps clear. Instructions for Drawing 11D — Drawing 30 — Plan the near toe lines and pale tips
- Place all three starts inside the near web using the front ankle bend. Start the first about 0.5 mm right and 1 mm down from it. From that same bend, start the second about 1 mm right and 1.5 mm down and the third about 2.5 mm right and 3 mm down. Curve freehand from these starts toward the left, middle and right toe dots in that order. Stop the left line about 2.5 mm short of its tip. Stop the other two about 1.5 mm short of their own tips.
- At the left toe of the near foot, start just inside its upper edge about 1.5 mm back from the tip. Make a small freehand bow and bring it back to the toe point. Leave a narrow taper of unshaded paper between that arc and the outside edge.
- At the middle toe of the near foot, start just inside its upper edge about 1.5 mm back from the tip. Make a small freehand bow and bring it back to the toe point. Leave a narrow taper of unshaded paper between that arc and the outside edge.
- At the right toe of the near foot, start just inside its upper edge about 1.5 mm back from the tip. Make a small freehand bow and bring it back to the toe point. Leave a narrow taper of unshaded paper between that arc and the outside edge.
- Keep the three fan lines inside the web and leave them short of their own toe tips. Each pale cap should taper toward its own toe point. Lift and narrow a cap curve if its paper wedge is too broad.
Chapter 5 — Ink and finish
4 steps · 7 progress drawings · Ink
Step 12 of 15 · Ink
Trace the selected contours in ink

Drawing 12A — Drawing 31 — Ink the selected pencil contoursView larger Instructions for Drawing 12A — Drawing 31 — Ink the selected pencil contours
- Trace the chosen pencil edges for the head, bill and neck. Follow the contours around the back and breast, then trace the wing, tail and lower feather returns. Leave the short curve above the middle feather separate. Trace the short curve over the broad feather through its existing pencil crossing near the tip, then lift the pen as the end tapers. Trace the ankle joins and web outlines. Inside each foot, follow the three long pencil fan lines and the three short curves around the pale toe caps. Keep the bill strip, the other feather gaps and the web scoops open.
- Check that the middle feather gap stays open and the broad-feather crossing stays joined. Keep the other ink joins at their existing pencil contacts, including on the bill, at the wing and tail ends, and beside the ankles.
Step 13 of 15 · Ink
Ink the face and add short neck strokes

Drawing 13A — Drawing 32 — Ink the eye and the nostrilView larger 
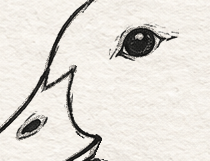
Detail 13A.1 — Pale spots beside the inkCheck the tiny white spot inside the eye, the pale rim, and the paper line around the slanted nostril. Instructions for Drawing 13A — Drawing 32 — Ink the eye and the nostril
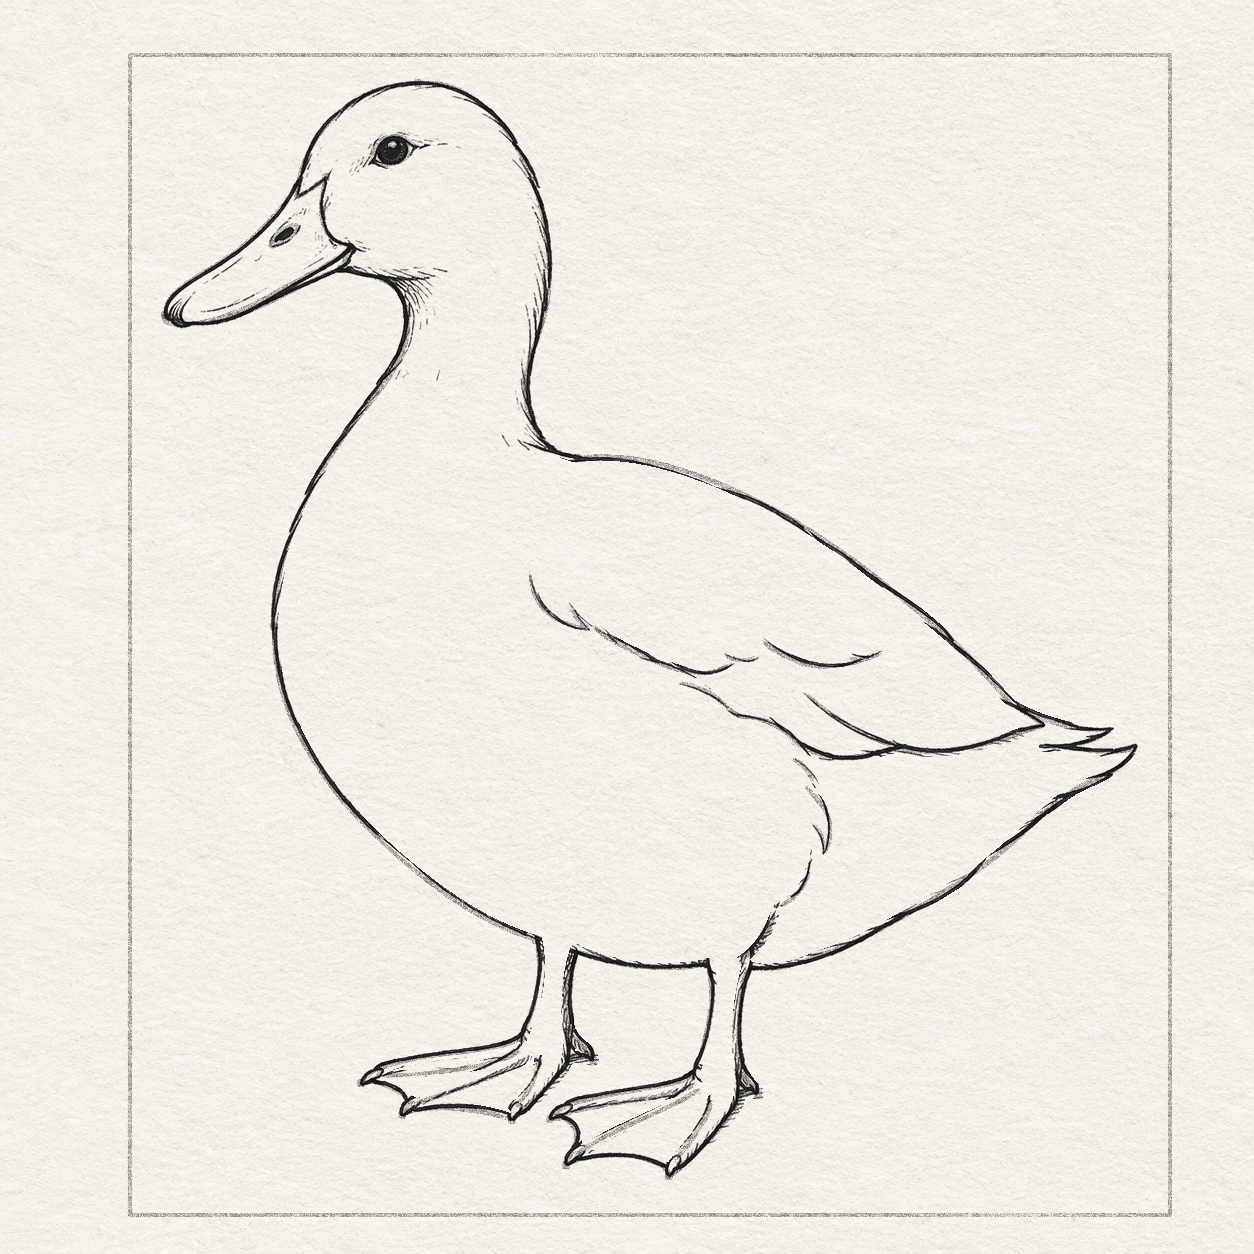
- Follow the pencil around the eye opening and along its two lids with the pen. Inside the slim pencil oval on the bill, outline a smaller slant. Then fill the eye around its tiny white spot and darken only the inside of the small slant.
- Keep the small highlight, the eye rim, the pale edge around the nostril and the open paper along the lower bill.

Drawing 13B — Drawing 33 — Add short marks beside the bill and neckView larger Instructions for Drawing 13B — Drawing 33 — Add short marks beside the bill and neck
- Put a few short marks inside the rounded bill tip, beside the lower bill edge and along the neck. Sweep the throat strokes down and right away from the cheek. Add a few short strokes parallel to the neck curve. Lift the pen for every short stroke so it tapers.
- Check the little cluster beside the cheek and the open middle of the neck. Leave the rest of the bill and neck mostly bare.
Step 14 of 15 · Ink
Add short strokes on the body and feet

Drawing 14A — Drawing 34 — Add short feather and body strokesView larger Instructions for Drawing 14A — Drawing 34 — Add short feather and body strokes
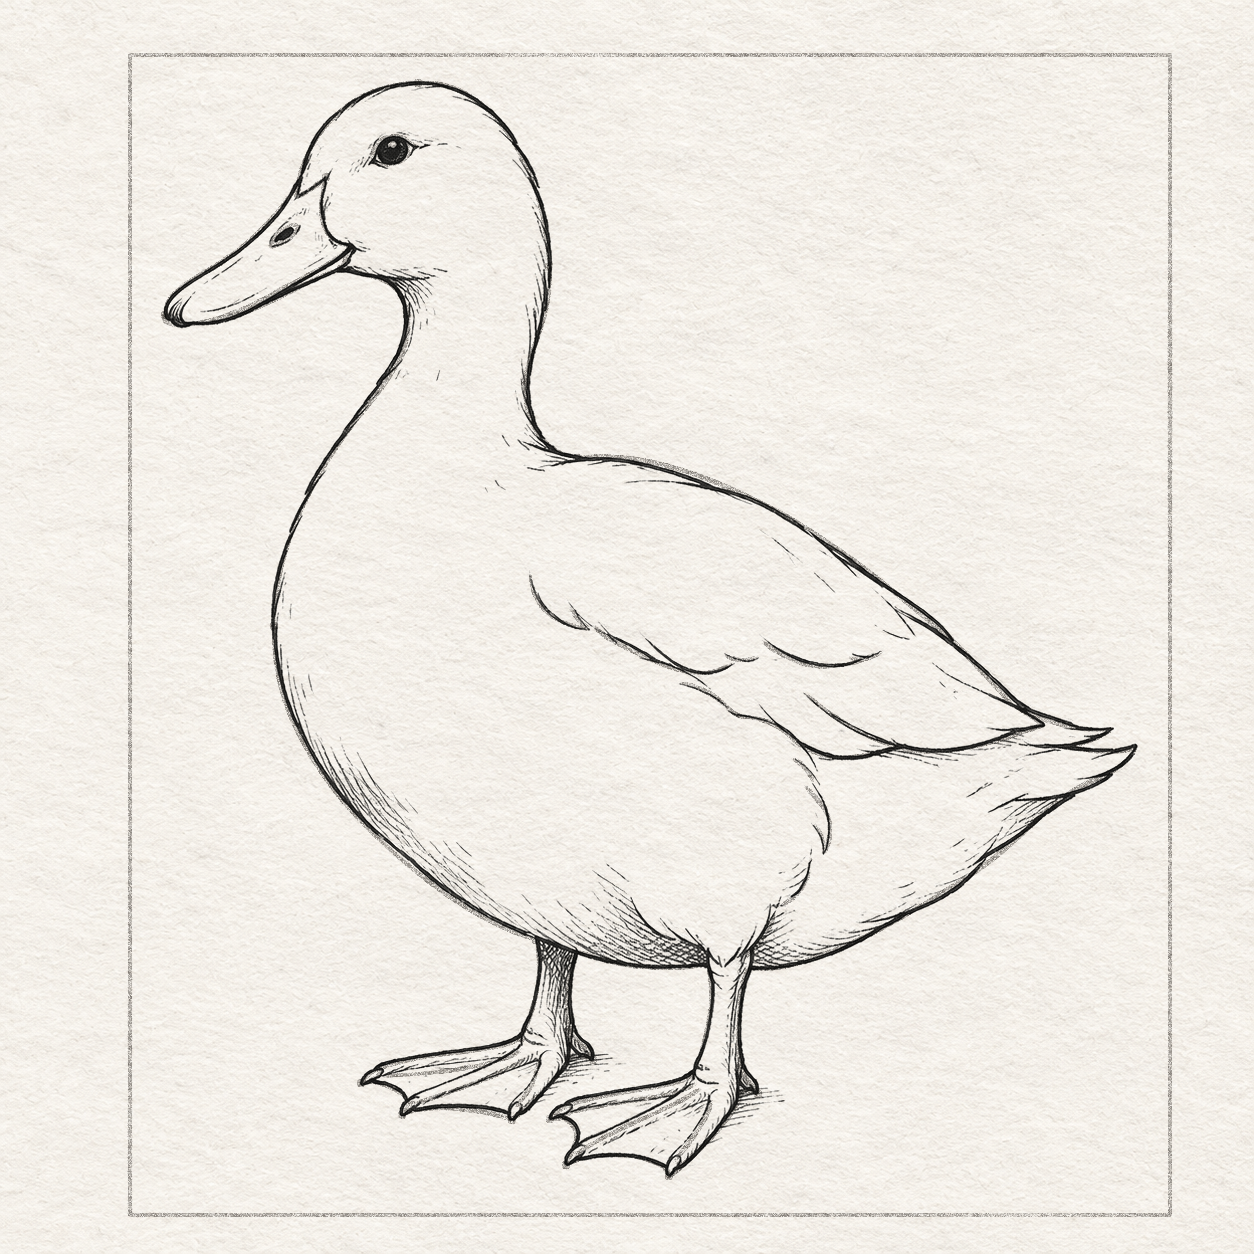
- Add a few short marks alongside the wing and tail edges. Draw spaced fine slants where the breast curves inward and where the belly approaches the legs. Then cross the first slants with a few shorter strokes at a different angle in three places. Put a small crossed patch immediately above the belly edge on each side of the opening for the near leg. Put the third patch just inside the lower edge of the tail near the turn into the rump. Keep the crossed patches close to those edges. Leave the leg opening and the broad areas of breast and wing clear.
- Look for two small crossed patches above the near-leg opening and one just inside the lower tail edge. Keep the opening and most of the breast and wing bare.

Drawing 14B — Drawing 35 — Add small leg strokes and the ground marksView larger 
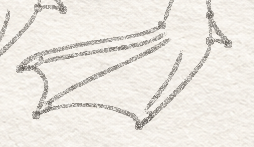
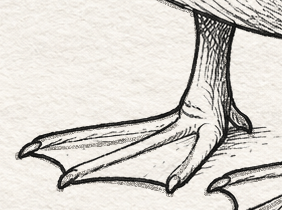
Detail 14B.1 — Far ankle and three pale tipsThe short diagonals cross the strokes just under the belly on the far leg. The lower leg stays lighter. Follow the ankle into the web and leave all three toe tips pale. 
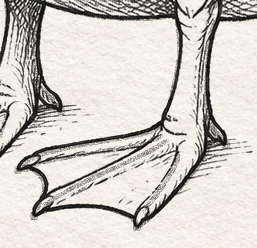
Detail 14B.2 — Near ankle and three pale tipsKeep the short rear point attached to the ankle. Follow each of the three toe ends and leave its pale cap. Instructions for Drawing 14B — Drawing 35 — Add small leg strokes and the ground marks
- Add a few fine ink strokes down each leg. Just below the belly, cross the upper ends of the farther leg’s strokes with a few shorter diagonals. Keep that small shadow within the upper few millimetres of the far leg. Leave the strokes farther down thin and keep the near leg pale. Add short marks beside and parallel to the long fan lines you already inked inside each web. Leave each pale toe cap clear. Just to the right of each small rear foot point, put a short broken group of shallow ground marks that tip slightly upward to the right. Keep each group within a few millimetres of its foot.
- Check that the crossed patch stays at the top of the far leg. Keep the near leg and all six toe caps pale. Leave the ground marks outside the toe shapes and close to the feet.
Step 15 of 15 · Cleanup
Check the ink and erase the pencil

Drawing 15A — Drawing 36 — Erase the working box and dotsView larger Instructions for Drawing 15A — Drawing 36 — Erase the working box and dots
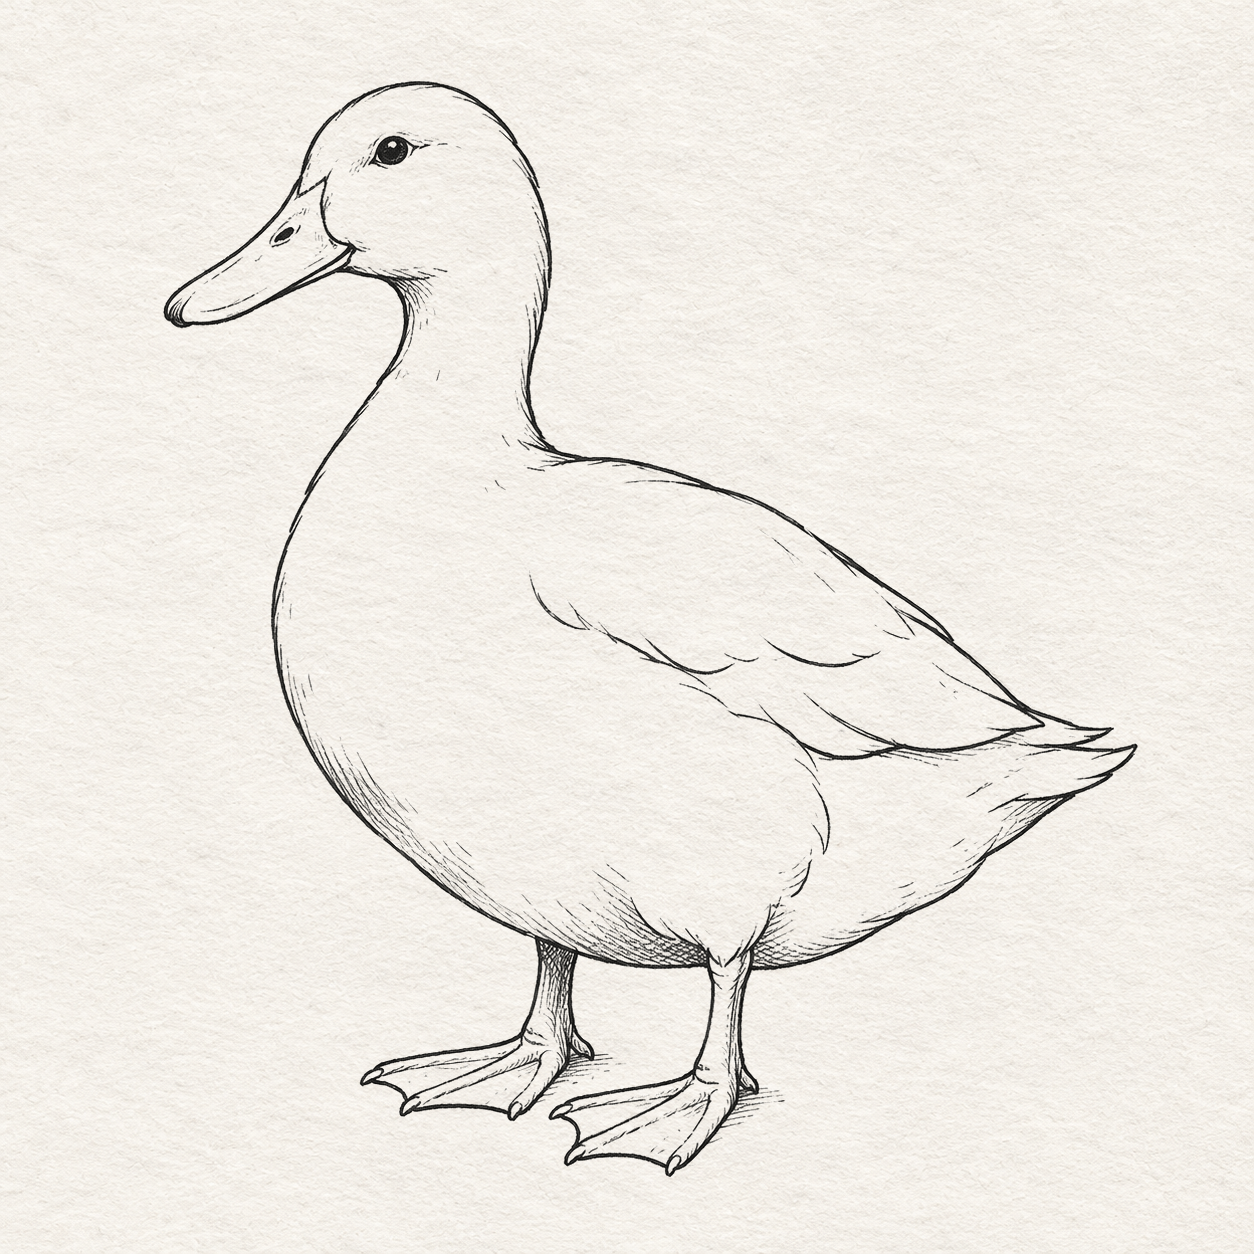
- Make a small dark pen patch on scrap of the same paper, about as dark as the filled eye. Let it dry and test it with a light rub. Once the patch stops smearing and the ink on the duck is dry too, use a clean eraser to lift the box and the remaining head, breast, bill and foot dots. Rub gently near the ink lines.
- Pause if any ink smears on the spare sheet. Give both sheets longer before erasing near the drawing.

Drawing 15B — Drawing 37 — Lift the pencil contours and finishView larger Instructions for Drawing 15B — Drawing 37 — Lift the pencil contours and finish
- With the box and dots gone, lift the remaining pencil beside the bill, wing, eye, toes and the rest of the pen lines. Use the corner of an eraser around the little pale spaces. Move the eraser lightly along each edge so the dry ink stays clear.
- Check the six toes, the narrow bill strip and the pale eye rim. Brush eraser crumbs away and stop when the pale spaces are clear.
If something looks off
If the bill lines cross
Check the two corners on the cheek. The short line goes down from the lower cheek corner to the throat. The long line curves along the bill to the lower cheek corner.