FinelinerEasy

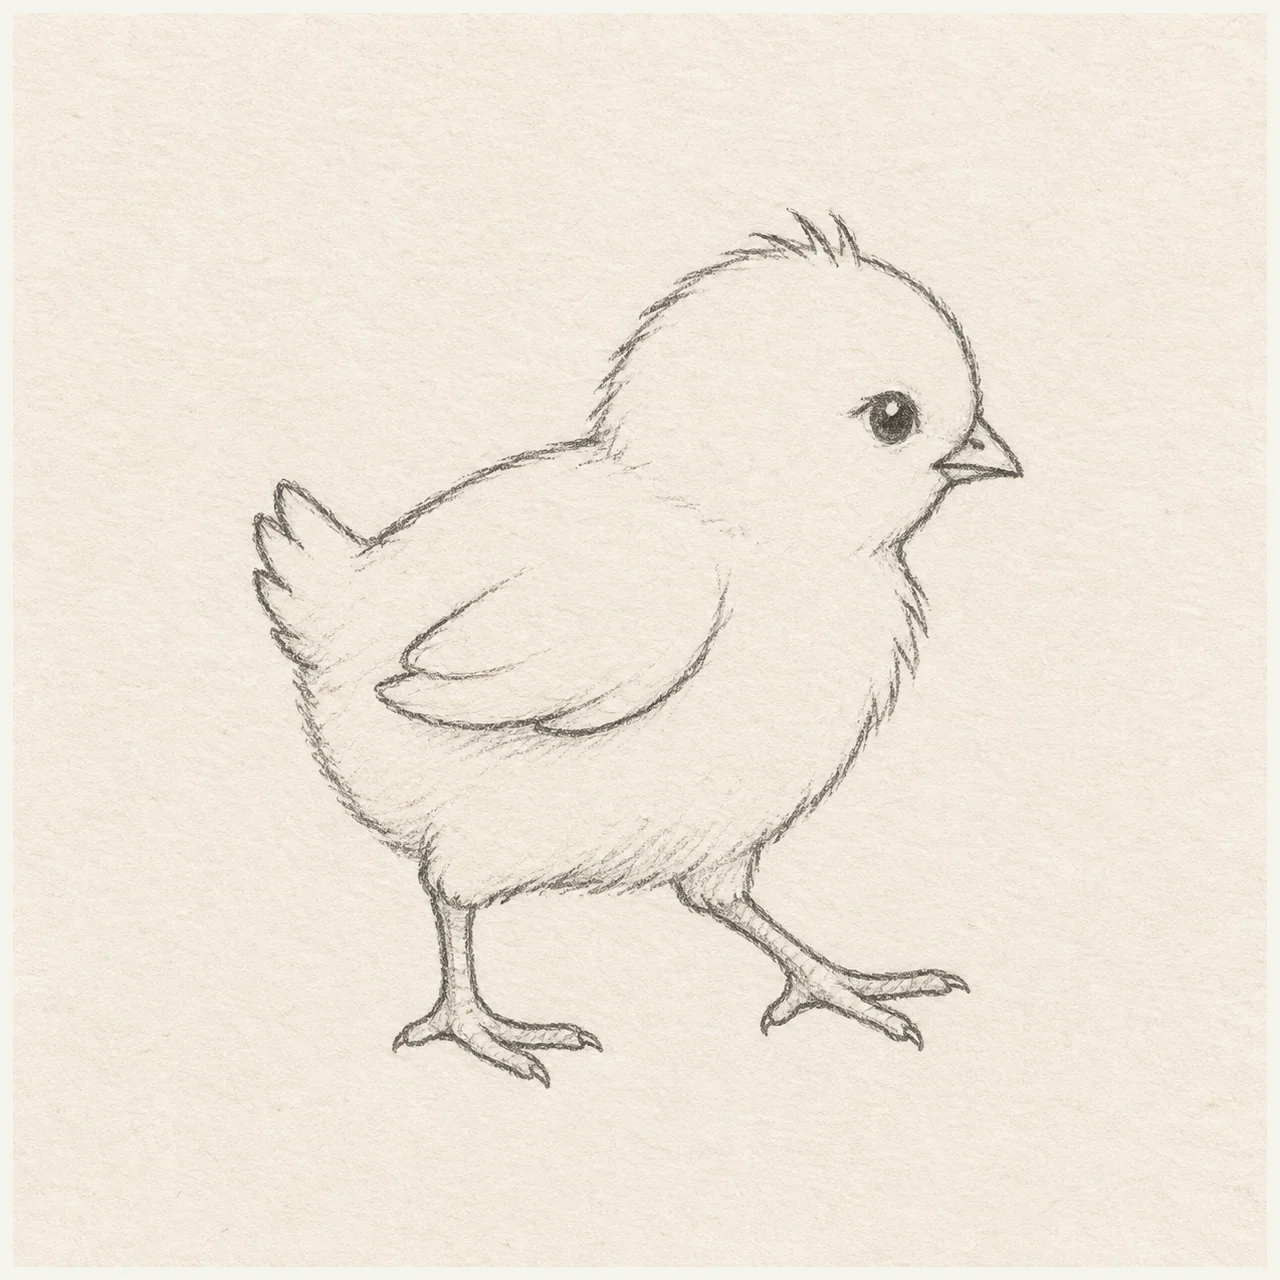
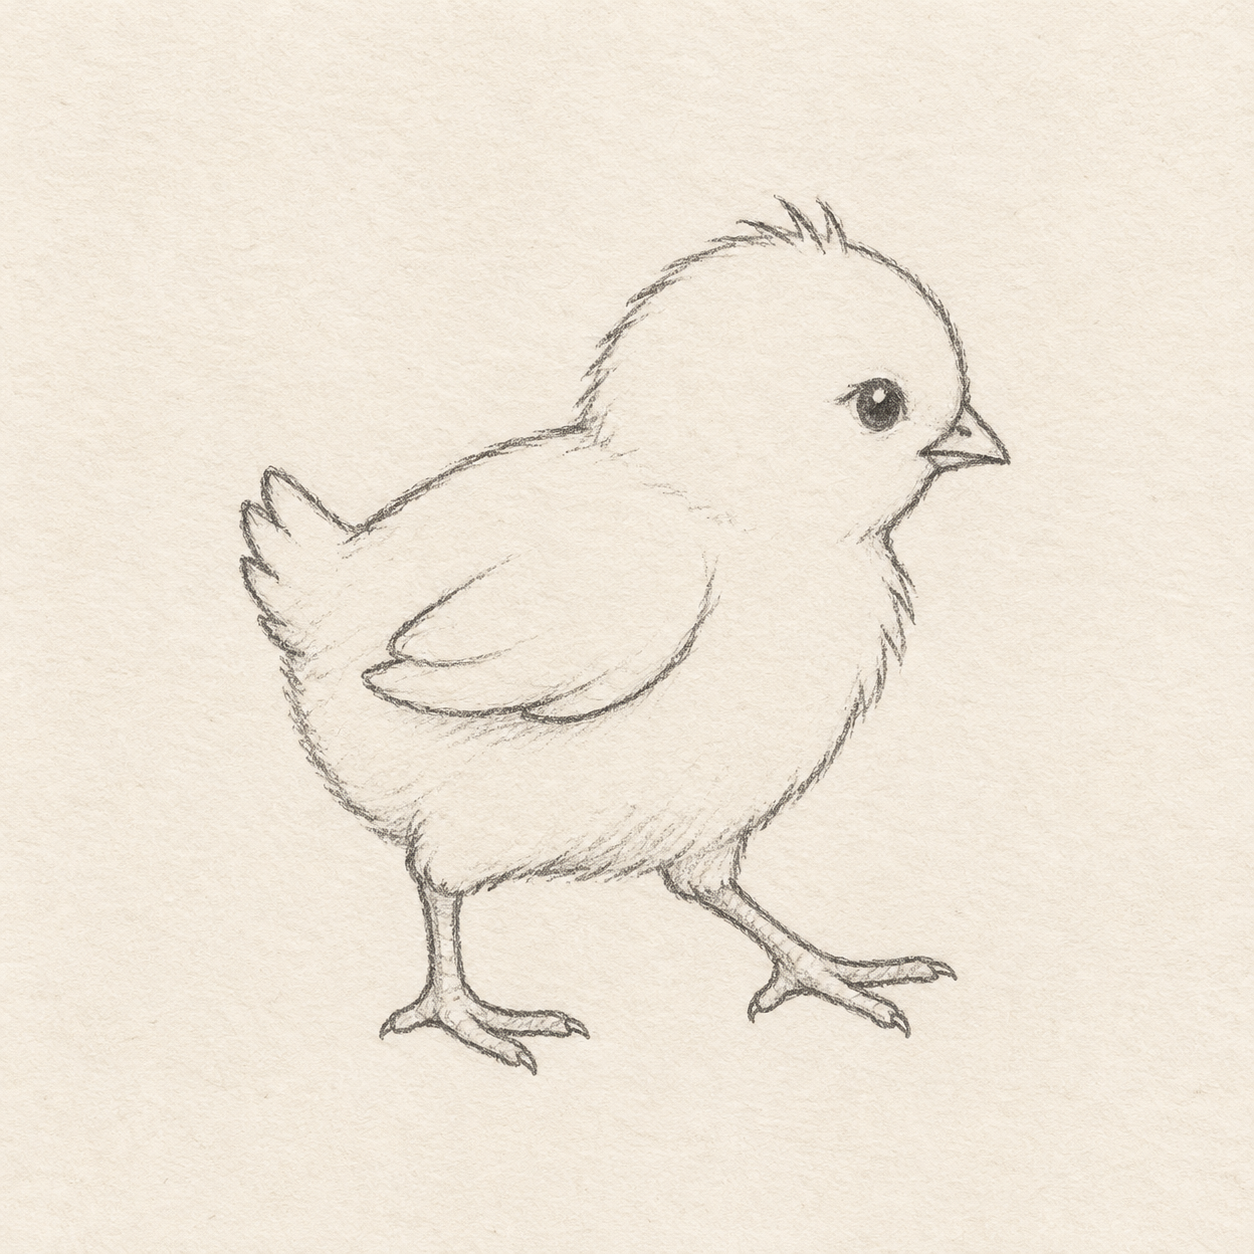
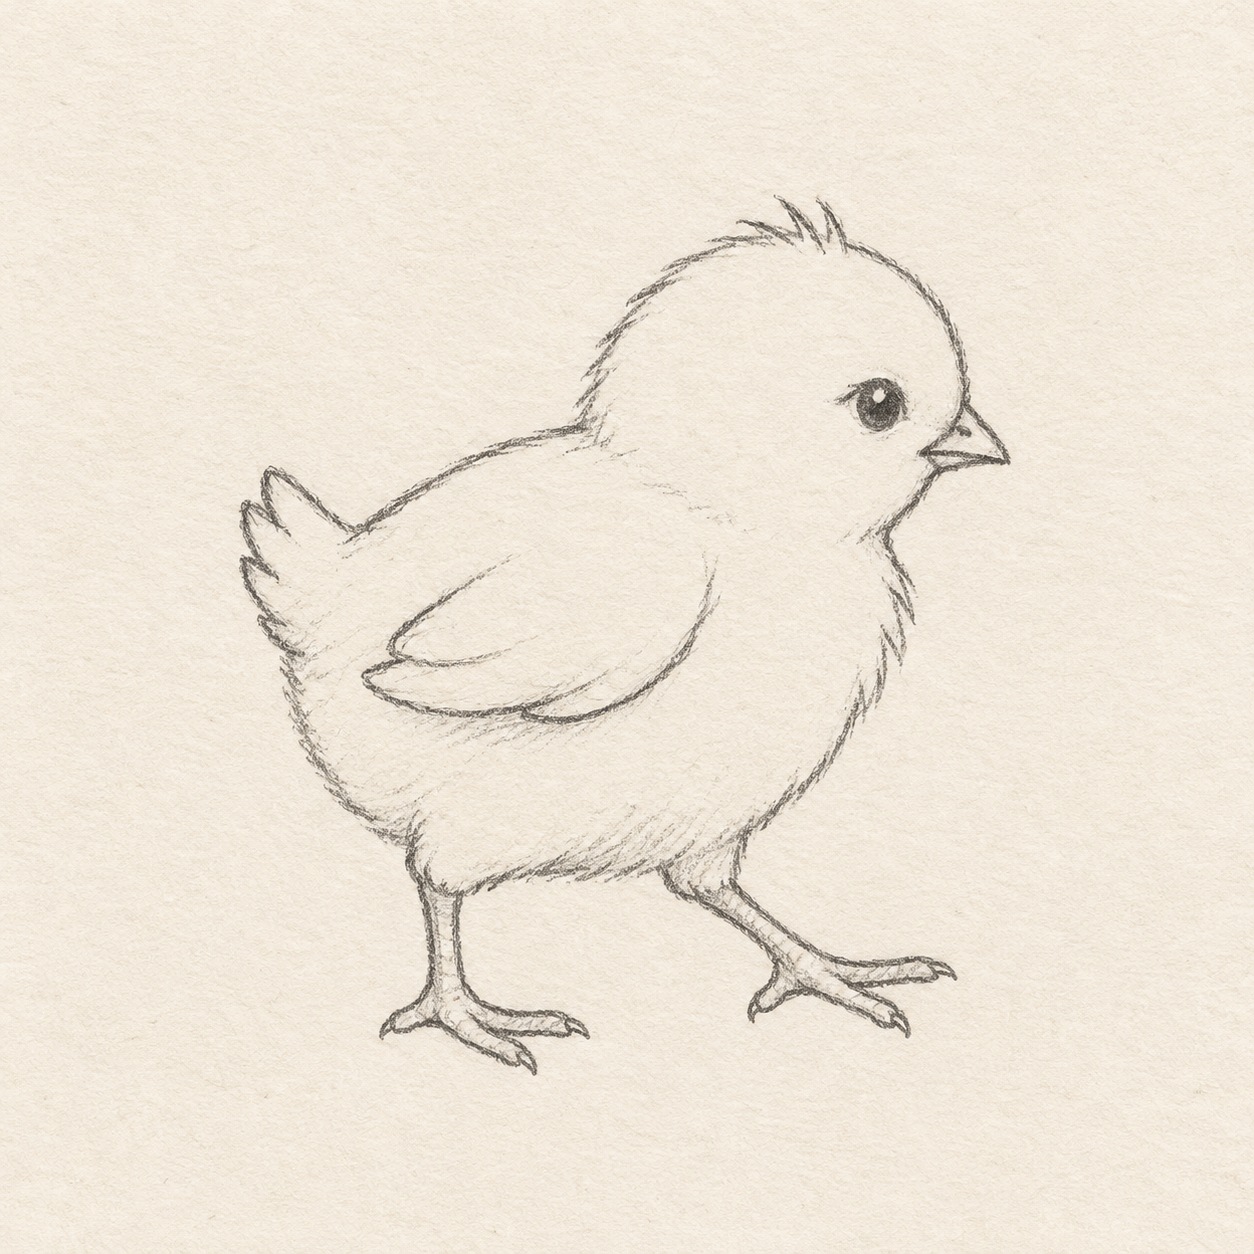
A chick taking a small step
Build a chick from two soft rounded shapes, then practice a folded wing and a pair of stepping feet. Choose a few feather tufts rather than drawing every feather.
Follow the drawing tutorial
Place the broad body, overlapping head and two different foot spreads, then select soft feather edges, a folded wing and an eye with a paper highlight.
Start the 8-step tutorialA small thing to tryPlace the supporting foot beneath the body before drawing the stepping foot, so the chick feels balanced.
Draw it, one step at a time
How to draw this stepping chick
Place the broad body, overlapping head and two different foot spreads, then select soft feather edges, a folded wing and an eye with a paper highlight.
What you’ll need
- HB pencil
- Ruler marked in centimetres and millimetres
- Soft eraser
- Sketchbook paper large enough for a 13 cm by 15 cm working box
Before you start
Picture-left and picture-right mean the sides of your page. All across/down measurements start at the working box’s top-left corner unless an existing mark is named. Use light pencil for the temporary guides and a little more pressure for selected edges. Rehearse freehand curves above the page; gently erase and redraw a misplaced light line before strengthening it. Keep every guide until the cleanup task. Each named Drawing shows the marks after its nearby actions, and each Detail belongs to that same Drawing. Put the 13 cm wide, 15 cm high working box where you want the chick, leaving paper around it; centring is optional.
Step 1 of 8 · Pencil
Set the box and body

Drawing 1A — Working boxView larger Instructions for Drawing 1A — Working box
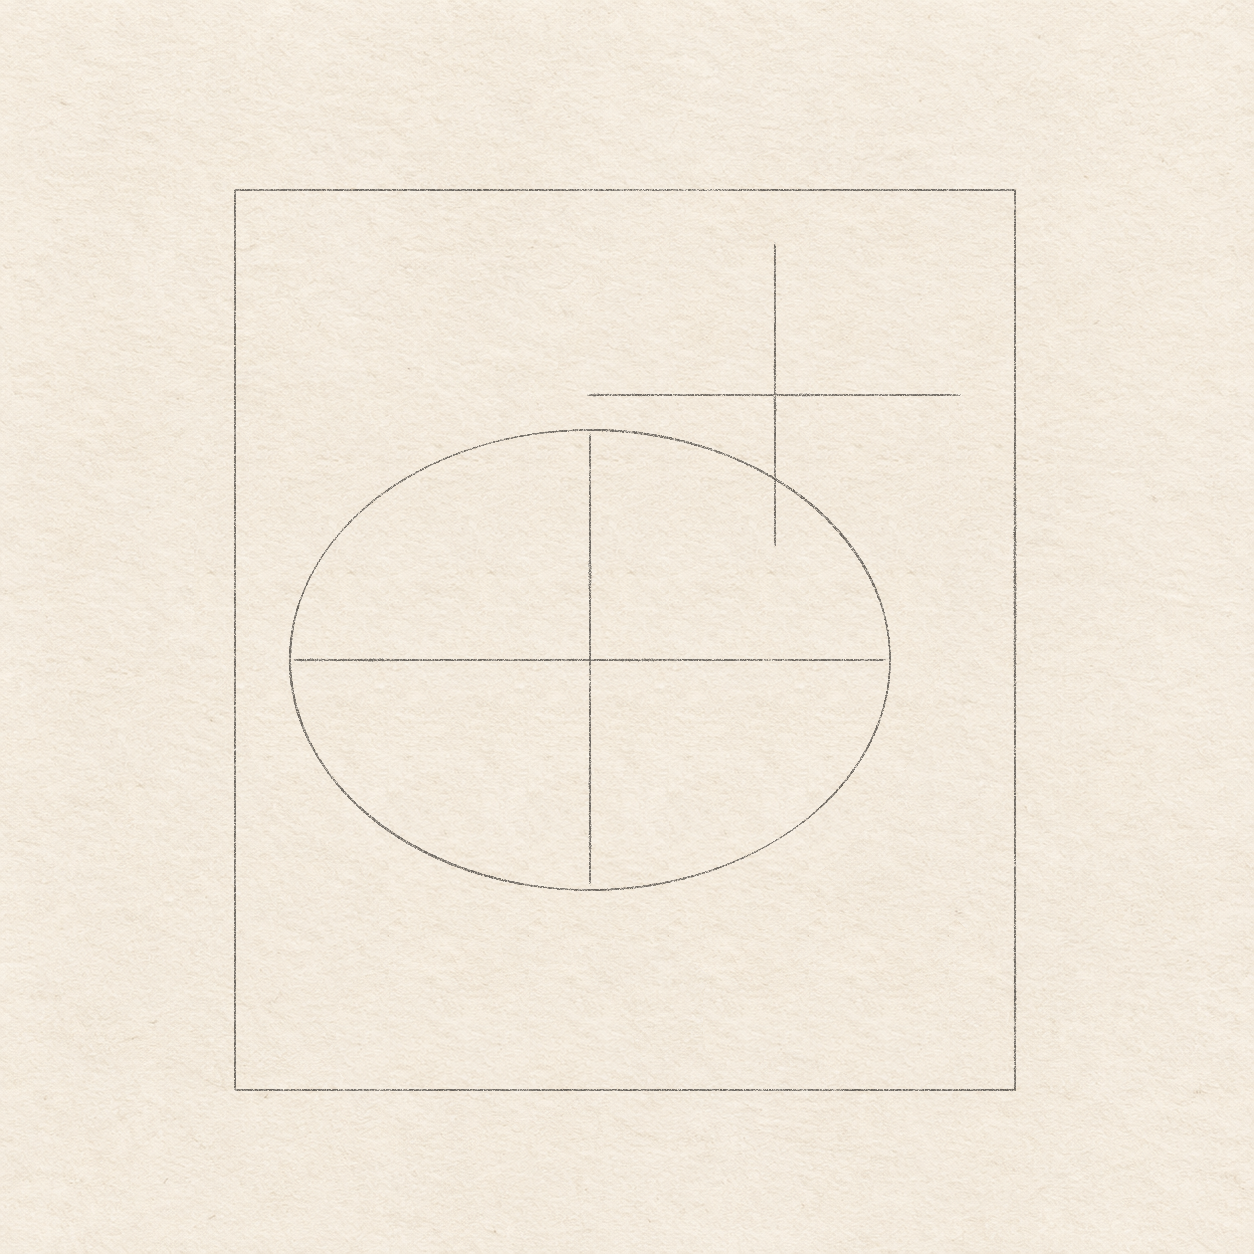
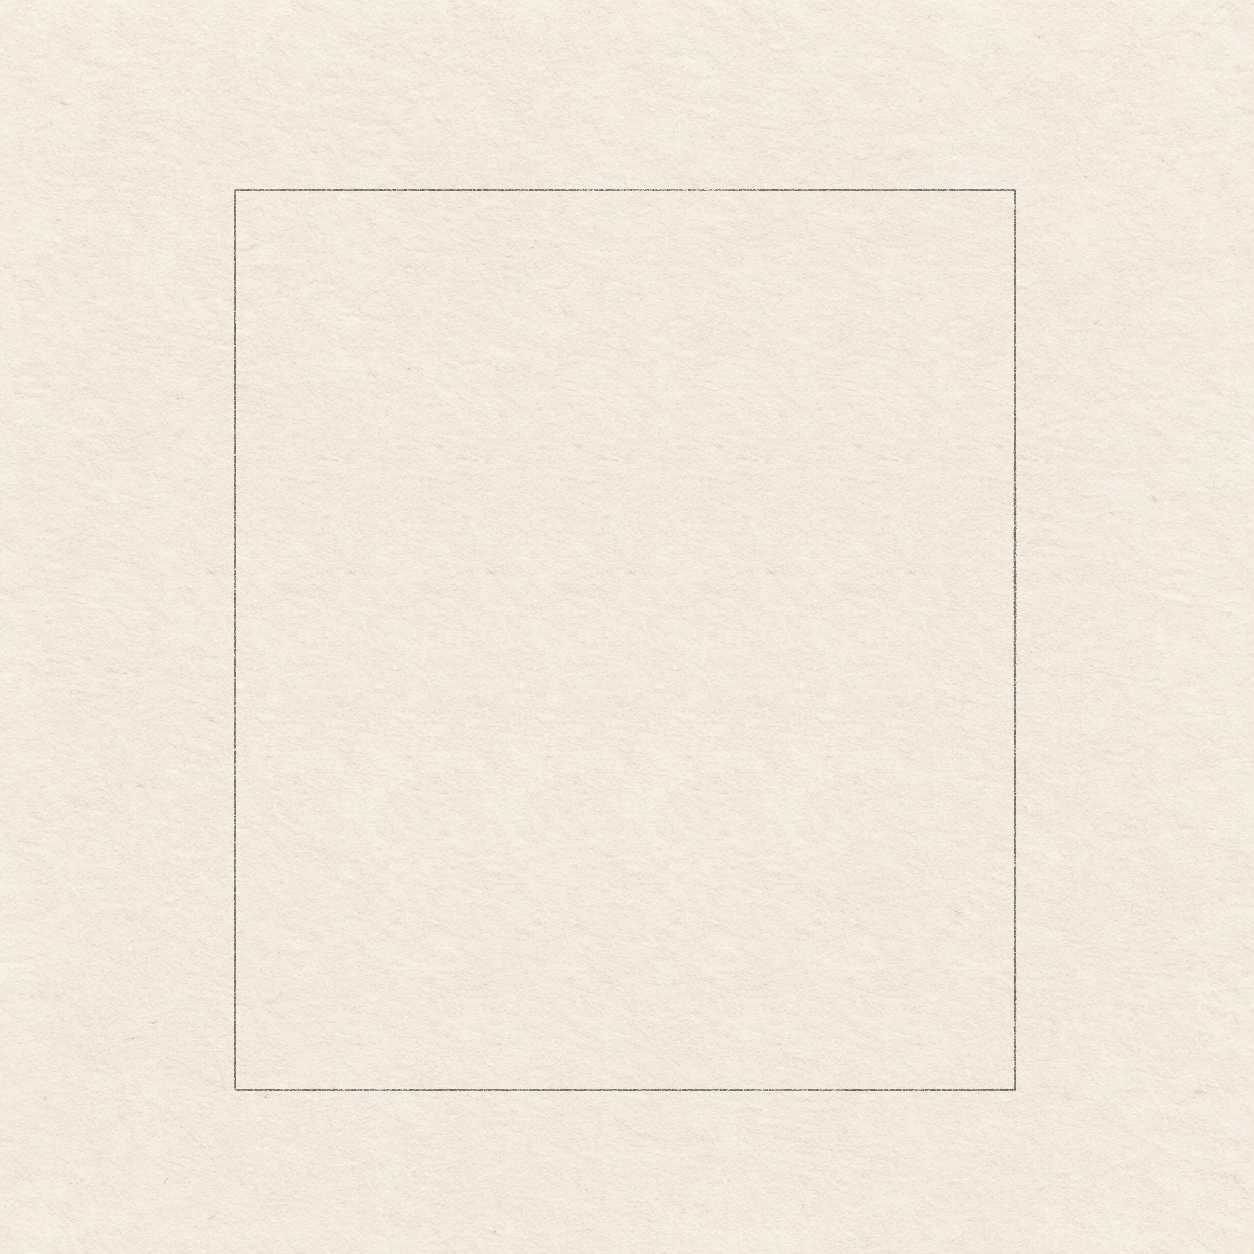
- Choose where you want the 13 cm by 15 cm working box, leaving paper around it. With a ruler and light HB pencil, draw a 13 cm horizontal top edge. From each end, draw a 15 cm side straight down, then join their lower ends. This box contains the whole chick, including its toes.

Drawing 1B — Body width and height guidesView larger Instructions for Drawing 1B — Body width and height guides
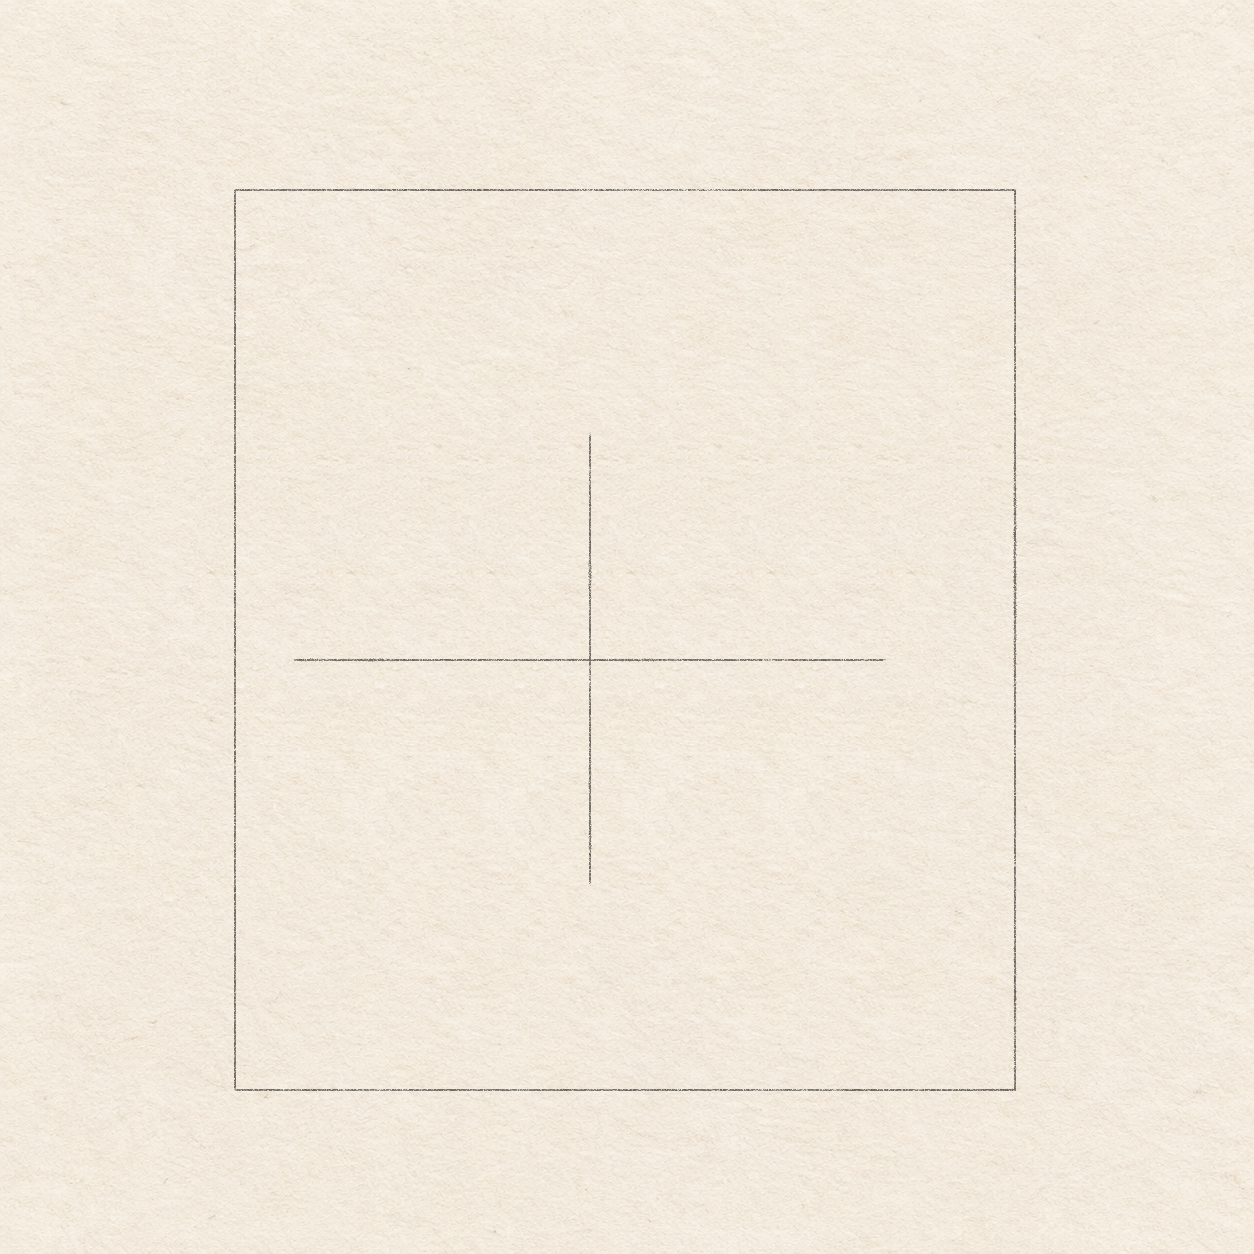
- Measure from the box’s top-left corner and mark the body centre about 5.9 cm across and 7.8 cm down.
- To set the body’s width, draw a light horizontal guide through this point, extending 5 cm to each side.
- Through the same centre, draw a light vertical guide about 3.8 cm up and 3.8 cm down. Keep this cross upright; correct a sloping guide before adding the oval.

Drawing 1C — Broad body ovalView larger Instructions for Drawing 1C — Broad body oval
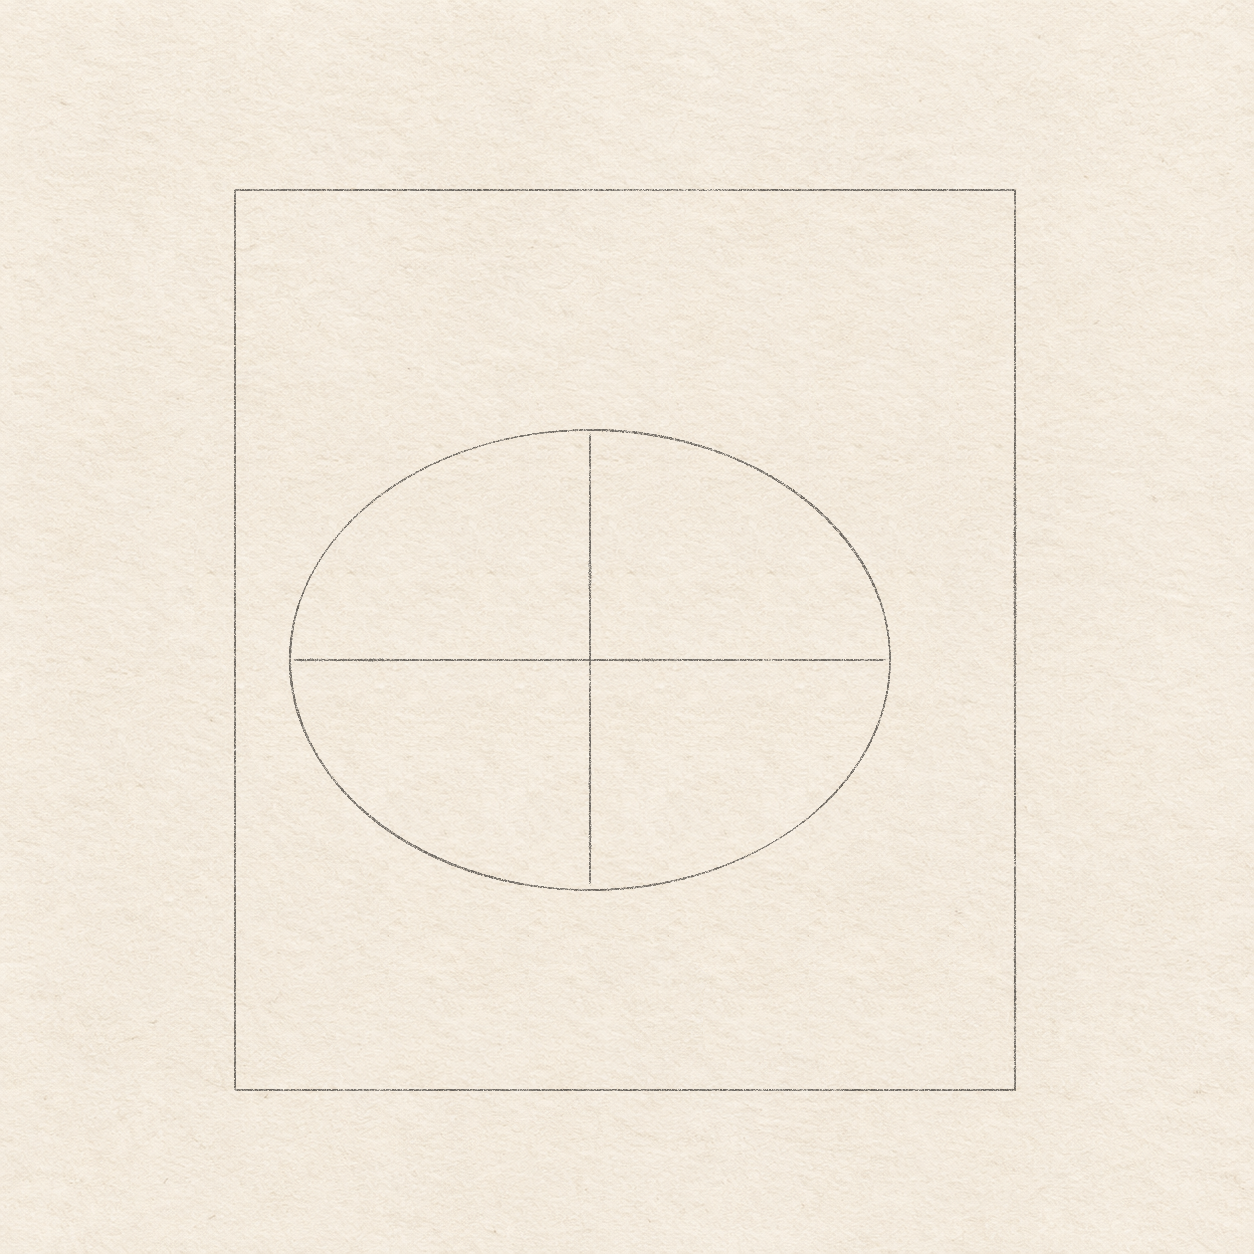
- Rehearse a smooth oval above the paper, wider than it is tall. Then draw it freehand through the four ends of the body cross. This light oval locates the body’s bulk, not the finished feather edge.
Step 2 of 8 · Pencil
Place the head

Drawing 2A — Head width and height guidesView larger Instructions for Drawing 2A — Head width and height guides
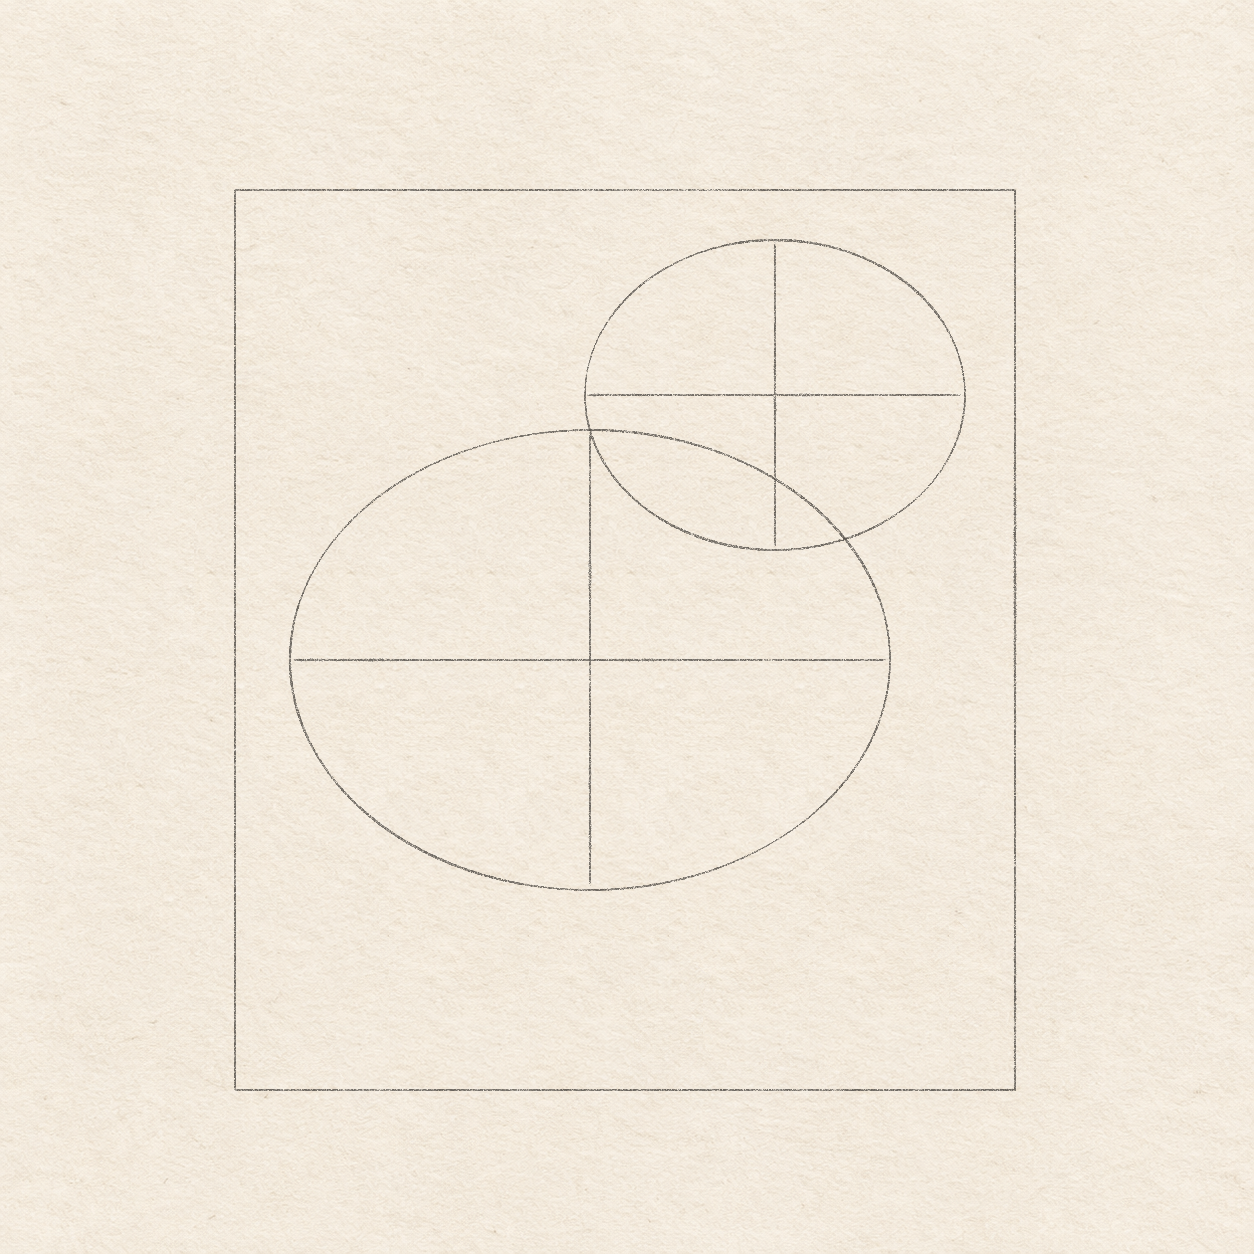
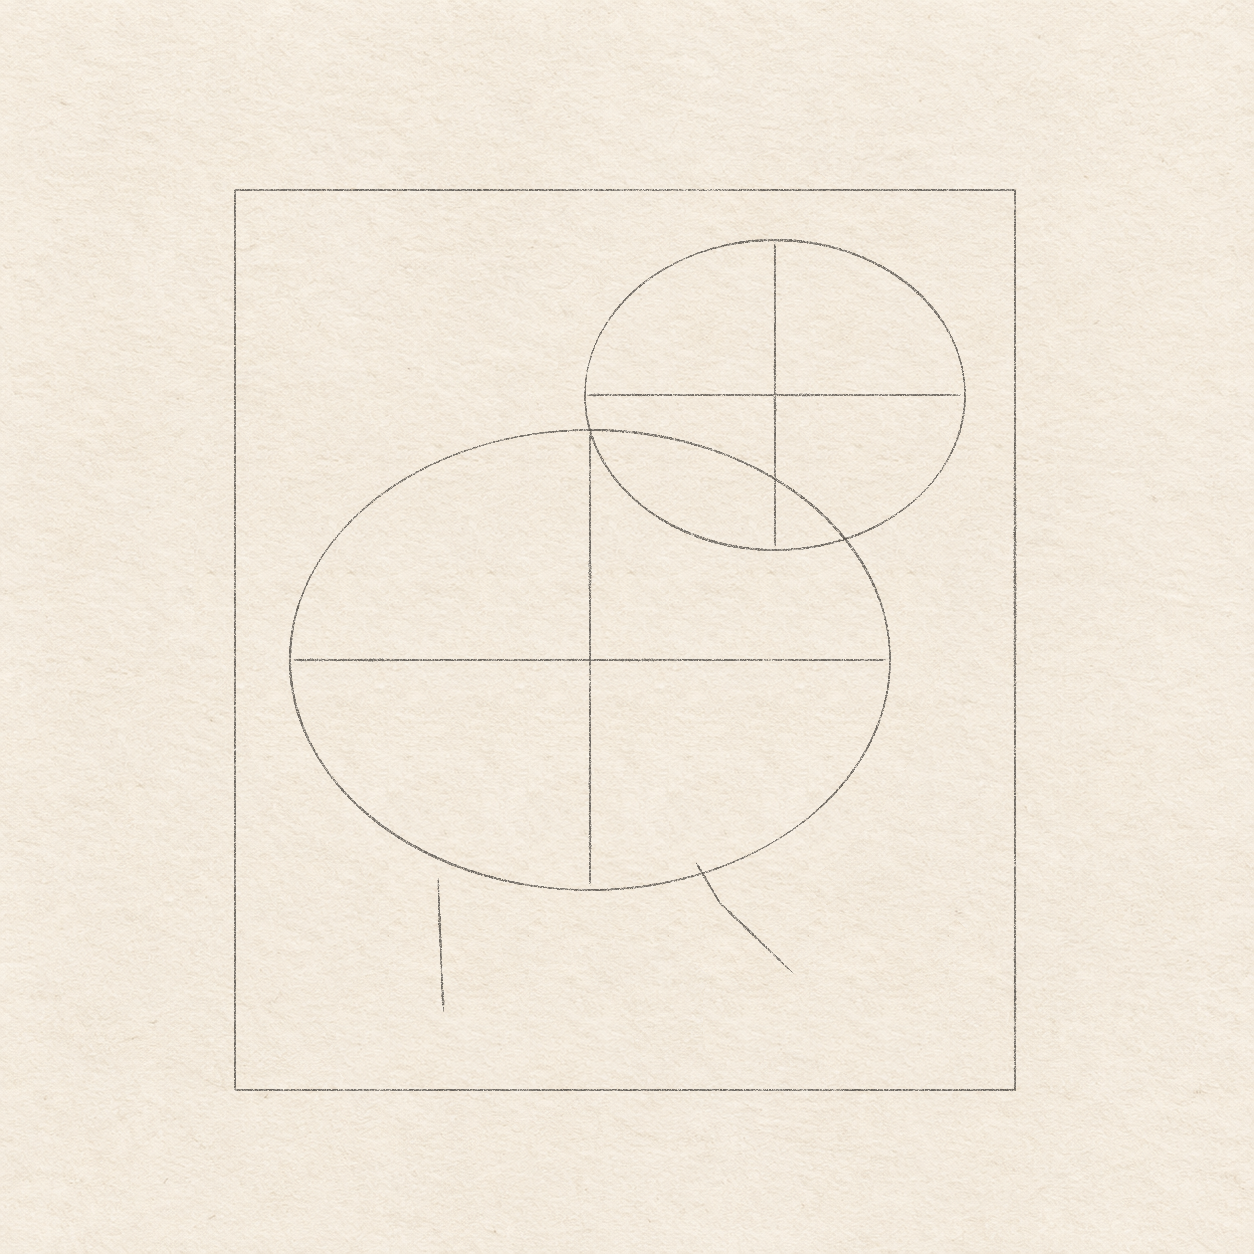
- From the same box corner, mark the head centre 9 cm across and 3.4 cm down. Through it, draw a light horizontal guide about 3.2 cm to each side.
- Compare it with the body cross: this smaller head guide should sit higher and farther right, overlapping the body’s upper-right part.
- Through the head centre, draw a light vertical guide about 2.6 cm up and 2.6 cm down. Keep it upright through the existing horizontal guide.

Drawing 2B — Overlapping head ovalView larger Instructions for Drawing 2B — Overlapping head oval
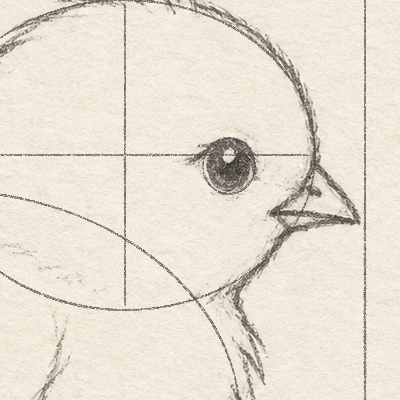
- Keep the head overlapping the body and leave both crosses visible. Rehearse the curve, then draw the head oval freehand through its four guide ends. The finished forehead, cheek and neck will reshape this rounded guide.
Step 3 of 8 · Pencil
Map the stepping legs and toes

Drawing 3A — Two leg directionsView larger Instructions for Drawing 3A — Two leg directions
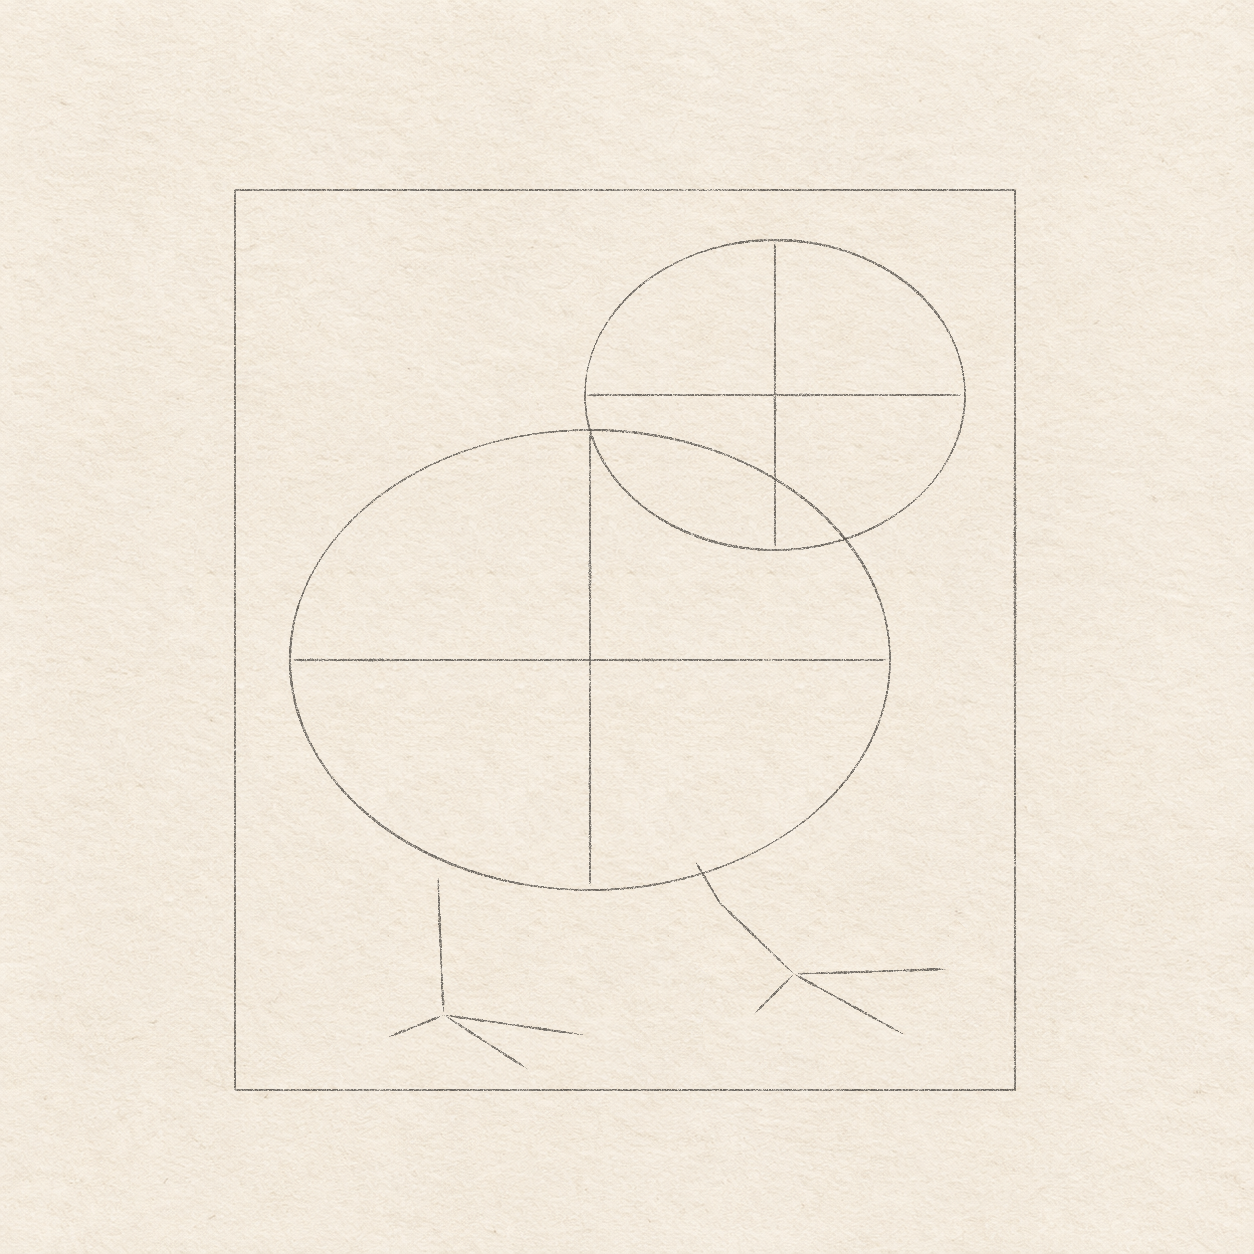
- Use the box corner to find the left leg start about 3.4 cm across and 11.4 cm down. From there, draw a light route almost straight down to 3.5 cm across and 13.8 cm down, bending slightly right near the bottom. Its lower end locates the left ankle.
- Find the other leg start about 7.7 cm across and 11.2 cm down from the box corner. Draw its light route down-right through a bend at about 8.1 cm across and 11.9 cm down, ending at 9.3 cm across and 13.1 cm down.
- Compare the two route ends: this right ankle should be higher and farther right than the left ankle.

Drawing 3B — Unequal toe spreadsView larger Instructions for Drawing 3B — Unequal toe spreads
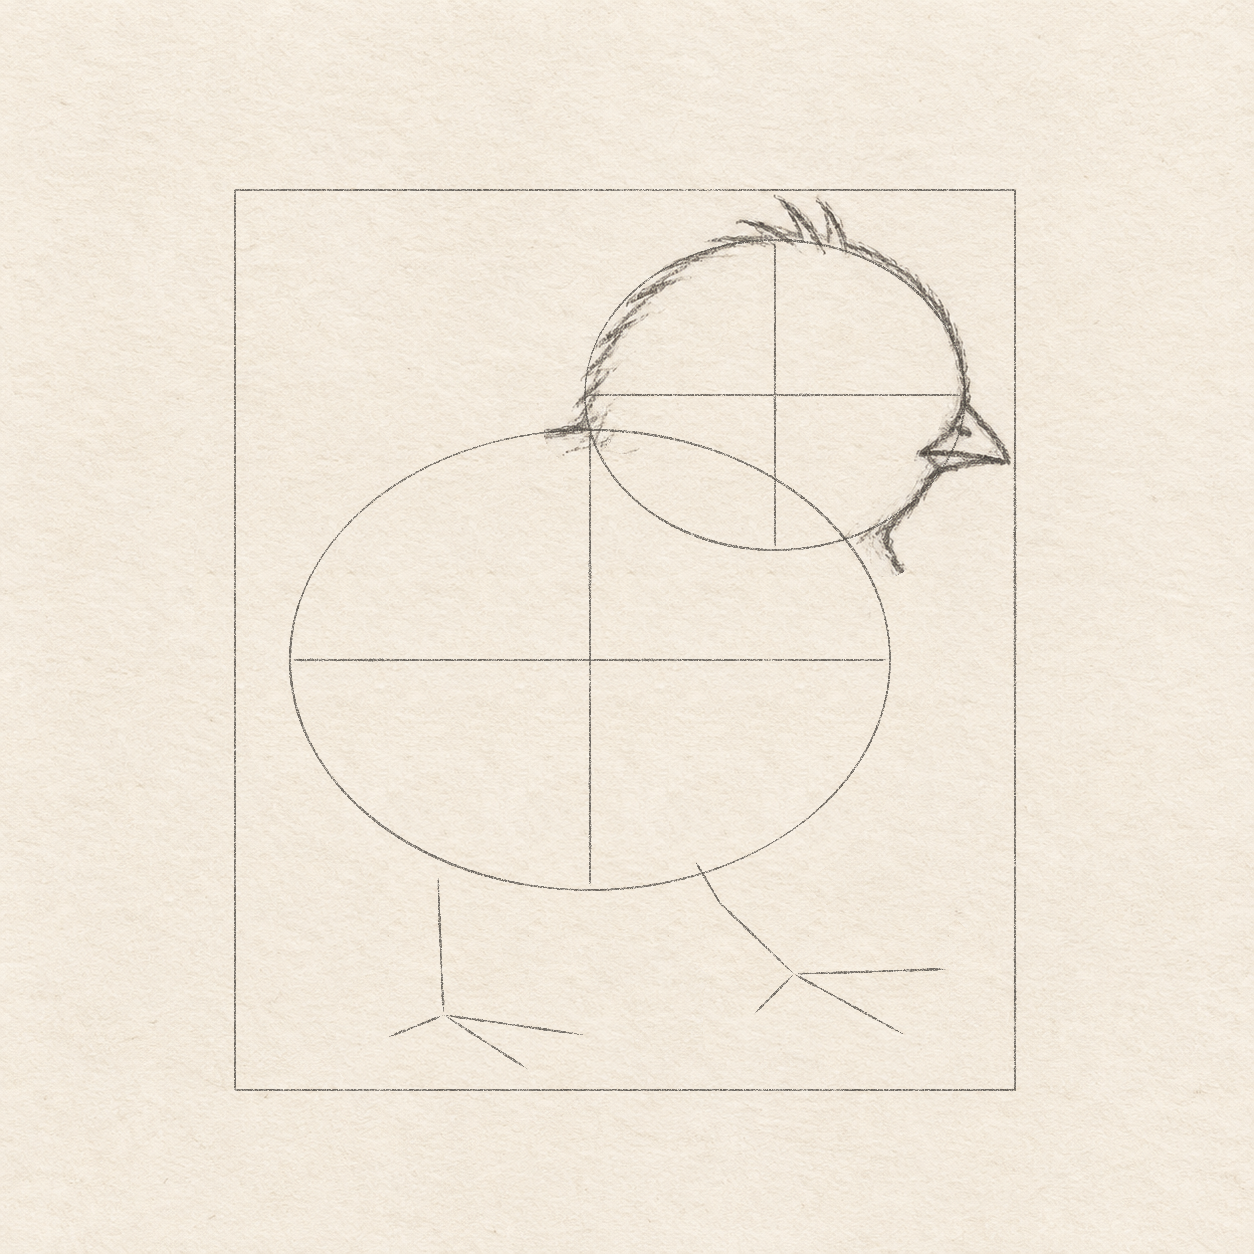
- The next rays locate toe centres; they are not toe outlines. From the left ankle, draw three light rays with unequal lengths: about 1 cm left and 4 mm down; 1.4 cm right and 9 mm down; and 2.3 cm right and 3 mm down.
- From the right ankle, draw its three light toe-centre rays: about 7 mm left and 7 mm down; 1.8 cm right and 1 cm down; and 2.6 cm right, almost level with the ankle.
- Compare both spreads before adding toe width. Keep the two feet different rather than making matching copies.
Step 4 of 8 · Pencil
Shape the head and beak

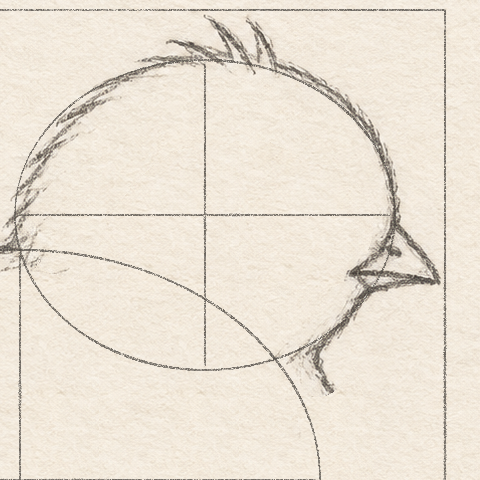
Drawing 4A — Head, crown and beak edgesView larger 
Detail 4A.1 — Head and beak joinsThe beak has separate upper, lower and mouth-divider strokes. The crown has only a few unequal tufts; the light oval is still a guide. Instructions for Drawing 4A — Head, crown and beak edges
- Keep the broad face pale and the head oval visible until cleanup. With short HB strokes, select the edge freehand: rise from the oval’s left side into the crown, round the forehead down the right side, then turn the cheek back to the body.
- Keep the tallest crown tips no more than about 1 cm above the head oval. Using a few broken HB strokes, draw several narrow, unequal tufts freehand at the top of the head; avoid a solid dark zigzag.
- On the head’s right side, find the beak tip near the box’s right edge, about 4.5 cm down from the top. Draw the pointed beak freehand, joining its upper edge to the forehead and its lower edge to the cheek.
- Leave a narrow pale strip above the lower beak edge as you add the short mouth divider across the beak. See Detail 4A.1 — Head and beak joins.
Step 5 of 8 · Pencil
Shape the body and tail

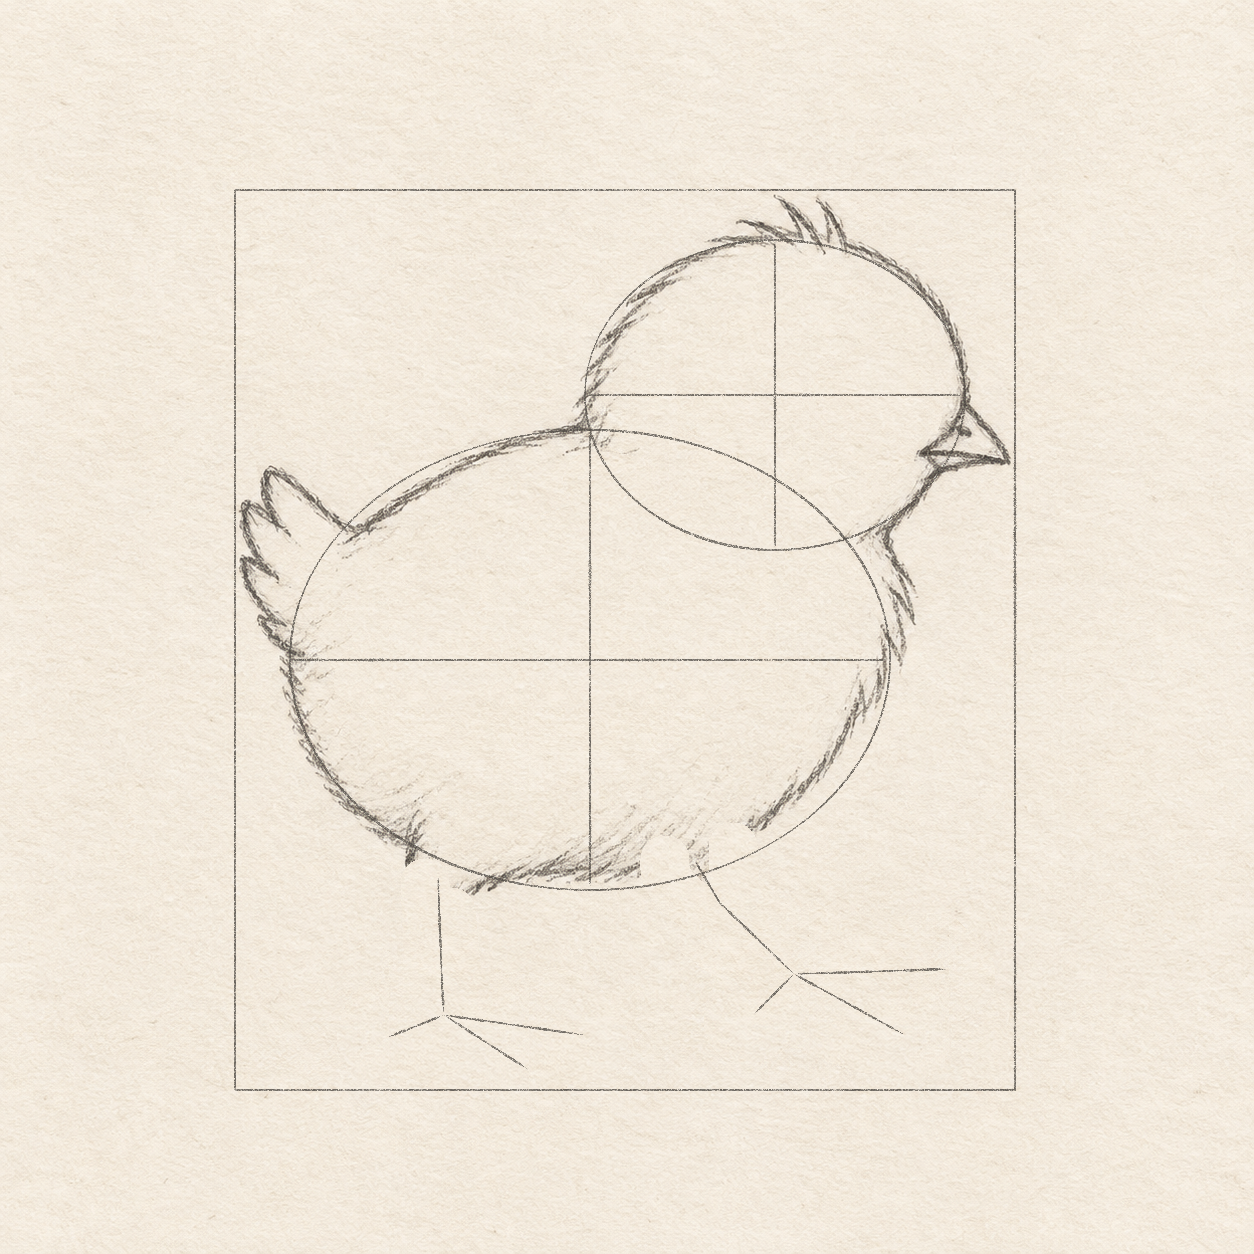
Drawing 5A — Body feather edge and tailView larger Instructions for Drawing 5A — Body feather edge and tail
- From the selected back of the head, draw the back freehand down-left toward the body oval’s left side.
- Before reaching the oval’s widest point, raise the tail up-left into three unequal tips near the box’s left edge, between about 4.7 cm and 6.3 cm down. Shape their small bends freehand, then return down to the body’s left edge.
- The belly must stop at the two leg starts, leaving room for their attachments. Following the body oval loosely, continue the left edge down and around the belly with short outward feather strokes.
- From the selected cheek, continue the right breast edge down and around to the belly. Keep small feather breaks rather than drawing one heavy oval outline.
- Keep most of the body as bare paper. With very light pressure, add a few short diagonal feather strokes just inside the lower-left body and belly, rising toward the right around the round body. Vary their spacing by eye; do not shade the whole oval.
Step 6 of 8 · Pencil
Enclose the two feet

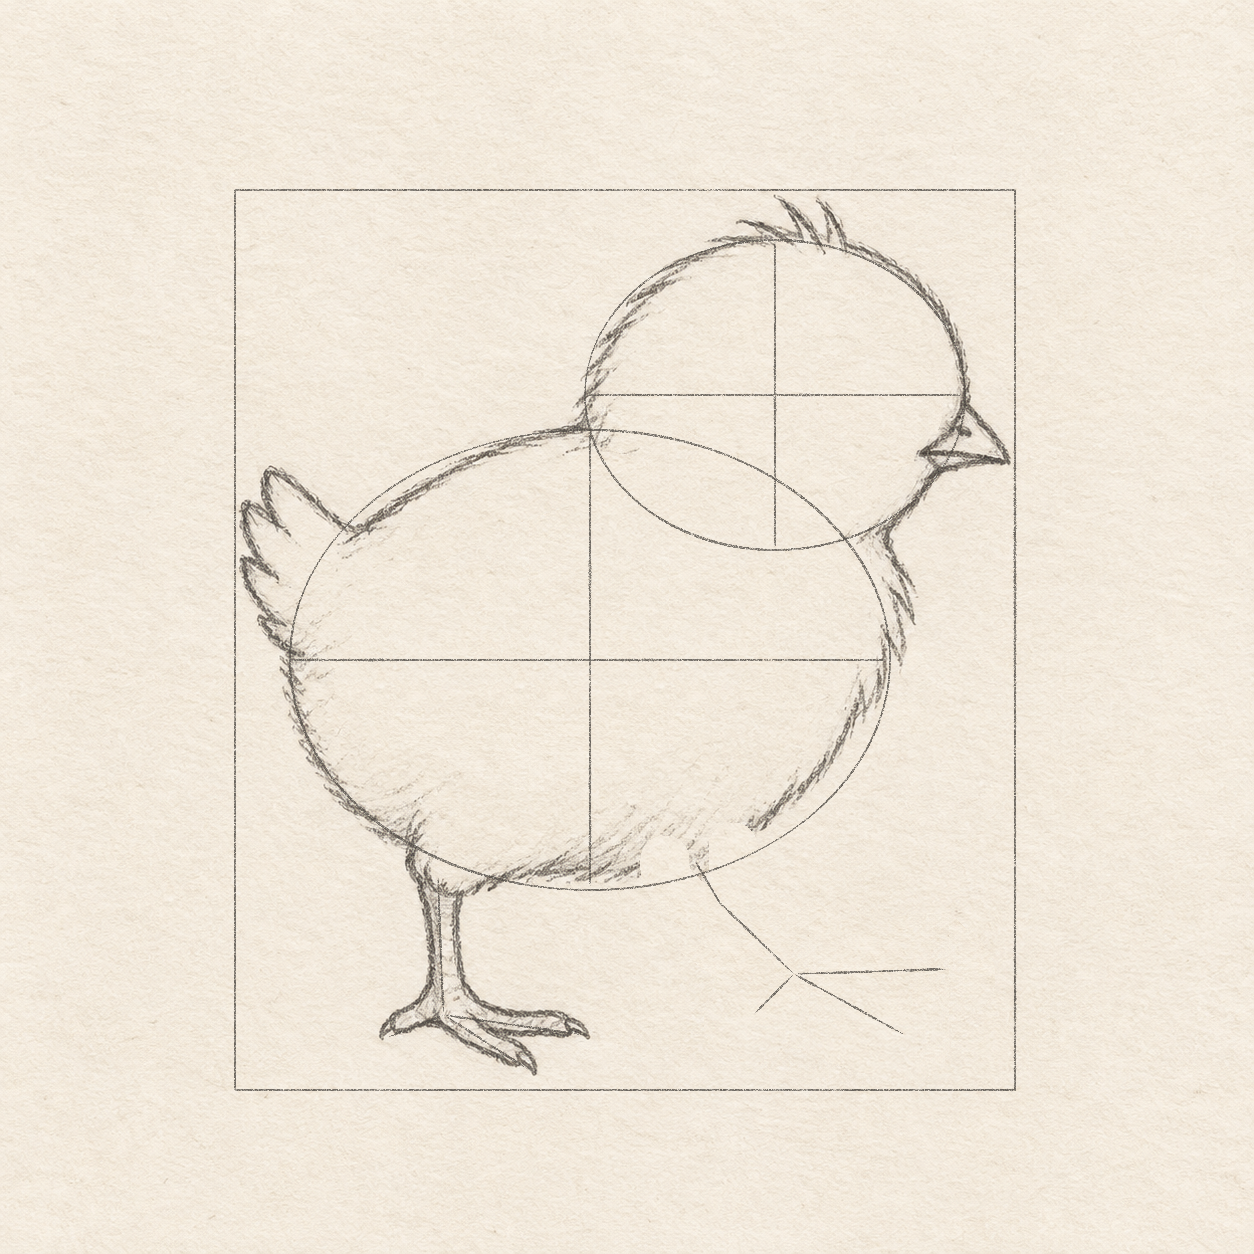
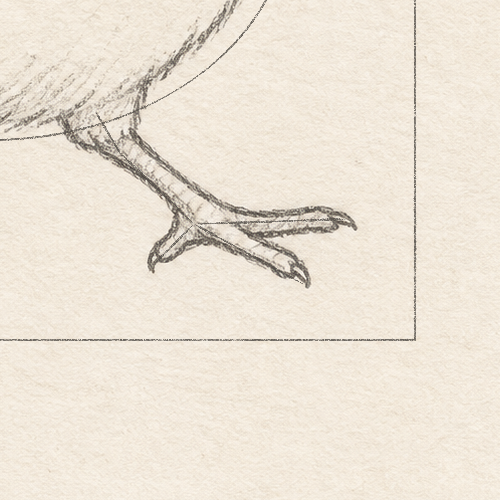
Drawing 6A — Planted leg and left footView larger 
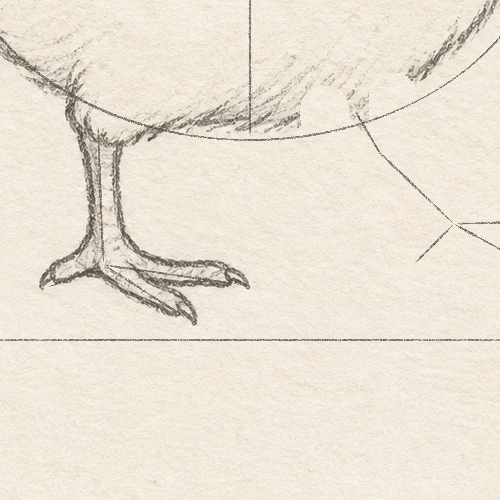
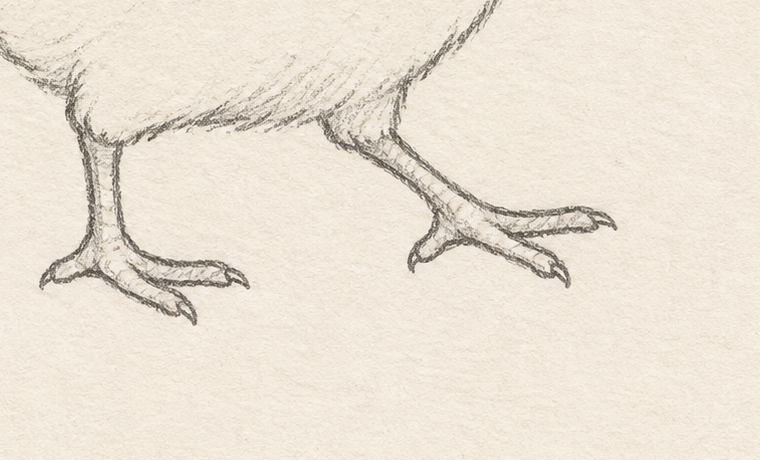
Detail 6A.1 — Planted foot and open toe gapsThe three toe rays remain inside the selected foot. Narrow rounded toes surround them, with open spaces between the unequal toes. The short slanted interior dashes are light pencil accents; their count and spacing can vary. Instructions for Drawing 6A — Planted leg and left foot
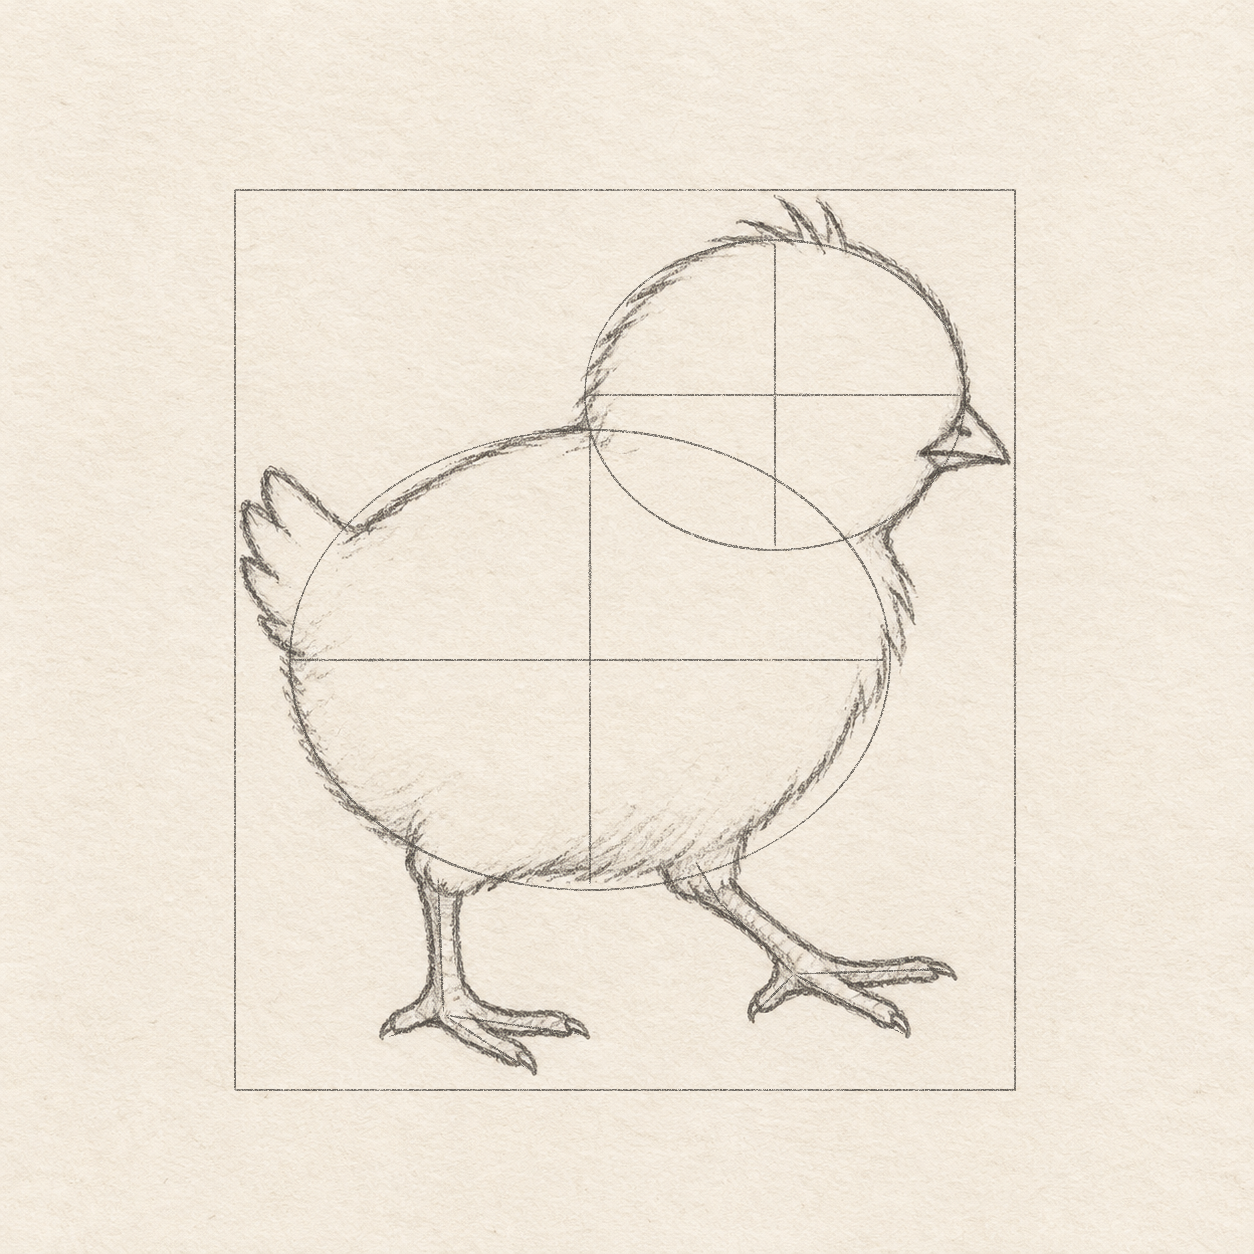
- Keeping the centre route visible, draw the left leg’s two sides freehand around it, roughly 4 mm apart through the narrow lower leg. Join their tops into the feathered belly and widen gently at the ankle instead of making a straight tube.
- Keep open gaps between the toes and preserve their unequal directions. Around each left toe ray, draw two narrow freehand curves about 2–3 mm apart, joining them at a rounded tip and returning each gap toward the ankle.
- Keep the short left toe separate from the two longer right toes. Gently erase and redraw a closed-up gap before adding darker pencil.
- Inside the left leg and its toes, add a few short, light, slanted pencil dashes. Draw these freehand within the outlines; their number and spacing can vary. Leave open paper between them instead of filling the foot. See Detail 6A.1 — Planted foot and open toe gaps.

Drawing 6B — Forward leg and right footView larger 
Detail 6B.1 — Forward foot and open toe gapsThe right foot has a short back-left toe and two longer rightward toes. The light rays still locate their unequal spread. The short slanted interior dashes are light pencil accents; their count and spacing can vary. Instructions for Drawing 6B — Forward leg and right foot
- The right leg slopes down-right, unlike the planted leg; keep its lower part about 4–5 mm wide. Draw its sides freehand around the bent route, joining the belly above and narrowing toward the forward ankle.
- Keep the short toe pointing back-left and the two longer toes pointing right, with open gaps between them. Enclose the three right toe rays with narrow freehand curves about 2–3 mm apart and rounded tips.
- Compare the ankle heights with the earlier leg routes before adding darker pencil. The forward ankle should remain higher than the planted one.
- Inside the right leg and its toes, add a few short, light, slanted pencil dashes. Draw these freehand within the outlines; their number and spacing can vary. Leave open paper between them instead of filling the foot. See Detail 6B.1 — Forward foot and open toe gaps.
Step 7 of 8 · Pencil
Draw the folded wing and eye

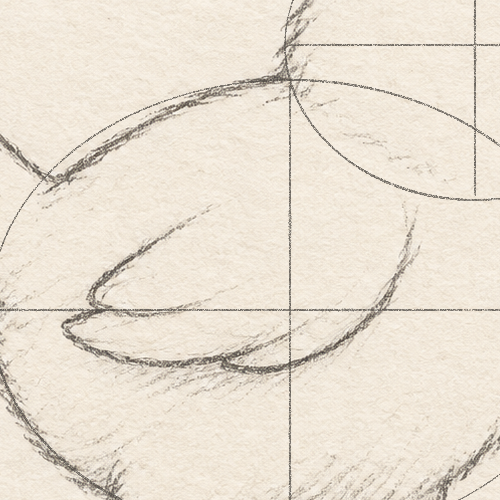
Drawing 7A — Folded wing and lower feather returnsView larger 
Detail 7A.1 — Whole wing and its faint upper curveThis is the same wing at this stage. Its faint upper curve bends down toward the left feather ends; the two darker lower returns stay separate, with narrow paper gaps. Instructions for Drawing 7A — Folded wing and lower feather returns
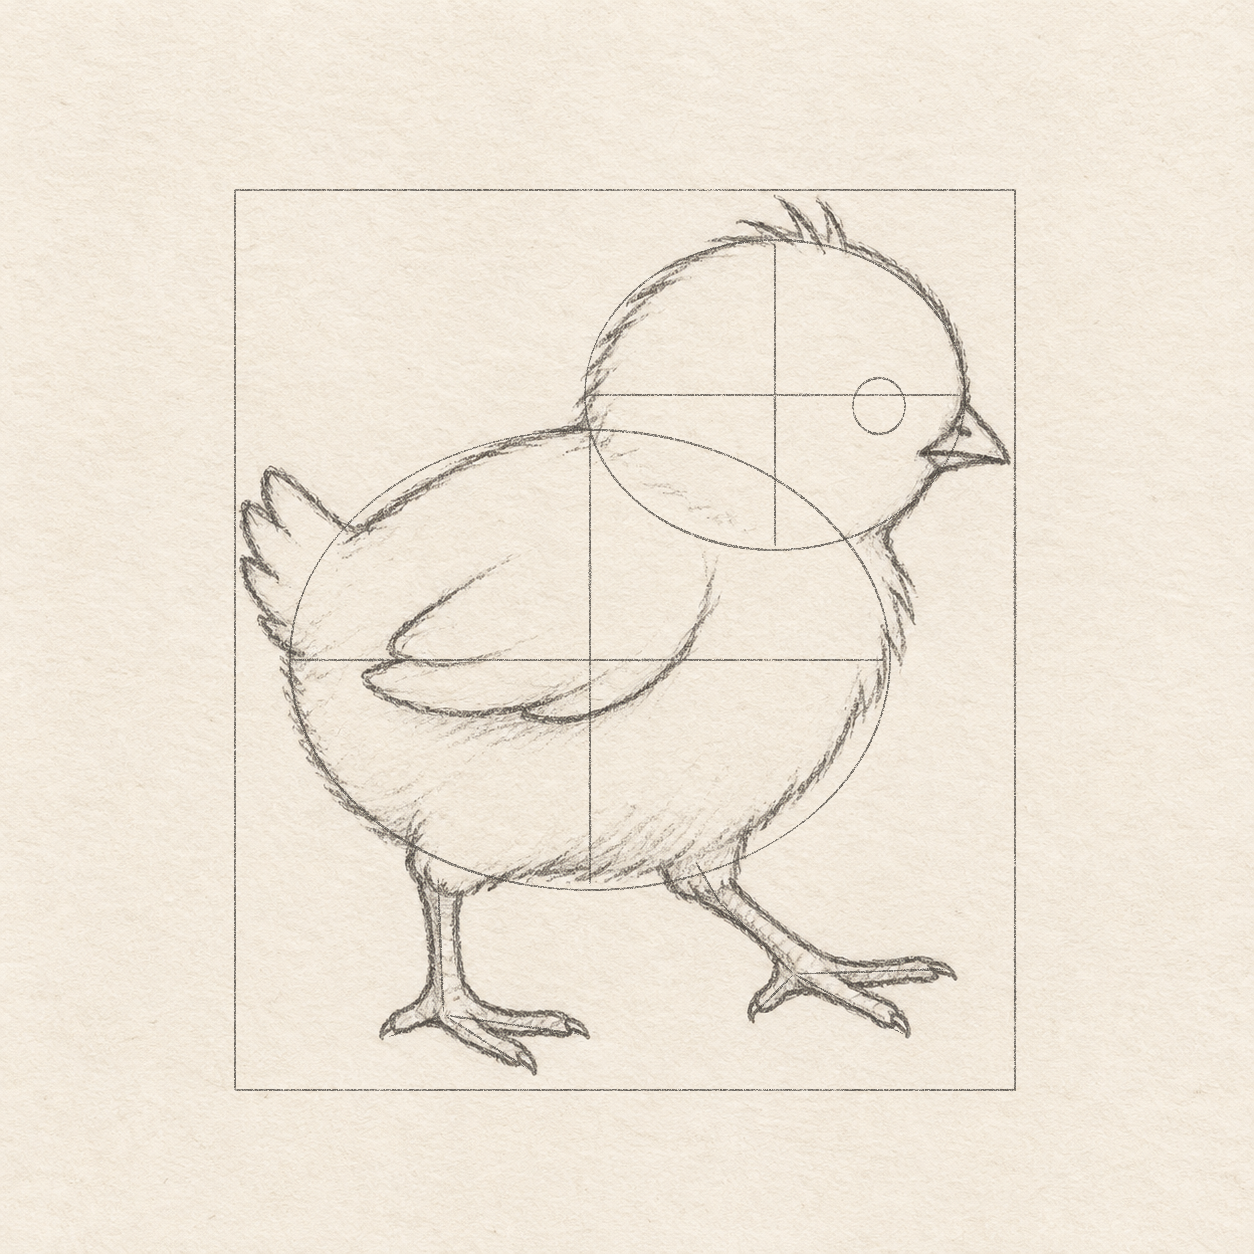
- From the box corner, find the start of the wing’s upper curve about 6 cm across and 4.9 cm down.
- Keeping the wing inside the body and the upper curve light, draw the upper curve freehand to the right, reaching no farther than about 8 cm across, then curve down-left toward 5 cm across and 8.9 cm down. See Detail 7A.1 — Whole wing and its faint upper curve.
- Near 2.2 cm across and 8.2 cm down from the box corner, shape the wing’s leftward feather ends freehand.
- Keep narrow pale gaps between the overlapping feathers as you draw a shallow feather edge back toward the rounded right side, followed by a second lower return. Do not merge the two returns into one thick band.
- Keep the broad wing face pale. Along its lower overlapping edges, deepen a few short pencil strokes and add only a little soft tone beneath them, using light pressure and broken strokes. Let the individual strokes vary by eye.

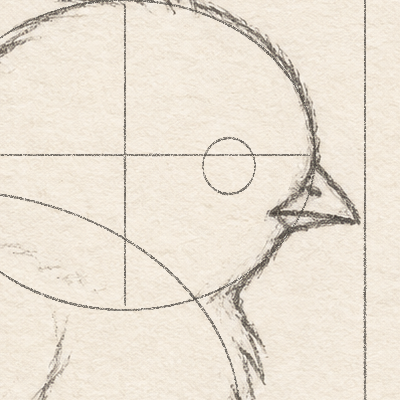
Drawing 7B — Eye position and outlineView larger 
Detail 7B.1 — Eye placement inside the headThe small eye is still an empty pencil oval. Its size and clear forehead gap are visible before any dark filling. Instructions for Drawing 7B — Eye position and outline
- From the box corner, find the eye centre about 10.7 cm across and 3.6 cm down. Keep a clear gap to the forehead and allow an upright oval roughly 9 mm wide and 9 mm tall around that centre. Shape it by eye: curve freehand from the left side over the rounded top, down the right side and around the bottom back to the start. Leave it empty. See Detail 7B.1 — Eye placement inside the head.

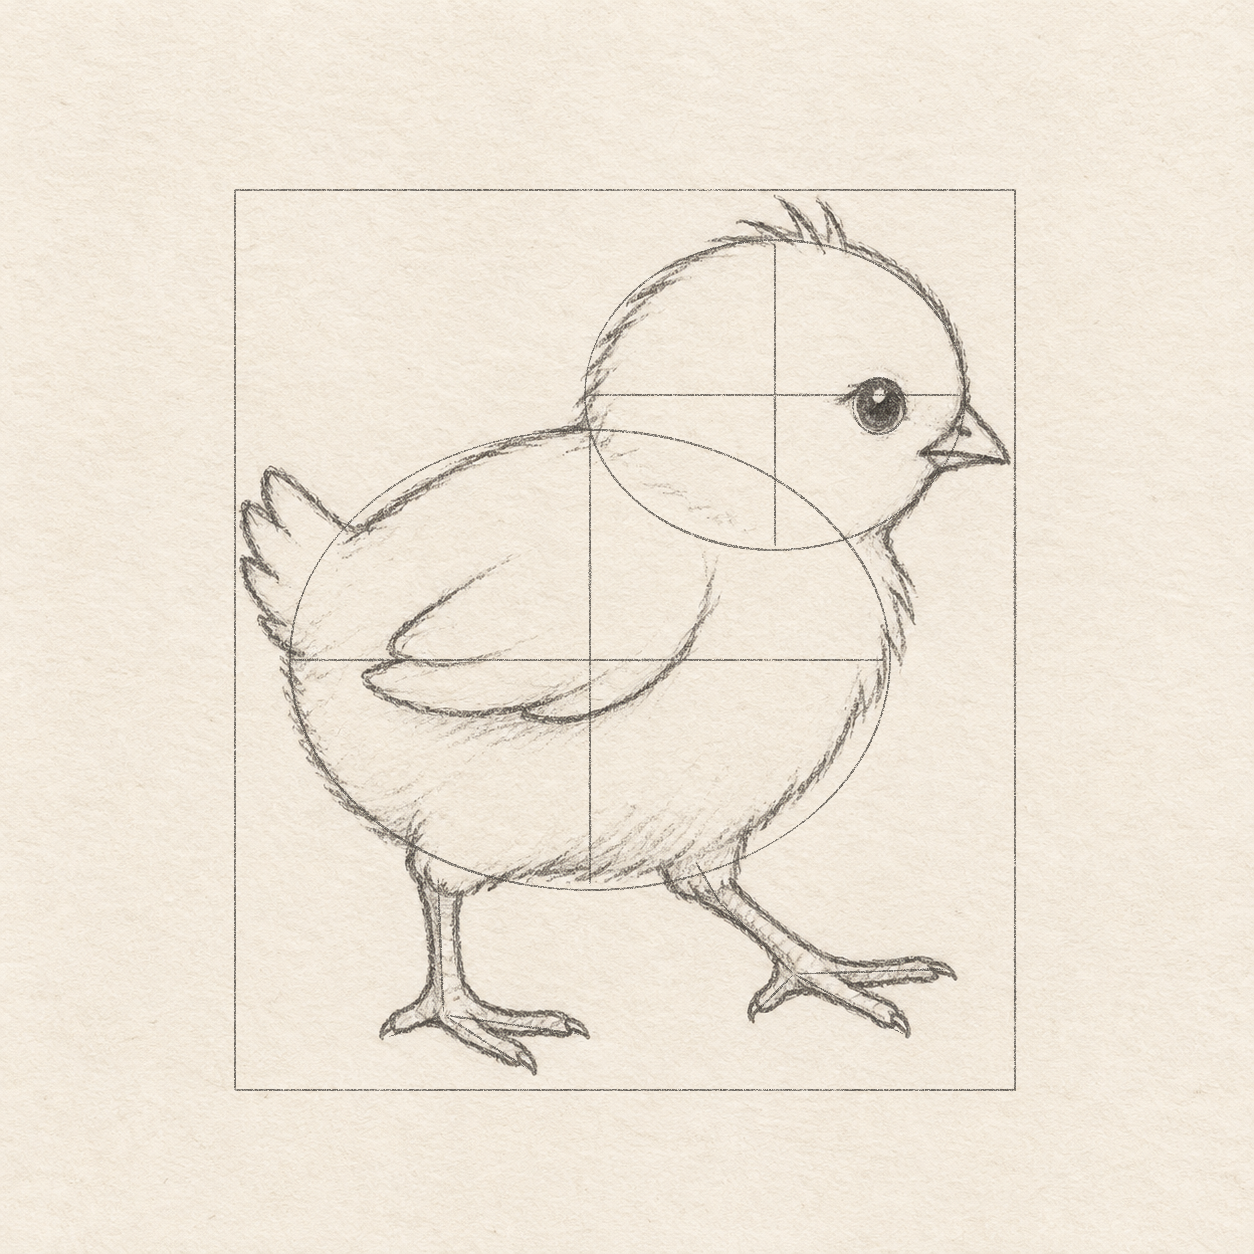
Drawing 7C — Dark eye with a paper highlightView larger 
Detail 7C.1 — Eye highlight and upper accentDark graphite surrounds the small upper-left paper highlight. The short upper-left accent is separate from the forehead and the light placement guides. Instructions for Drawing 7C — Dark eye with a paper highlight
- Inside the eye oval, keep a pale oval highlight about 2 mm wide near the upper-left as untouched paper. With short pencil strokes, darken around that patch, keeping the eye’s outer edge softly rounded.
- Keeping it separate from the long forehead contour, add the short light accent just above and left of the eye, curving toward the eye’s upper edge. It is not a second full eye ring. See Detail 7C.1 — Eye highlight and upper accent.
Step 8 of 8 · Pencil
Erase the guides and keep the finish soft

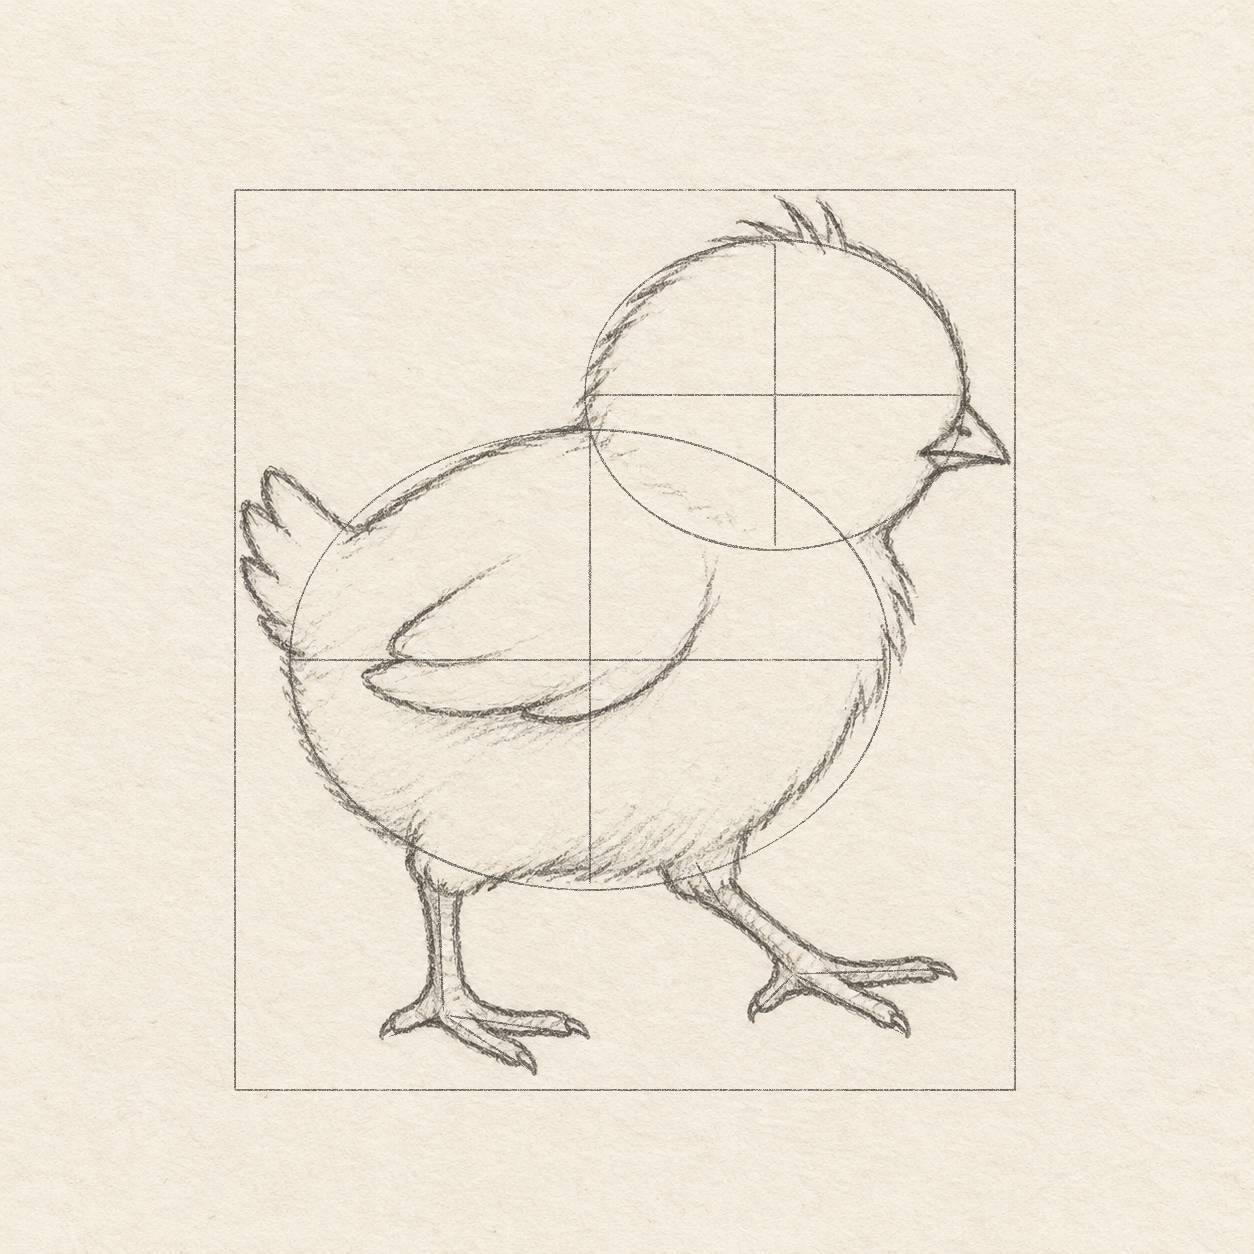
Drawing 8A — Finished soft pencil chickView larger 
Detail 8A.1 — Finished stepping feetAfter the centre routes are erased, the two differently angled feet keep narrow rounded toes and clear gaps. Instructions for Drawing 8A — Finished soft pencil chick
- Keep the selected feather edges, dark eye and paper highlight intact. In small sections, use a soft eraser to remove the visible working box, both oval crosses, unused mass-oval sections, leg and toe centre routes, and the light eye oval. Avoid rubbing across the whole chick.
- Keep the finished head, body and wing mostly pale. If an edge needs strengthening, add a few short HB strokes there by eye, leaving other edges broken and soft. Avoid a uniform dark outline or a blanket of extra shading. See Detail 8A.1 — Finished stepping feet.
If something looks off
The chick looks like two separate balls
Keep the head overlapping the body. The selected neck and back connect the masses; the unused inner oval arcs stay light and are erased only in cleanup.
The feet look like matching copies
Return to the two ankle ends and their different toe fans. The planted ankle is lower; the forward foot has its own higher ankle and unequal rightward toes.
The feather edge looks like a thick pen line
Reduce pencil pressure and use a few short broken strokes. Keep broad areas as paper rather than tracing every oval heavily or adding uniform shading.