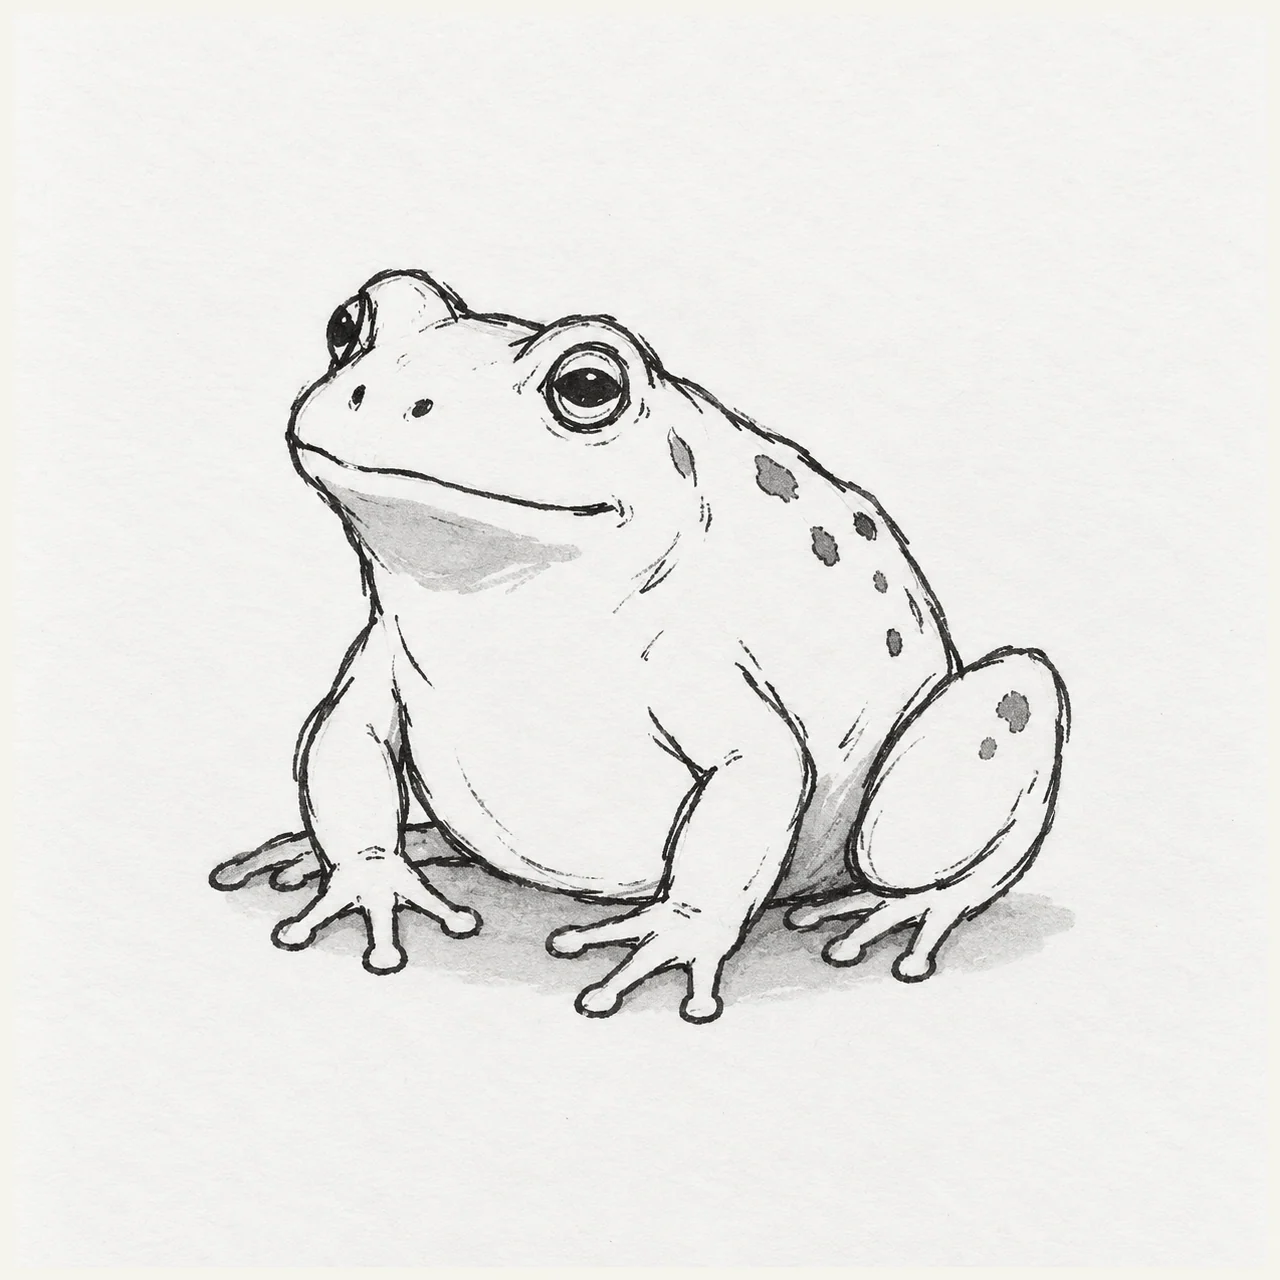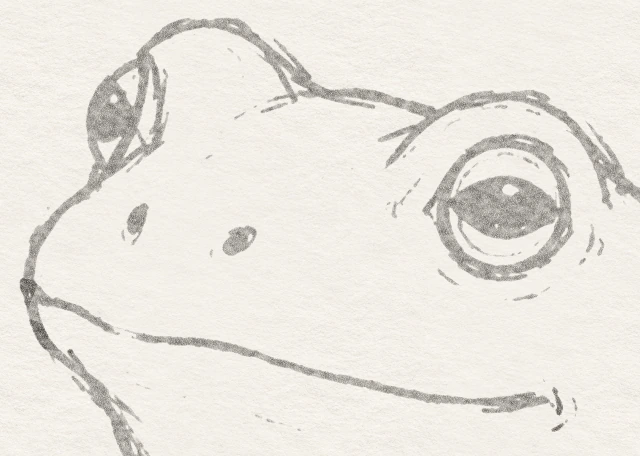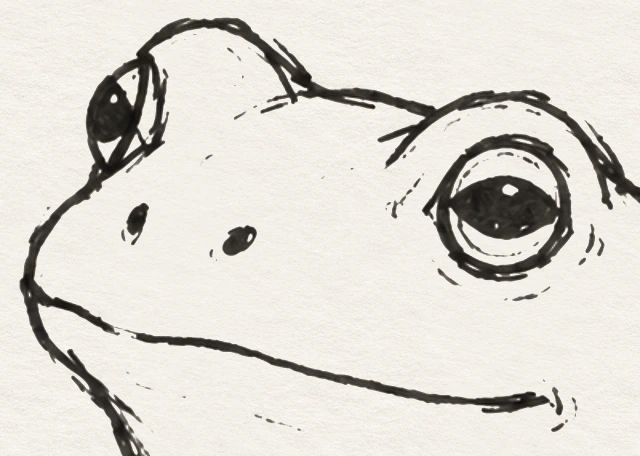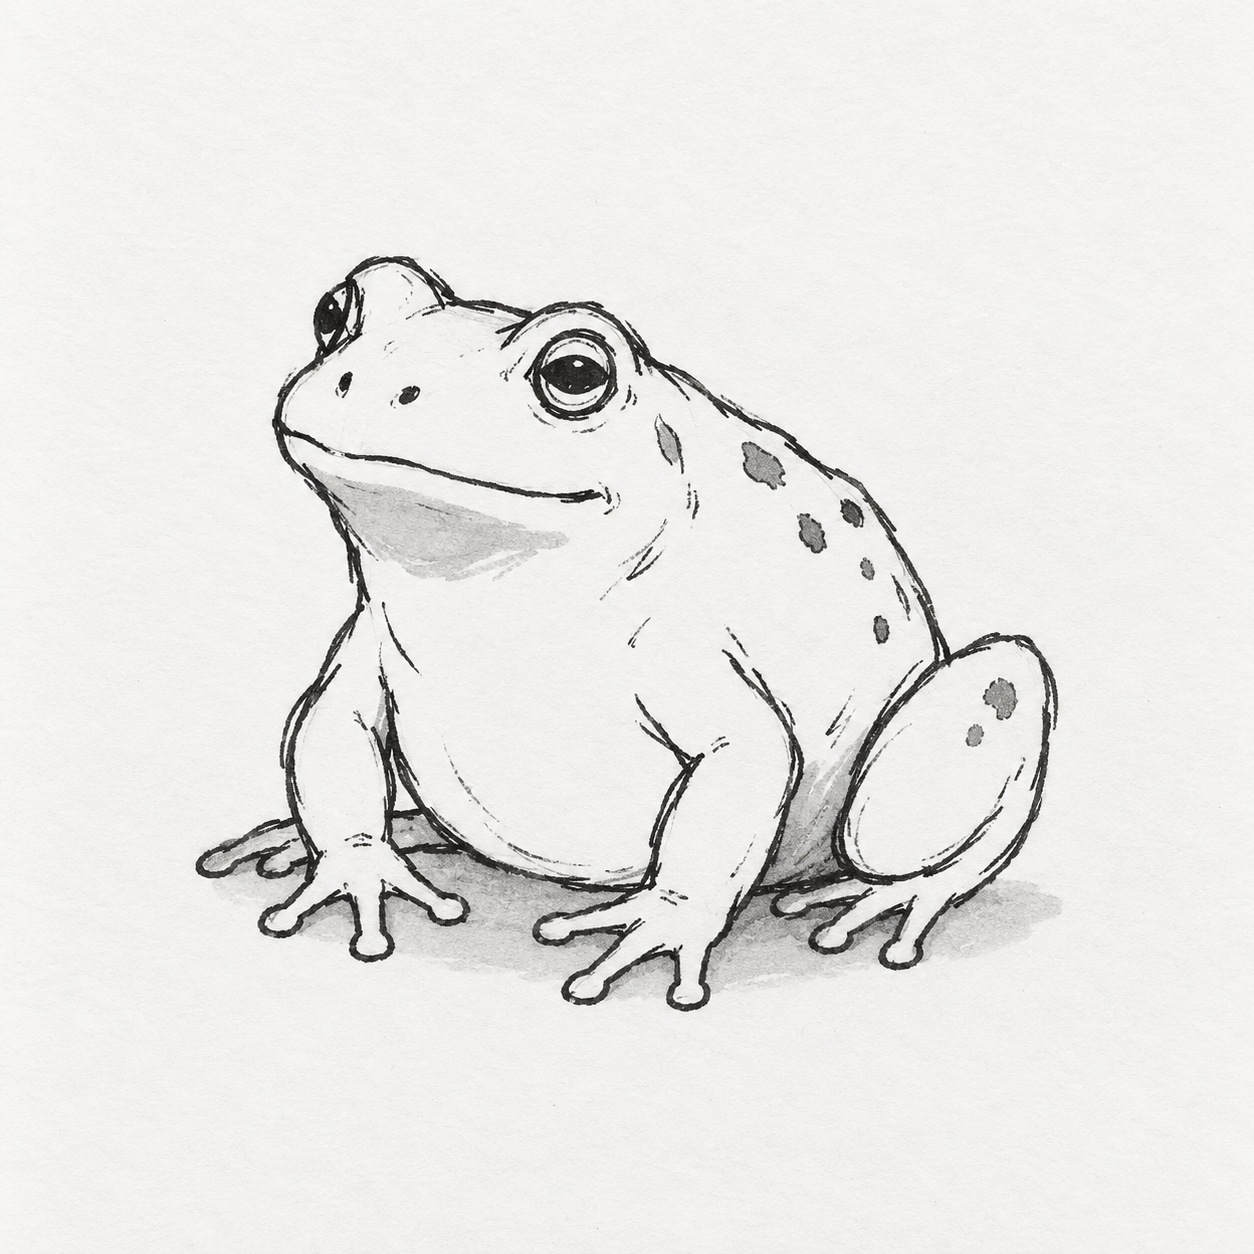
Black marker sketch of a seated frog in three-quarter view, with raised eyes, folded hind legs, splayed toes, a few spots, and small gray shadows.
Drawing referenceAbout reference use

A frog sitting quietly

Build a seated frog from a rounded head and body, then show how the folded legs overlap. A few spots and small gray shadows give the sketch form.

AnimalsEasyMarkerReference practice: about 15 min
Save reference

Follow the drawing tutorial

Draw this seated frog with a measured pencil layout, clearly placed forms and toes, then selected contours, black marker and a little gray.

Start the 24-step tutorial

A small thing to tryCheck the gaps between the legs before adding spots. Those open spaces make the seated pose readable.

Draw it, one step at a time

How to draw this seated frog

Draw this seated frog with a measured pencil layout, clearly placed forms and toes, then selected contours, black marker and a little gray.

24 illustrated steps Full tutorial: about 60 minutes, at your pace

What you’ll need

  • HB pencil
  • Soft or kneaded eraser
  • Ruler marked in centimetres and millimetres
  • Fine black felt-tip marker
  • Light gray marker
  • Sketchbook paper

Before you start

Use paper large enough for a 17 × 15 cm working box with space around it. Choose where this box goes; centring is optional. Measure across from the box’s left edge and down from its top unless an action names another mark. Left and right mean the sides of the picture. Use a ruler for the box and stated points, then draw curves freehand. Keep guides light for later erasure. The measurements are approximate; correct misplaced pencil marks before marker. For another size, keep all distances in the same proportion.
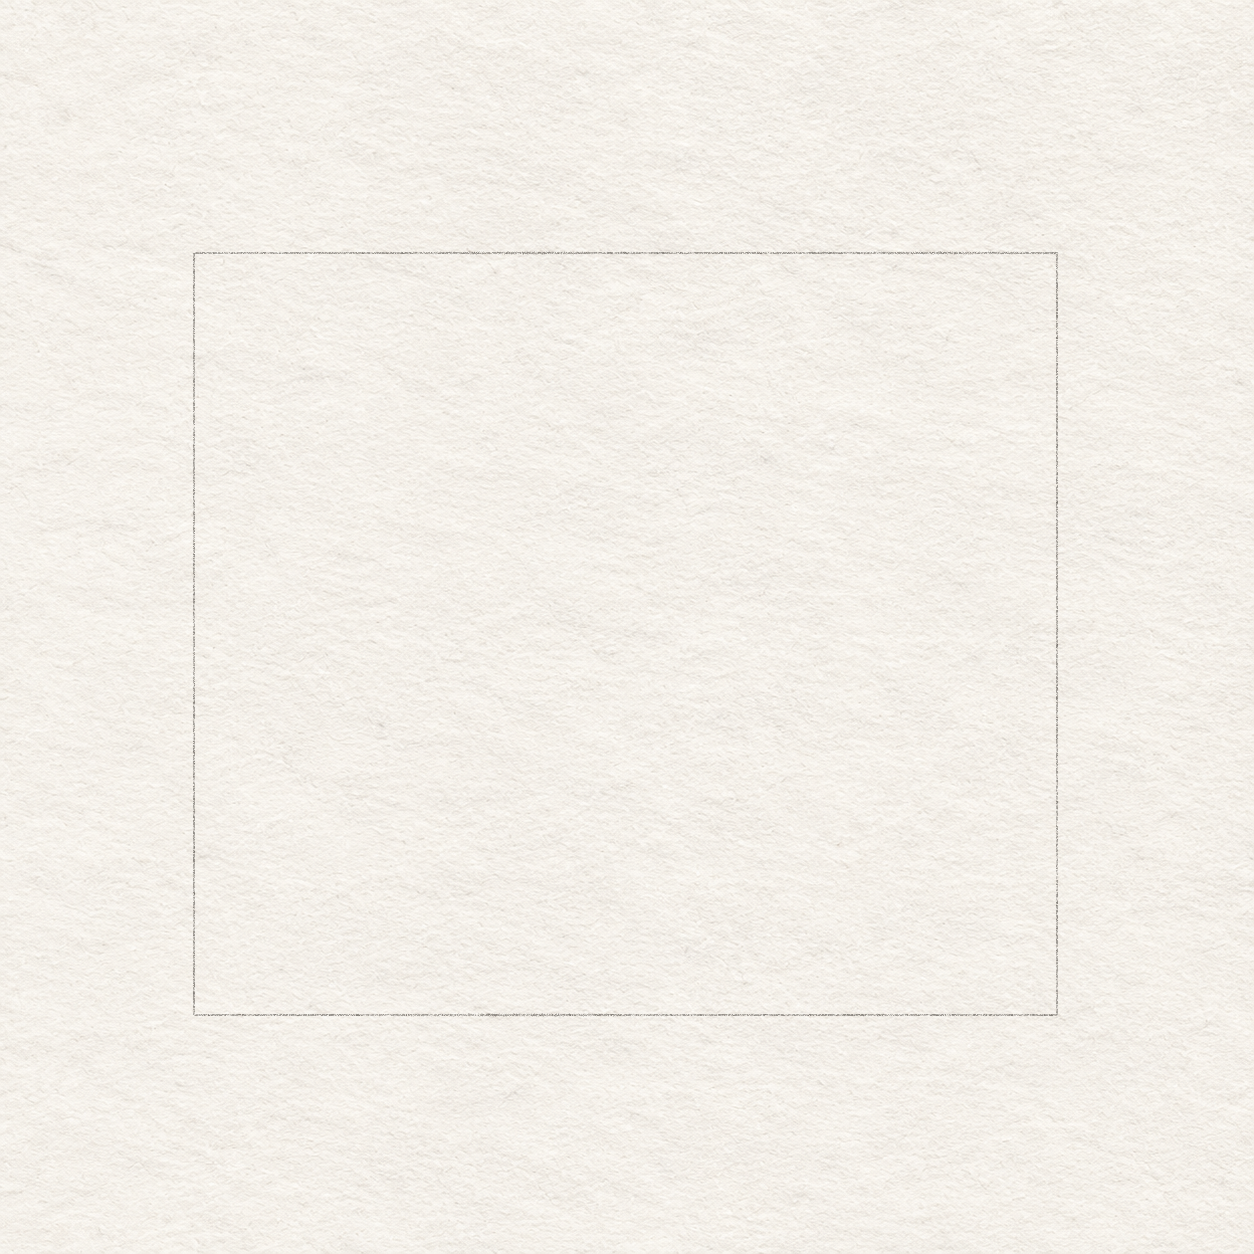
  1. A light 17 cm by 15 cm pencil rectangle on textured paper; no frog parts have been drawn yet.
    Drawing 1 — Draw a light guide boxView larger
    Pencil

    Draw a light guide box

    Instructions for Drawing 1 — Draw a light guide box
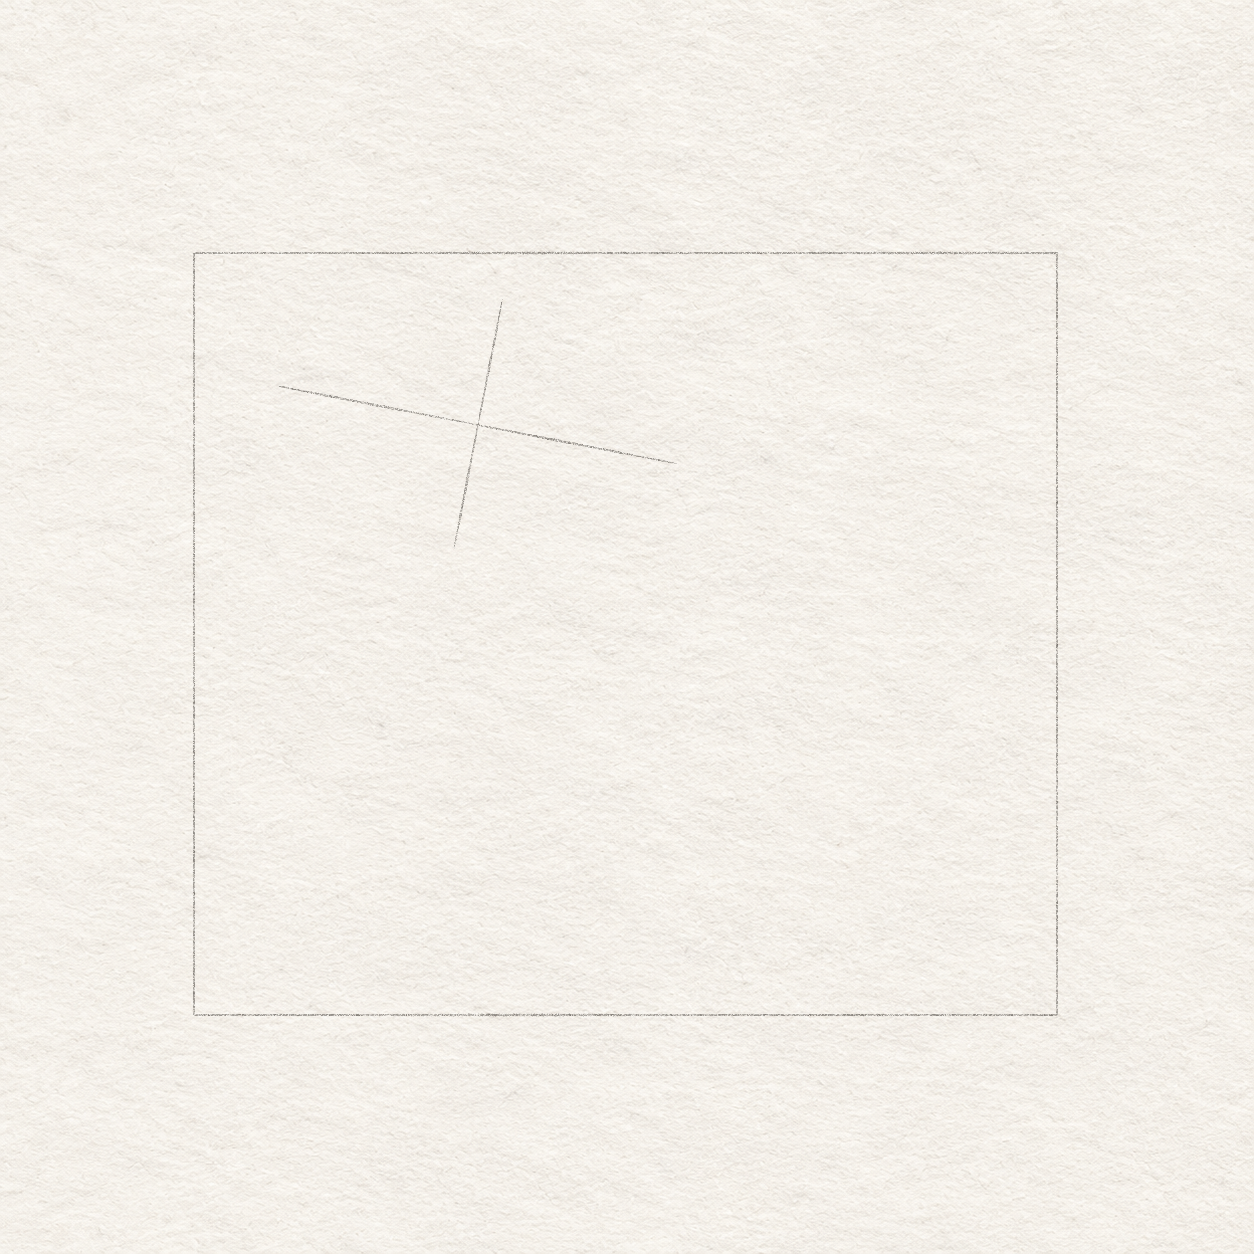
    1. Use a ruler marked in centimetres. Keep the reference visible while you place the light guides.
    2. Choose where you want the 17 cm by 15 cm working box, leaving paper around it. With a ruler and light pencil, draw a 17 cm horizontal top edge. From each end, draw a 15 cm side straight down, then join their lower ends. Keep the four sides light for later erasure.
    3. Measure both sides so the box is wider than it is tall.
    4. In the following steps, ‘across’ means from the box’s left edge. ‘Down’ means below its top edge.
    Next step
  2. The same working box with a tilted long axis and perpendicular short axis locating the head oval’s center and four tips.
    Drawing 2 — Mark the head’s centre and tiltView larger
    Pencil

    Mark the head’s centre and tilt

    Instructions for Drawing 2 — Mark the head’s centre and tilt
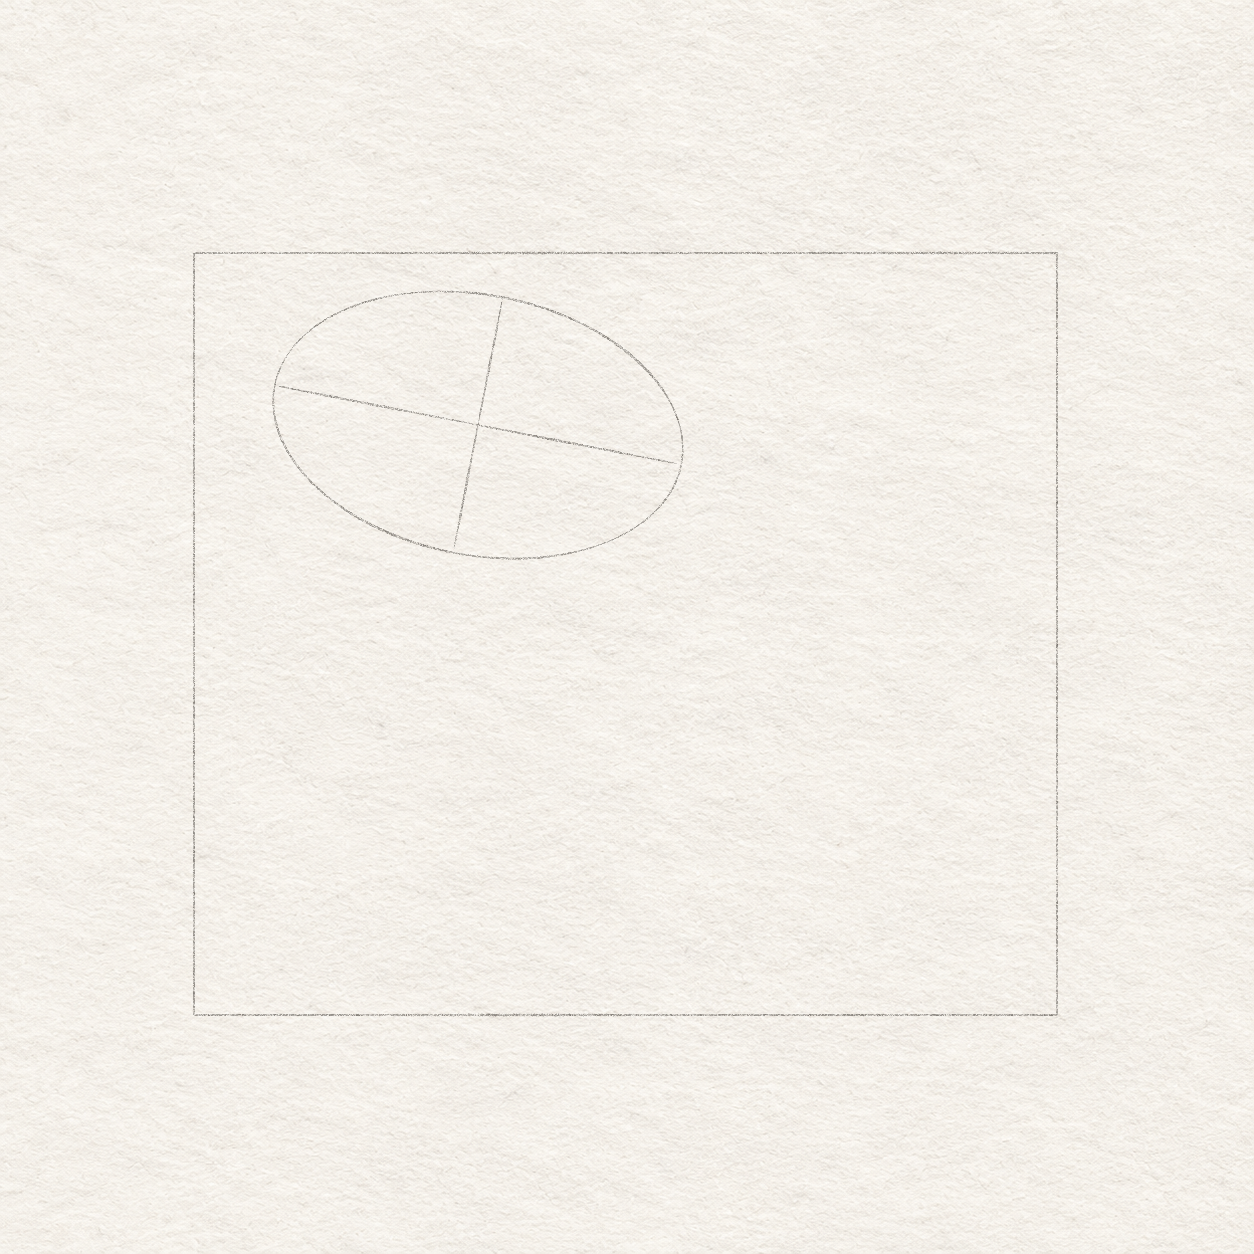
    1. From the box’s top-left corner, measure 5½ cm right, then 3½ cm down. Mark the head’s centre there.
    2. Mark the left end of the head: 1½ cm across and 2¾ cm down. Mark the right end: 9½ cm across and 4¼ cm down.
    3. Join those two ends with a light line through the centre. It slopes gently down to the right: 1½ cm lower over 8 cm across.
    4. Mark a top end at 6 cm across and 1 cm down, then a bottom end at 5 cm across and 6 cm down.
    5. Join the top and bottom ends through the same centre. This shorter line leans slightly left as it goes down. Keep both lines light.
    Next step
  3. A light head oval touching the four tips of the retained tilted cross inside the same working box.
    Drawing 3 — Draw the head ovalView larger
    Pencil

    Draw the head oval

    Instructions for Drawing 3 — Draw the head oval
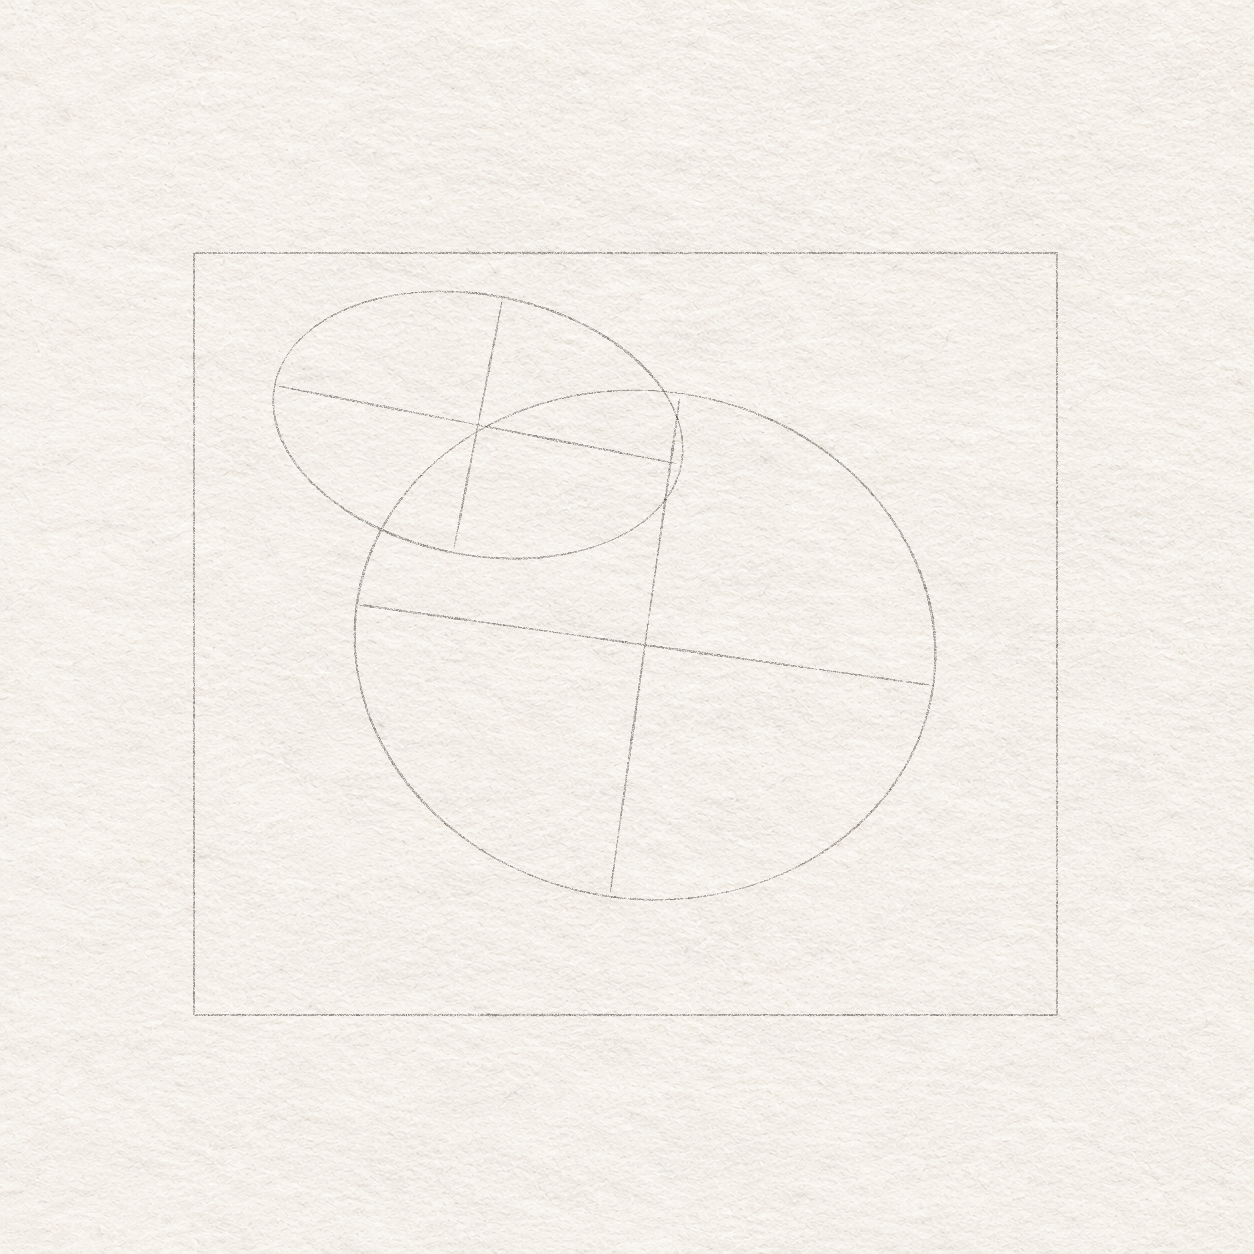
    1. Practise an oval motion above the four head marks before touching the paper.
    2. Draw one light oval through the top, right, bottom and left ends. Round each turn; avoid pointed corners.
    3. Keep the centre and four ends fixed. If one curve bulges, erase just that curve and try it again.
    4. Leave the cross and guide box visible.
    Next step
  4. The head construction retained exactly, with a larger rounded body oval and its axes overlapping below and to the right.
    Drawing 4 — Draw the body behind the headView larger
    Pencil

    Draw the body behind the head

    Instructions for Drawing 4 — Draw the body behind the head
    1. Mark the body centre near 9 cm across and 7¾ cm down, measured from the guide box.
    2. Mark its left end at 3¼ cm across and 7 cm down, and its right end at 14½ cm across and 8½ cm down. Join them lightly.
    3. Mark its top at 9½ cm across and 2¾ cm down, and its bottom at 8¼ cm across and 12¾ cm down. Join these through the body centre.
    4. Draw a rounded oval through those four ends, using the same motion as for the head.
    5. Let it overlap the lower-right part of the head. Keep the head unchanged; the two ovals should overlap, rather than just touch.
    Next step
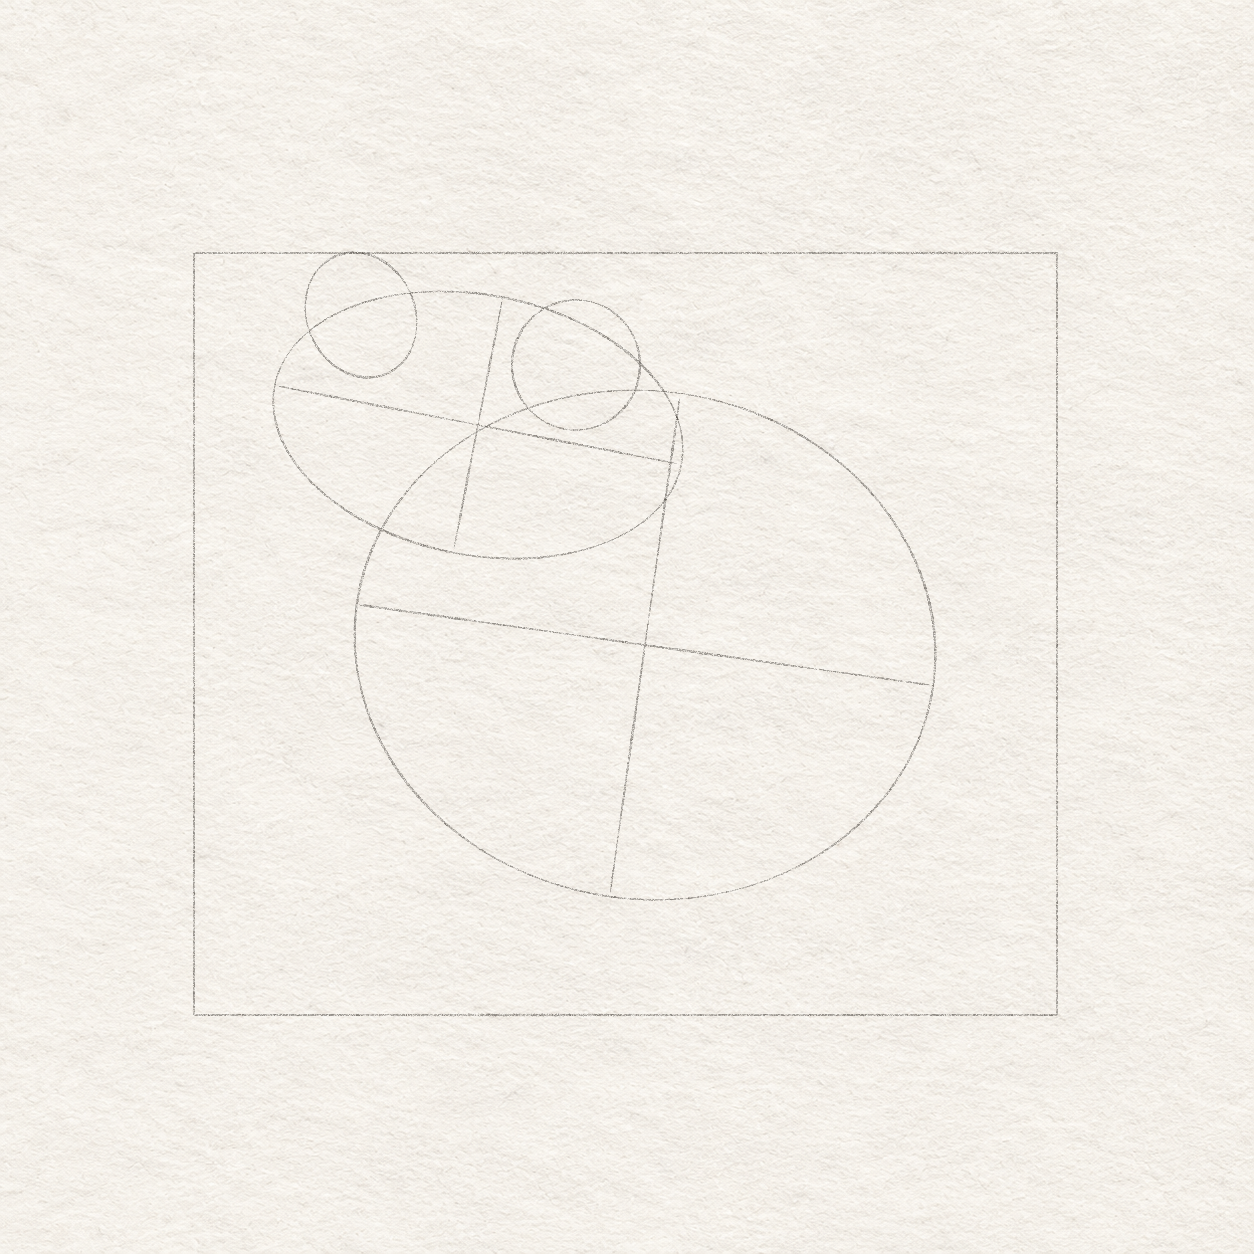
  5. Two small raised eye masses overlap the upper head envelope; the far left mass is higher and smaller than the near right mass.
    Drawing 5 — Add the two raised eye shapesView larger
    Pencil

    Add the two raised eye shapes

    Instructions for Drawing 5 — Add the two raised eye shapes
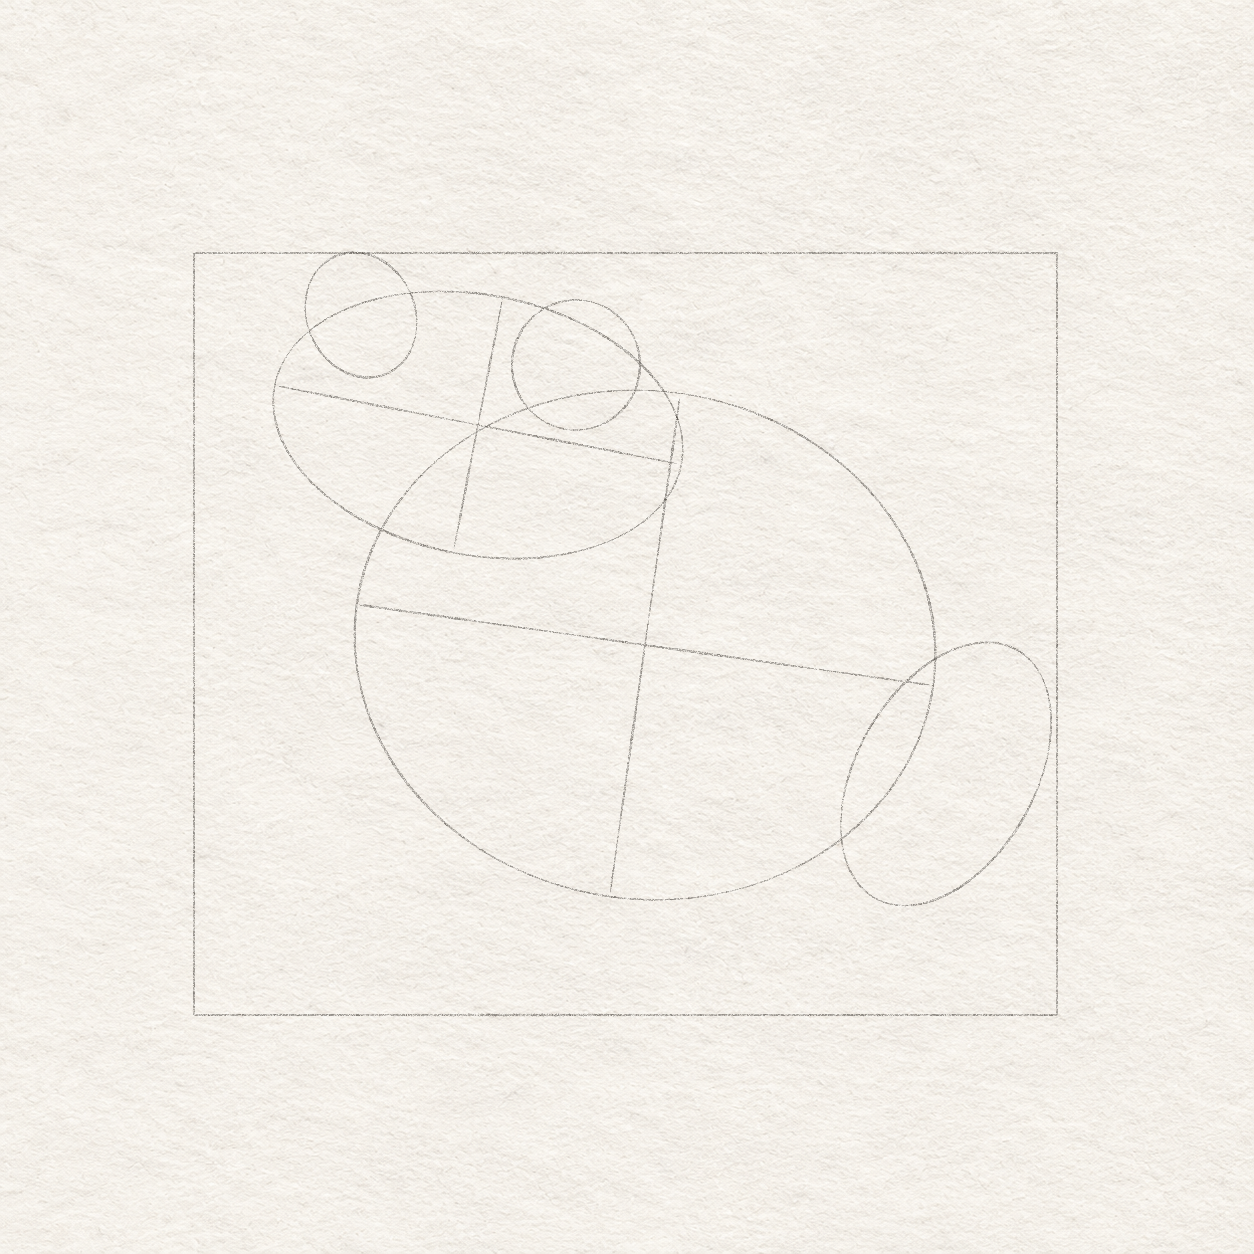
    1. Mark the left eye-mound centre at 3¼ cm across and 1¼ cm down. Do not draw the oval yet.
    2. Its top leans about ½ cm left of the centre and its bottom about ½ cm right. Within about 2 cm of width and 2½ cm of height around the centre, shape that tilted oval by eye. Curve freehand from the tilted top down its right side, round the bottom, then return up its left side to the start.
    3. For the right mound, mark a centre at 7½ cm across and 2¼ cm down. Shape a rounder loop about 2½ cm across around this centre by eye: curve freehand over the top, around the right side and bottom, then back up the left side.
    4. Both mounds overlap the head’s top curve. The left one reaches almost to the box top; the right one sits lower.
    5. Leave them empty. These are raised shapes, not the smaller eye openings drawn later.
    Next step
  6. A long tilted haunch mass overlaps the lower-right body, with all earlier layout marks retained.
    Drawing 6 — Place the folded back legView larger
    Pencil

    Place the folded back leg

    Instructions for Drawing 6 — Place the folded back leg
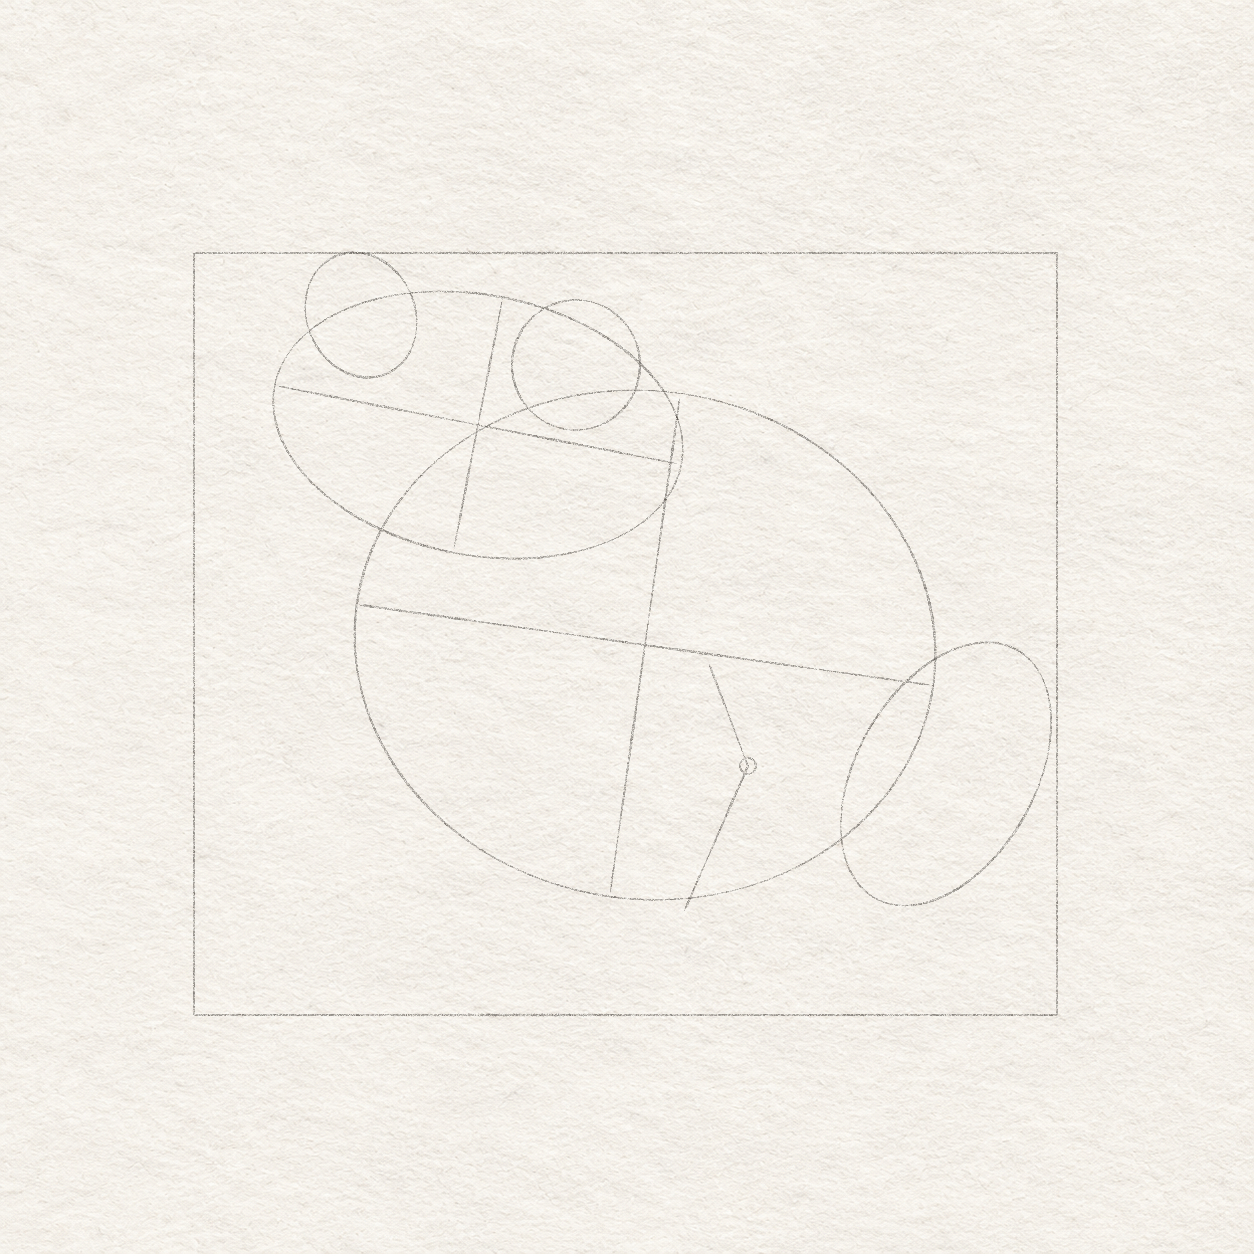
    1. Work at the body’s lower-right edge. Mark the leg oval’s centre at 14¾ cm across and 10¼ cm down.
    2. Mark its upper-right end at 16¼ cm across and 7¾ cm down. Mark its lower-left end at 13¼ cm across and 12¾ cm down.
    3. Imagine a line between those ends: it rises about 5 cm while moving 3 cm right. The oval follows that direction.
    4. Mark the oval’s side ends at about (13¼ cm across, 9½ cm down) and (16¼ cm across, 11¼ cm down). These give its short width, running upper-left to lower-right—not horizontally across the page.
    5. Draw a light oval through all four ends. Let it overlap the body, with its outside close to the box’s right side; keep the body curve visible.
    Next step
  7. A right-hand shoulder-to-elbow-to-wrist joint chain bends down-right then down-left within the existing body construction.
    Drawing 7 — Place the right front-leg bendView larger
    Pencil

    Place the right front-leg bend

    Instructions for Drawing 7 — Place the right front-leg bend
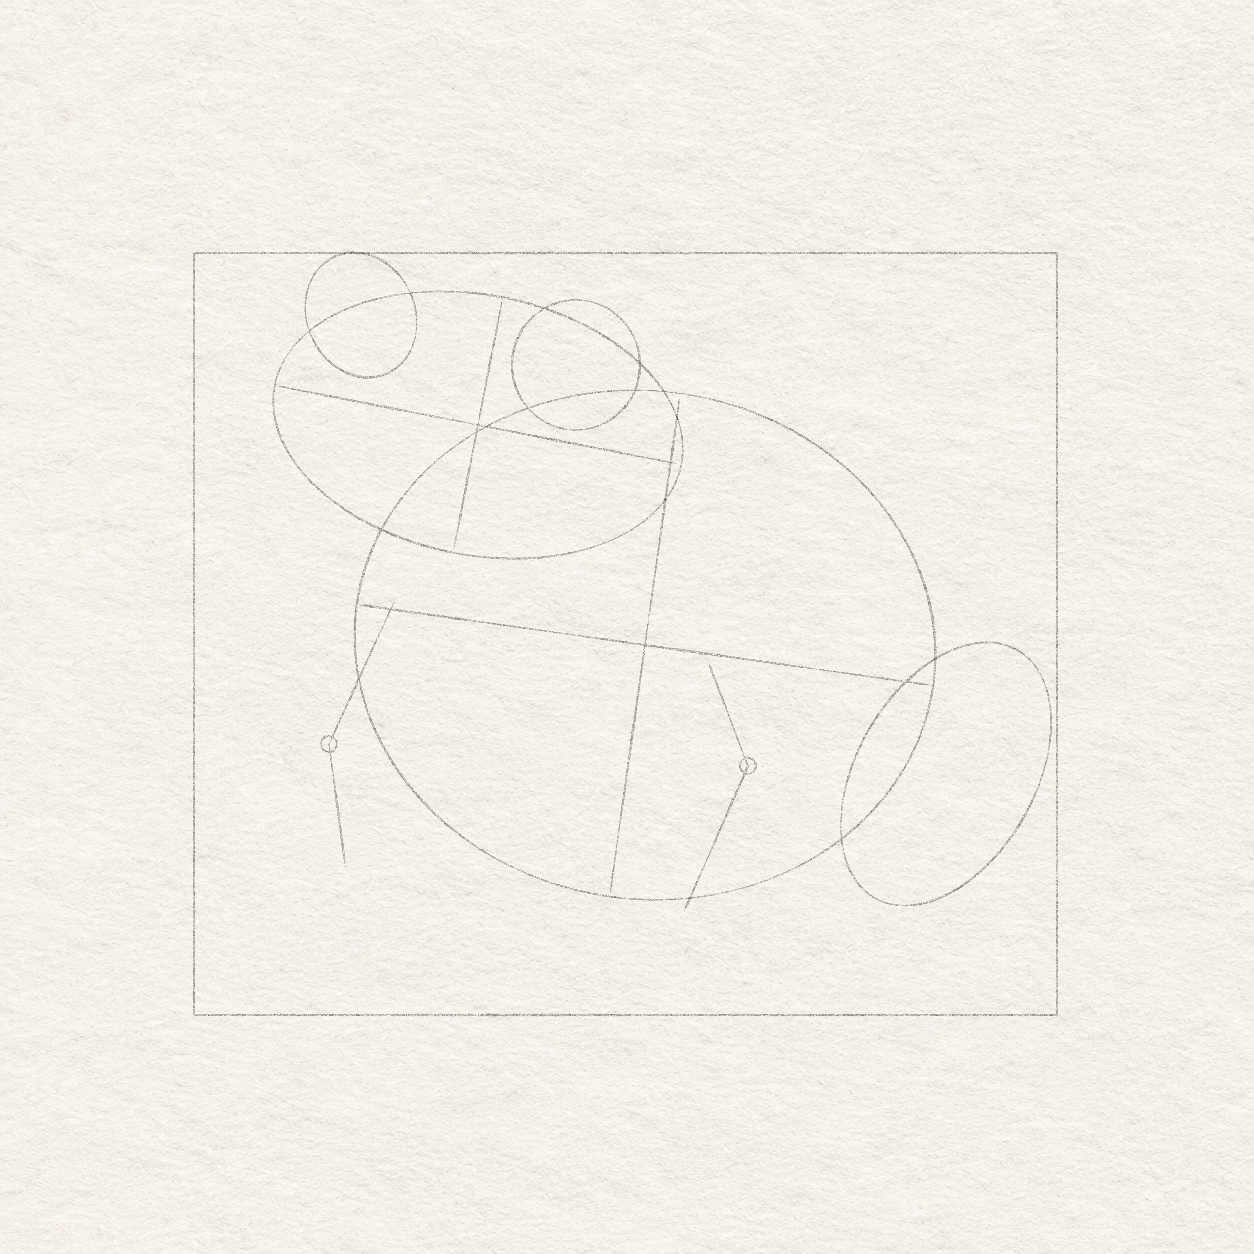
    1. Mark three points: shoulder at 10 cm across and 8 cm down; elbow at 11 cm across and 10 cm down; wrist at 9¾ cm across and 13 cm down.
    2. Join shoulder to elbow, then elbow to wrist. Add a small light circle at the elbow.
    3. The first line goes down-right. The longer second line goes down-left.
    4. Keep these lines light: they show the middle of the leg, not its outside edges. The palm will begin at the wrist.
    Next step
  8. Both front joint chains are visible, with the left far elbow higher and its forearm more upright than the near leg.
    Drawing 8 — Place the left front-leg bendView larger
    Pencil

    Place the left front-leg bend

    Instructions for Drawing 8 — Place the left front-leg bend
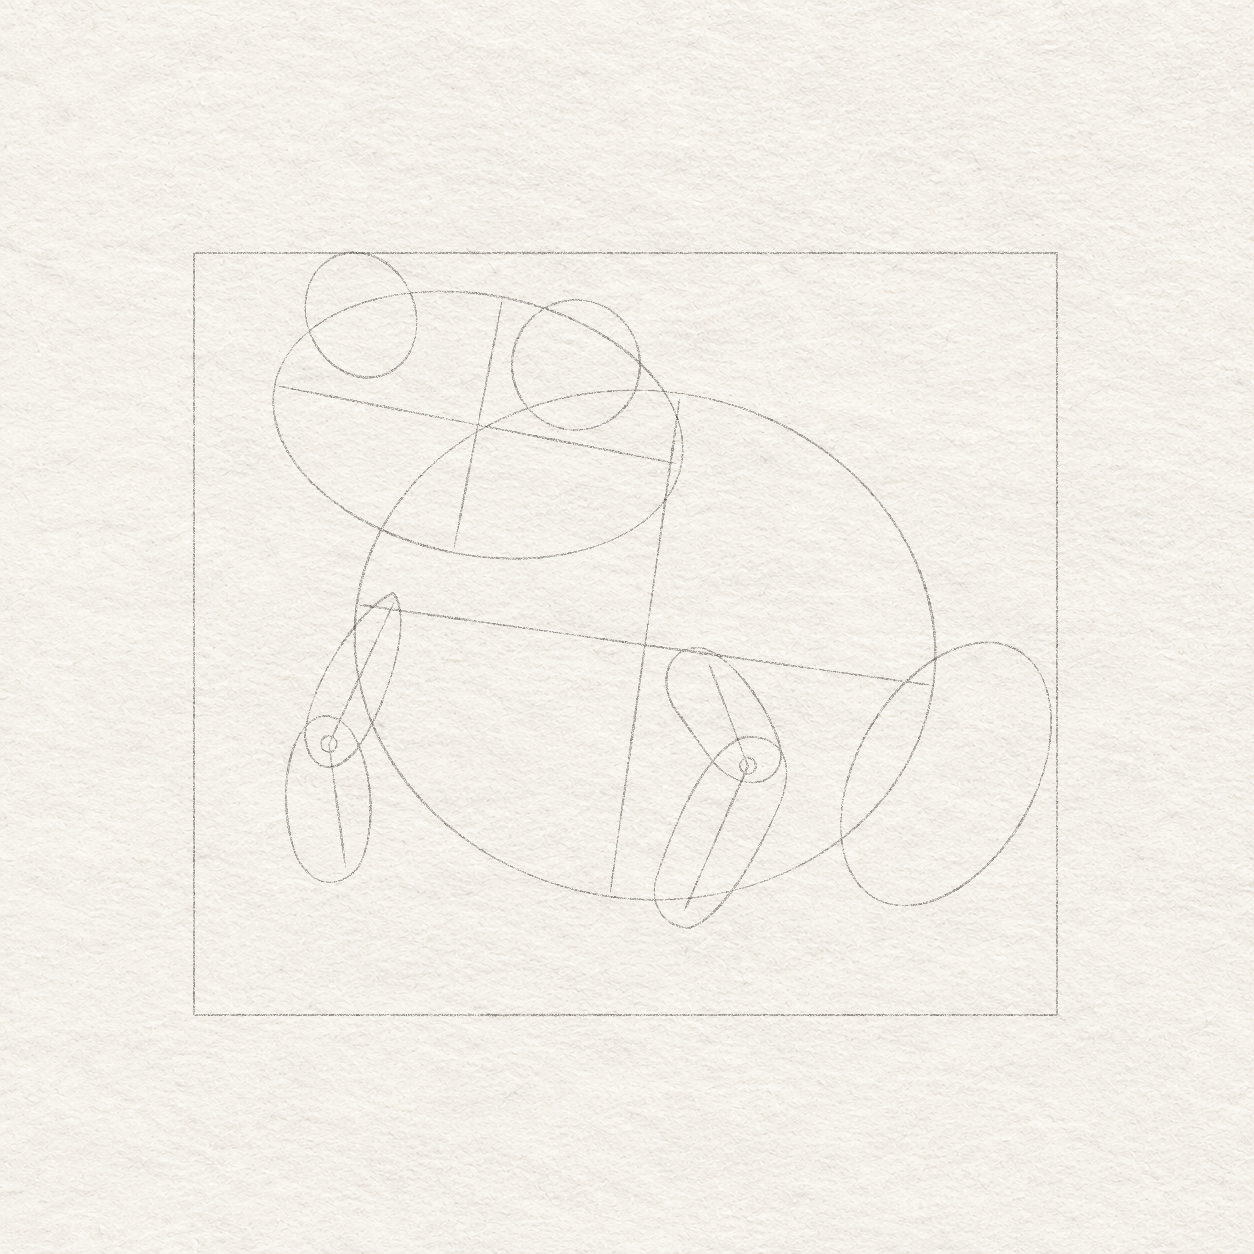
    1. Mark the left shoulder just below the head, at 4 cm across and 6¾ cm down.
    2. Mark its elbow at 2¾ cm across and 9¾ cm down, then its wrist at 3 cm across and 12¼ cm down.
    3. Join shoulder to elbow, then elbow to wrist. Circle the elbow lightly.
    4. This upper line slopes down-left; the lower line is nearly upright. Its wrist sits about ¾ cm above the right wrist.
    5. Keep the right leg unchanged. The toes will extend below both wrists later.
    Next step
  9. Tapered upper-arm and oval forearm volumes wrap around the same retained shoulder, elbow and wrist chains.
    Drawing 9 — Add thickness around both front legsView larger
    Pencil

    Add thickness around both front legs

    Instructions for Drawing 9 — Add thickness around both front legs
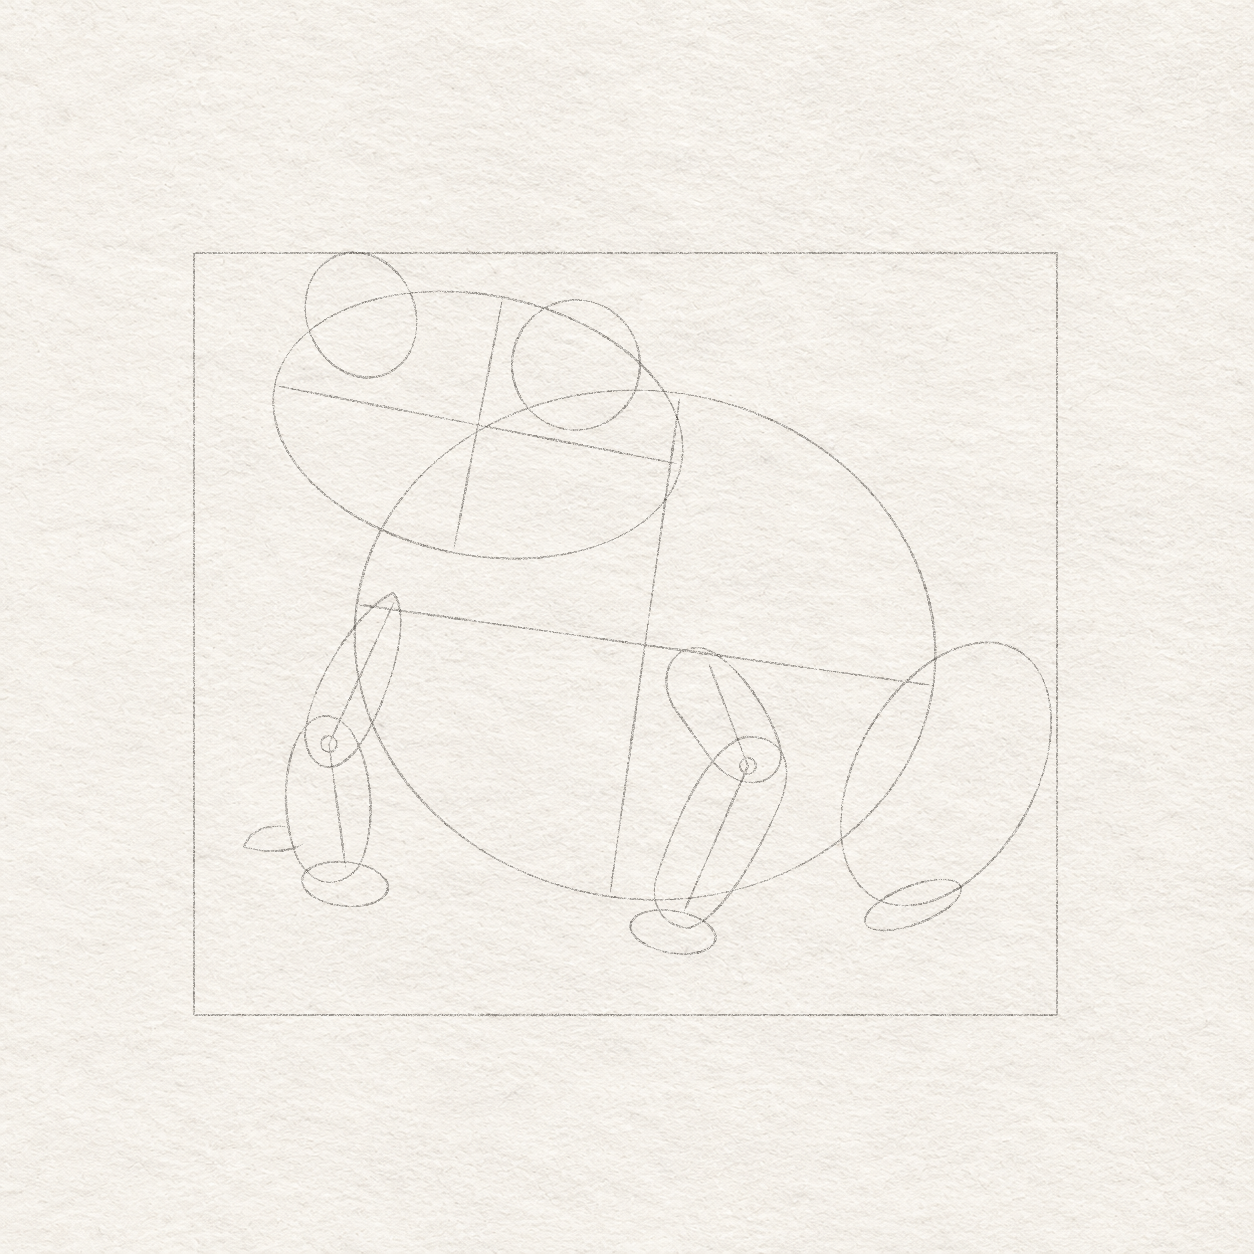
    1. Around each shoulder-to-elbow line, draw a long rounded upper-arm shape from the shoulder to the elbow. Make it about 1½ cm across at its widest part, narrower at the shoulder and rounded at the elbow.
    2. Around each elbow-to-wrist line, draw a freehand oval that narrows toward the wrist, about 1½ cm across at its widest part. Use that leg’s own line for its direction and length, and let the oval overlap the upper shape at the elbow.
    3. Keep both bend lines inside the shapes. Keep the shoulder, elbow and wrist points in place.
    4. Leave an open gap between the forearms and belly. If an oval fills that gap, make the oval narrower without moving the wrist or elbow.
    Next step
  10. Two shallow front palms, one slanted right hind-foot base and a small partly hidden left hind-foot wedge are placed beneath their existing limbs.
    Drawing 10 — Place the four foot basesView larger
    Pencil

    Place the four foot bases

    Instructions for Drawing 10 — Place the four foot bases
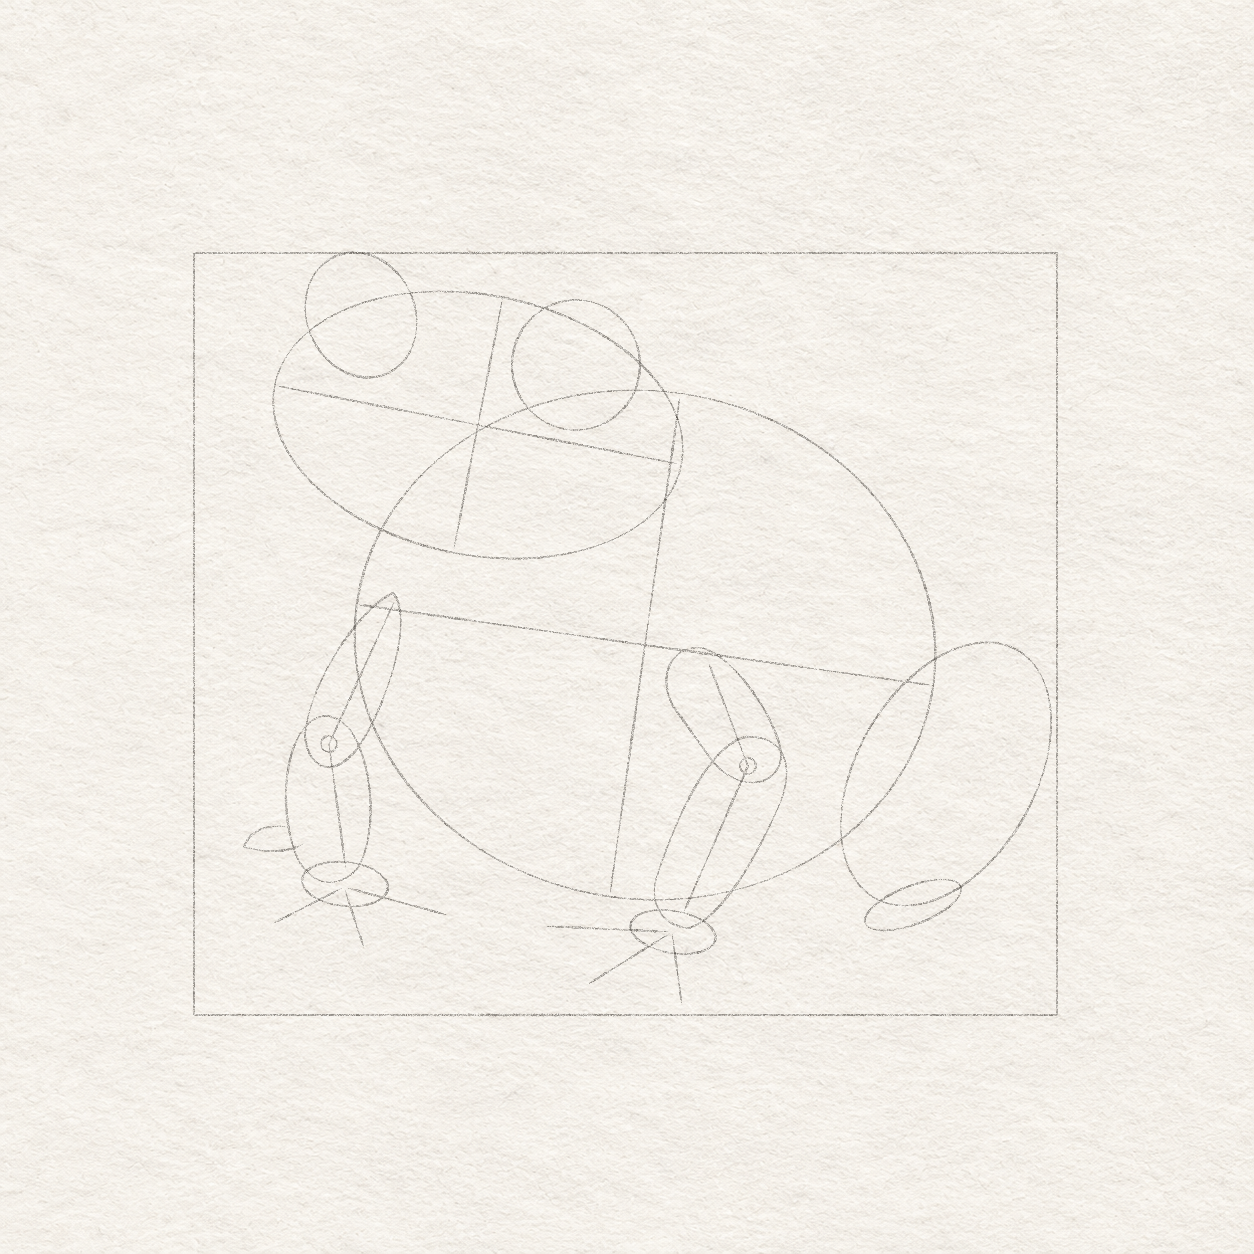
    1. At each front wrist, allow a shallow palm oval about 1¾ cm wide and ¾ cm high, centred just below the wrist with its top overlapping the wrist end. Shape it by eye: curve freehand from that overlap out around the left end, across the shallow bottom, around the right end and back to the overlap. The right palm sits lower.
    2. Below the folded back leg, mark the back-foot base centre at 14¼ cm across and 12¾ cm down. Do not draw the oval yet.
    3. The right end sits about ¾ cm higher than the left. Within about 2 cm of length and ¾ cm of height, shape the light foot-base oval by eye with that slope. Curve freehand around its higher right end, along the lower side, around the lower left end and back along the top.
    4. Behind the left forearm, shape a small light wedge pointing left by eye. From the forearm’s left edge, draw its upper side freehand to the left-pointing tip, then turn back along its lower side to the forearm; stop where the wider right end is hidden. Centre it near 1½ cm across and 11½ cm down; make it about 1¼ cm long and ½ cm high.
    5. Keep four separate groups. The small left wedge is partly hidden by the forearm; shorten it if it merges with the palm.
    Next step
  11. Three direction rays radiate from each front palm, with the nearer front foot spreading wider and reaching lower.
    Drawing 11 — Mark the front toe directionsView larger
    Pencil

    Mark the front toe directions

    Instructions for Drawing 11 — Mark the front toe directions
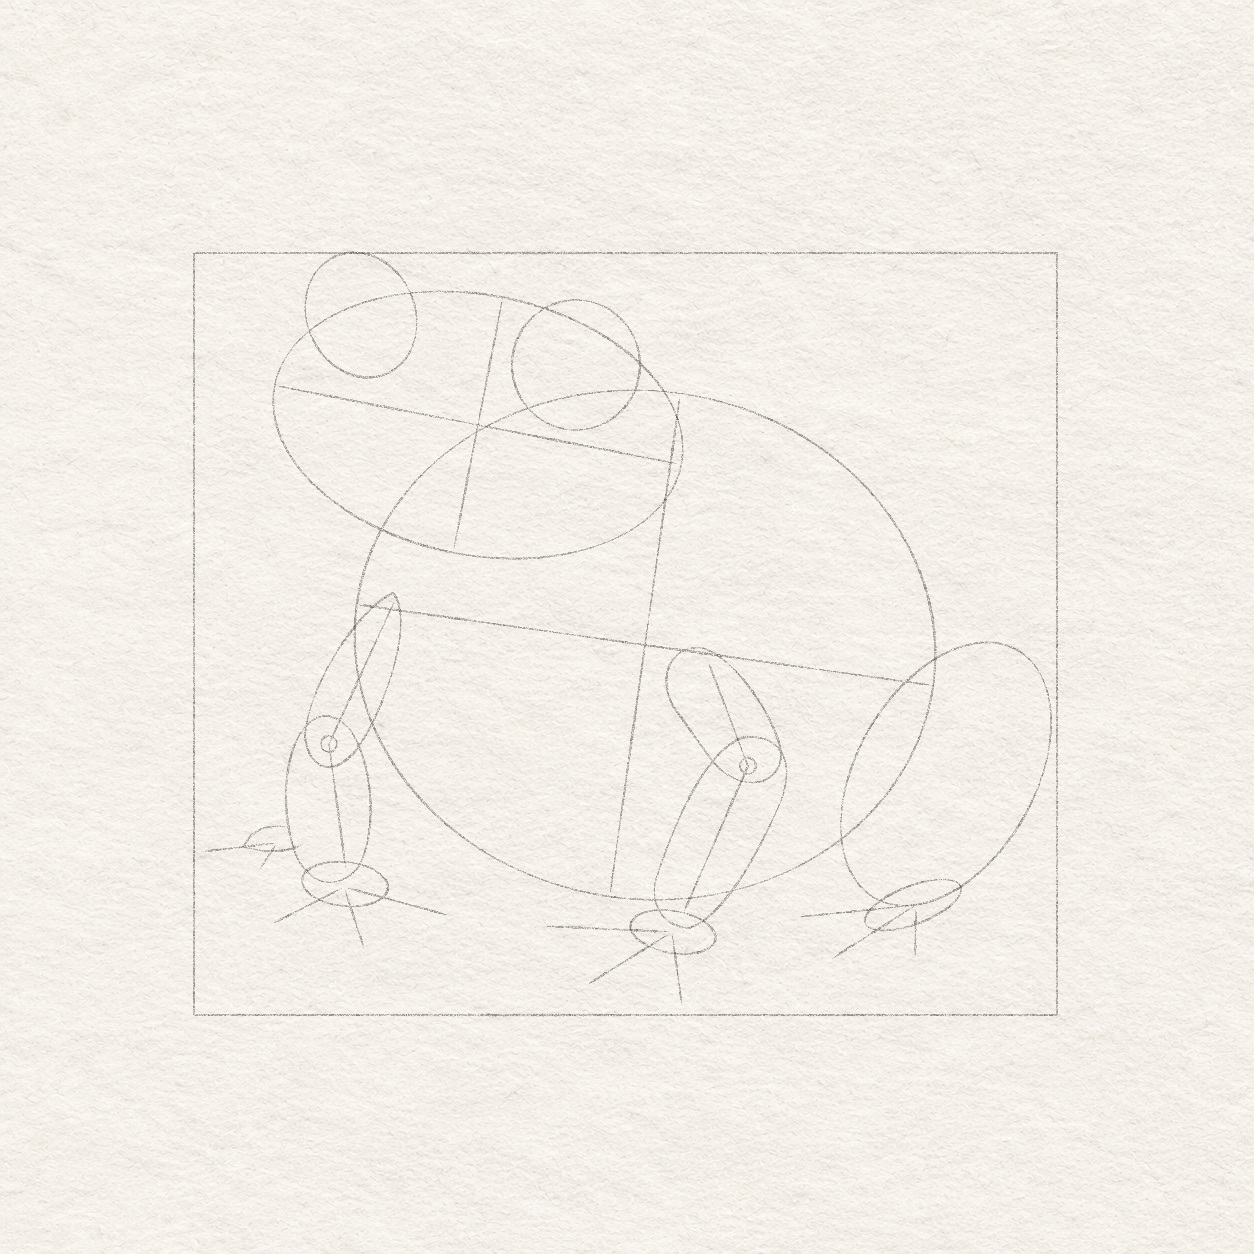
    1. Measure from the left palm’s centre. Mark three toe ends: 1½ cm left and ¾ cm down; ½ cm right and 1¼ cm down; 2 cm right and ½ cm down.
    2. From the right palm’s centre, mark: 2½ cm left at the same height; 1¾ cm left and 1 cm down; ¼ cm right and 1½ cm down.
    3. Join each palm centre to its three toe ends with light lines. Measure from the palm—not the elbow or box corner.
    4. Each group should spread like a fan. The right fan is wider and reaches nearly to the box bottom; the left ends about 1 cm higher.
    5. Leave space around each line for a rounded toe. These lines will be erased, rather than inked as seams.
    Next step
  12. A left-spreading right hind-foot fan and two small hidden left hind-foot rays join the two retained front-foot fans.
    Drawing 12 — Mark the back toe directionsView larger
    Pencil

    Mark the back toe directions

    Instructions for Drawing 12 — Mark the back toe directions
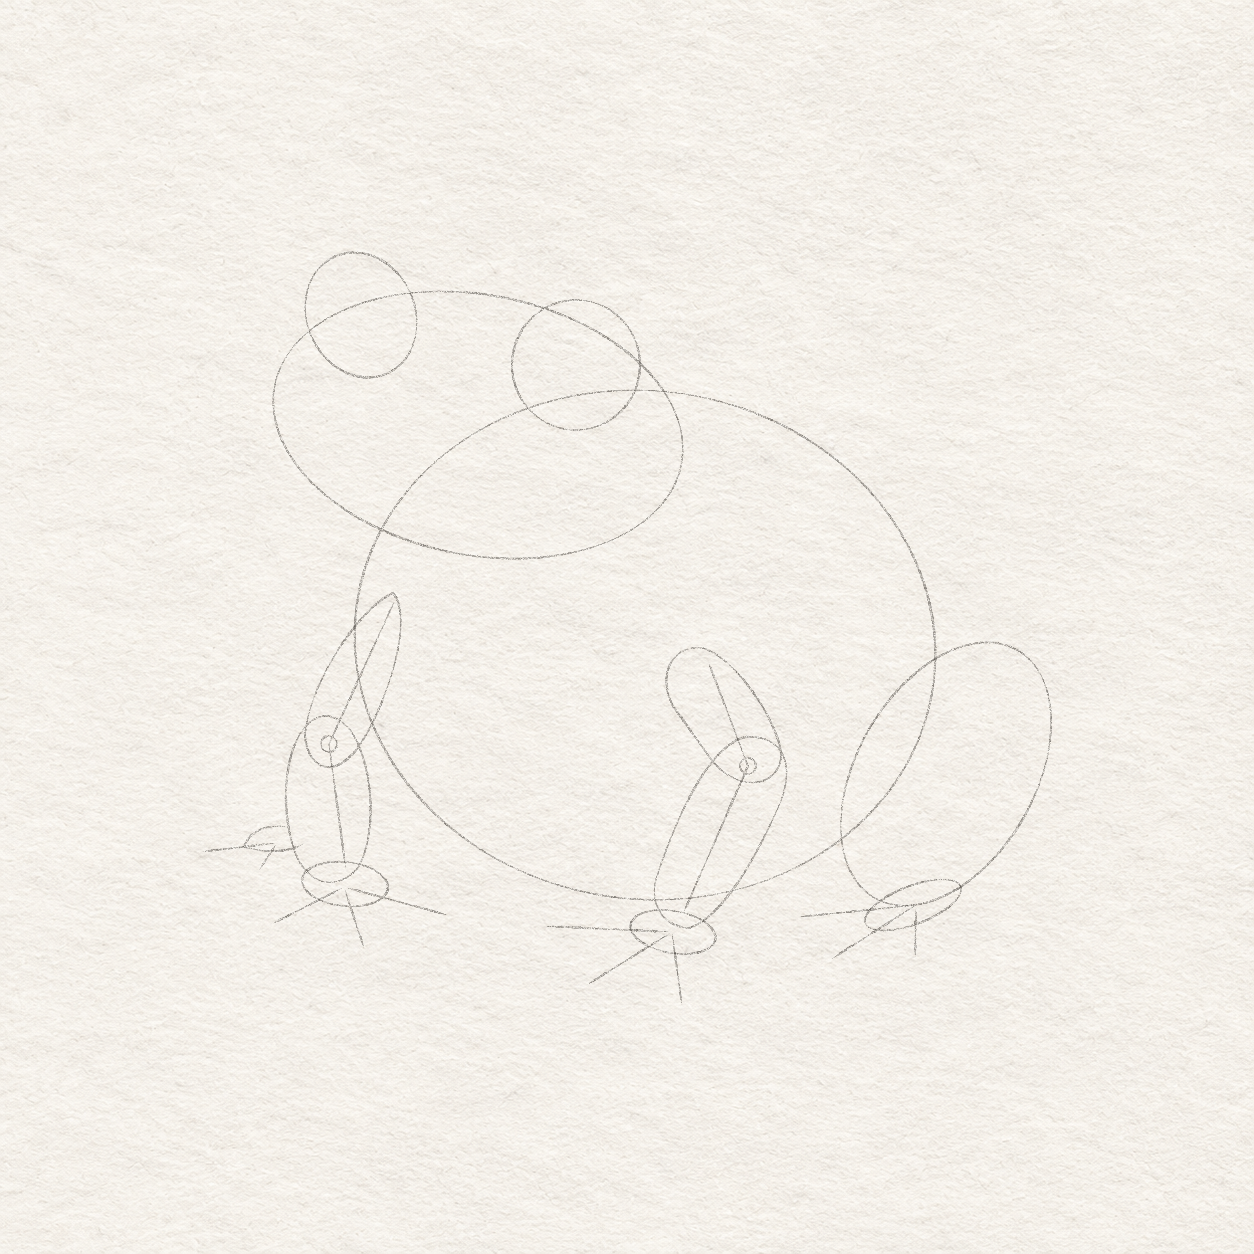
    1. From the right back-foot base centre, mark three ends: 2¼ cm left and ¼ cm down; 1¾ cm left and 1 cm down; directly below by 1 cm.
    2. Join that centre to the three ends. This fan spreads leftward beneath the folded leg.
    3. From the small hidden left wedge’s centre, draw only two lines: 1½ cm left and ¼ cm down; ½ cm left and ½ cm down.
    4. Keep the small group behind the left forearm. Do not add a complete third fan there.
    5. The right back toes end higher than the lowest right front toe. Keep all four foot groups separate.
    Next step
  13. The complete mass, joint, foot-base and toe-ray construction retained, with only the outer working rectangle and head/body straight crosses erased.
    Drawing 13 — Compare the pose, then erase the boxView larger
    Pencil

    Compare the pose, then erase the box

    Instructions for Drawing 13 — Compare the pose, then erase the box
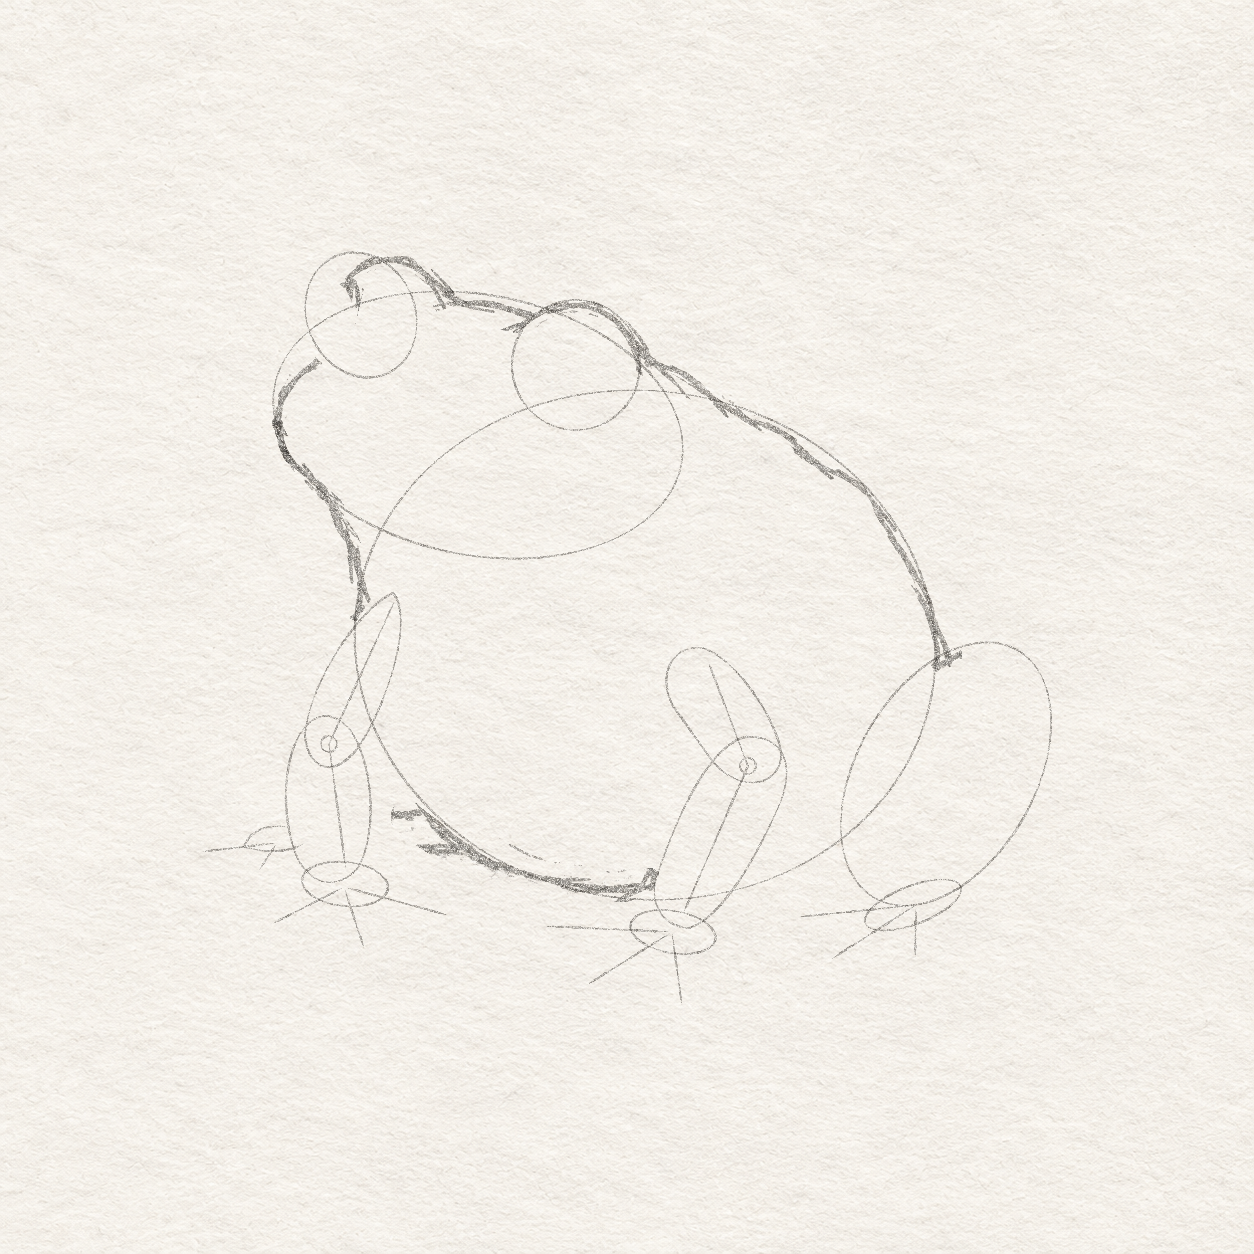
    1. Before erasing, compare the top eye, right folded leg, far-left hidden toe and lowest right front toe against the box.
    2. Keep the head and body overlapping, and leave the open gap between the forearms. Fix any misplaced outer point now.
    3. Erase the guide box and the straight head and body crosses.
    4. Keep all shape ovals, leg bend lines, foot bases and toe lines. You still need those to choose the outlines.
    Next step
  14. The same frog construction with chosen head brow back and belly contours added on the unchanged textured paper.
    Drawing 14 — Choose the head and body outlinesView larger
    Pencil

    Choose the head and body outlines

    Instructions for Drawing 14 — Choose the head and body outlines
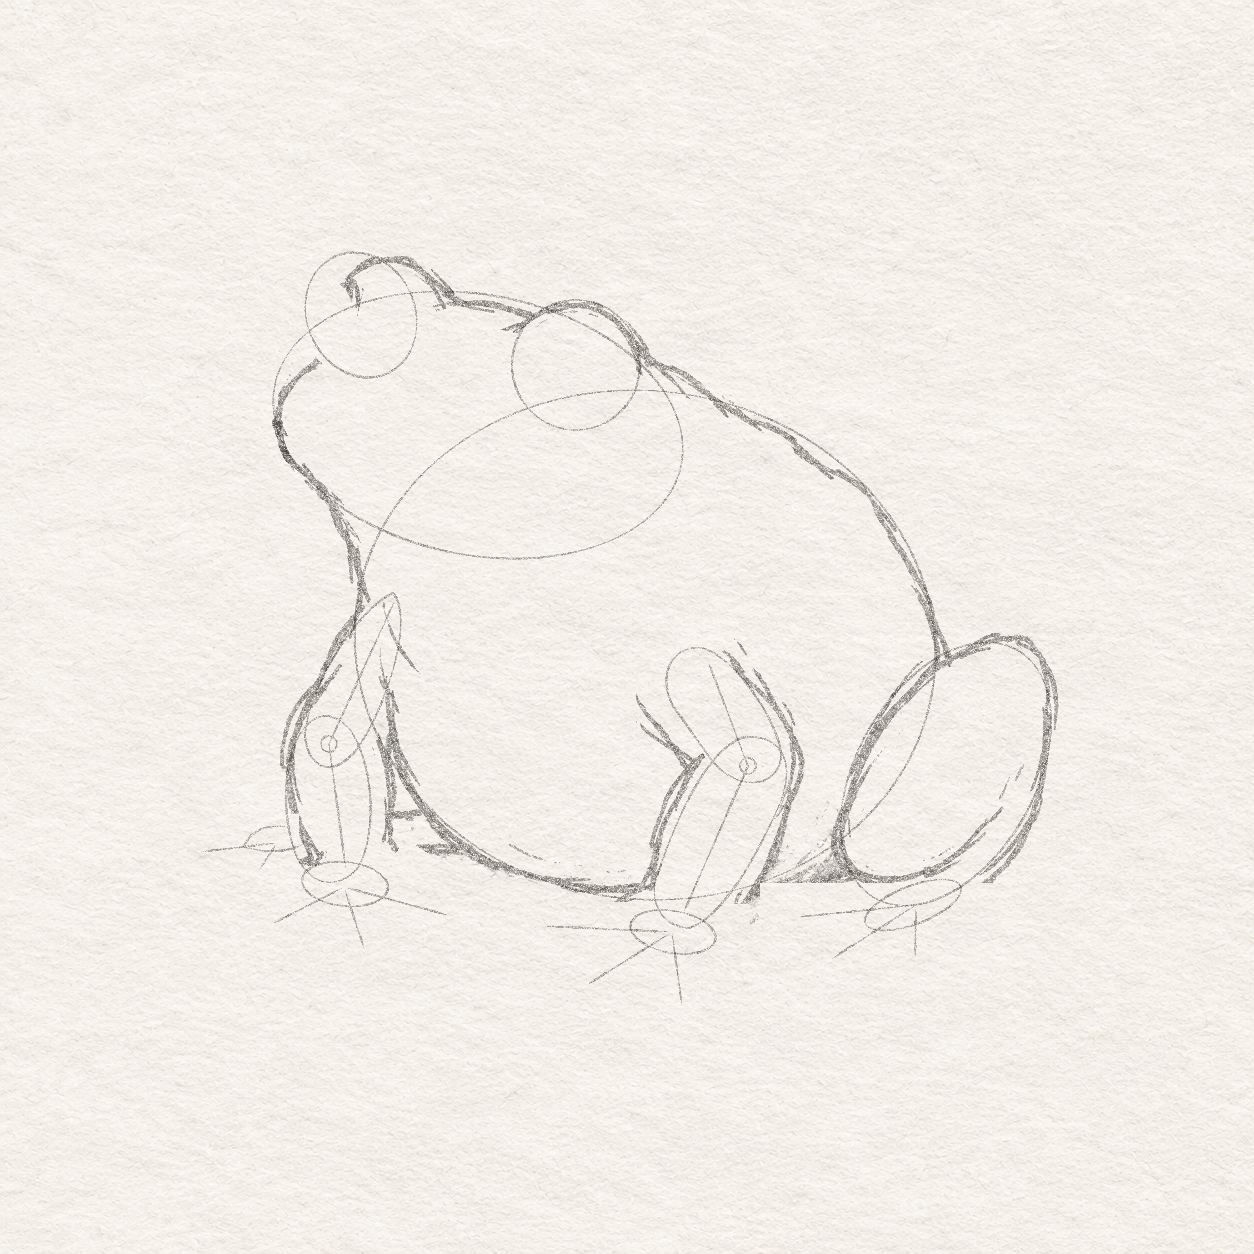
    1. Starting below the left eye mound, follow the head oval around its leftmost rounded turn to make the blunt snout.
    2. Below that turn, curve down toward the existing left shoulder. Leave the head oval here; do not follow its lower edge across the body.
    3. Round the brow over the tops of the two raised eye shapes.
    4. Choose the back and lower belly edges around the body oval. Stop where a leg sits in front: the back stays behind the folded leg, and the belly behind the forearms.
    5. Keep the light guides. Erase any short outline that accidentally crosses a front leg.
    Next step
  15. Selected pencil leg outlines around retained guides, with a small low pencil contact wedge between the right forearm and folded back leg; broad leg and belly interiors remain clear.
    Drawing 15 — Join the leg shapes into outlinesView larger
    Pencil

    Join the leg shapes into outlines

    Instructions for Drawing 15 — Join the leg shapes into outlines
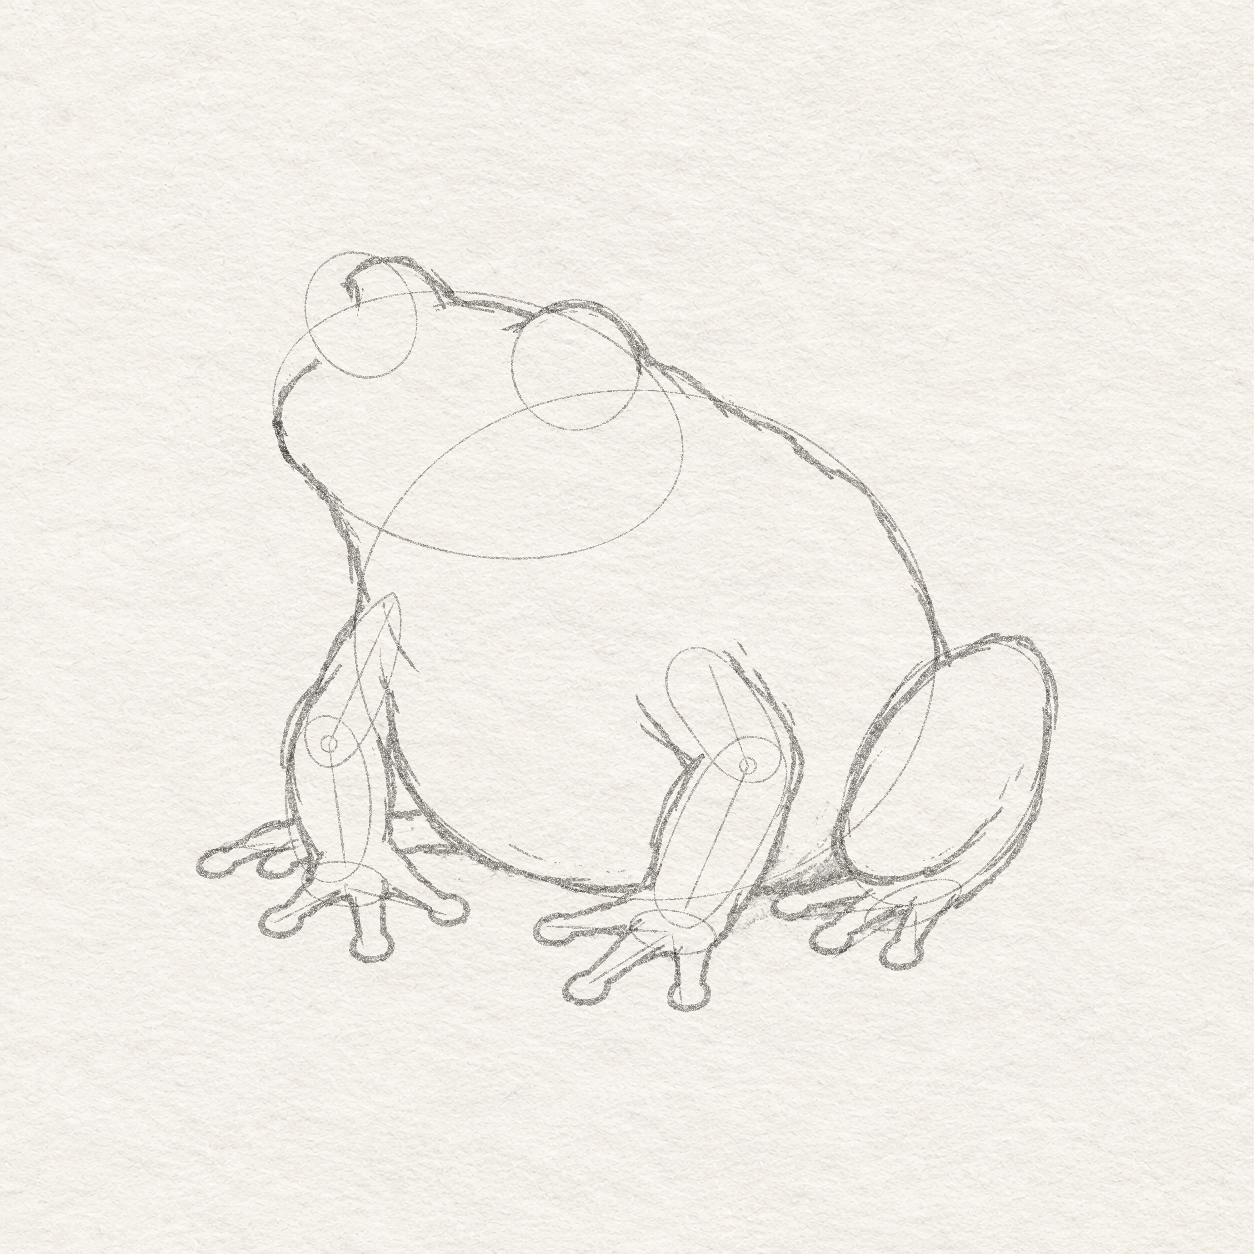
    1. Join each upper-arm shape to its forearm with smooth outside edges. Round the elbow instead of tracing the ovals’ pointed crossing.
    2. Narrow each front leg into its existing wrist and palm. Keep the right forearm leaning down-left and the left one more upright.
    3. Follow the folded back leg’s outer curve down toward its slanted foot base.
    4. Keep the front legs in front of the belly, with the central gap open. The left forearm hides part of the small back-foot wedge.
    5. Leave the inner bend lines light. If a join pinches, smooth it without moving the wrist or elbow.
    6. After joining the leg outlines, plan a small shadow between the right forearm and folded back leg. From the leg’s lower-left curve, let it reach about 1¾ cm left towards the forearm and rise no more than ¾ cm against the leg.
    7. Shade this low wedge with short, close pencil strokes, tapering it left. Shape its lower edge freehand, roughly level with the leg’s bottom. This is a shadow, not a toe outline. Keep the broad leg and belly clear.
    Next step
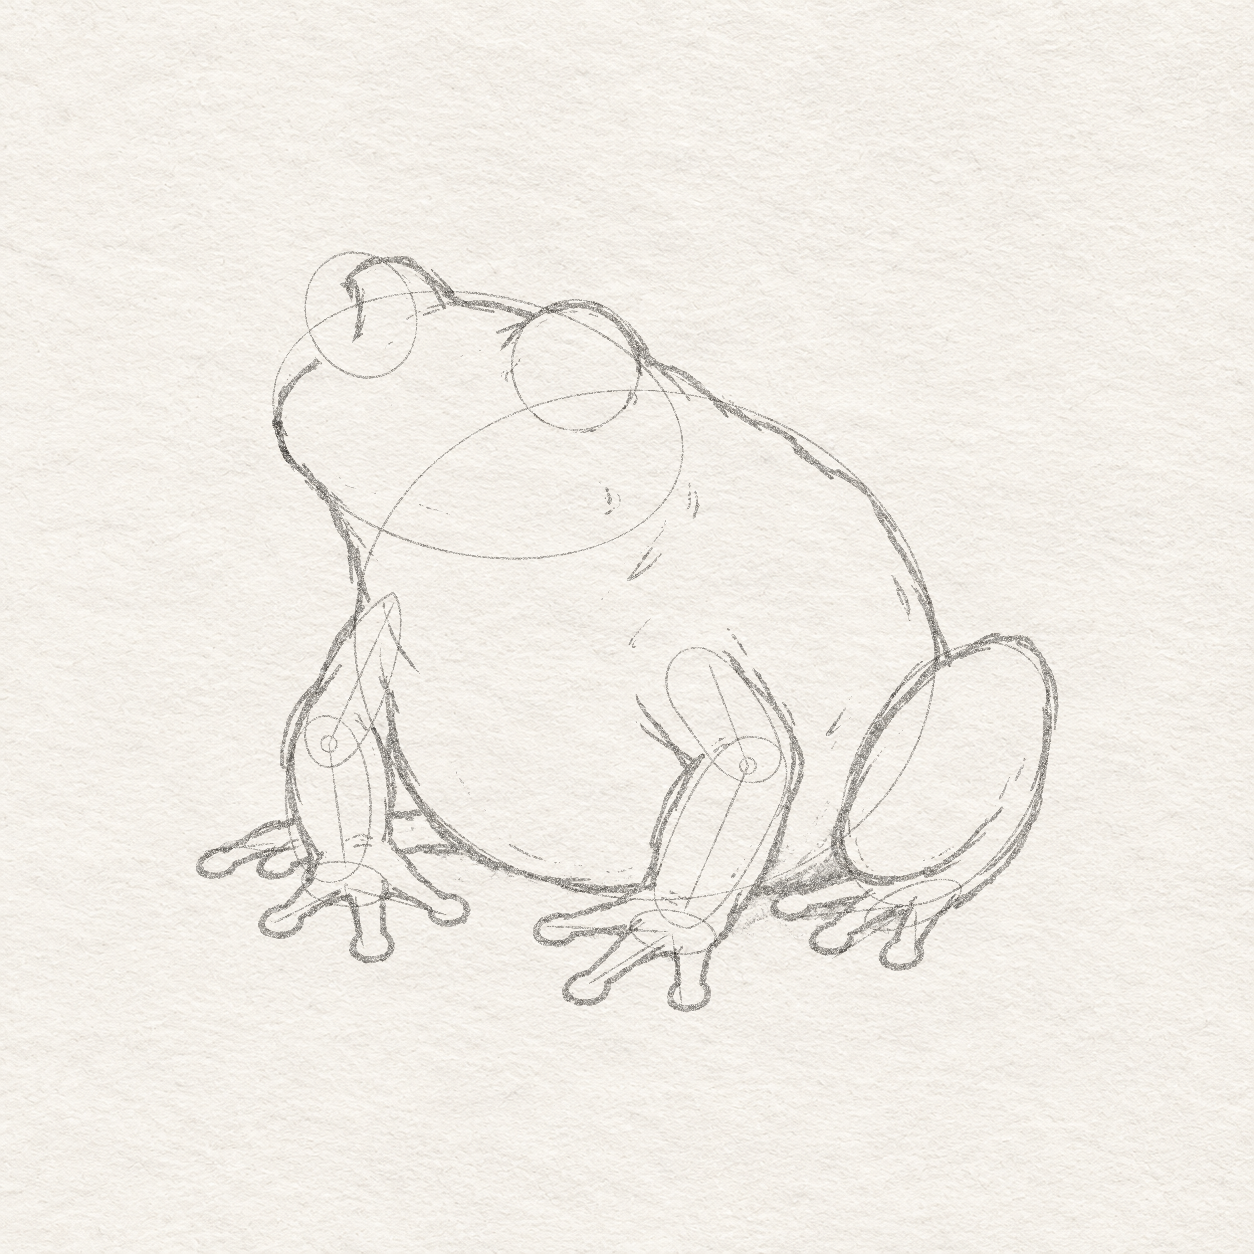
  16. Rounded pencil toe outlines around the retained rays, with small free-edged contact accents in exterior paper near the right back toes; digit interiors and their farther separations stay clear.
    Drawing 16 — Draw rounded outlines around the toe linesView larger
    Pencil

    Draw rounded outlines around the toe lines
    Instructions for Drawing 16 — Draw rounded outlines around the toe lines

    1. Start with the right front foot. Draw two sides around each toe line, about ½ cm apart, and round them together near its planned end.
    2. Return to the palm with a shallow U-shaped gap before starting the next toe.
    3. Repeat for the left front foot, right back foot, then the small hidden left group. That hidden group shows only two toes.
    4. Keep each guide line inside its toe. Do not darken it as a middle seam.
    5. If two toes join together, erase their inner sides and reopen the gap without moving the palm.
    6. Outside the right back foot, place a small contact shadow just above the upper left-pointing toe, beneath the folded leg. Follow the nearby toe edge for up to 1½ cm, keeping the shadow about 3 mm deep. Shape it freehand; no closed pocket or extra guide is needed.
    7. Use short pencil strokes and taper the accent into the surrounding paper. You may add a second, shorter accent beside the next toe root, up to 1 cm long. Shorten either accent to fit your toe shapes. Leave every toe interior and the clear space farther out between the toes unshaded.
    Next step
  17. Short tapered joint and arm/body accents, an inside-back echo above the near shoulder, and sparse optional brow and cheek/upper-chest marks; no new limb or toe boundary appears.
    Drawing 17 — Add a few small crease marksView larger
    Pencil

    Add a few small crease marks

    Instructions for Drawing 17 — Add a few small crease marks
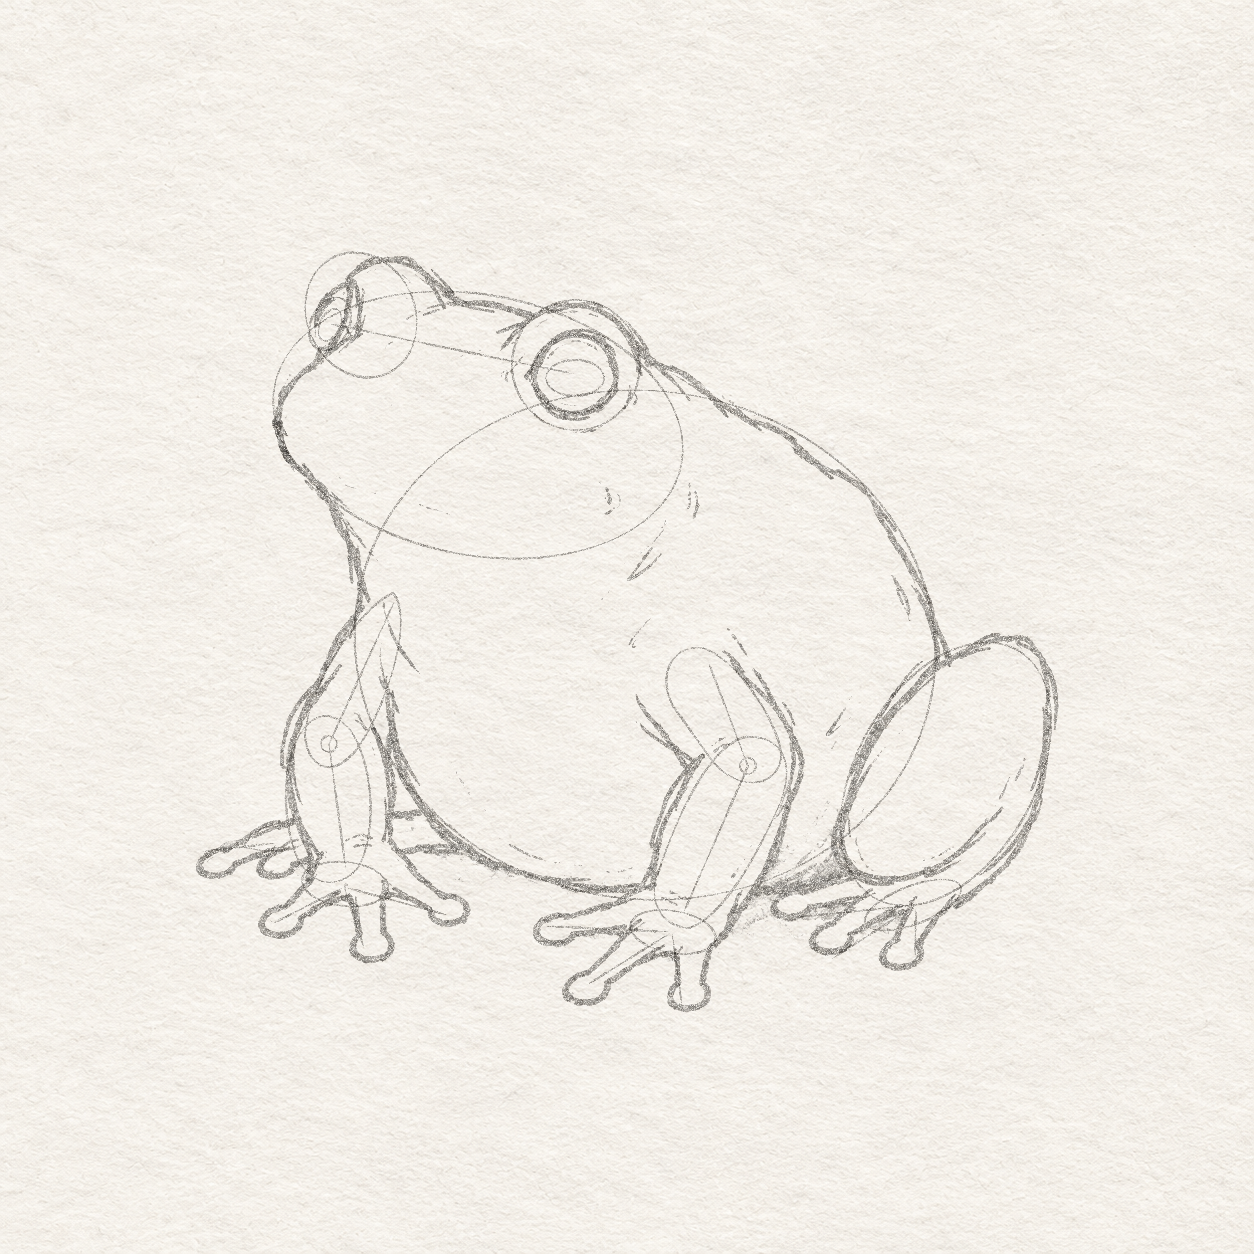
    1. Add a few short curves beside the elbow bends, wrist-to-palm joins and arm-to-body joins. Follow the nearby outline’s curve.
    2. Just inside the body's right outline, above the folded leg and a little above the right shoulder, add one short downward mark.
    3. You may add a few tiny marks inside the brows and below the right eye mound, above the shoulders.
    4. Keep these optional marks short and separate. Shorten or omit any mark that looks like a cut or another outside edge.
    Next step
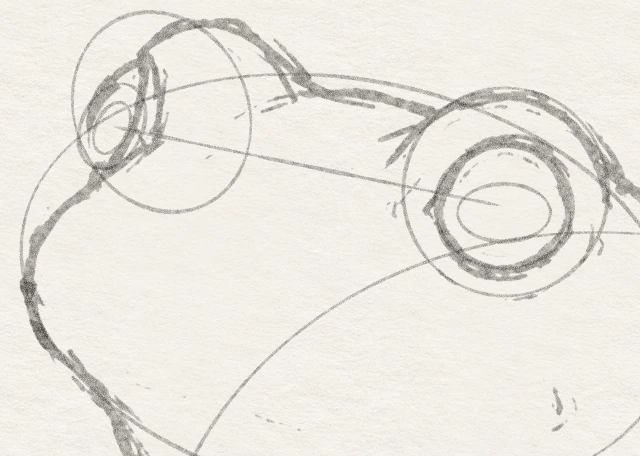
  18. Outer opening guides, a center alignment and selected unfilled eye rims, with a broad near pupil guide and narrow tilted far pupil guide inside them.
    Drawing 18 — Place the smaller eye openingsView larger
    Enlarged current frog eye selection with retained eye forms, selected visible openings and light pupil placements.
    Detail 18.1 — Face construction and contoursEnlarged from this same step. The larger eye forms locate volume; the selected visible openings sit inside them. Compare the narrower tilted far opening, pupil placements and the gaps that remain light.
    Pencil

    Place the smaller eye openings

    Instructions for Drawing 18 — Place the smaller eye openings
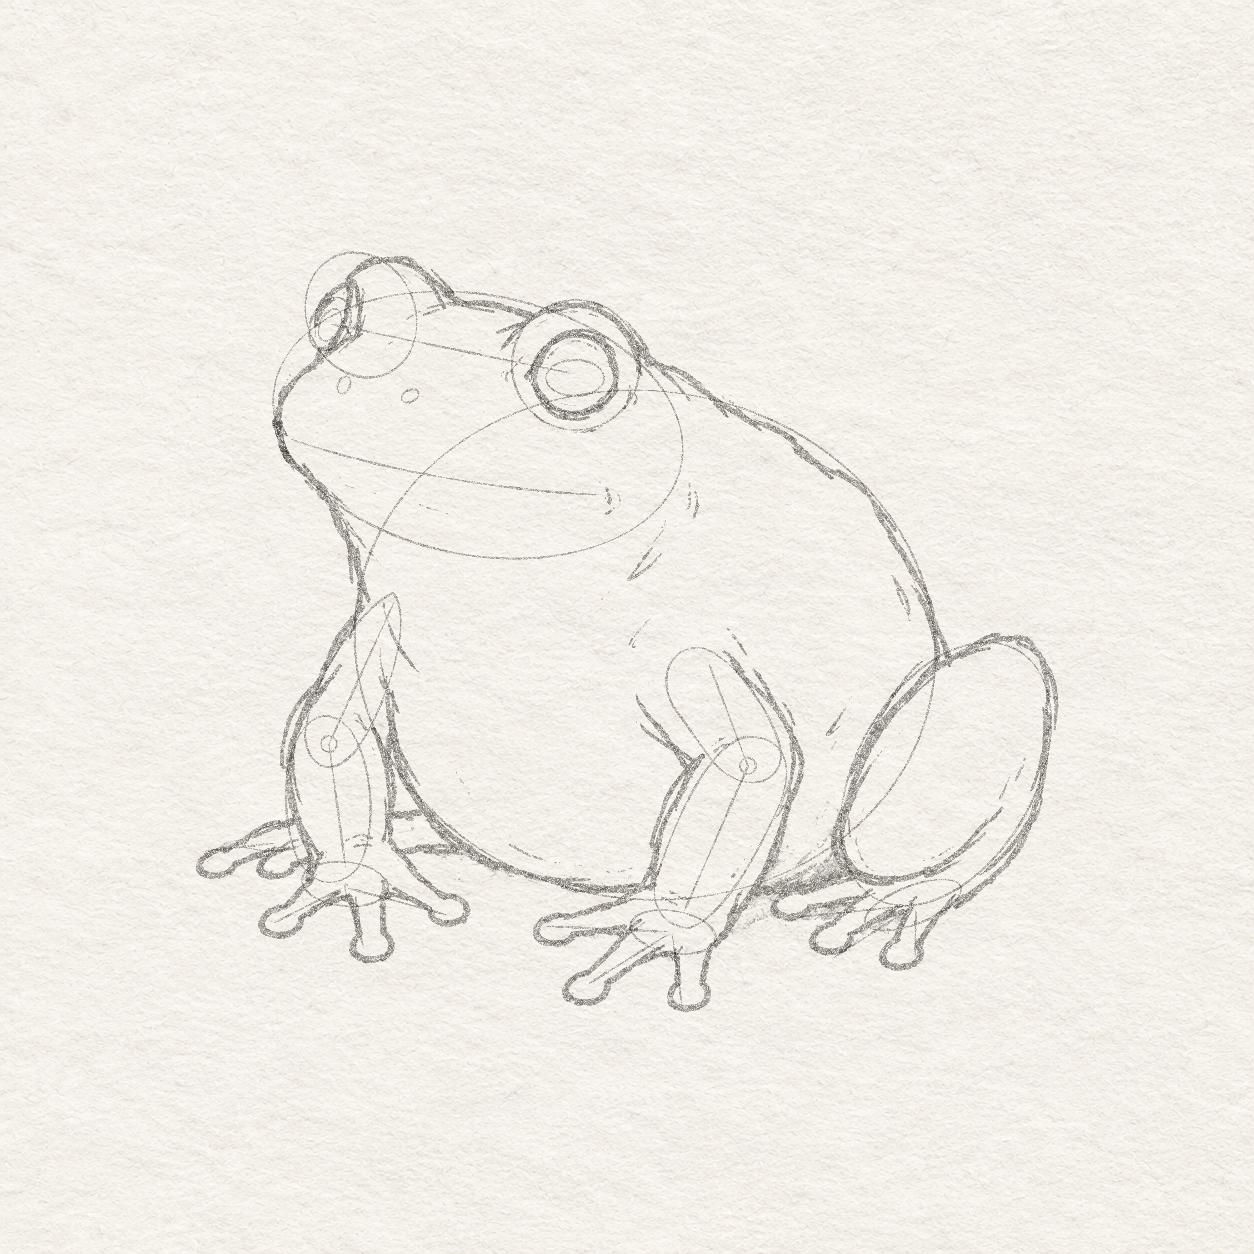
    1. Inside the right mound, place an opening centre ¼ cm below the mound’s centre. Allow a roundish opening 1¾ cm wide and 1½ cm high around that centre. Shape it by eye: curve freehand over the top, around the right side and bottom, then up the left side to close the loop.
    2. Inside the left mound, mark the opening centre ⅝ cm left and ¼ cm down from the mound centre. Do not draw the opening yet.
    3. Its top leans ¼ cm right of the opening centre and its bottom ¼ cm left. Within about ¾ cm of width and 1 cm of height, draw that tilted light oval freehand by eye. Curve from its tilted top around the right side to the tilted bottom, then return around the left side to close it. This is the small opening, not the large mound oval.
    4. Inside the right opening, allow an empty horizontal pupil oval 1¼ cm wide and ¾ cm high, centred slightly below the opening’s centre. Shape it freehand by eye: round from the left end over its shallow top, around the right end and back along the shallow bottom.
    5. Inside the left opening, allow an empty pupil oval ⅜ cm wide and ⅝ cm high, also slightly below its opening centre and leaning top-right to bottom-left. Shape the loop freehand by eye: curve from the upper-right end around one side to the lower-left end, then return around the other side.
    6. Lightly join the two opening centres. The line falls about 1 cm to the right over 5 cm across; it is a temporary alignment guide.
    7. The small opening ovals set each rim's size and position. Draw a firmer rim close around each small opening oval, tucking its upper arc under the brow. Keep both pupils inside these rims; leave the large mound guides light.
    8. Leave the pupils empty and the light guides visible. If a pupil crosses a rim, make it smaller before filling.
    Next step
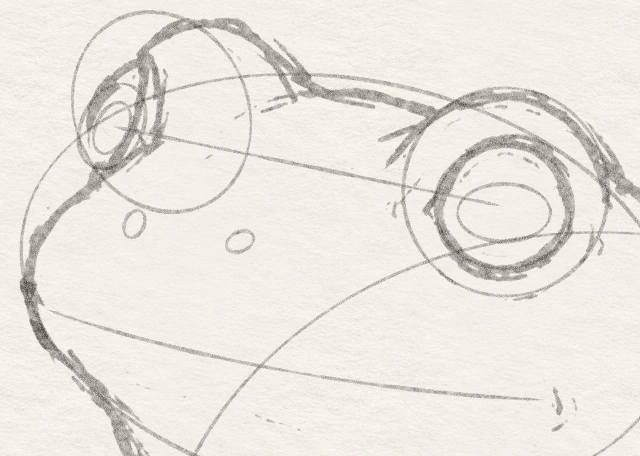
  19. A shallow mouth guide begins just inside the snout turn and ends below the near eye; two small nostril guides above it have different tall and wide directions.
    Drawing 19 — Place the mouth and nostrils lightlyView larger
    Enlarged current frog face with light nostril placement ovals, eye guides and the inset mouth-guide left end.
    Detail 19.1 — Face construction and contoursEnlarged from this same step. The light nostril ovals locate the two positions. The shallow mouth guide starts inside the snout; its short left gap is deliberately joined during the next refinement.
    Pencil

    Place the mouth and nostrils lightly

    Instructions for Drawing 19 — Place the mouth and nostrils lightly
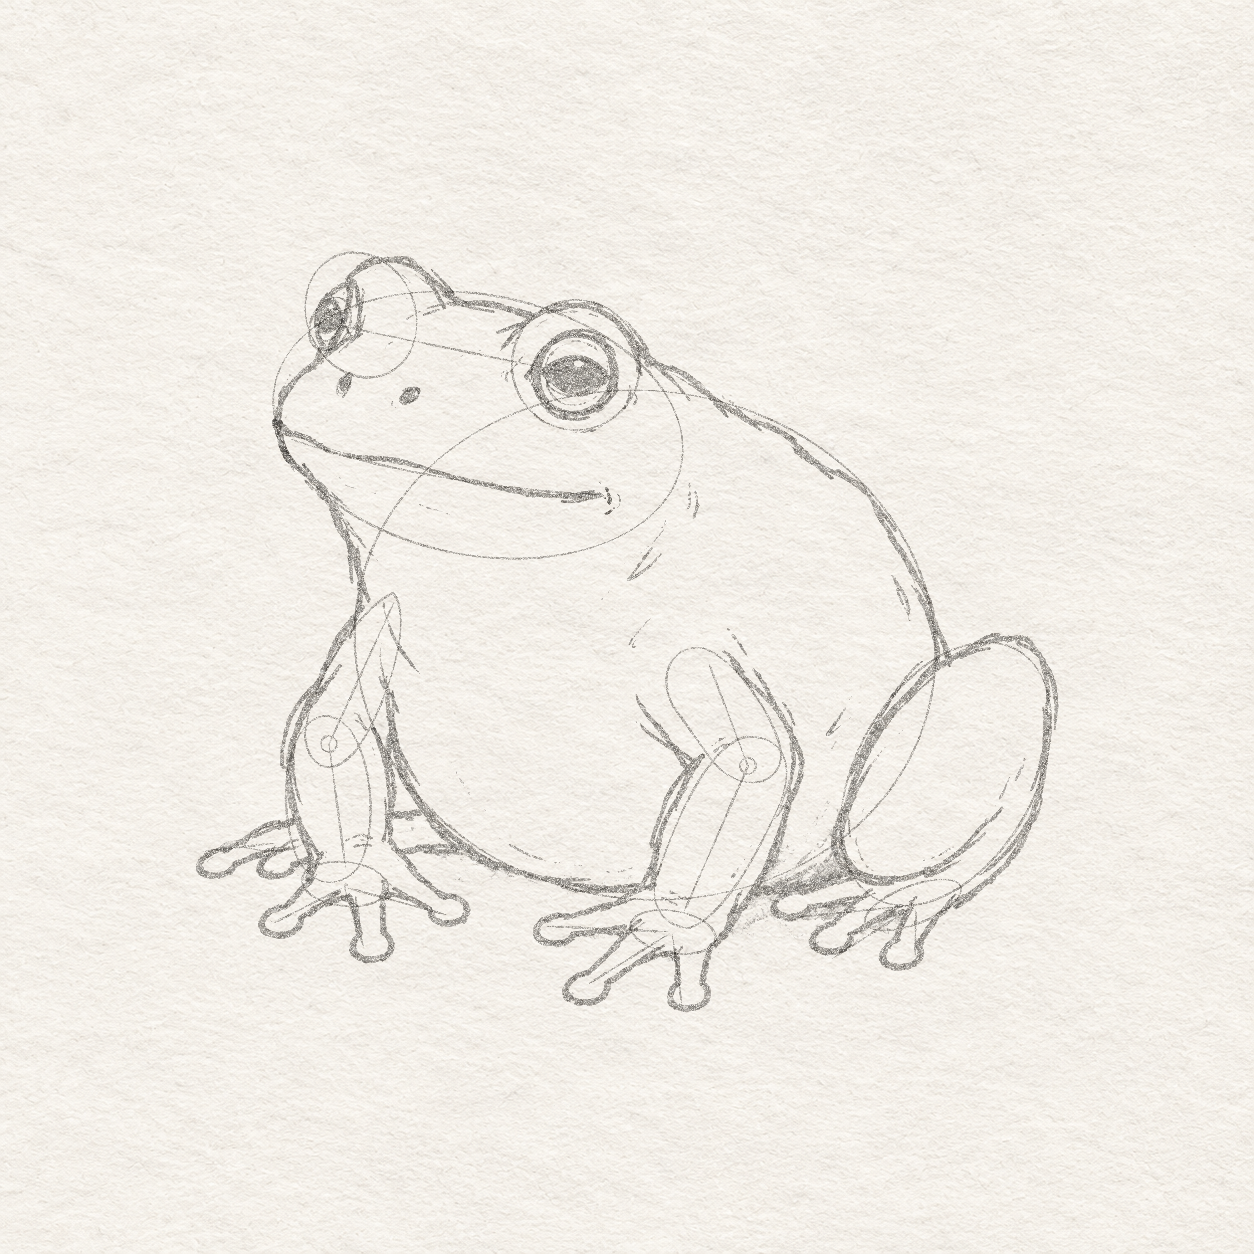
    1. From the snout's leftmost rounded turn, mark the mouth start ¼ cm right and ¼ cm down, just inside the outline.
    2. Mark its other end ½ cm right and 2½ cm below the right eye’s opening centre. Join them with a shallow curve that falls gently to the right.
    3. From the mouth’s left start, place the first nostril 1¼ cm right and 1 cm up. Place the second another 1¼ cm right and ¼ cm down.
    4. Use tiny light ovals, ¼–⅜ cm long. Shape each freehand by eye: curve along one side, round the end and return along the other side to close the small loop. Make the first taller, leaning right at the top; make the second wider, rising slightly to the right.
    5. Keep both nostrils above the mouth and separate from the eyes. Leave the small gap between the mouth guide and snout for the next step.
    Next step
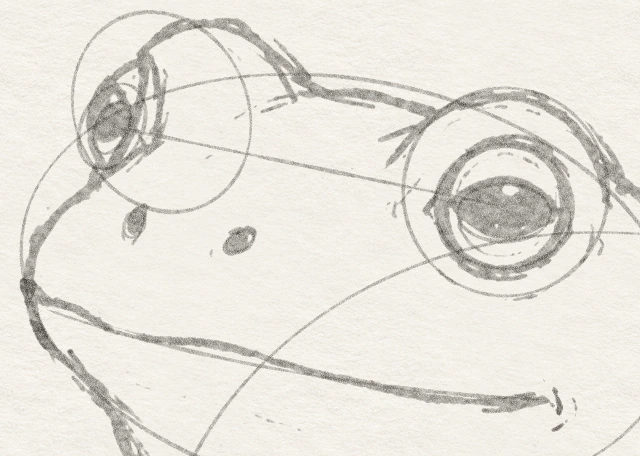
  20. Dark pupils retain small upper highlights inside the previously chosen rims; the mouth and two nostrils are refined in their established positions.
    Drawing 20 — Darken the pupils, mouth and nostrilsView larger
    Enlarged refined frog face with a joined mouth, dark pupils around white highlights, nostrils and retained light construction.
    Detail 20.1 — Face construction and contoursEnlarged from this same step. The darker mouth now joins the selected snout. Preserve the small white eye highlights while darkening the pupils and nostrils; the light construction still remains.
    Pencil

    Darken the pupils, mouth and nostrils

    Instructions for Drawing 20 — Darken the pupils, mouth and nostrils
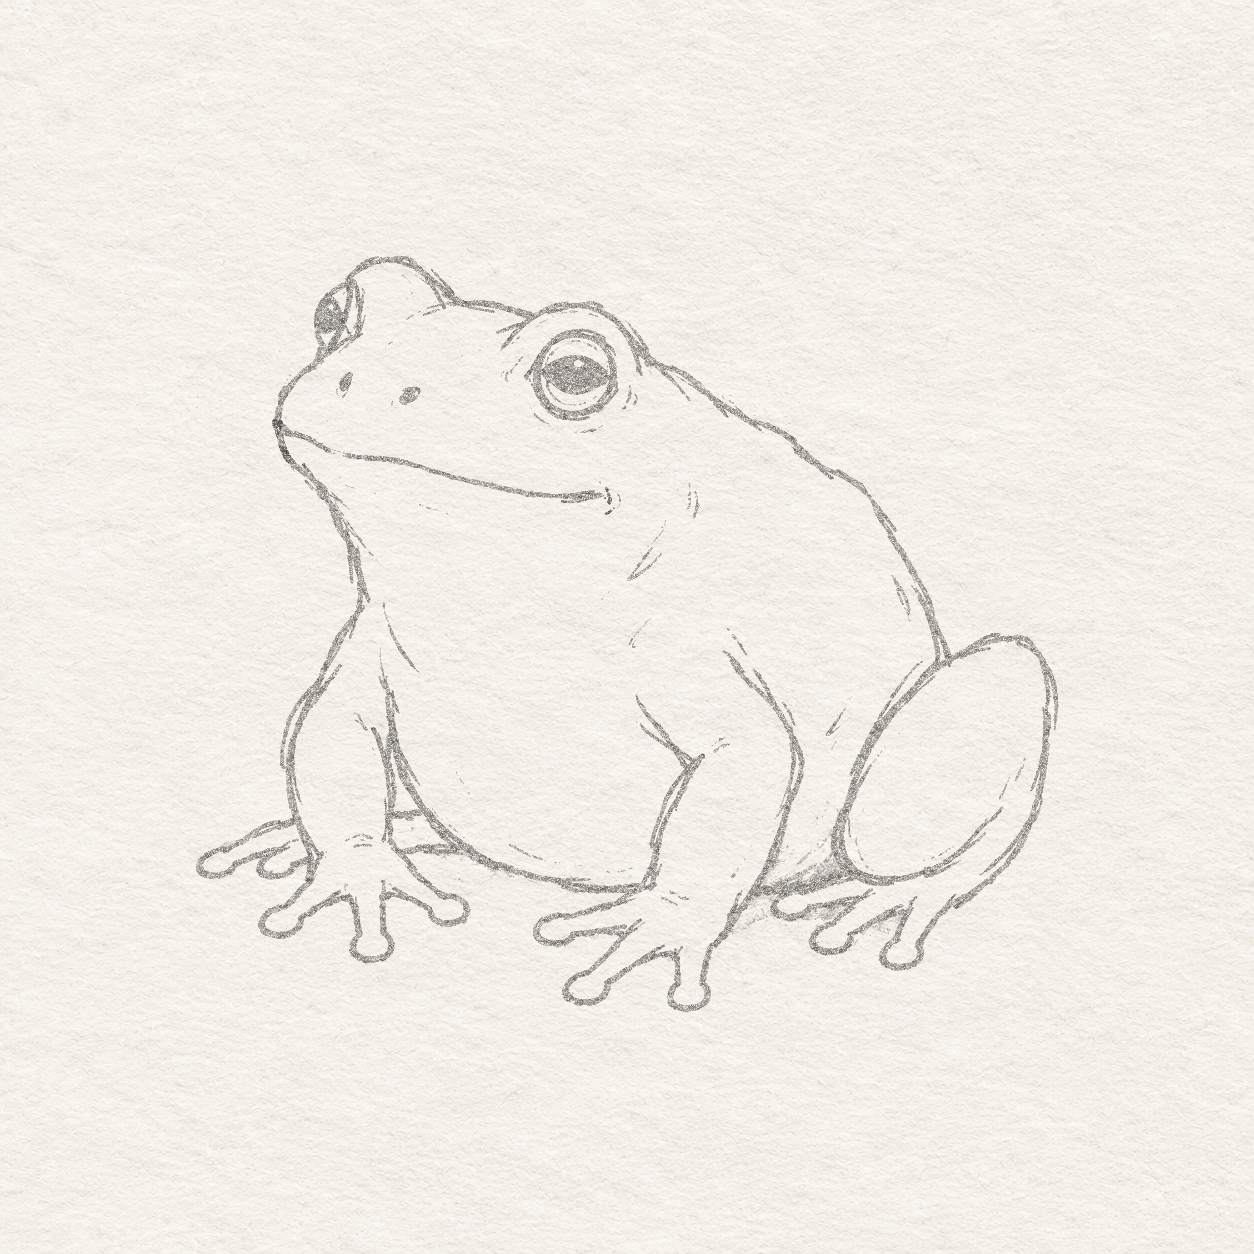
    1. Leave a tiny white highlight near the top of each pupil oval. Darken around those spaces, keeping the right pupil broad and the left one narrow and tilted.
    2. Extend the mouth’s left end ¼ cm up and ¼ cm left to meet the snout. Follow the shallow curve to its right end below the right eye.
    3. Darken the two nostrils where you placed them, keeping them separate from the mouth.
    4. Keep the light face guides until the next step. If pencil filling closes a highlight, erase that small area and reopen it before ink.
    Next step
  21. The same finished pencil frog without construction guides, retaining selected outlines and small facial details on the unchanged paper.
    Drawing 21 — Erase the construction guidesView larger
    Enlarged cleaned frog face showing selected contours, eye highlights, nostrils and mouth after guide erasure.
    Detail 21.1 — Face construction and contoursEnlarged from this same step. Construction guides have been removed. Keep the selected eye rims, white highlights, nostrils and shallow mouth as the clean drawing for pen.
    Pencil

    Erase the construction guides

    Instructions for Drawing 21 — Erase the construction guides
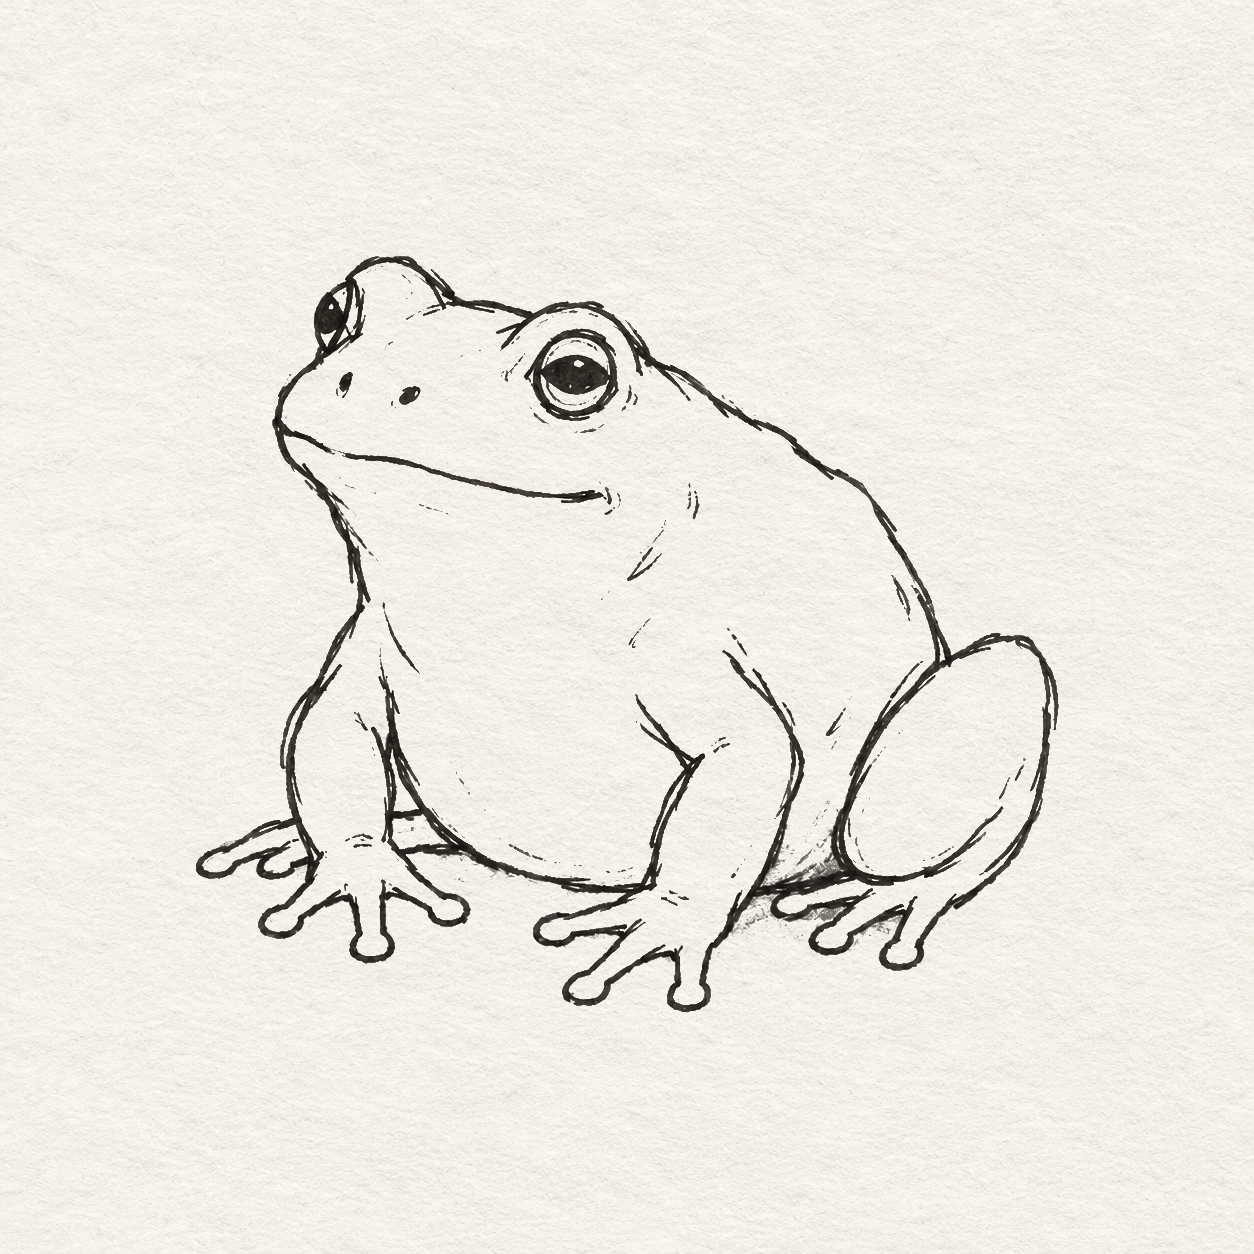
    1. Gently erase the light head, body, eye-mound and folded-leg ovals.
    2. Erase the leg bend lines, overlapping arm shapes, foot bases and toe lines.
    3. Erase the facial alignment and placement guides, including the line between the eye openings.
    4. Keep the chosen outlines, pupils, white highlights, mouth, nostrils and short crease marks.
    5. If you lift a wanted outline, restore just that pencil edge before inking. Keep the front limbs in front of the belly and the small back foot partly hidden.
    Next step
  22. Black marker outlines and filled facial marks, with the small forearm/haunch and right hind-toe-base contact fills; broad gray shadows and spot fills have not been added.
    Drawing 22 — Trace your chosen pencil linesView larger
    Enlarged current frog inked eye contours, preserved white highlights, nostrils and snout-to-mouth join.
    Detail 22.1 — Face construction and contoursEnlarged from this same step. Follow the selected contours with pen, preserving the narrow far eye and white highlights. The mouth joins the snout without an extra unplanned gap.
    Marker

    Trace your chosen pencil lines

    Instructions for Drawing 22 — Trace your chosen pencil lines
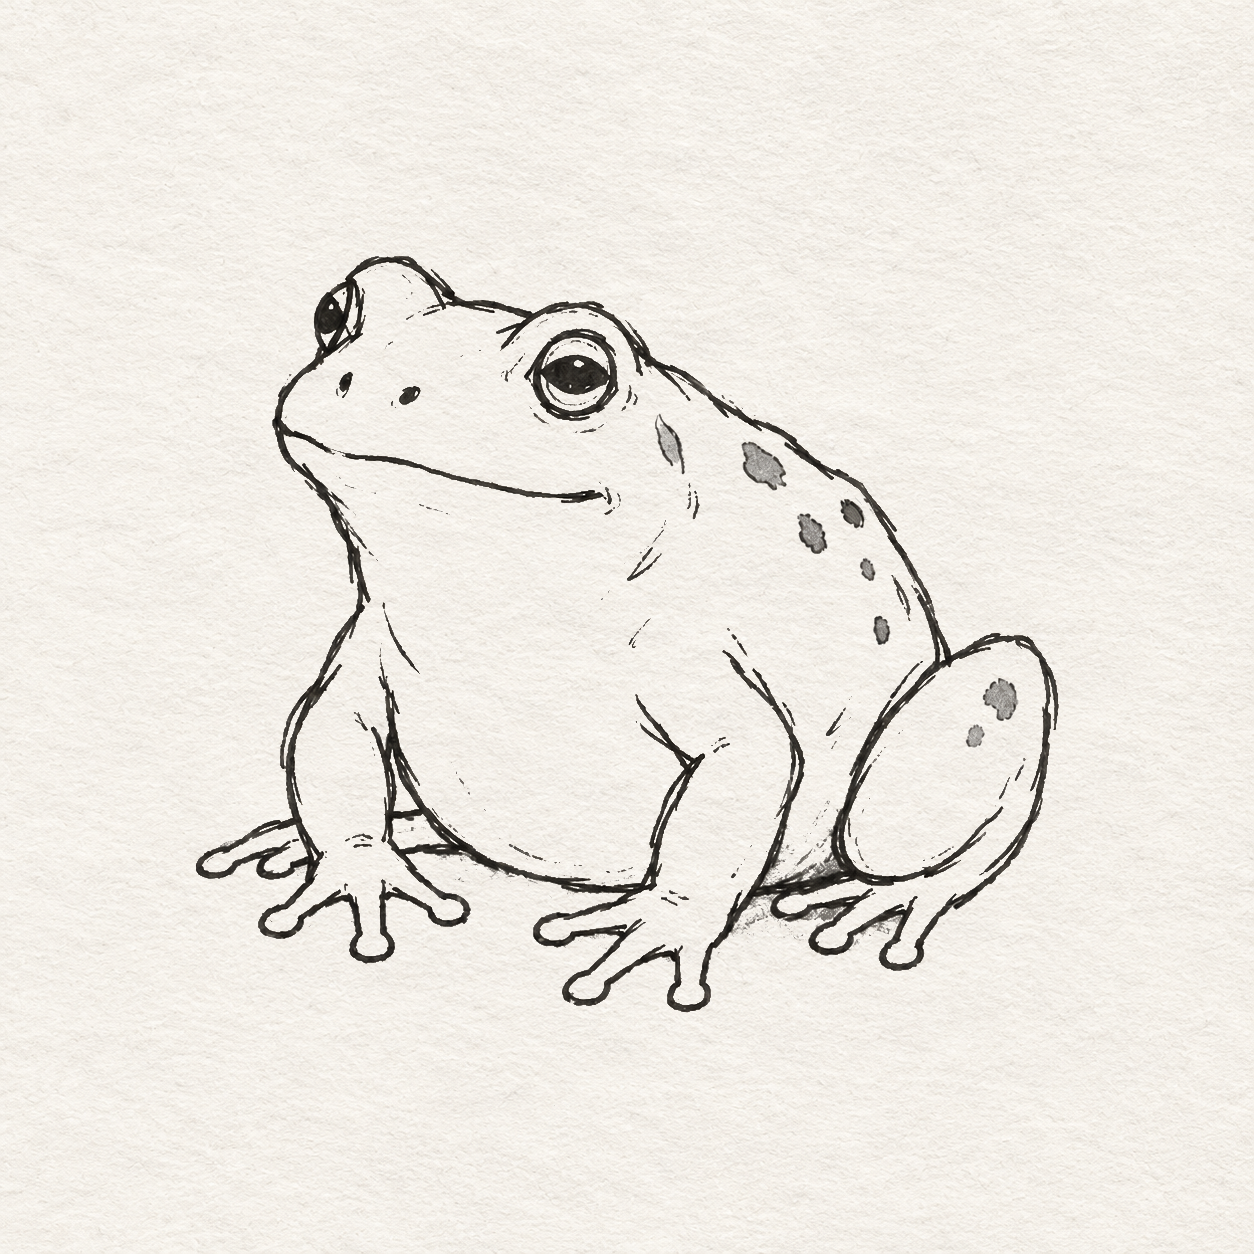
    1. Test the fine black marker on scrap paper first.
    2. Trace the chosen head and body outlines, including the back and belly, then the leg and toe outlines, eye rims, mouth and short crease marks. Keep the overlap stops and leave construction lines out.
    3. Darken the pupils around their white highlights, then the nostrils. Keep the toe gaps open.
    4. After tracing those outlines, fill the same small pencil-shadow wedge between the right forearm and folded leg with black marker. Follow its existing pencil bounds with short strokes, keeping the broad leg white.
    5. With black marker, follow only the small contact accents you chose in pencil beside the right back toes. Keep the white toe interiors and the clear outer spaces unfilled. These free-edged accents may vary with your toe shapes; the later gray shadow softens the surrounding area.
    6. Use a relaxed grip; turn the paper for curves. Leave small wobbles rather than thickening every line.
    7. Let the ink dry. Try a gentle eraser pass on a similar pen patch on scrap first; when it does not smear, erase the remaining pencil.
    Next step
  23. Sparse irregular spots outlined dark and filled light gray within the completed frog’s upper back and folded right leg, with the forearms and broad interiors clear.
    Drawing 23 — Add a few irregular spotsView larger
    Marker

    Add a few irregular spots

    Instructions for Drawing 23 — Add a few irregular spots
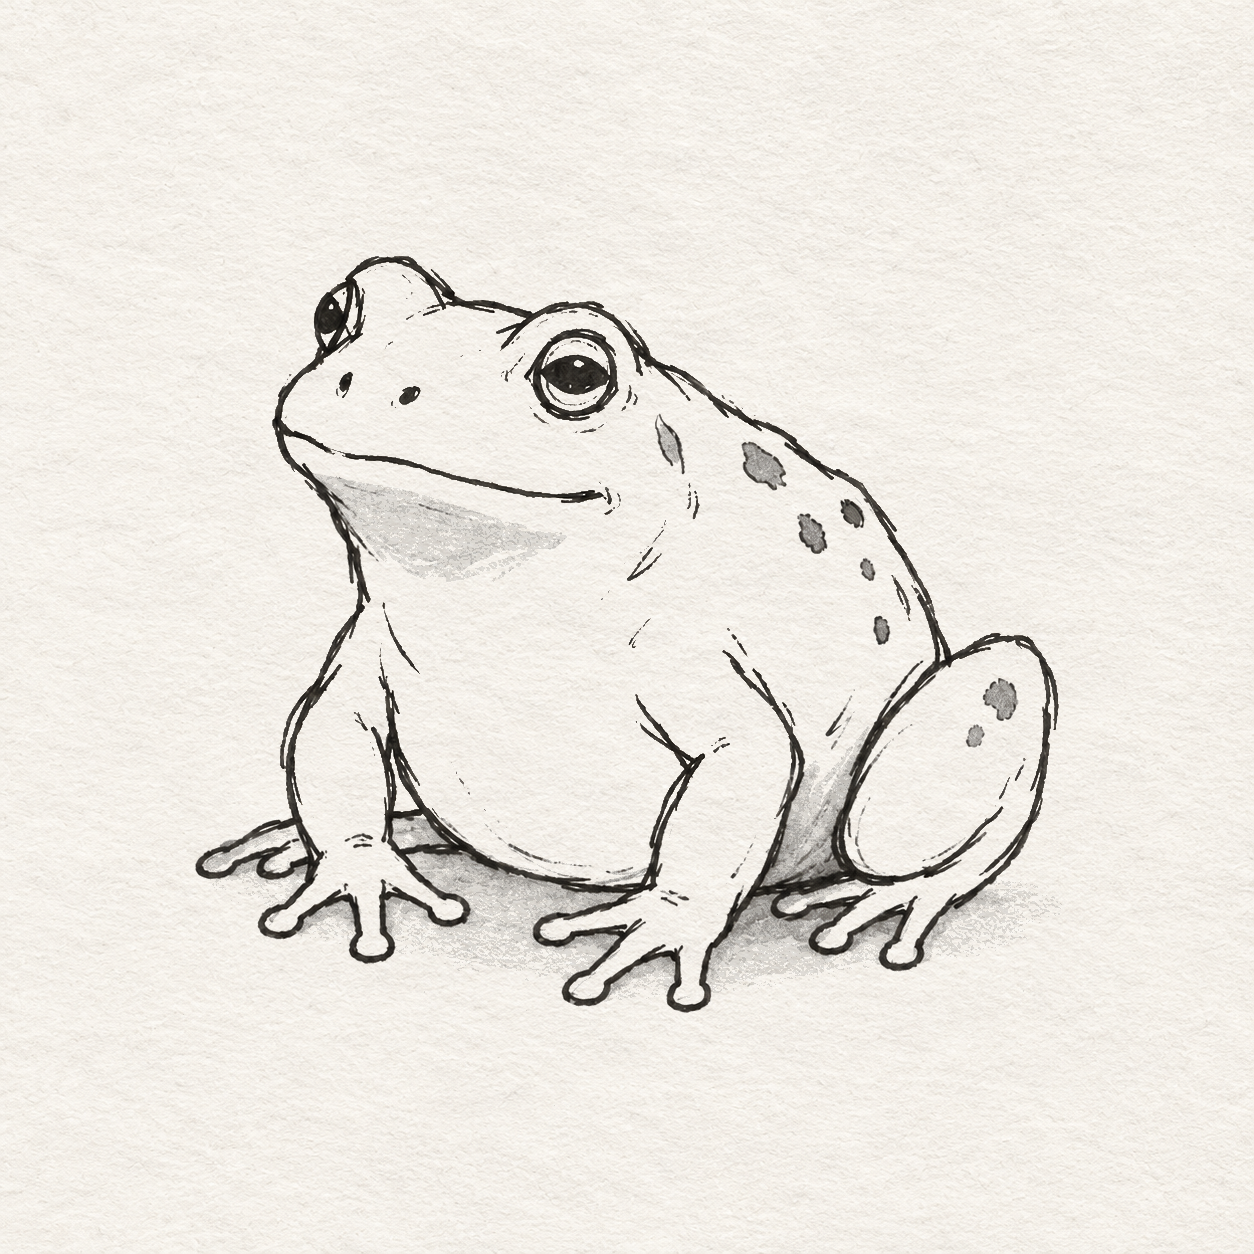
    1. Inside the upper back and folded right leg, draw a few small closed loops freehand by eye. Curve around each uneven rounded spot and return to its start, leaving plenty of blank paper between them. You may add one narrow spot below and to the right of the right eye, as in the picture.
    2. Test the gray marker on scrap paper. Fill each enclosed spot with light gray, keeping its dark outline thin and the paper between spots clear.
    3. Vary the shapes and use only a few larger spots. Their exact positions may differ from the picture.
    4. Keep the rest of the face and belly mostly clear. Stop if spots hide the leg shapes; ignore paper flecks and erased guide crossings.
    Next step
  24. Restrained gray beneath the head, at the lower belly and narrow forearm/haunch overlap wedge, with a soft toe-contact shadow and the broad haunch left light.
    Drawing 24 — Add a little gray shadowView larger
    Finish

    Add a little gray shadow

    Instructions for Drawing 24 — Add a little gray shadow

    1. Test the gray on scrap paper. Add a little beneath the head and along the lower belly beside the right forearm.
    2. Shade the narrow gap between that forearm and the folded back leg. Keep the broad leg and body interiors light.
    3. Add a small soft shadow directly under the feet. Make it darkest at the toe contacts and let it fade outward.
    4. Keep the gray lighter than the outline. You can stop here without adding more shading.
    Back to the steps

If something looks off

The proportions drift as I add smaller parts

Follow the listed centimetre measurements throughout. Recheck the working box, head tips and body overlap before the proportion-check stage. Compare opposite extremities, not only the last small mark. Lift a misplaced guide lightly before choosing its contour.

I cannot make a smooth oval

Return to the four-tip head example. Rehearse the whole loop, touch the tips with a light continuous stroke and round between them. Keep the center and tips fixed; replace only a bulging arc rather than moving every guide.

The legs or feet look tangled

Identify two front wrists and two separate hind-foot bases. The tiny hidden hind foot sits behind the far arm. Check the open wedge between the forearms and the different toe-tip levels before outlining any foot.

The eyes look like matching circles

The raised mounds locate volume. The far visible opening shifts toward the snout and tilts down-left beneath its brow; it does not trace the whole mound. Check both unfilled rims before reserving highlights and filling pupils.

Do I have to measure every spot?

No. This reference’s structure uses measured anchors, but individual skin spots are deliberately irregular. Keep their regions and sparse density while allowing small differences.