A black marker makes decisions visible. Every contour, gap, and filled shape carries more weight than a faint pencil guide, so choosing what to leave out matters as much as choosing what to draw. A simple silhouette and a few well-placed darks can carry a whole subject.
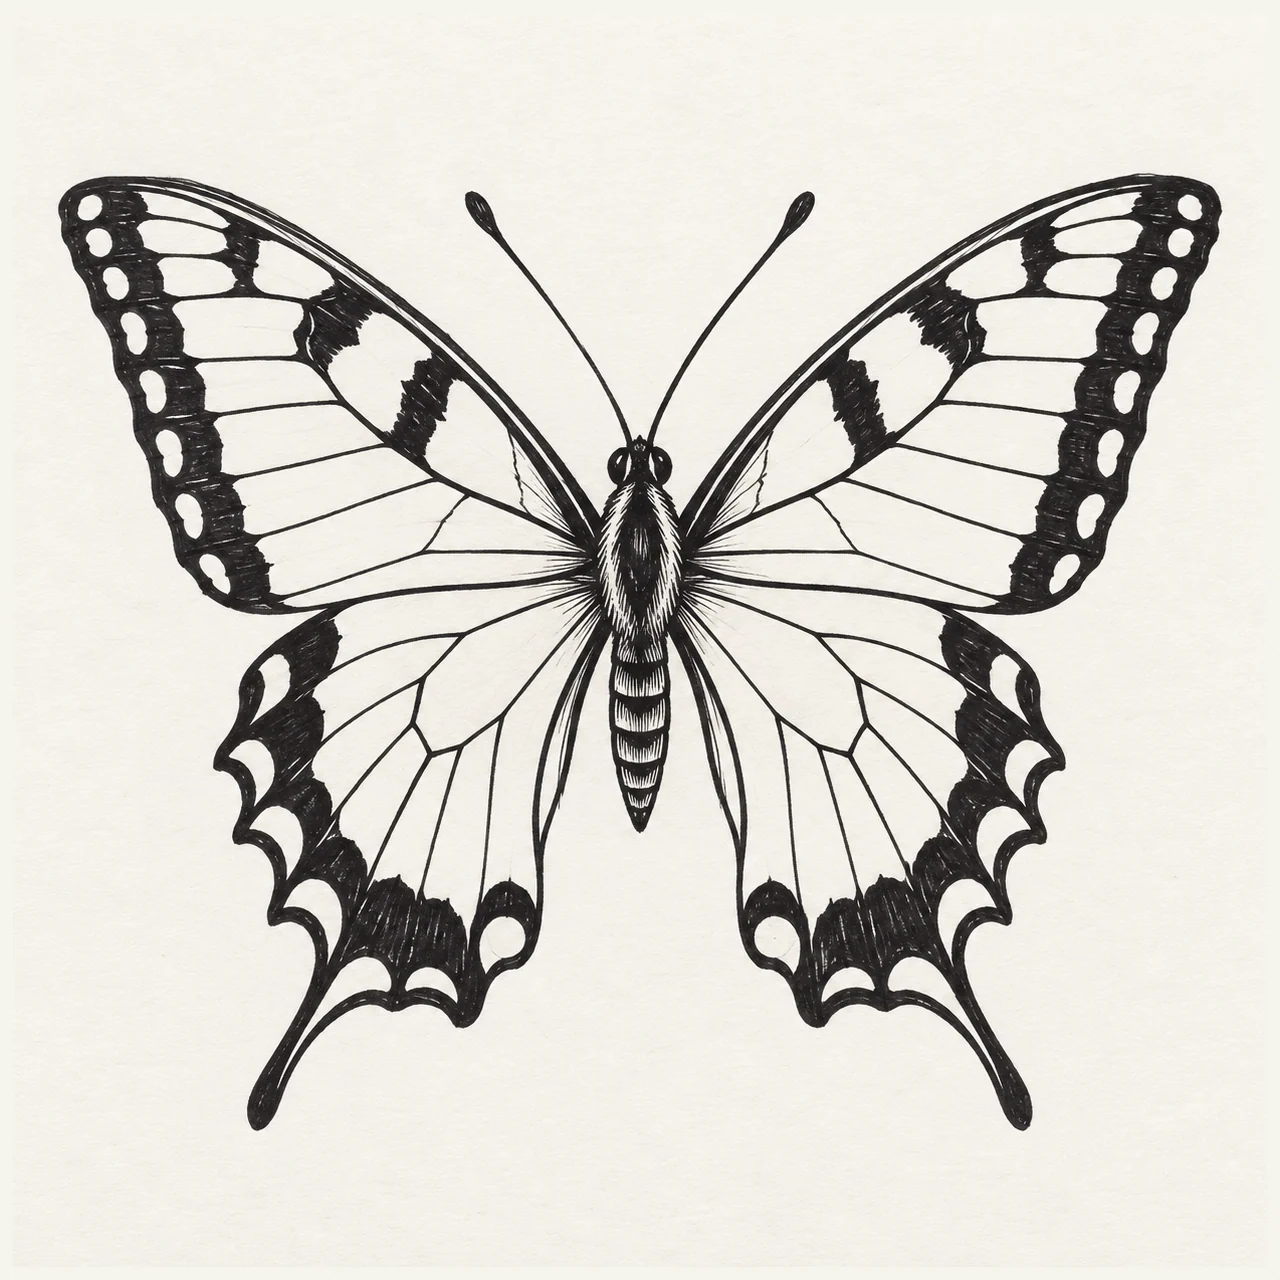
This guide covers black-and-white line drawings with a felt-tip marker, brush pen, or fineliner. Use the tool you have, test it on your paper, and begin with a subject large enough to leave clear spaces between marks. The butterfly exercise separates planning, contours, and pattern into three passes.
Test your pen and paper together
On a scrap of the same paper, draw a thin line, a slow curve, and a small filled patch. Let them dry, inspect the edges, and check the back. This tells you more about the combination than the label on either product alone.
A fine tip leaves room for small details. A broad tip suits larger shapes, and a brush tip can vary width as its pressure and angle change. Make the first subject at least palm-sized so a small wobble does not close an important gap.
Ink behavior depends on the marker. Alcohol-based dye markers such as Copic can bleed through paper, so use a protective backing sheet and check the surface underneath. Absorbent paper may also let ink spread sideways. If edges feather, test a smoother paper intended for the tool or a finer tip before drawing.
Plan the important landmarks in pencil
Sketch the outer limits, main axis, and largest shapes lightly. You need enough guidance to place the marker lines, not a fully shaded pencil drawing to trace. Heavy graphite can leave grooves and be difficult to remove cleanly after inking.
For a butterfly, mark the body centerline, the widest points of the upper wings, and the lower wing tips. Compare matching landmarks on each side before drawing outlines. Look for a balanced spread rather than assuming every small pattern must be perfectly mirrored.
Decide where a line should start and finish. Break a long outline at a natural corner or overlap. Rotate the page so a curve falls in a comfortable direction. Planning stopping points is more useful than forcing the whole drawing into one uninterrupted stroke.
Warm up with the curves you need
Fill a scrap with C-curves, S-curves, loops, and short straight strokes. Use the approximate size of the curves in your subject. A row of tiny loops will not prepare the same movement as a large sweeping wing edge.
Rehearse a difficult movement just above the paper, then make the mark. Move from your wrist or arm when it feels more comfortable for a broad curve. Move steadily enough to avoid hesitant corrections, and slow down where you need control at a turn or endpoint.
Try three versions of the same curve. Notice whether the problem comes from the starting angle, bend, or final stop, then change that part. Repeatedly tracing over the full curve often creates a thick, uneven border without correcting its shape.
Give line width a clear job
A slightly stronger outside contour can separate the subject from the page, while lighter internal lines describe smaller features. You can strengthen a short edge where two forms overlap. Keep the change deliberate; a dark border around every part can crowd the drawing.
With one fixed-width tip, create emphasis through placement and omission. Leave quiet stretches of paper between important details. With a brush pen, test a light-to-heavy stroke first. Pressing harder on a fineliner will not reliably give the same effect and can damage its tip.
Choose a small area to emphasize, such as the butterfly's body or a cat's face. Keep nearby marks simpler so they do not all compete. You can make a drawing bold without making every line broad or every space black.
Balance black shapes with open paper
Read the silhouette first. A butterfly's wing spread and shape do much of the work; a few major markings can be enough. For a cat, the ears, back, tail, and small face may communicate the pose without rows of fur strokes.
Before filling a dark patch, outline it lightly and compare the white area around it. Keep a visible gap between neighboring black shapes when the reference separates them. Restoring a narrow white gap after two dark areas merge is difficult without adding another material.
Build small filled shapes with overlapping strokes suited to the tip. Avoid dwelling at one point and depositing excess ink. Pause after each major dark and check the whole drawing. If one wing is heavier, compare the pattern sizes before automatically darkening the other to match.
Draw a butterfly in three passes
Use the butterfly reference below or another clear front-facing image. Make a light plan about the width of your hand. Separating placement, contour, and pattern prevents small details from deciding the shape too early.
- Pass 1 — placement: mark the centerline and paired wing landmarks in pencil. Compare the upper and lower wing sizes. Sketch major dark patches, leaving generous paper gaps between them.
- Pass 2 — contour: ink the body and outer wing curves. Work one manageable curve at a time, lifting at natural changes in direction. Rotate the paper when a stroke feels awkward instead of tightening your grip.
- Pass 3 — pattern: add the largest markings before small veins or dots. Fill one dark area, compare both sides, and continue where the next mark helps describe the wings.
- Final check: let the ink dry, then test a gentle eraser stroke on scrap before removing pencil guides. Leave useful pencil marks if erasing would disturb the ink or paper.
Troubleshoot the mark, not the whole page
Compare the problem with the drawing at normal viewing distance before deciding whether another mark will help.
- A contour wobbles: keep it if the shape reads. If you strengthen it, make one deliberate pass along a short section. Tracing every edge again can make the whole drawing heavier than intended.
- Ink spreads beyond the edge: test another paper-and-tip combination. Reduce the time the tip rests in one place and leave more room between nearby details.
- A black area swallows the pattern: stop adding darks and simplify surrounding marks. Next time, enlarge the drawing or plan wider white gaps before filling.
- The eraser smears ink: let it dry longer and test on scrap. Drying and erasability vary with ink and paper, so a test is more useful than a fixed waiting time.
- Lines blur when colored over: test the exact liner and coloring marker together. For alcohol markers, use a liner intended to resist alcohol; waterproof does not automatically mean alcohol-resistant.
Choose one change for the next study
Keep the first drawing and name a change for the second: a wider wing gap, fewer small markings, or a steadier outer curve. Use a similar size and the same tool so you can see what that decision changed.
Then try another subject with the same constraint. Draw a cat with only its main contours, or flowers with thin stems and stronger petal edges. Limiting the details makes you choose which marks carry the subject. Add complexity after those choices feel clear.
Choose a practice reference
- A butterfly in ink
Plan paired wing landmarks, then add contours and the largest dark markings in separate passes.
- A few cosmos flowers
Keep internal detail light and leave clear gaps between stems, leaves, and petals.