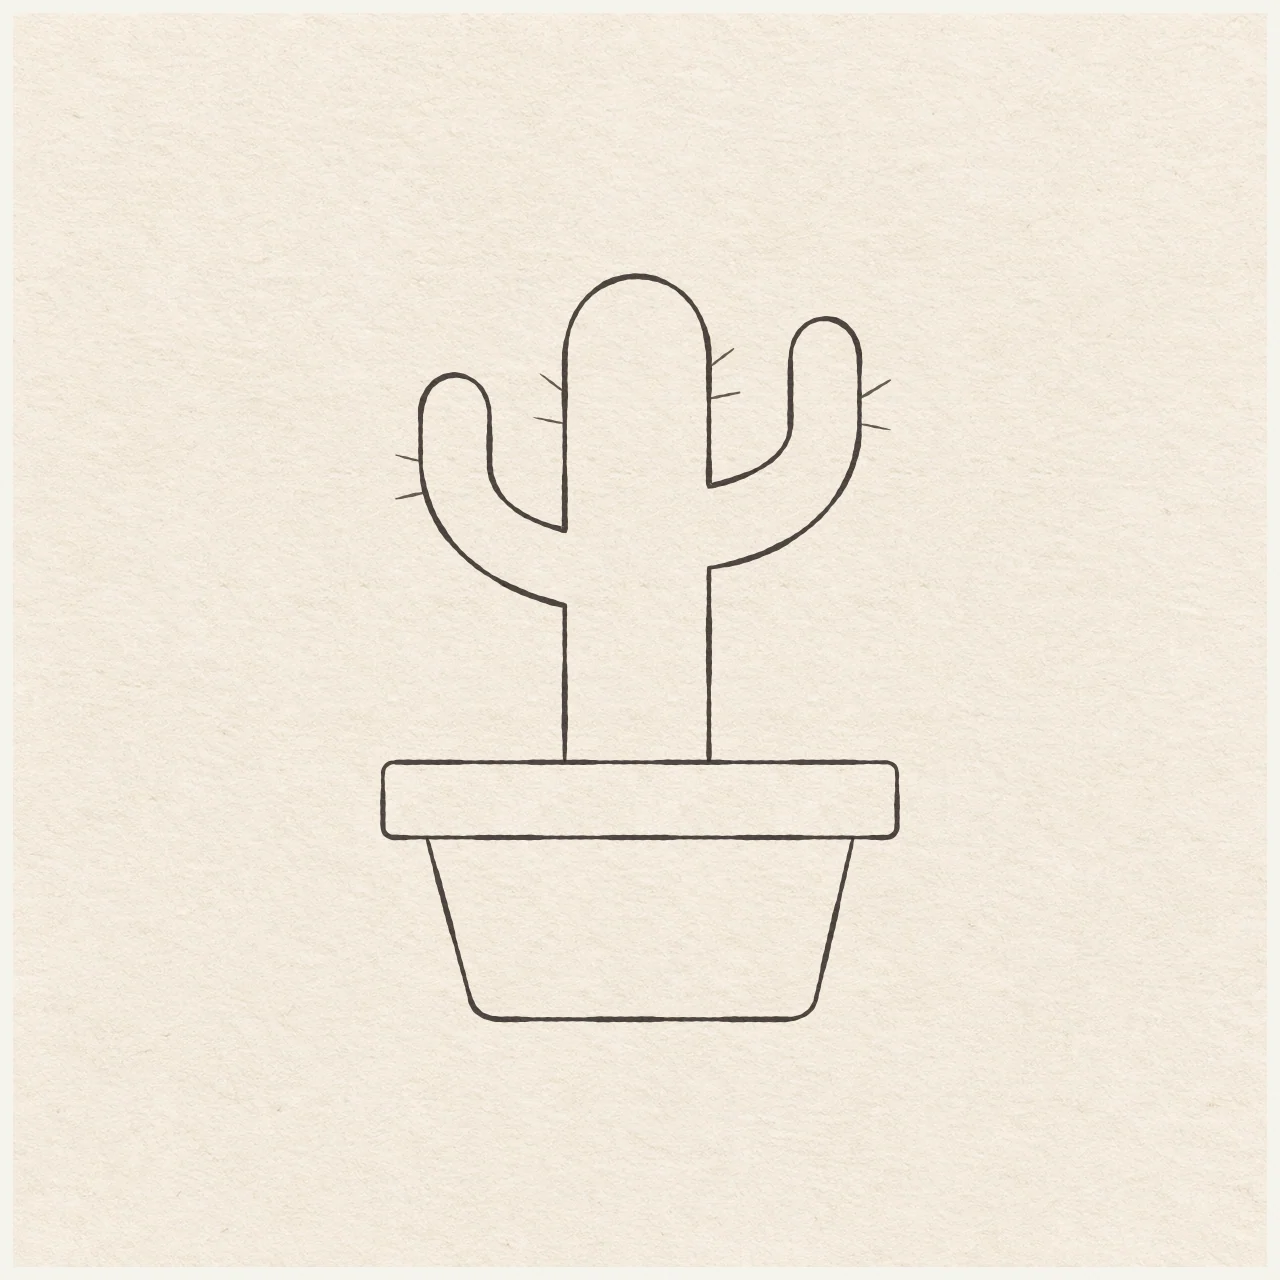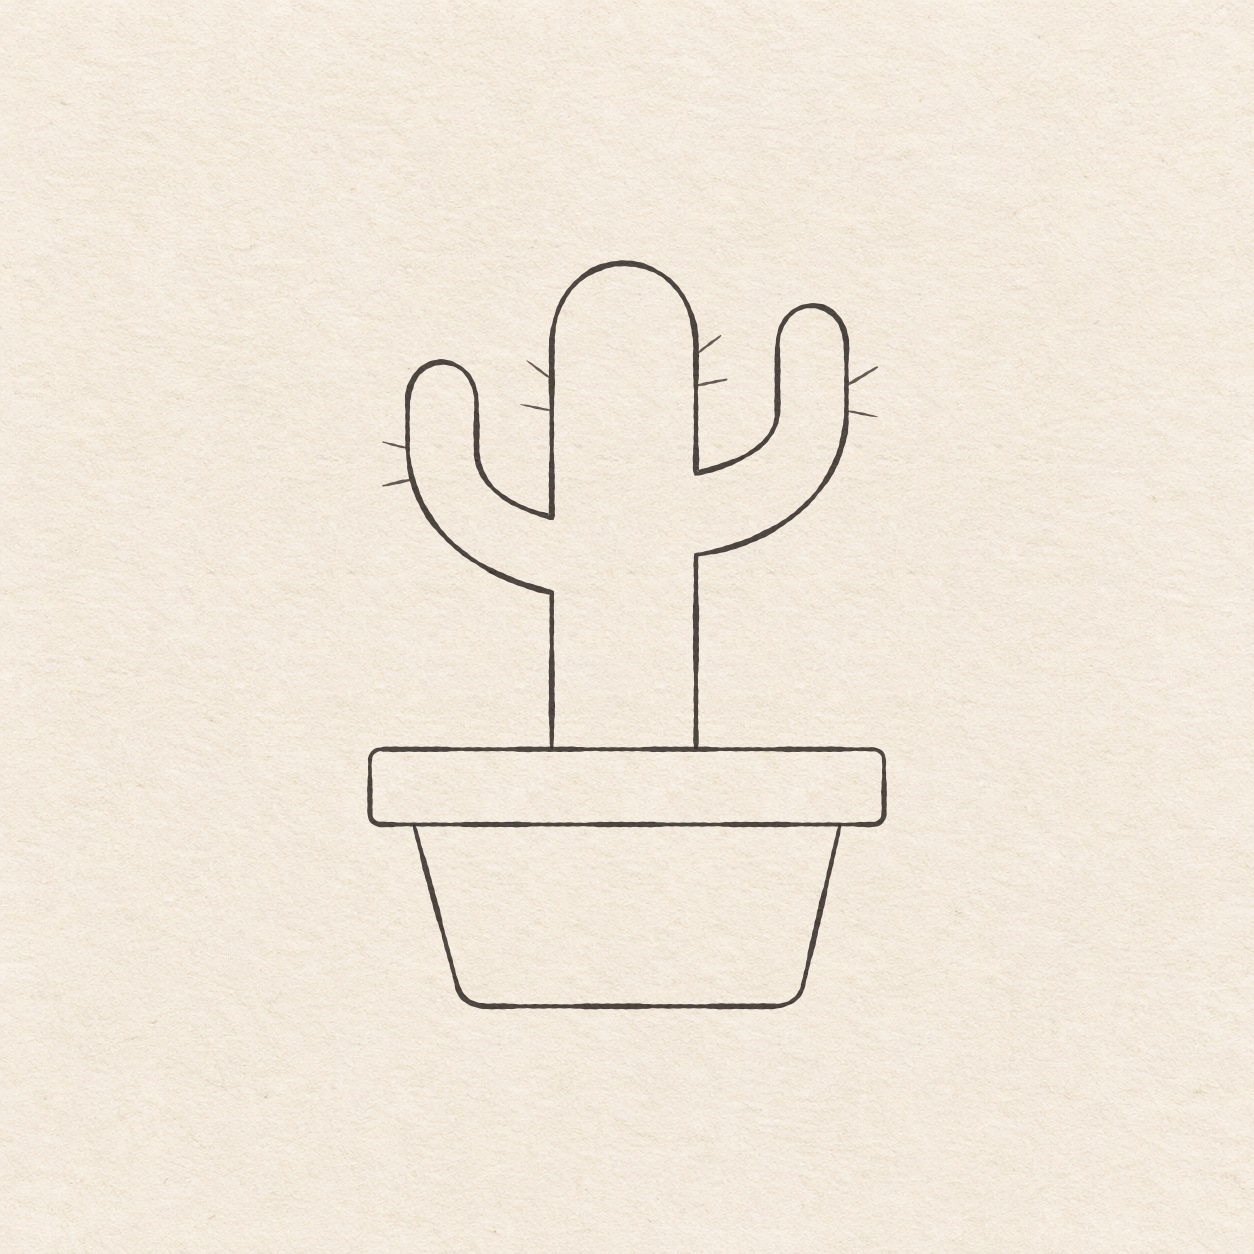
Fineliner drawing of a tall potted cactus with two short rounded branches and four pairs of spines.
Drawing referenceAbout reference use

Branching cactus in a pot

Make a straight-sided pot, then turn a tall cactus stem around two unequal branches.

Nature & plantsEasyFinelinerReference practice: about 24 min
Save reference

Follow the drawing tutorial

Make a straight-sided pot, then turn a tall cactus stem around two unequal branches.

Start the 6-step tutorial

A small thing to tryWhile the shape is still in pencil, look for a white channel between each branch tip and the tall stem. Widen the narrower channel a little if the edges run together.

Draw it, one step at a time

Draw a cactus in a pot

Make a straight-sided pot, then turn a tall cactus stem around two unequal branches.

6 illustrated steps Full tutorial: about 24 minutes, at your pace

What you’ll need

  • HB pencil
  • Eraser
  • Ruler
  • Scrap of paper with a square corner
  • Fine black pen
  • Drawing paper

Before you start

This example is about 8 cm wide and 11.8 cm high. Choose where the top of the pot will sit. The plant grows upward from it.
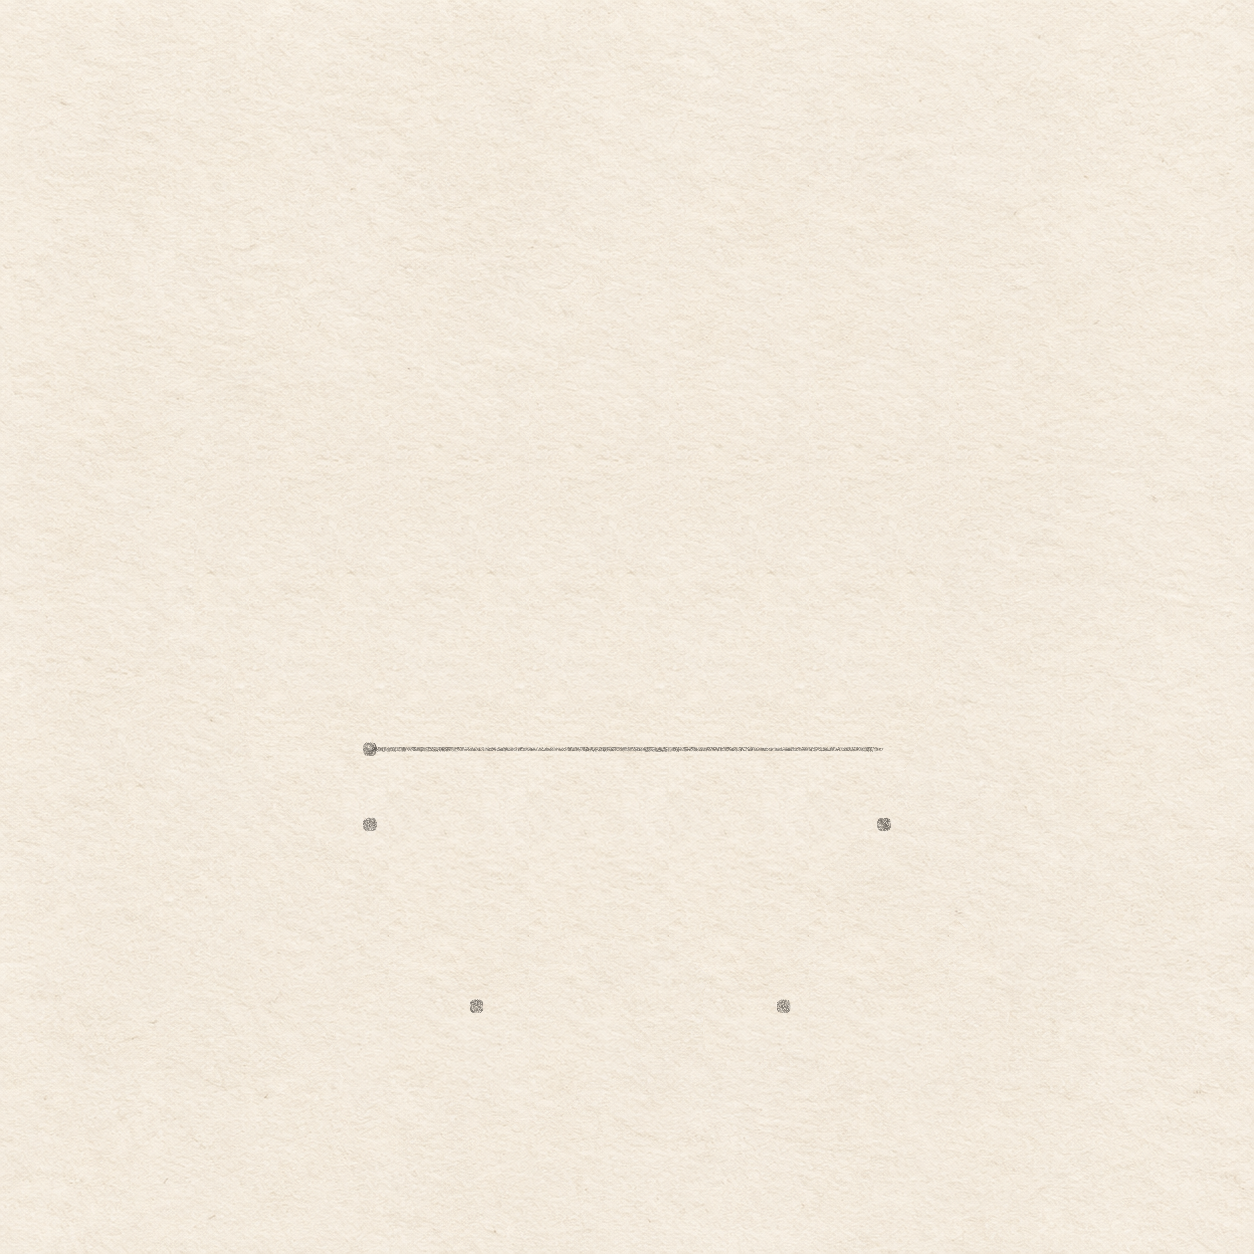
  1. A faint pot-width line with two lower rim corners and two low base dots.
    Drawing 1 — Place the top and bottom of the potView larger
    Pencil

    Place the top and bottom of the pot

    Instructions for Drawing 1 — Place the top and bottom of the pot
    1. Choose the left corner of the pot rim and mark a dot. Leave 1 cm to the left for the spines, 8.5 cm to the right, 8 cm above, and 4.5 cm below, plus a margin. Move the dot before ruling if the pot or plant would crowd an edge.
    2. Rule a light level line 8.2 cm to the right of that dot. The top of the finished rim will sit on this line.
    3. Line up one edge of a square scrap corner with the ruler line. Mark a dot 1.2 cm straight down from each end. Check that both lower dots sit at the same height.
    4. From the left end of the line, measure 1.7 cm and 6.6 cm right. At each spot, use the square corner to mark a dot 4.1 cm down. Both dots should sit inside the rim width.
    Next step
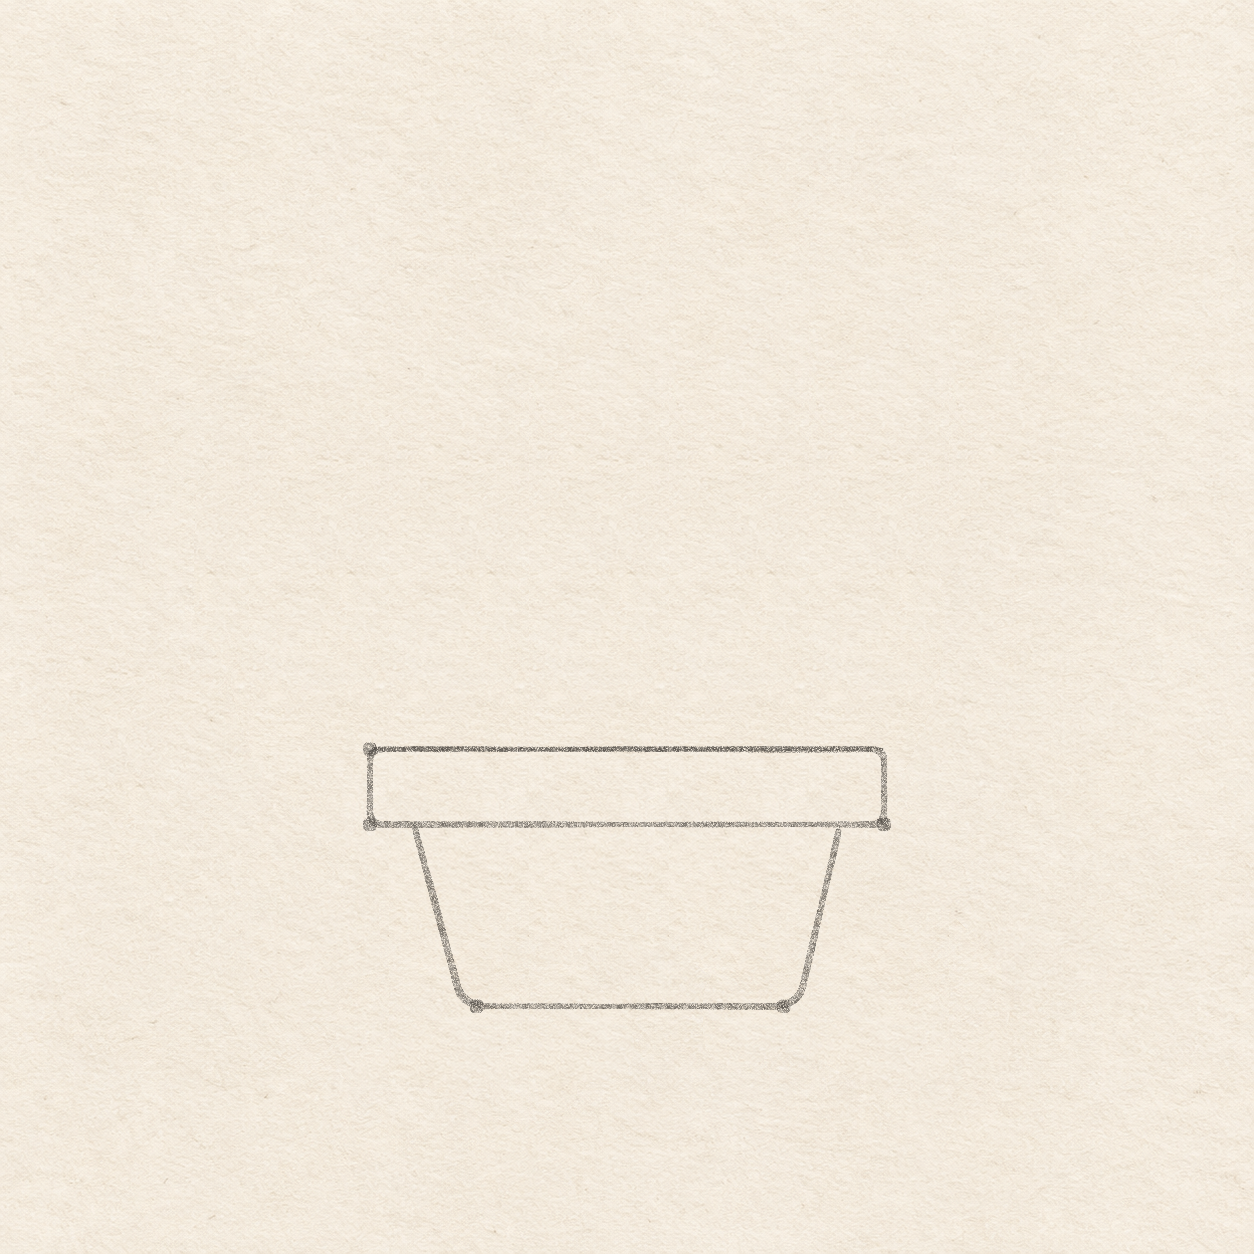
  2. A shallow rim rectangle has small rounded corners and a soft, narrower base below it.
    Drawing 2 — Round the rim and draw the potView larger
    Pencil

    Round the rim and draw the pot

    Instructions for Drawing 2 — Round the rim and draw the pot
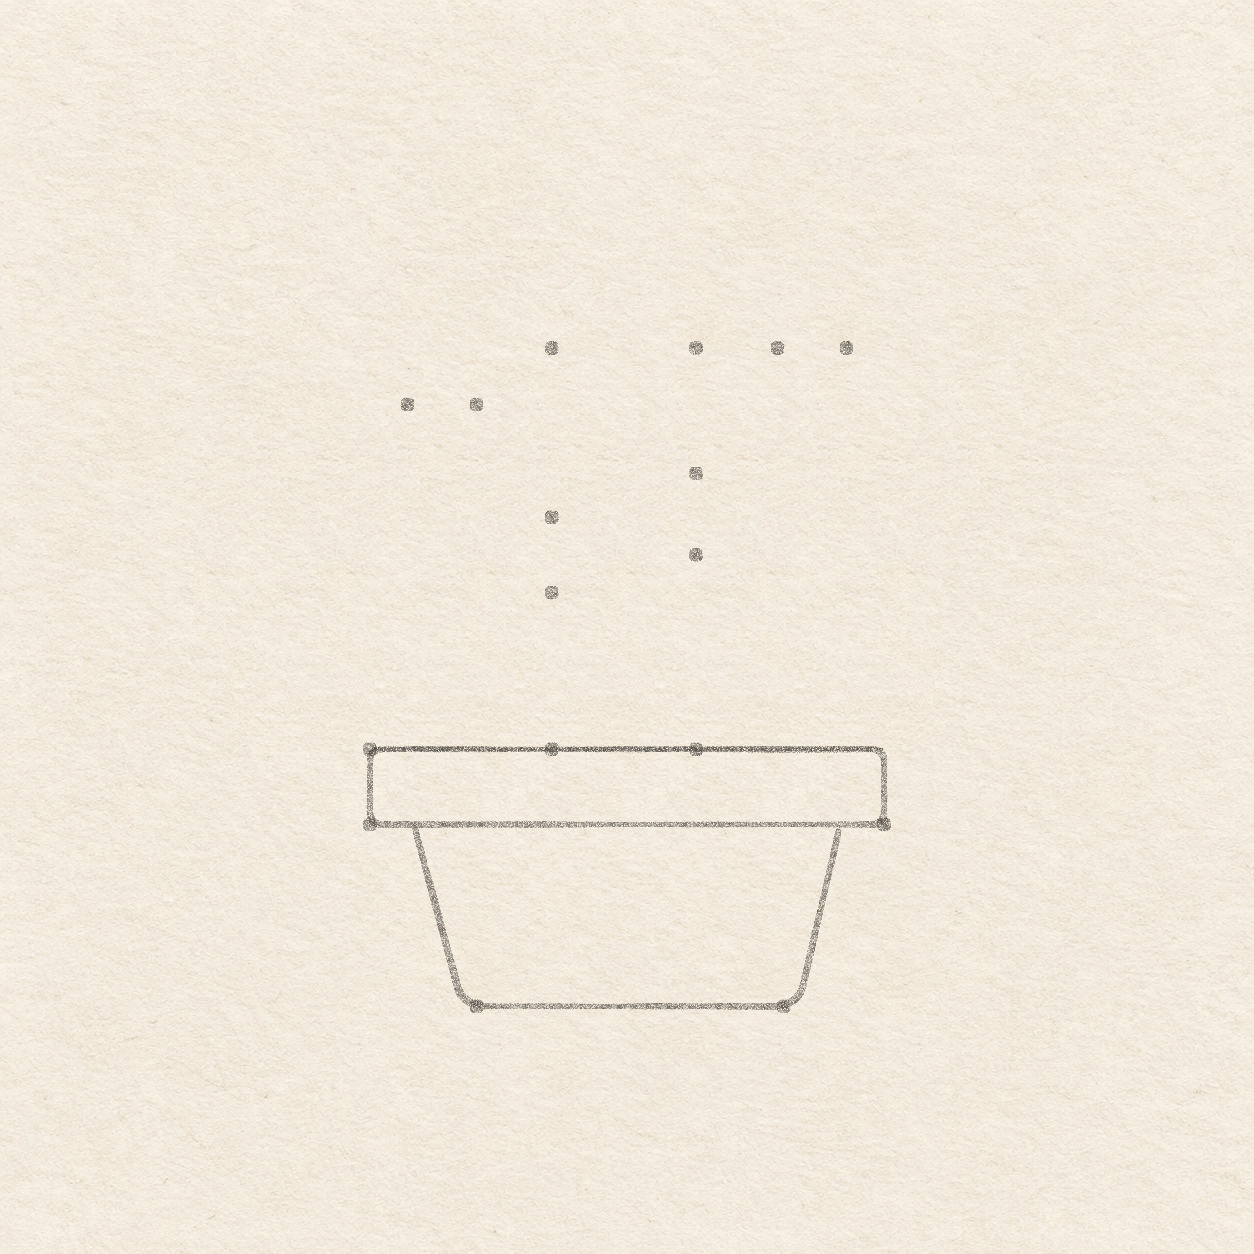
    1. Rule along the top measuring line and between the lower corner dots. Join the ends on each side, rounding the four corners by about 2 mm. The side edges are upright. Keep the band shallow.
    2. Start the left side 7 mm inward from the left lower corner dot, on the lower rim. Rule down and inward toward the left base dot. Start the right side 7 mm inward from the right lower corner dot and slope to its base dot. Soften both bottom corners into a short level stroke between the dots. Stop the upper ends at the lower rim edge.
    Next step
  3. A handful of pencil stops mark the cactus stem and the turns of both branch tips above the pot.
    Drawing 3 — Mark the stem and branch limitsView larger
    Pencil

    Mark the stem and branch limits

    Instructions for Drawing 3 — Mark the stem and branch limits
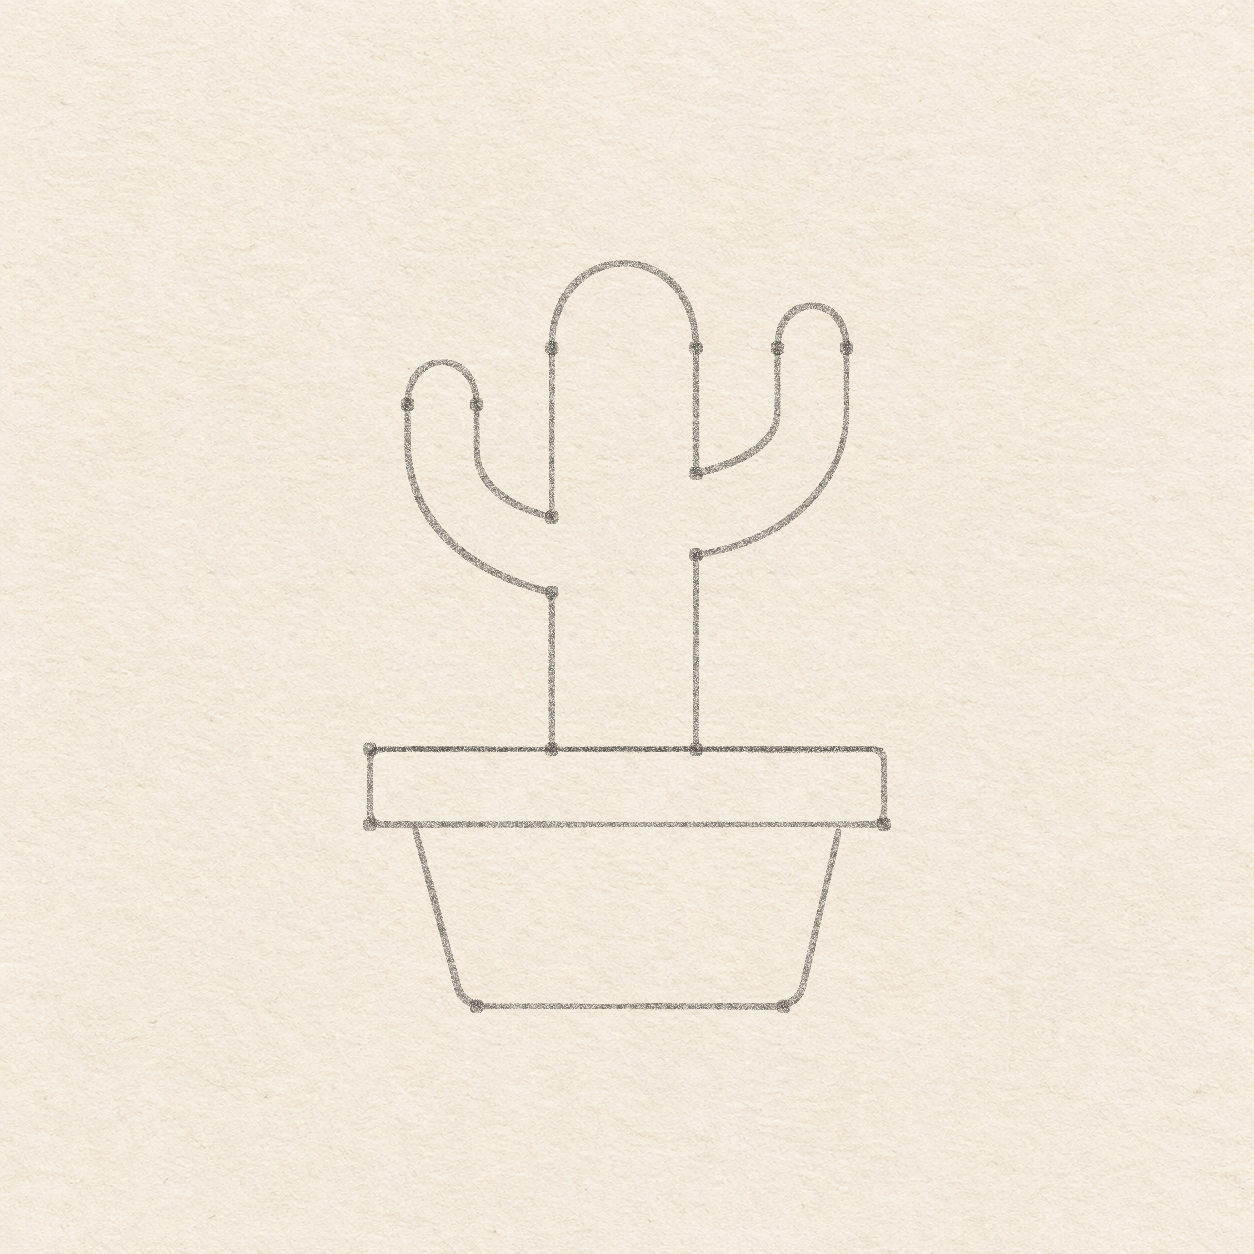
    1. From the left end of the top rim, mark two dots 2.9 cm and 5.2 cm right. Use the square corner to mark another dot 6.4 cm straight above each one. The lower two dots sit on the pot rim and the upper pair set the width of the rounded stem.
    2. Use the top rim to place the left branch: measure 6 mm and 1.7 cm right from its left end, then 5.5 cm up at each spot. Place the right branch at 6.5 cm and 7.6 cm from the same end, then 6.4 cm up. On the left side lined up with its stem base, put two more dots 2.5 and 3.7 cm above the pot. On the right side lined up with the other base, put dots 3.1 and 4.4 cm above.
    Next step
  4. The tall middle stem arches over two smaller rounded branches and meets the pot at two points.
    Drawing 4 — Sweep around the trunk and branchesView larger
    Pencil

    Sweep around the trunk and branches

    Instructions for Drawing 4 — Sweep around the trunk and branches
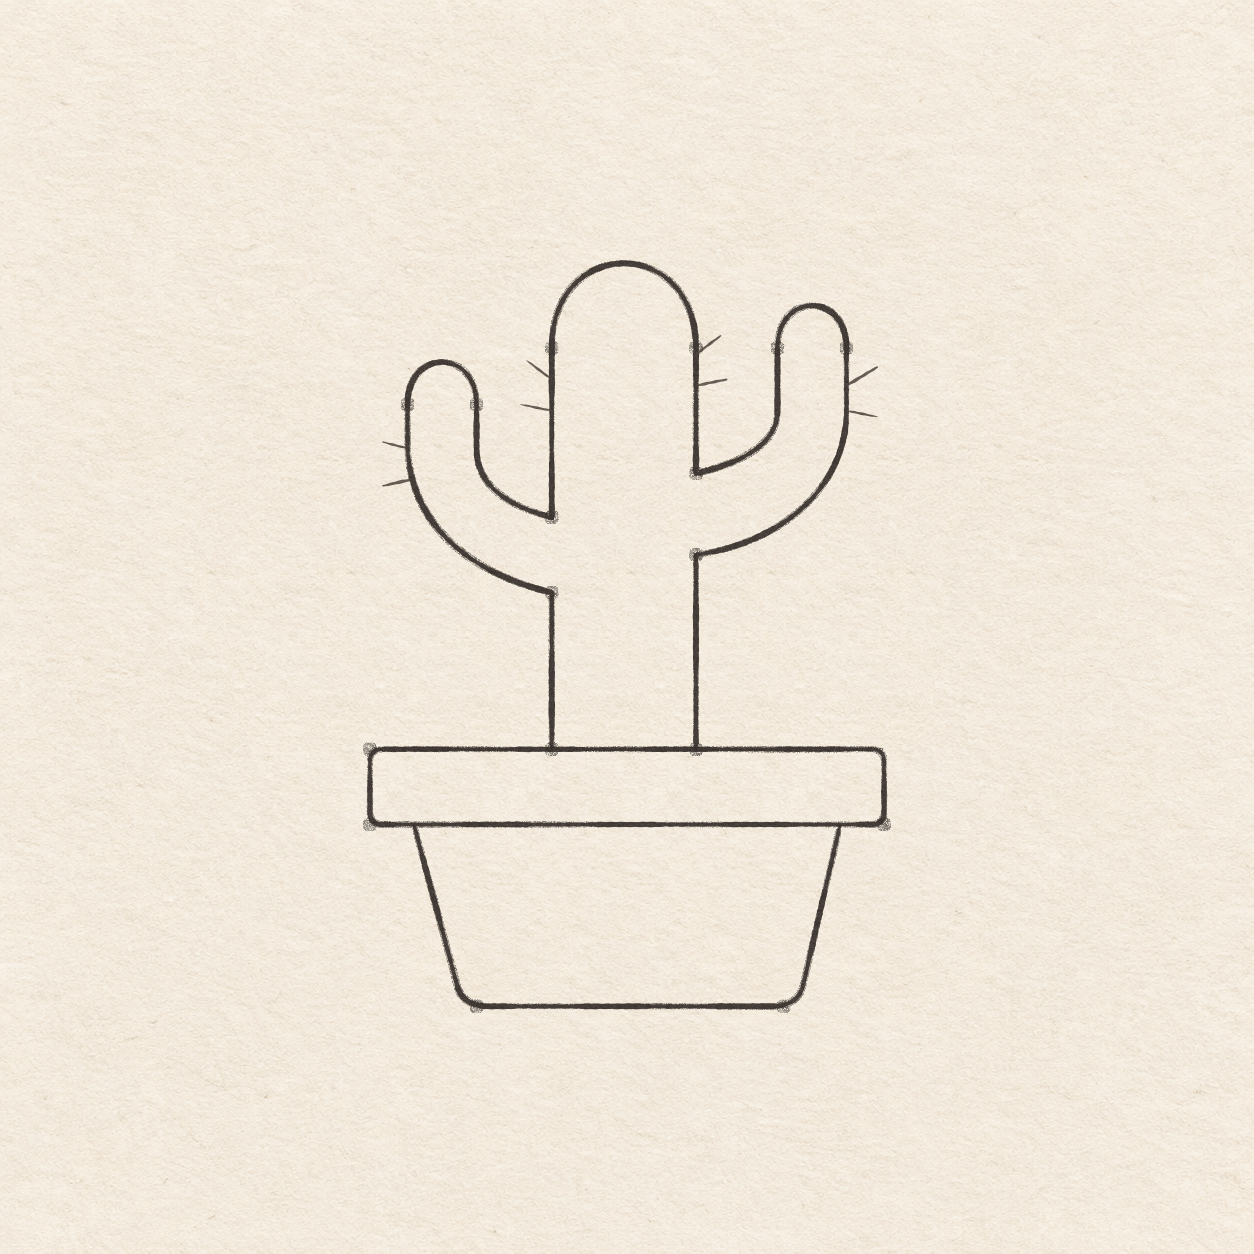
    1. Freehand up from the left base to the lower left return dot. Bow out and up to the leftmost branch dot. Round about 7 mm above the two branch dots, then come down the inside of the branch and curve back to the higher left return dot. Rise to the main stem top dots and round about 1.4 cm above them. Descend to the higher right return, curve up to the right branch dots and round about 7 mm above them. Bow back to the lower right return and head straight down to the other stem base.
    Next step
  5. The inked cactus has four pairs of short outward spines and a clear white gap between each branch and the main stem.
    Drawing 5 — Ink the edges and add a few spinesView larger
    Ink

    Ink the edges and add a few spines

    Instructions for Drawing 5 — Ink the edges and add a few spines
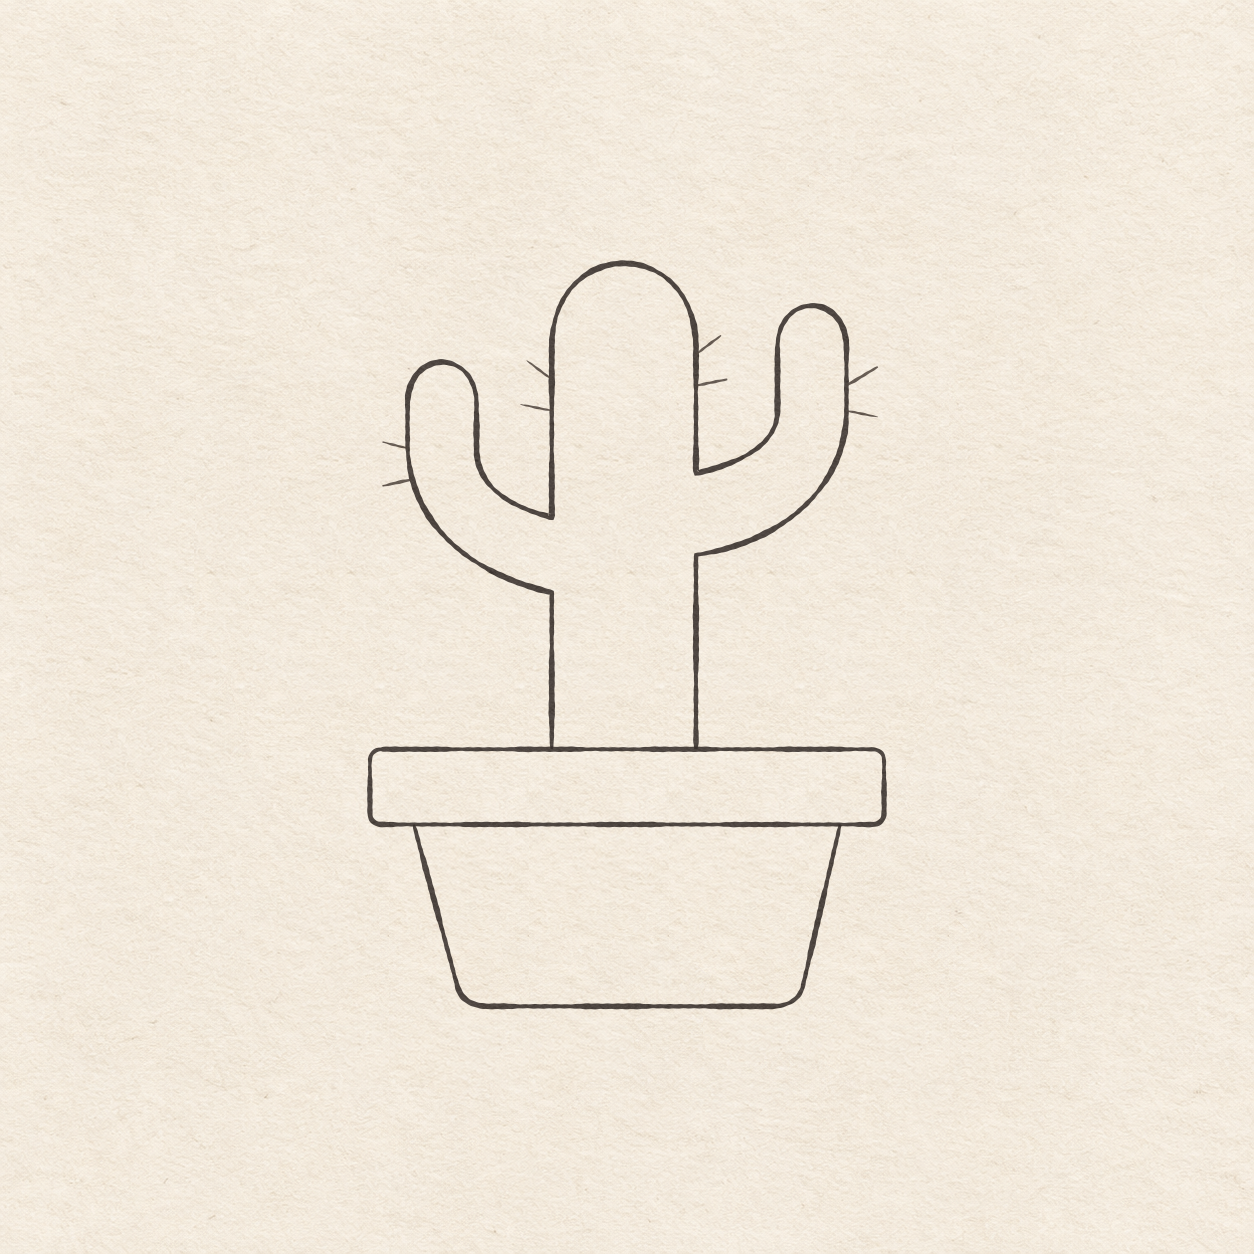
    1. Trace the four edges of the rim with the pen. Keep the band empty and round the four corners.
    2. Follow the two sloped pencil sides and the short level base. Stop each upper end at the lower rim edge.
    3. Trace the entire cactus edge in pen from the left base to the right base. Join both ends to the pot top and leave both branch channels open.
    4. Freehand two short outward slants from the outside of each small branch. Make two more on each side of the upper main stem. Start each stroke on the edge. Keep each about 4 to 5 mm and stop in open paper, with a gap inside each pair.
    Next step
  6. A tall fineliner cactus with two rounded branches and four spine pairs rests in a low pot.
    Drawing 6 — Erase the dry pencil guidesView larger
    Cleanup

    Erase the dry pencil guides

    Instructions for Drawing 6 — Erase the dry pencil guides

    1. Fill a small patch on a scrap of the same paper with the same pen. Rub the patch gently with your eraser. If it smears, wait and test again. Once the patch stops smearing, erase the measuring line, plotted dots and any remaining pencil marks beside the dry ink.
    Back to the steps

If something looks off

If the cactus branches are crowded

While the shape is still in pencil, look for a white channel between each branch tip and the tall stem. Widen the narrower channel a little if the edges run together.