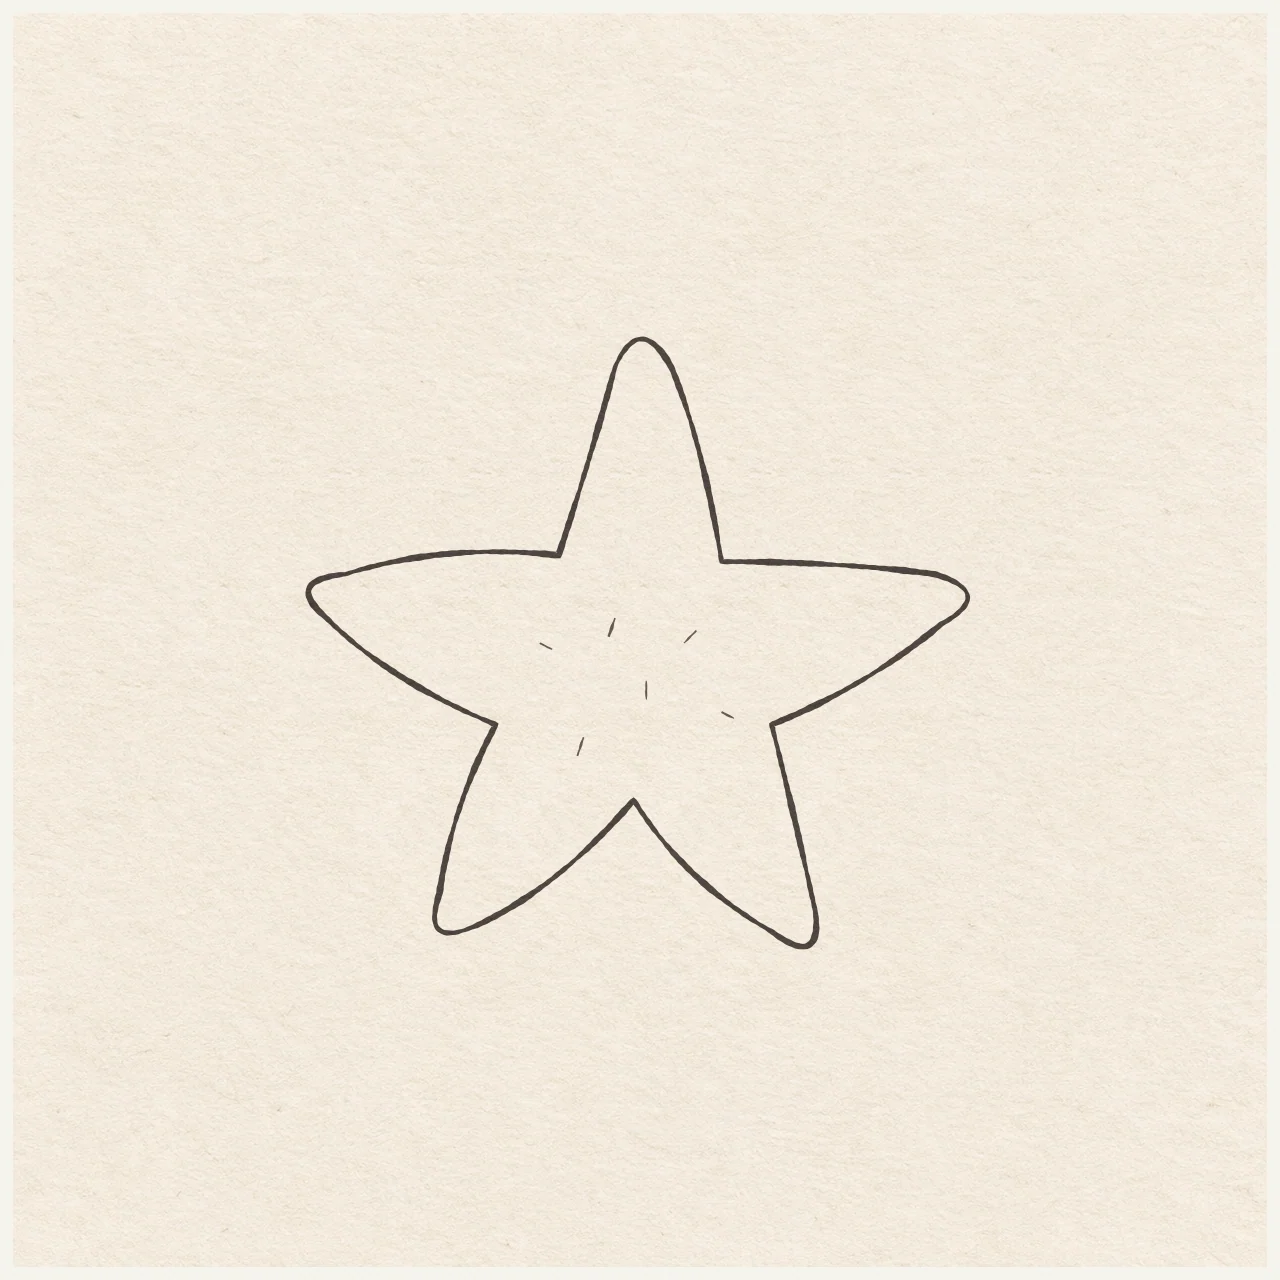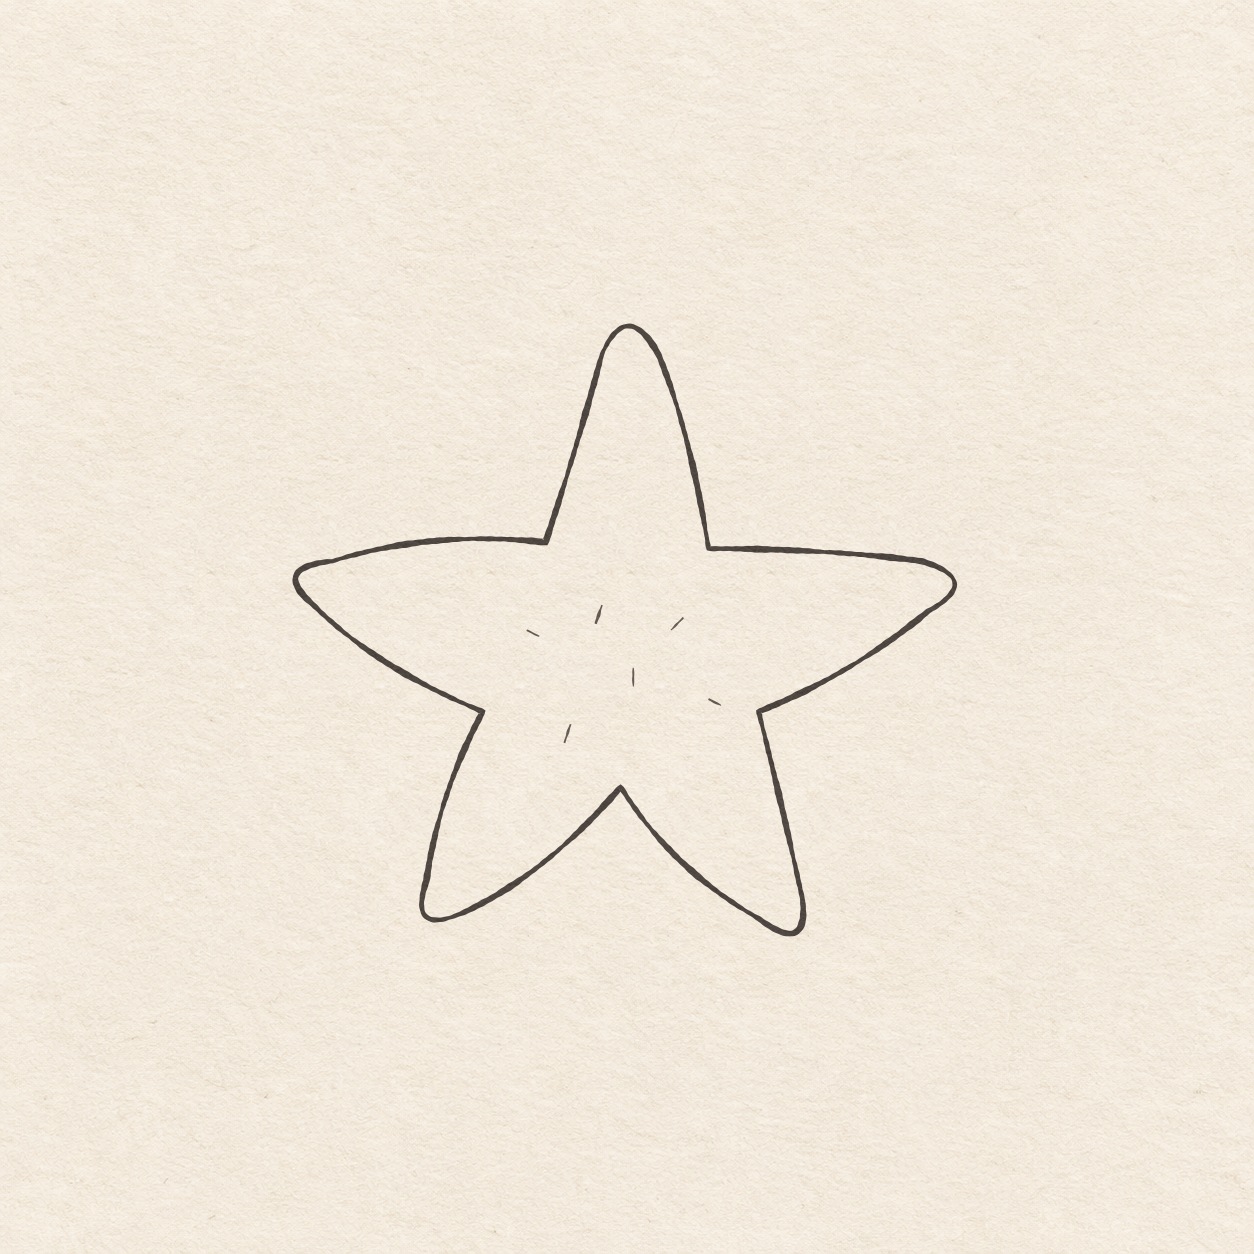
Fineliner drawing of a starfish with five rounded arms and six short marks near the middle.
Drawing referenceAbout reference use

Five-armed starfish

Use a light cross to position five rounded arms, then add a few small texture strokes.

Nature & plantsEasyFinelinerReference practice: about 22 min
Save reference

Follow the drawing tutorial

Use a light cross to position five rounded arms, then add a few small texture strokes.

Start the 5-step tutorial

A small thing to tryRound the pencil stroke just past each outer stop. Keep the inward turns distinct so the arms still read separately.

Draw it, one step at a time

Draw a five-armed starfish

Use a light cross to position five rounded arms, then add a few small texture strokes.

5 illustrated steps Full tutorial: about 22 minutes, at your pace

What you’ll need

  • HB pencil
  • Eraser
  • Ruler
  • Scrap of paper with a square corner
  • Fine black pen
  • Drawing paper

Before you start

This example is about 10.5 cm wide and 9.7 cm high. Choose a spot for the center and leave a little clear space all around the arms.
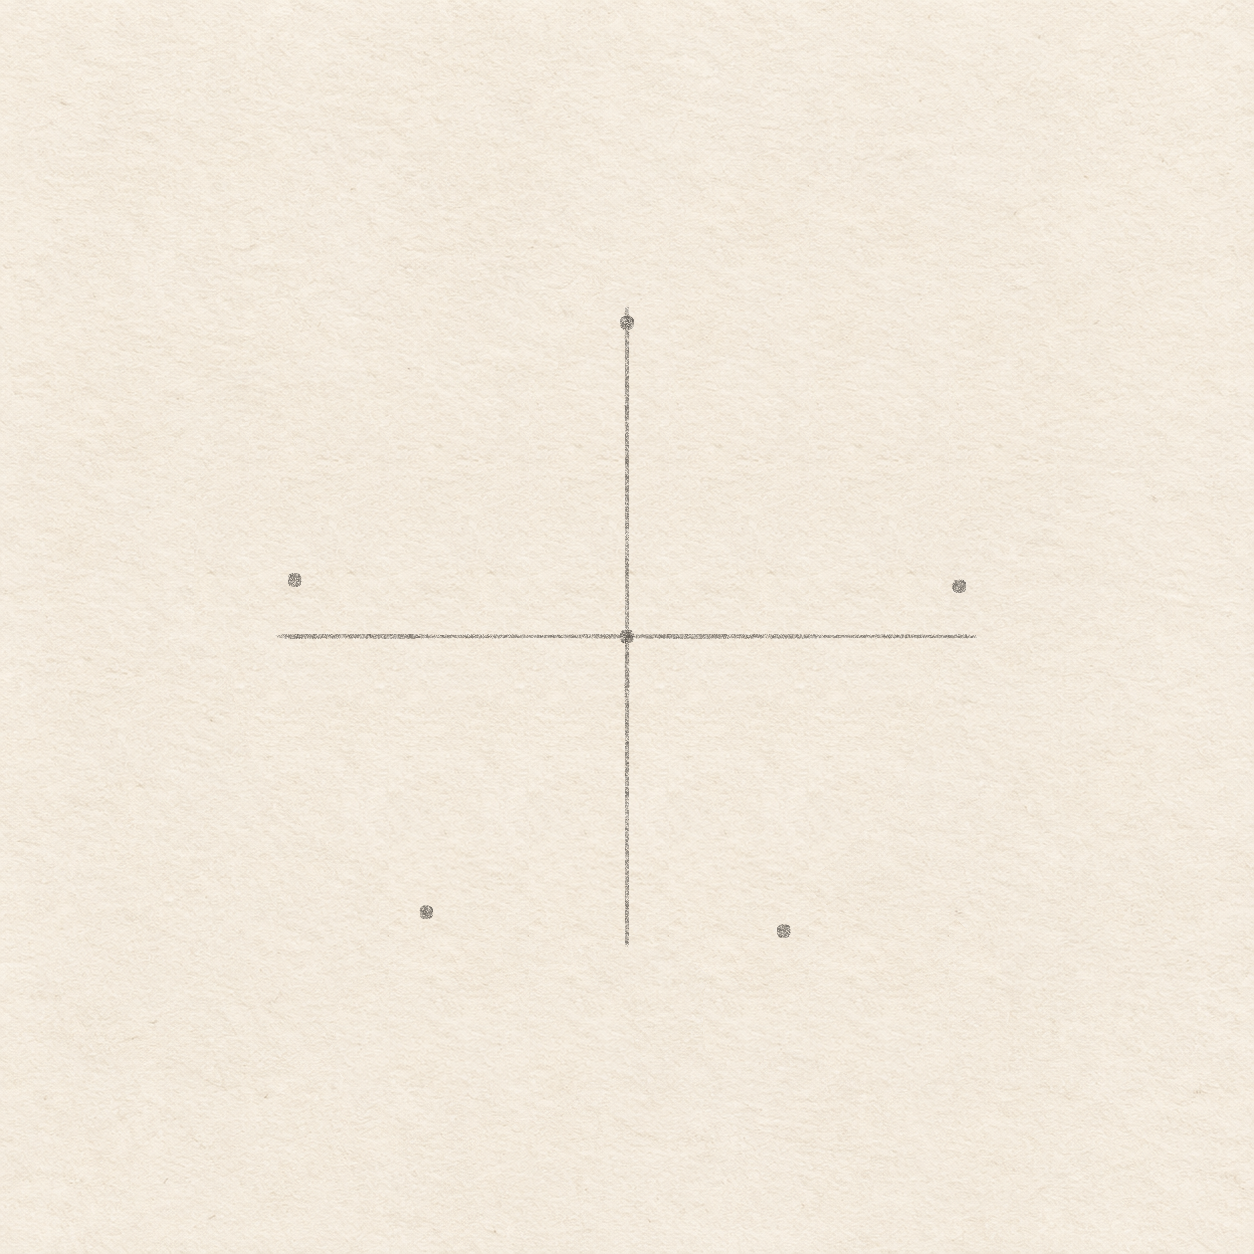
  1. A pale cross and five plotted dots locate one upper arm, two side arms and two lower arms.
    Drawing 1 — Set the middle and measure the five arm tipsView larger
    Pencil

    Set the middle and measure the five arm tips
    Instructions for Drawing 1 — Set the middle and measure the five arm tips

    1. Choose the middle and mark a small center dot. Leave 5.5 cm to each side and 5.5 cm above and below, plus a margin. Pick a new middle before measuring if the space feels tight.
    2. Rule a faint horizontal line from the dot, 5.6 cm each way. Set a square scrap corner at the dot with one edge on the line, and rule a vertical line 5.3 cm up and 5 cm down. Keep both lines faint so they are easy to erase.
    3. On the upright line, put the top arm dot 5 cm above the middle. From the center of the horizontal line, mark the right arm 5.3 cm right and 8 mm up, and the left arm 5.3 cm left and 9 mm up. Use the square corner to get the heights. For the two lower arms, mark one 2.5 cm right and 4.7 cm down, and another 3.2 cm left and 4.4 cm down. All sideways measurements start from the center.
    Next step
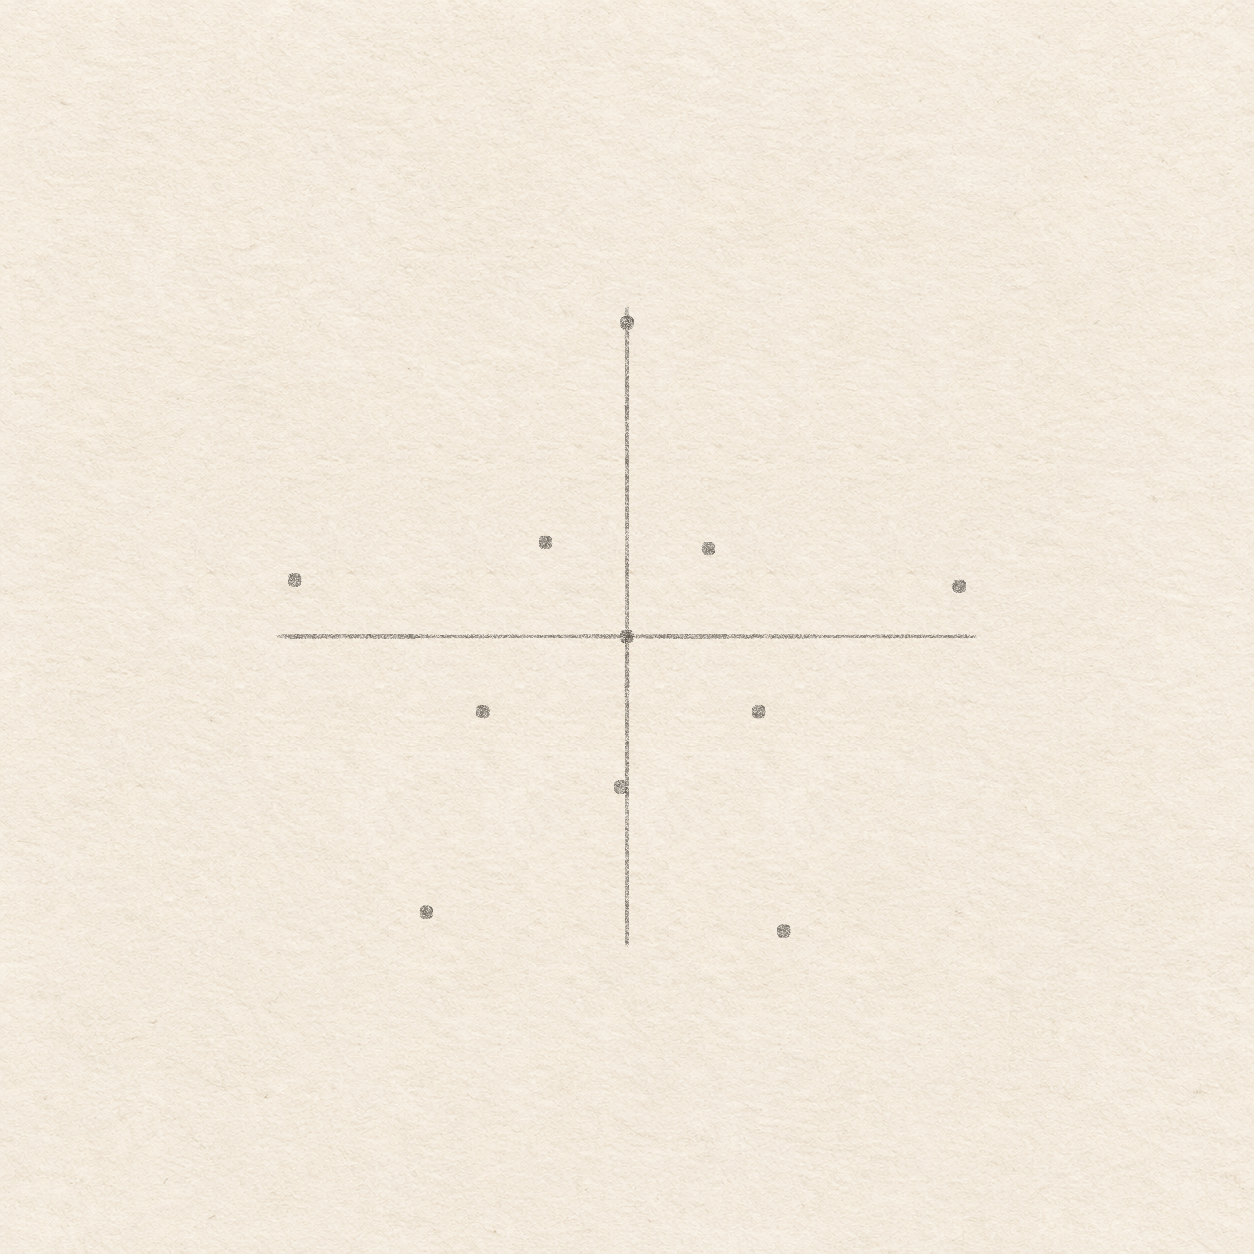
  2. Five smaller dots sit between the arm tips and closer to the middle.
    Drawing 2 — Mark the spaces between the armsView larger
    Pencil

    Mark the spaces between the arms

    Instructions for Drawing 2 — Mark the spaces between the arms
    1. Use the square corner again. From the center, mark one dot 1.3 cm left and 1.5 cm up. Mark another 1.3 cm right and 1.4 cm up. For the lower turns, mark 2.1 cm right and 1.2 cm down, 1 mm left and 2.4 cm down, and 2.3 cm left and 1.2 cm down.
    Next step
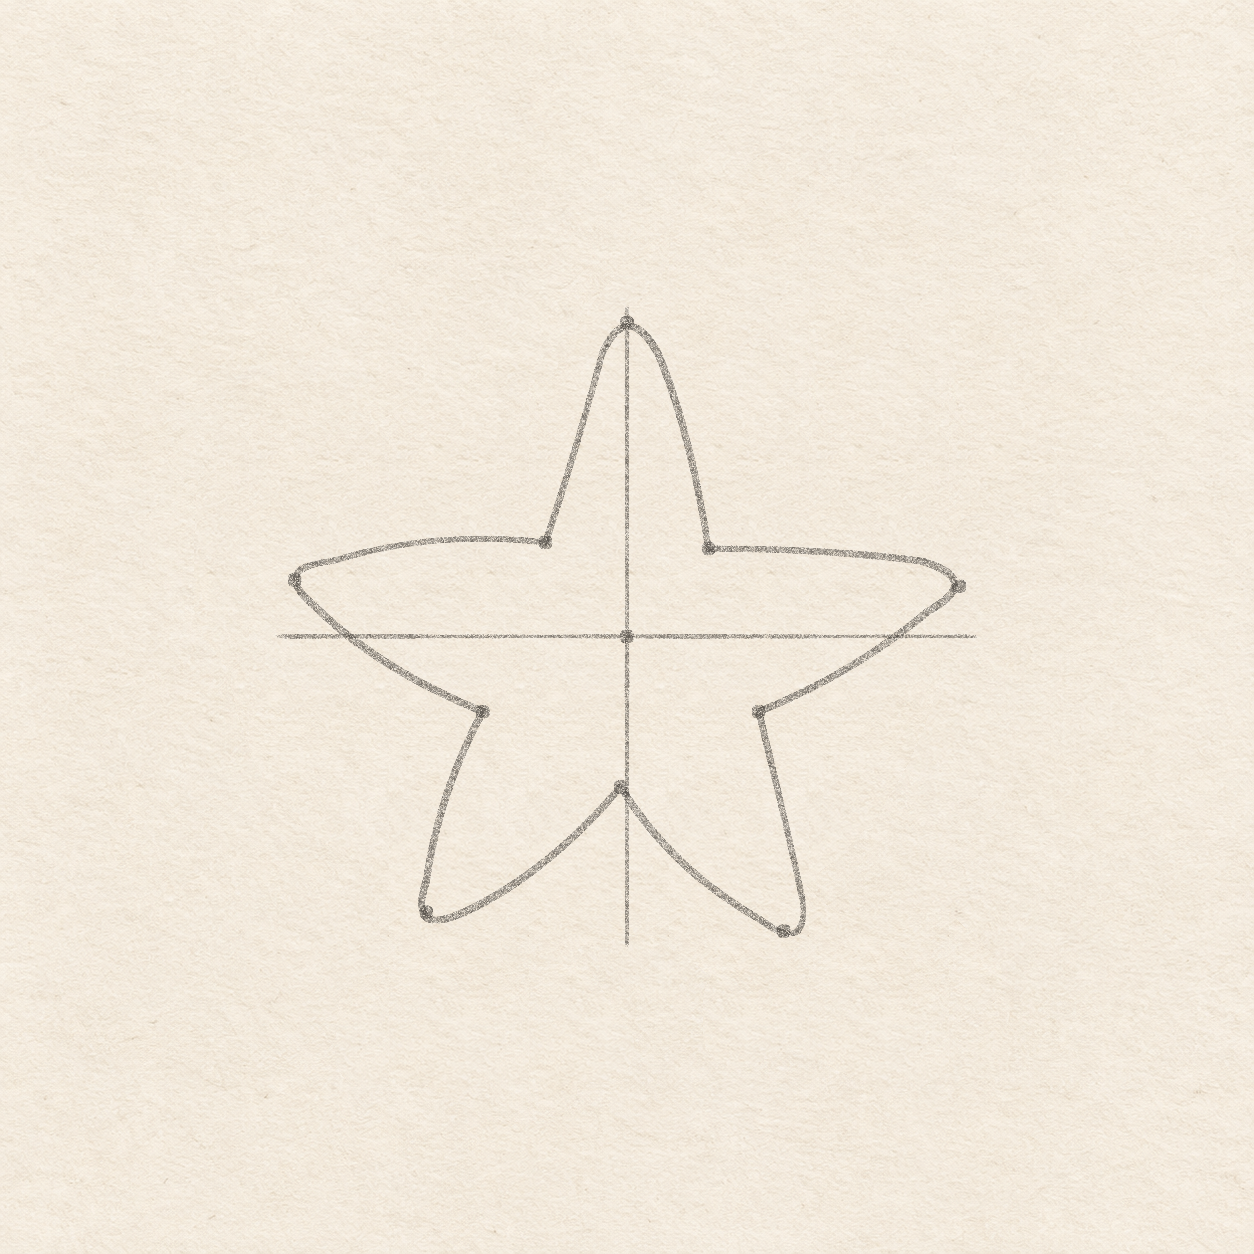
  3. A five-arm outline passes through the five outer tips and five inner turns.
    Drawing 3 — Round the five armsView larger
    Pencil

    Round the five arms

    Instructions for Drawing 3 — Round the five arms
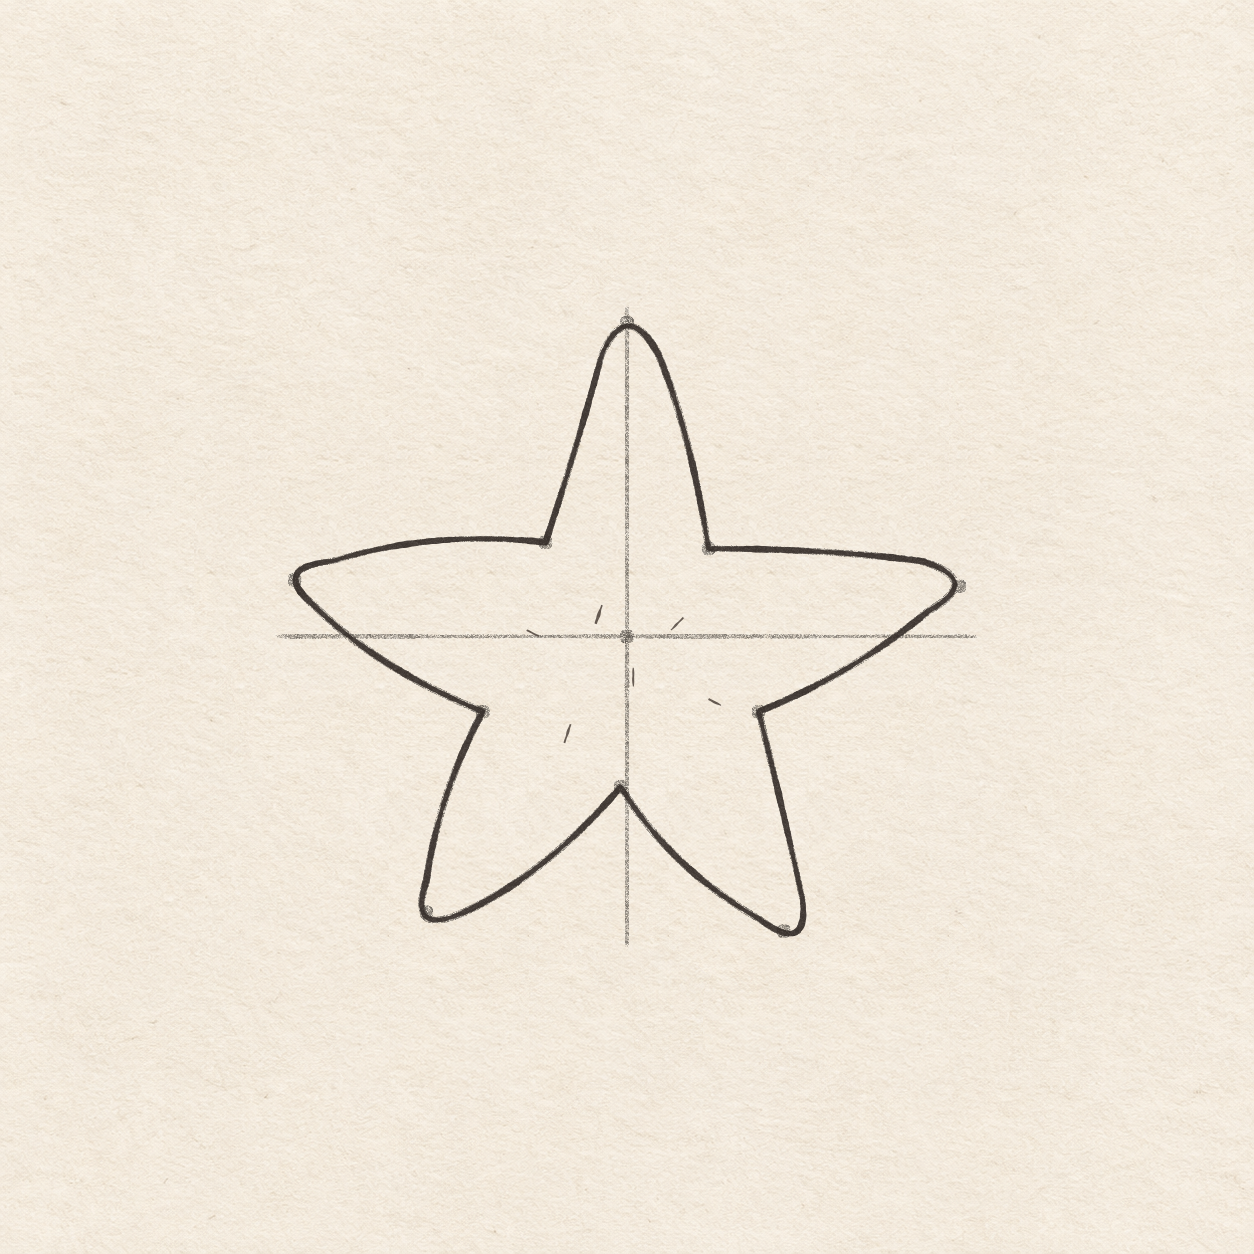
    1. Start at the upper-left inner dot. Freehand up through the top tip, round it, and return to the upper-right inner dot. Bow out through the far-right tip, round it, and come back to the right lower turn. Continue through the bottom-right tip to the lowest inner dot. Repeat through the bottom-left tip to the lower-left inner dot. Round the far-left tip and join the starting dot. Keep each arm broader near the middle and narrower at its tip.
    Next step
  4. Five clean inked arms surround six short scattered texture strokes.
    Drawing 4 — Ink the arms and add textureView larger
    Ink

    Ink the arms and add texture

    Instructions for Drawing 4 — Ink the arms and add texture
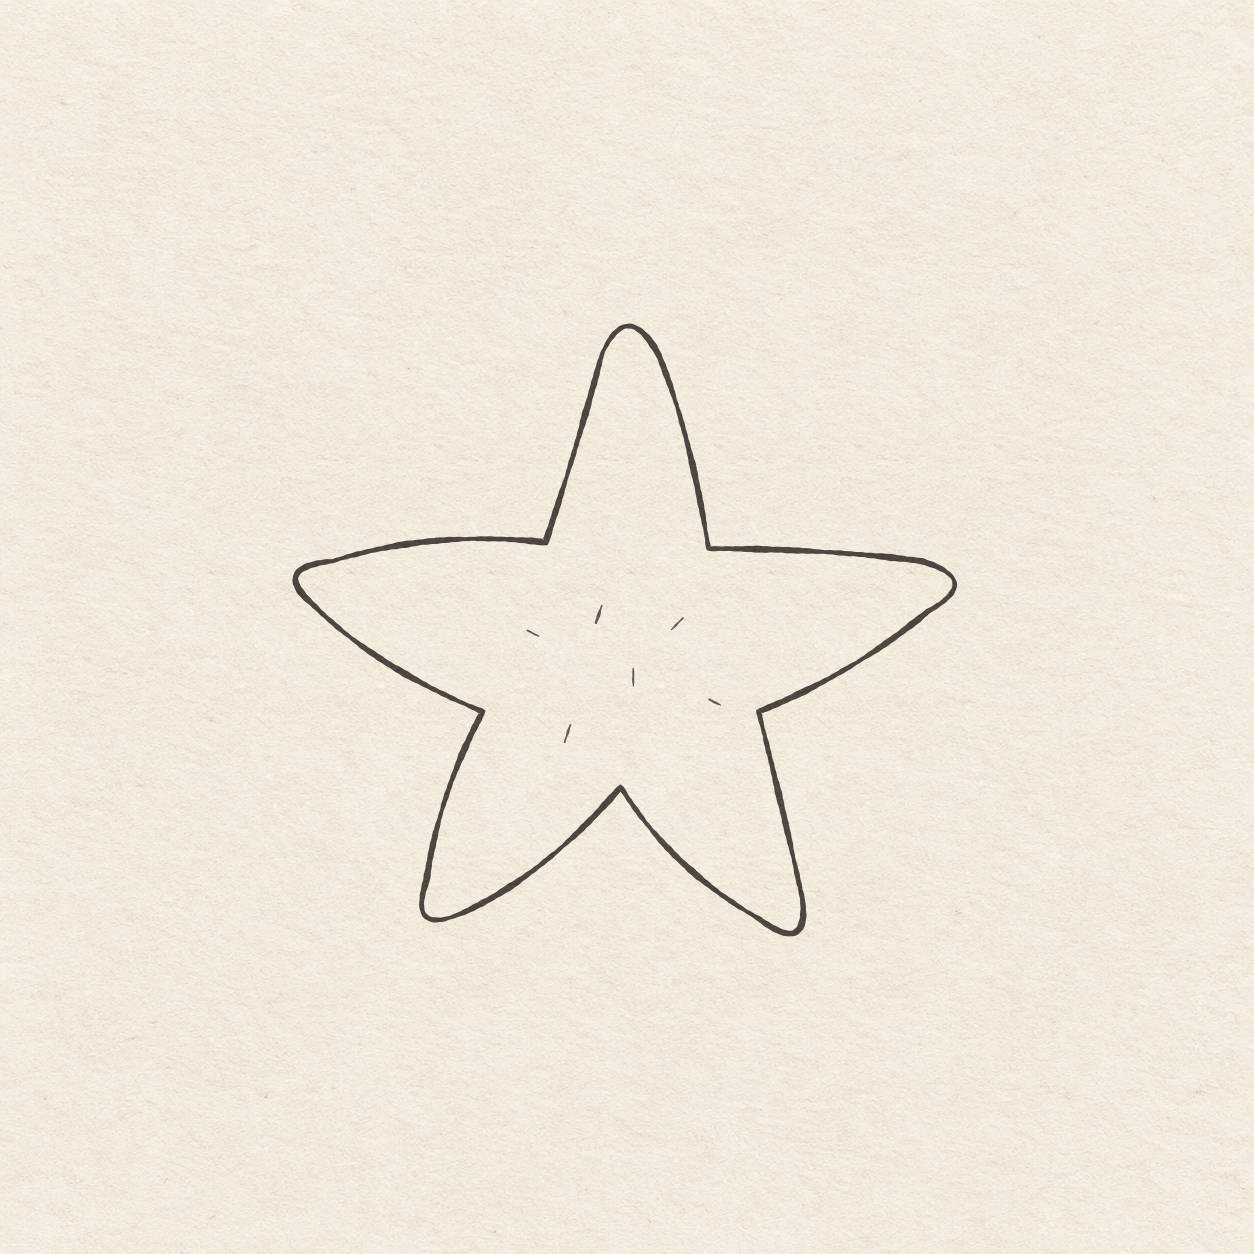
    1. Follow the whole pencil outline with the pen. Lift at the inward corners if it helps keep both lines on the same mark.
    2. Freehand six short angled ticks scattered in the central area between the five inward turns. Keep the marks separate and roughly 2 to 3 mm long. Leave most of the arms open.
    Next step
  5. The inked starfish has five rounded arms and six light central texture marks.
    Drawing 5 — Erase the dry pencil guidesView larger
    Cleanup

    Erase the dry pencil guides

    Instructions for Drawing 5 — Erase the dry pencil guides

    1. Fill a small patch on a scrap of the same paper with the same pen. Rub the patch gently with your eraser. If it smears, wait and test again. Once the patch stops smearing, erase the measuring cross, all dots and any remaining pencil marks beside the dry ink.
    Back to the steps

If something looks off

If the arms look too sharp

Round the pencil stroke just past each outer stop. Keep the inward turns distinct so the arms still read separately.