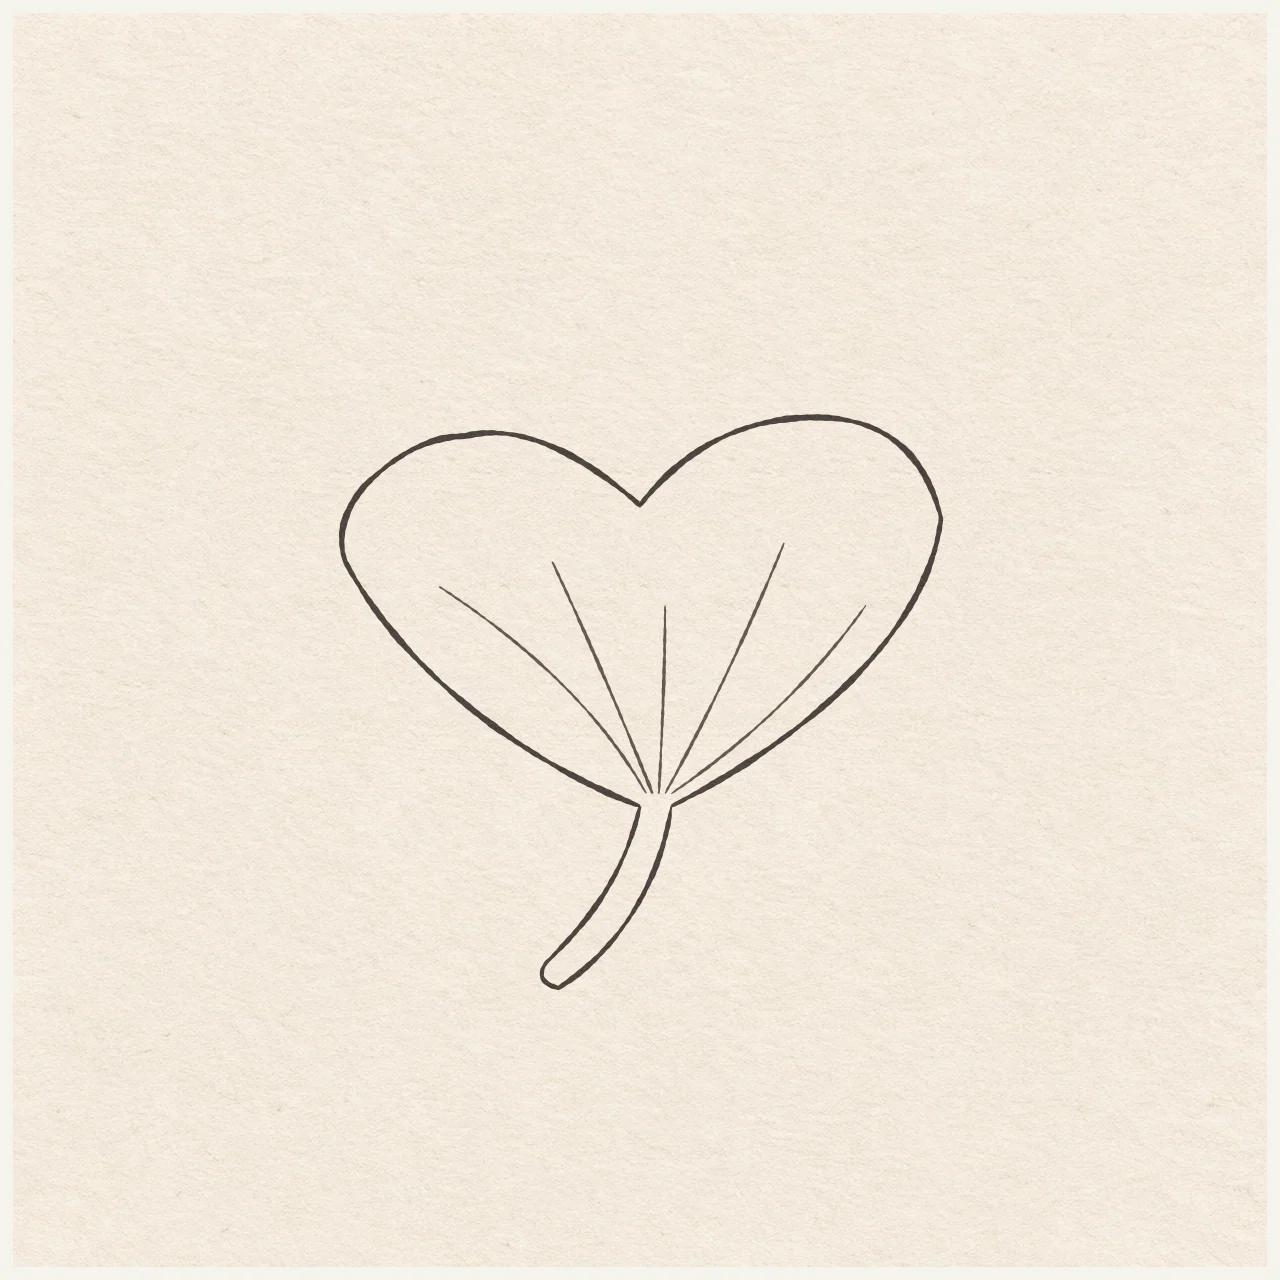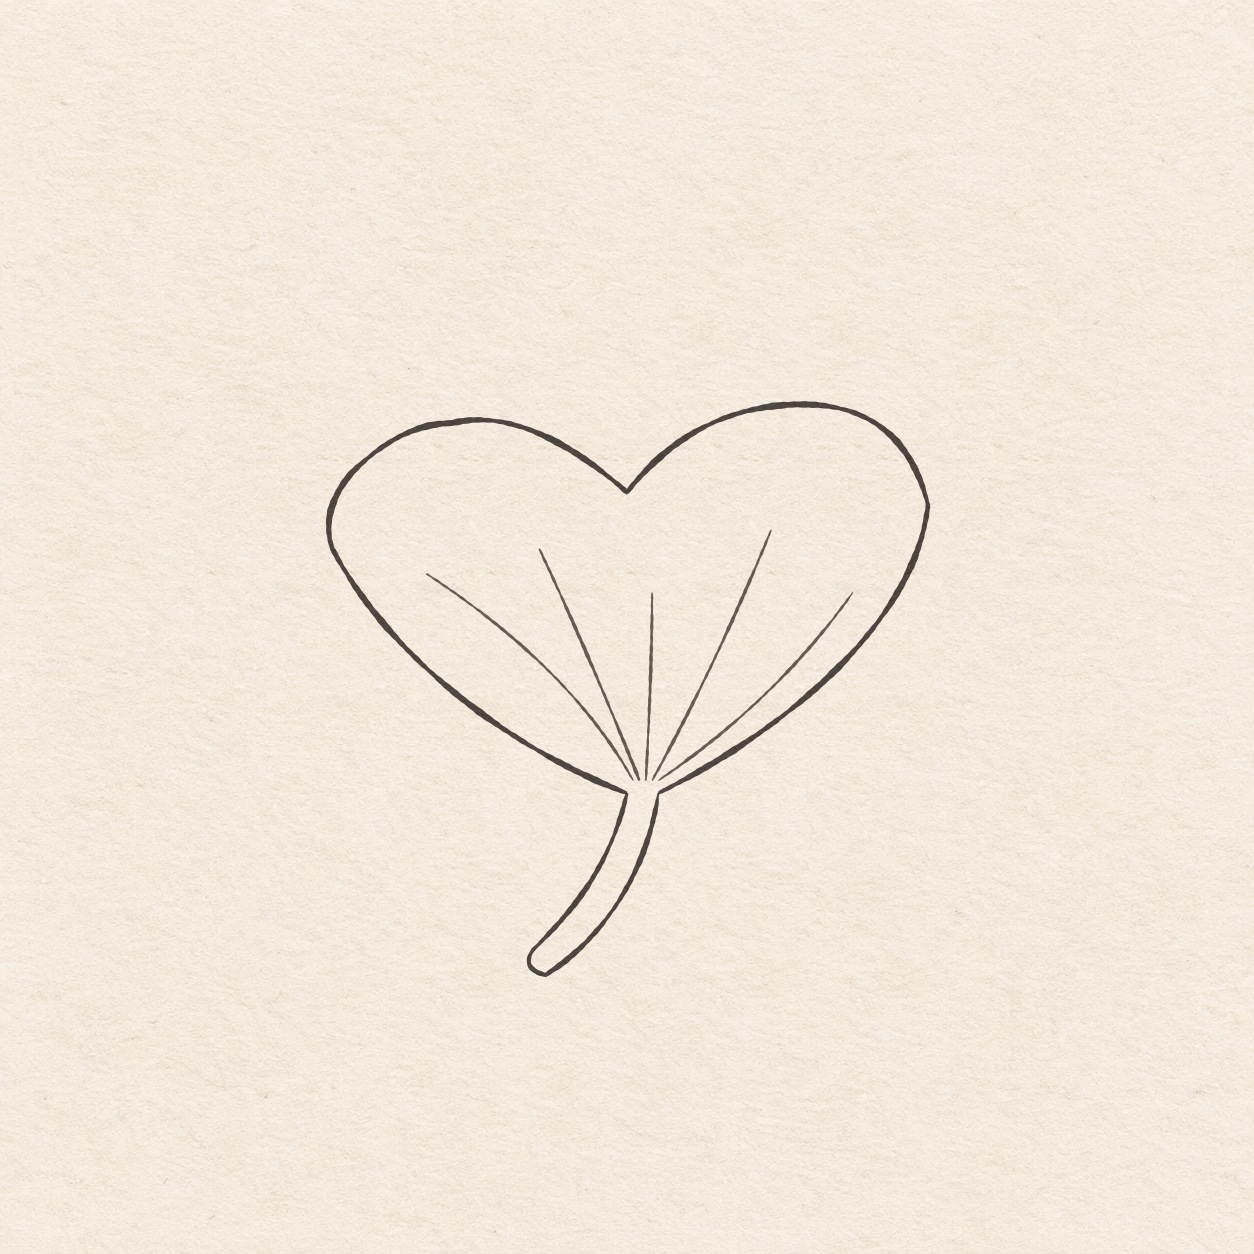
Fineliner drawing of a broad ginkgo leaf with a shallow central notch, five curved veins and a stem bending left.
Drawing referenceAbout reference use

Fan-shaped ginkgo leaf

Build a notched fan and a curved stem, then let a few fine veins spread through the leaf.

Nature & plantsEasyFinelinerReference practice: about 19 min
Save reference

Follow the drawing tutorial

Build a notched fan and a curved stem, then let a few fine veins spread through the leaf.

Start the 6-step tutorial

A small thing to tryWhile the leaf is still in pencil, deepen the shallow dip between the two upper dots. Keep both sides soft and rounded.

Draw it, one step at a time

Draw a ginkgo leaf

Build a notched fan and a curved stem, then let a few fine veins spread through the leaf.

6 illustrated steps Full tutorial: about 19 minutes, at your pace

What you’ll need

  • HB pencil
  • Eraser
  • Ruler
  • Scrap of paper with a square corner
  • Fine black pen
  • Drawing paper

Before you start

This example is about 9.6 cm wide and 9.2 cm high. Choose a spot for the base of the fan. The stem curves down and left from there.

  1. A faint level line runs through two closely spaced stem joins.
    Drawing 1 — Set the fan baseView larger
    Pencil

    Set the fan base

    Instructions for Drawing 1 — Set the fan base

    1. Choose where the fan will meet the stem on its left side and put a faint dot there. Leave 5 cm to the left, 5 cm to the right, 6.5 cm above and 3.2 cm below, plus a little margin. Move this dot before starting if the leaf would sit too close to an edge.
    2. Rule a light line 5 cm to each side of that dot. Use it to measure sideways. For every height, turn a scrap’s square corner so one edge rests on the line and the other points straight up or down. Keep the line faint because it will be erased after inking.
    3. Mark the right stem join 5 mm right of the first dot on the level line. Keep the two dots separate. The fan will have an opening between them.
    Next step
  2. Five upper pencil dots mark the two wide turns, two lobe tops and the dip.
    Drawing 2 — Mark the fan turns and notchView larger
    Pencil

    Mark the fan turns and notch

    Instructions for Drawing 2 — Mark the fan turns and notch

    1. Measure along the faint line from the left join. At 4.7 cm left, mark a dot 3.9 cm up for the left turn. At 2.8 cm left, mark one 5.9 cm up for the left lobe. Directly above the left join, mark the notch 4.8 cm up. Use the square corner for all three heights.
    2. From the left join, measure 2.8 cm right along the line and mark the right lobe 6.2 cm up. At 4.8 cm right, mark the wide right turn 4.6 cm up. The right lobe is a little higher than the left lobe.
    Next step
  3. A notched fan silhouette ends in two distinct stem joins at its base.
    Drawing 3 — Sweep the two sides of the fanView larger
    Pencil

    Sweep the two sides of the fan

    Instructions for Drawing 3 — Sweep the two sides of the fan
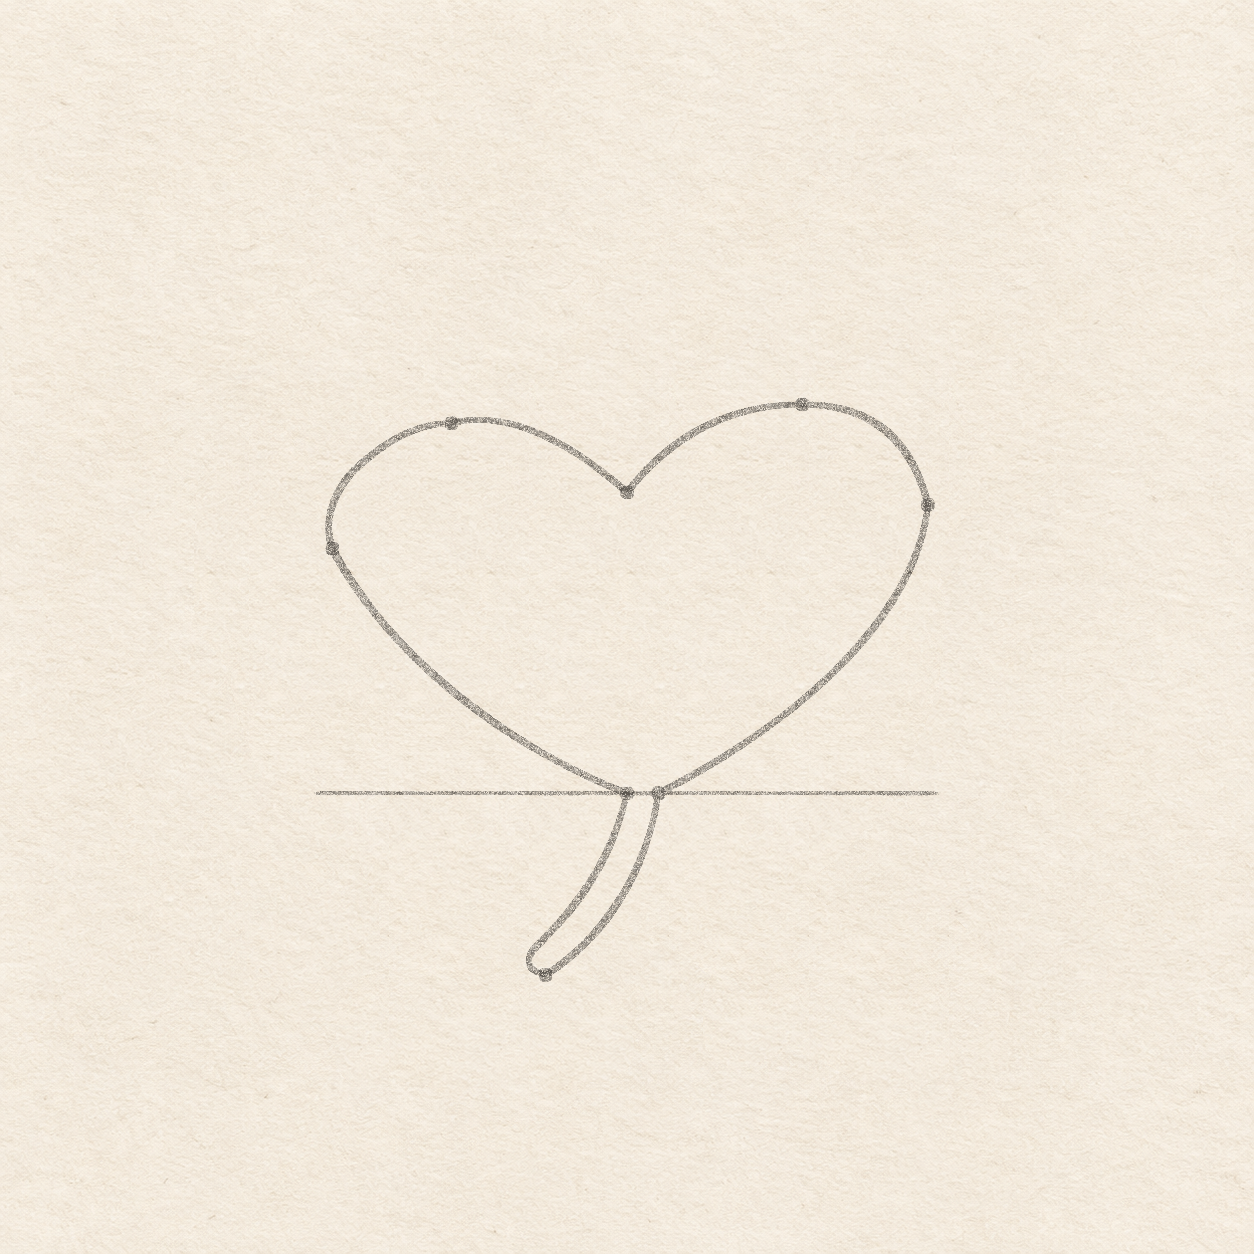
    1. Start at the left join and sweep up and left through the wide left turn. Round up and in to the left lobe, then dip to the middle notch. Rise to the right lobe, round out through the wide right turn, and sweep down and left to the right join. Keep the join-to-join opening at the base and let the two upper lobes be slightly unequal.
    Next step
  4. Two curved stem edges join the lower fan and meet around the lower-left tip.
    Drawing 4 — Curve the short stemView larger
    Pencil

    Curve the short stem

    Instructions for Drawing 4 — Curve the short stem
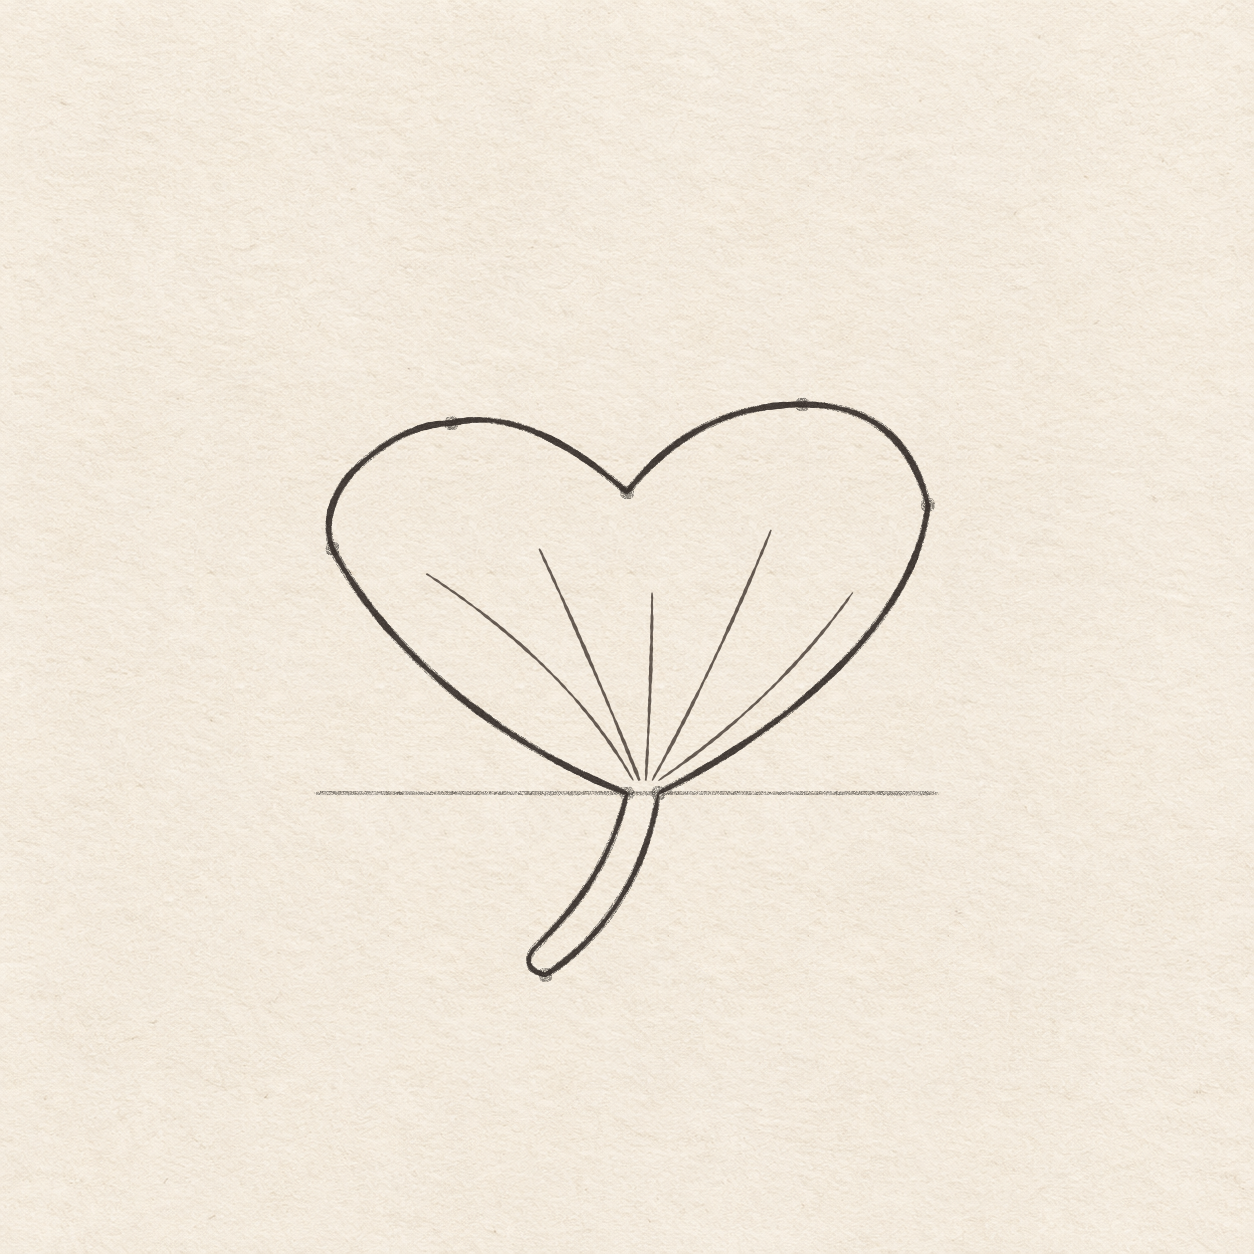
    1. Use the square corner on the level line. From the left join, go 1.3 cm left along the line, then mark a dot 2.9 cm straight down. The new dot sits down and left from both joins on the leaf.
    2. From the left join, freehand a gently curved line down-left toward the low dot. Round the tip into that dot. Sweep back up and right to the right join, leaving a slim ribbon of paper between the sides. Keep the sides about 5–7 mm apart before the rounded tip. Leave the top open where it meets the fan.
    Next step
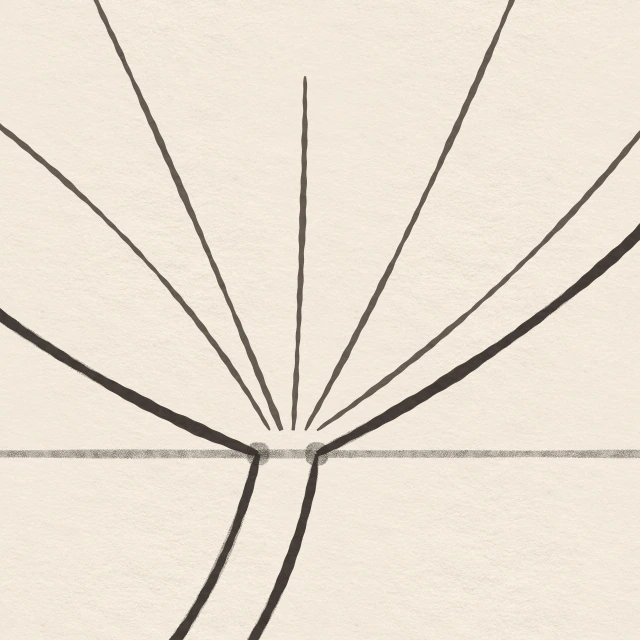
  5. A dark leaf outline and curved stem surround five lighter veins that stop inside the fan.
    Drawing 5 — Ink the leaf and add the veinsView larger
    A close view of five separate vein starts just above the ginkgo stem opening, with the faint measuring line still visible.
    Detail 5.1 — Vein starts above the stemThe five veins start separately just inside the fan. The faint pencil line across the stem opening is erased in the next drawing.
    Ink

    Ink the leaf and add the veins

    Instructions for Drawing 5 — Ink the leaf and add the veins
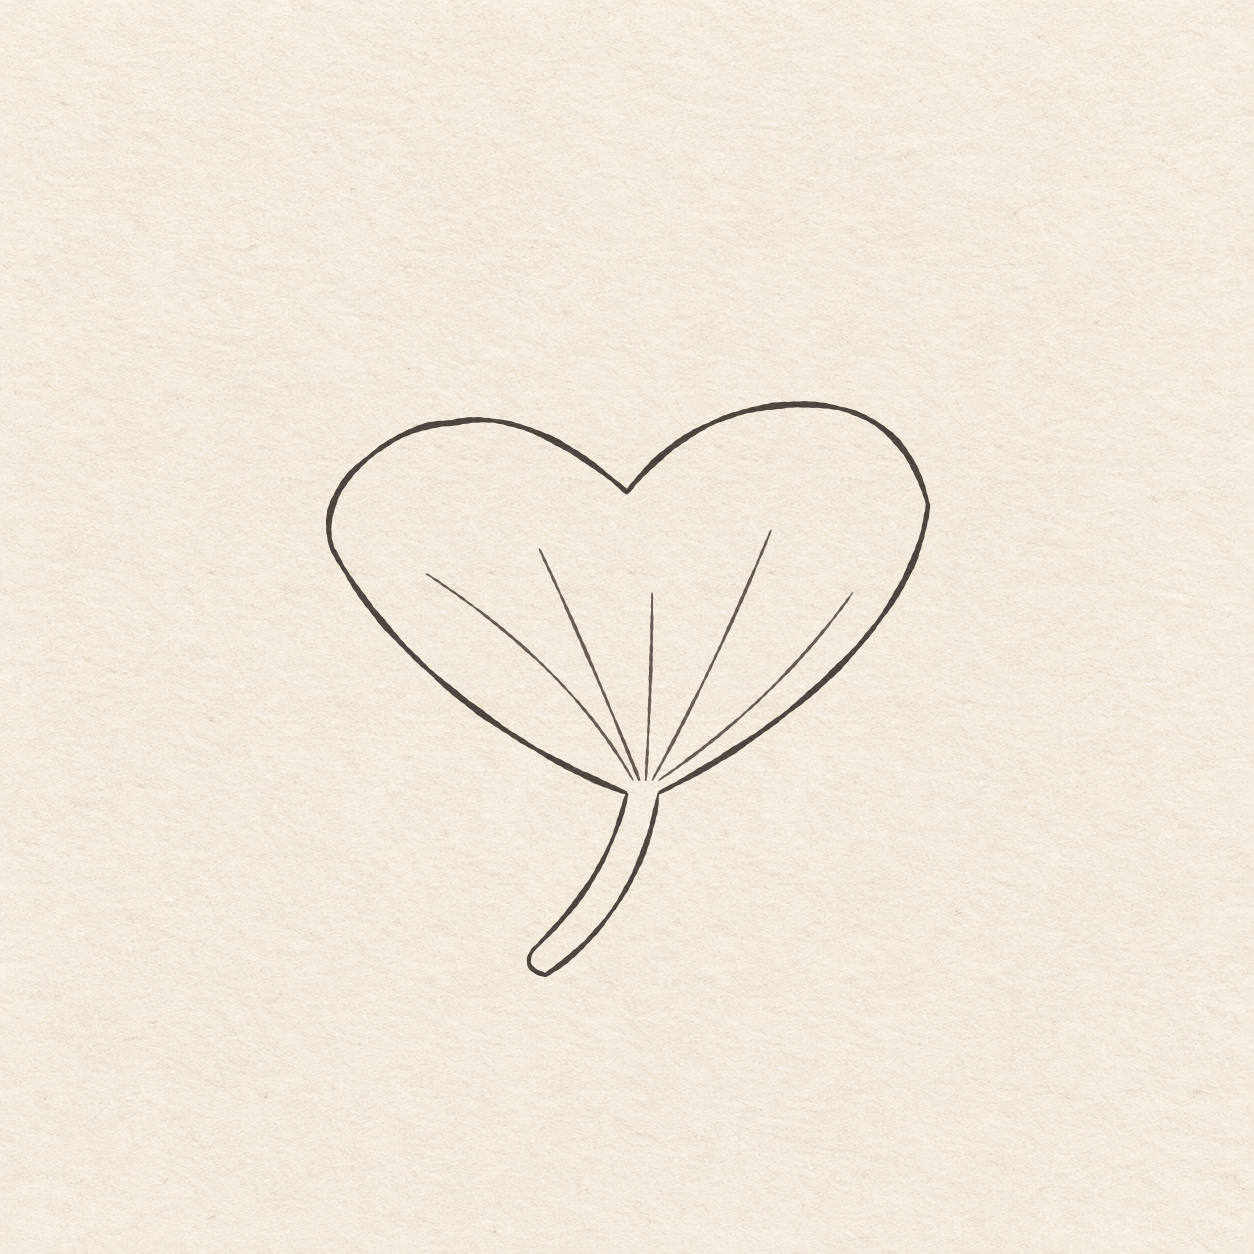
    1. Follow the whole fan edge in ink from the left join around to the right join. Keep the small opening at the base beneath the fan.
    2. Follow the curved stem sides and tip in ink. Start and stop where the sides meet the fan. Leave the pencil guide for cleanup. Keep the ink open between the two joins.
    3. Freehand five thin veins from five separate starts just above the opening at the fan base. Space the starts roughly 1 mm apart. Curve one toward each side, one toward each lobe and one toward the notch. Stop each well before the rim and keep the veins out of the stem.
    Next step
  6. The inked ginkgo fan has two upper lobes, five light veins and a slim stem curving to the left.
    Drawing 6 — Erase the dry pencil guidesView larger
    Cleanup

    Erase the dry pencil guides

    Instructions for Drawing 6 — Erase the dry pencil guides

    1. Fill a small patch on a scrap of the same paper with the same pen. Rub the patch gently with your eraser. If it smears, wait and test again. Once the patch stops smearing, erase the measuring line, guide dots and any remaining pencil marks beside the dry ink.
    Back to the steps

If something looks off

If the two lobes blend into one

While the leaf is still in pencil, deepen the shallow dip between the two upper dots. Keep both sides soft and rounded.