FinelinerEasy

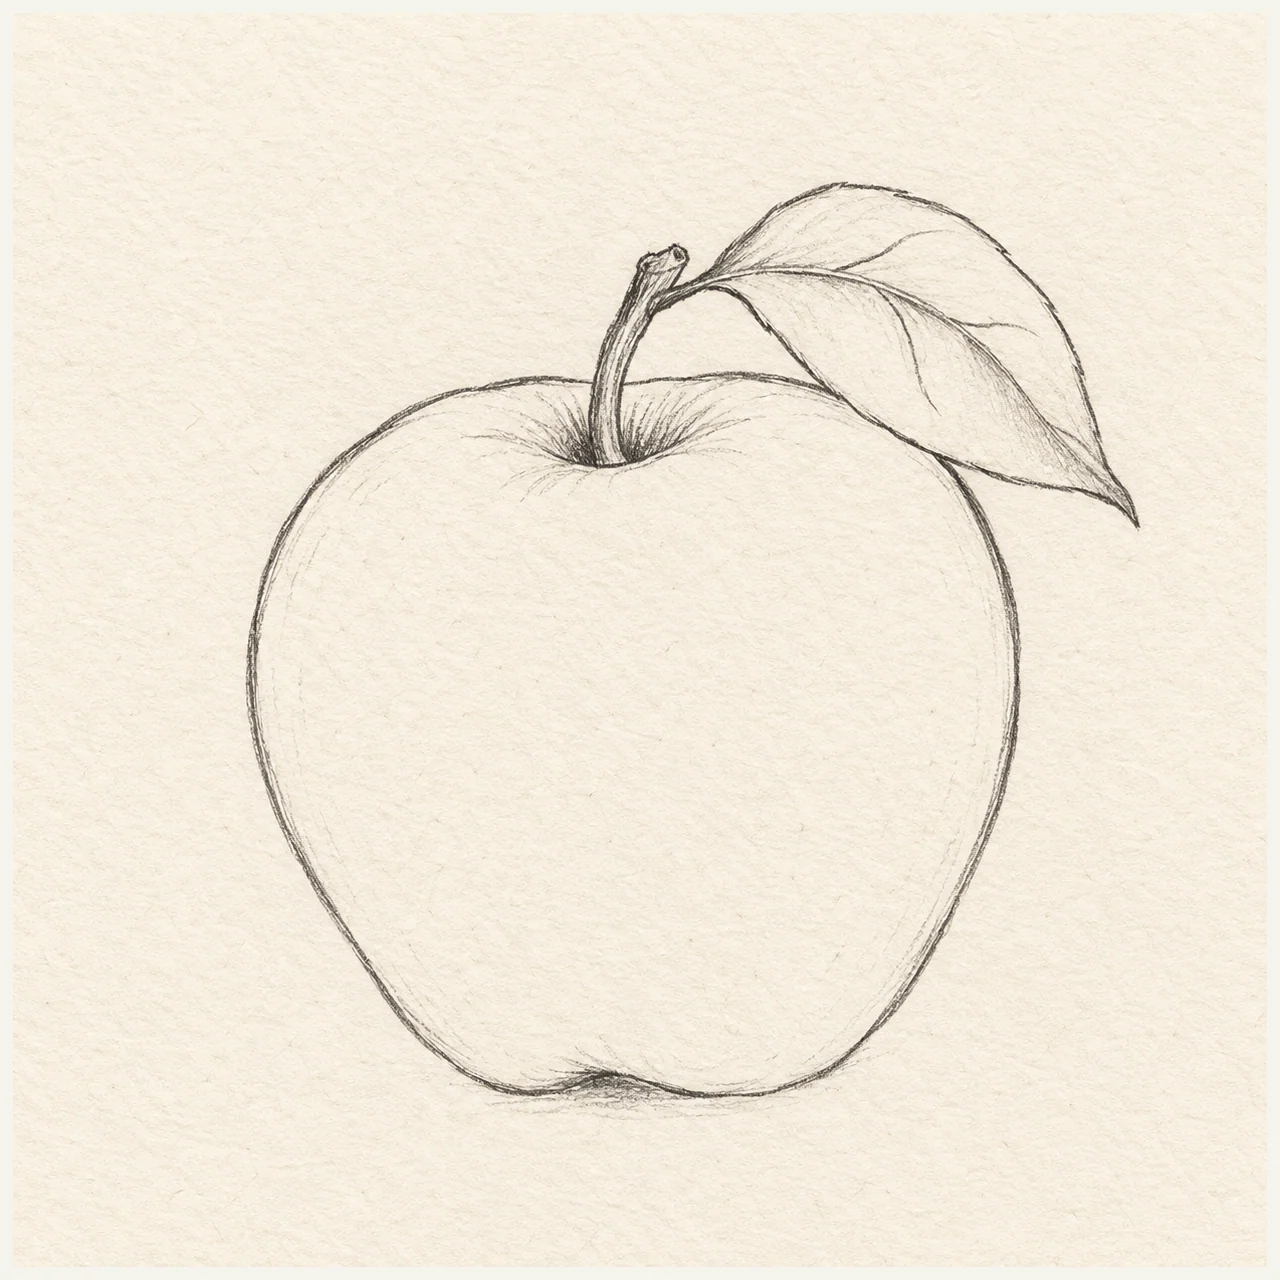
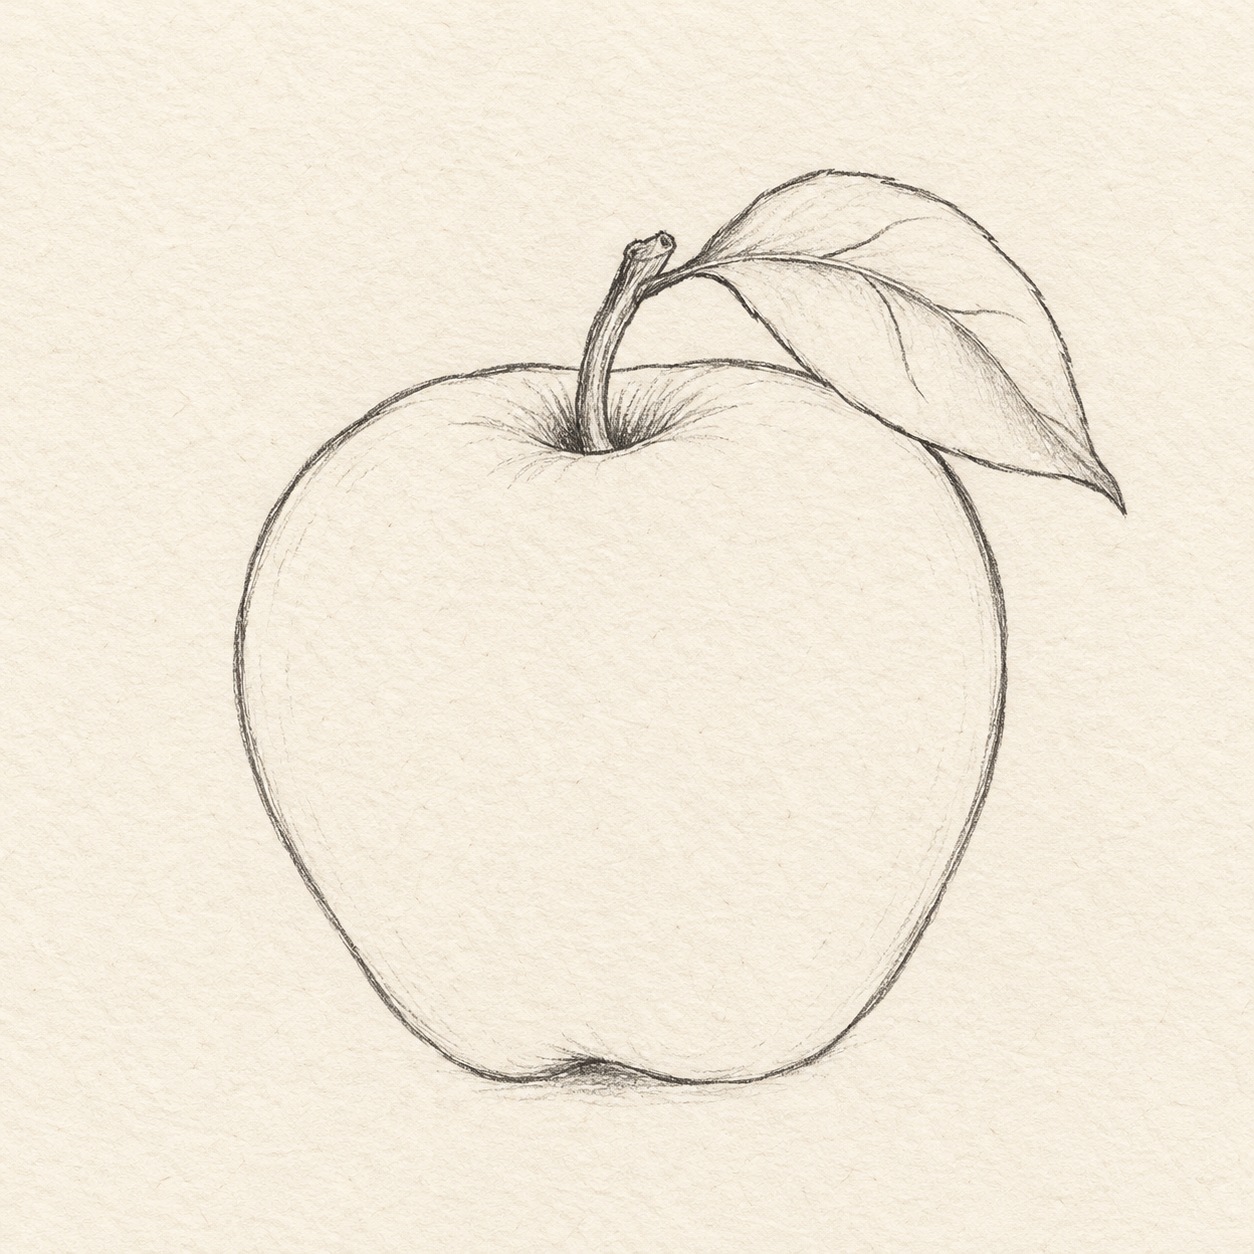
An apple with a folded leaf
Sketch an uneven apple contour and a small hollow around its stem. One folded leaf and restrained local graphite give it form without polishing the whole surface.
Follow the drawing tutorial
Use a measured broad oval, a curved stem and a single overlapping leaf, then strengthen the contours and add restrained local graphite.
Start the 8-step tutorialA small thing to tryUse the top dip and bottom notch to suggest the apple’s axis before adding the leaf.
Draw it, one step at a time
How to Draw an Apple with One Leaf in Pencil
Use a measured broad oval, a curved stem and a single overlapping leaf, then strengthen the contours and add restrained local graphite.
What you’ll need
- HB pencil
- Kneaded eraser
- Ruler marked in centimetres and millimetres
- Paper with room for a movable 10 cm working square and comfortable margins
Before you start
Choose where the complete working square will sit on your own sheet. Across means right and down means toward the bottom, measured from that square’s top-left corner unless an existing mark is named. Keep the square, crosses and first sketch light. Rehearse each curve above the paper before drawing freehand between its stated physical supports. Lift and redraw a misplaced light section before strengthening it. Named Drawings show their nearby actions completed; Details show that same stage more closely.
Step 1 of 8 · Pencil

Build the broad body guide

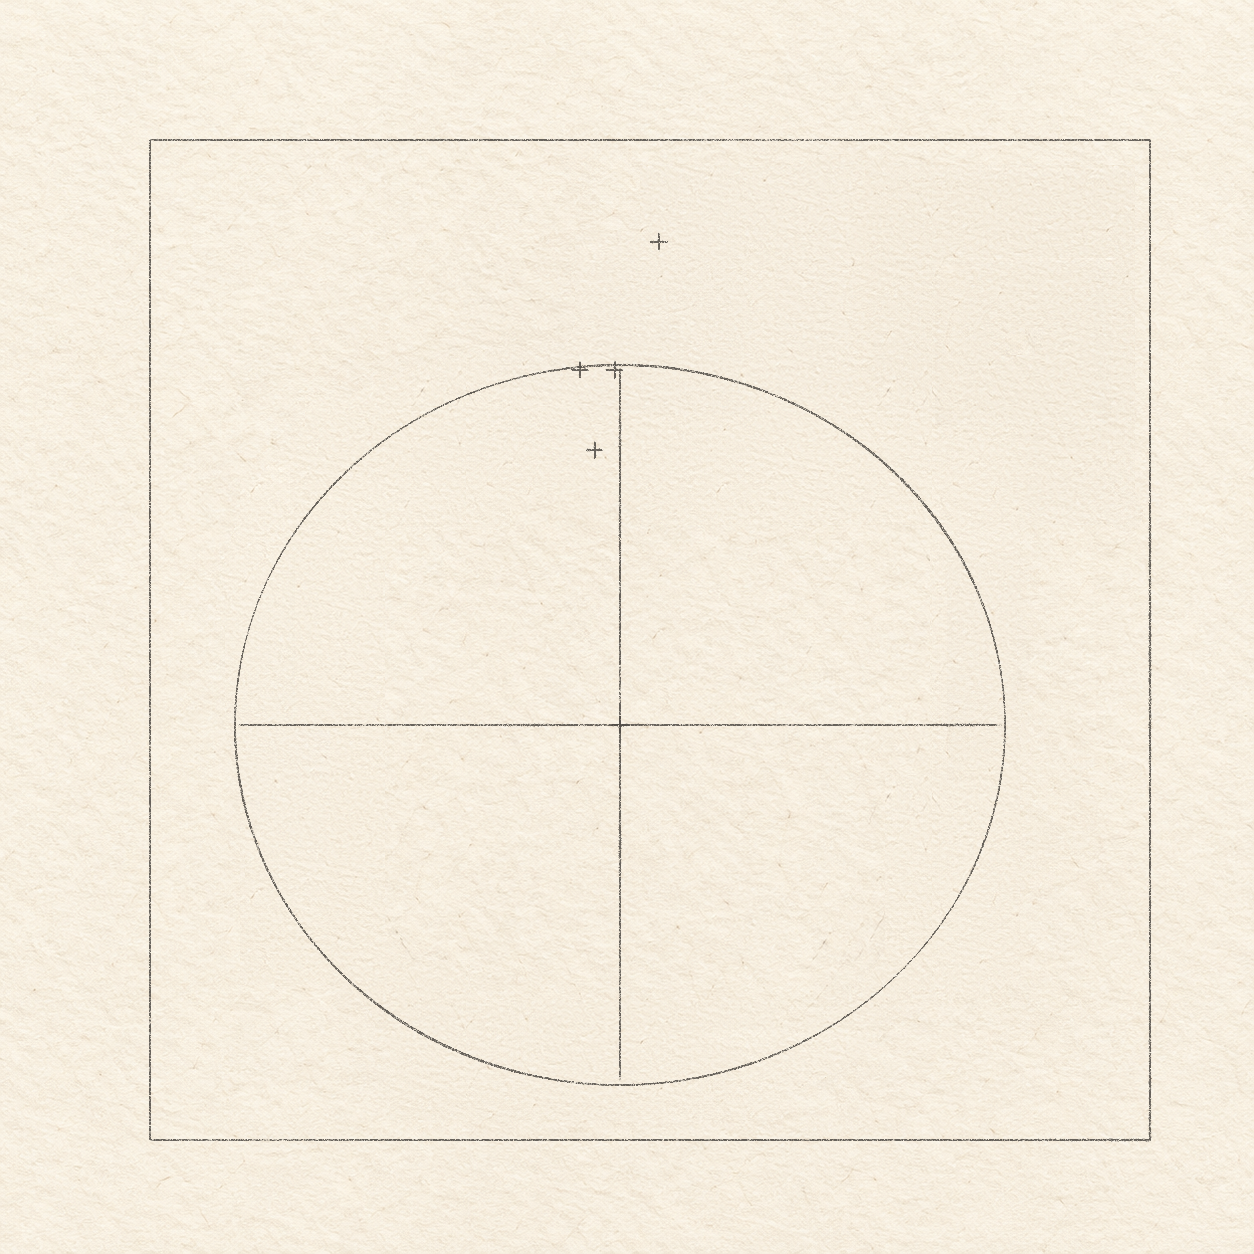
Drawing 1A — Movable working squareView larger Instructions for Drawing 1A — Movable working square
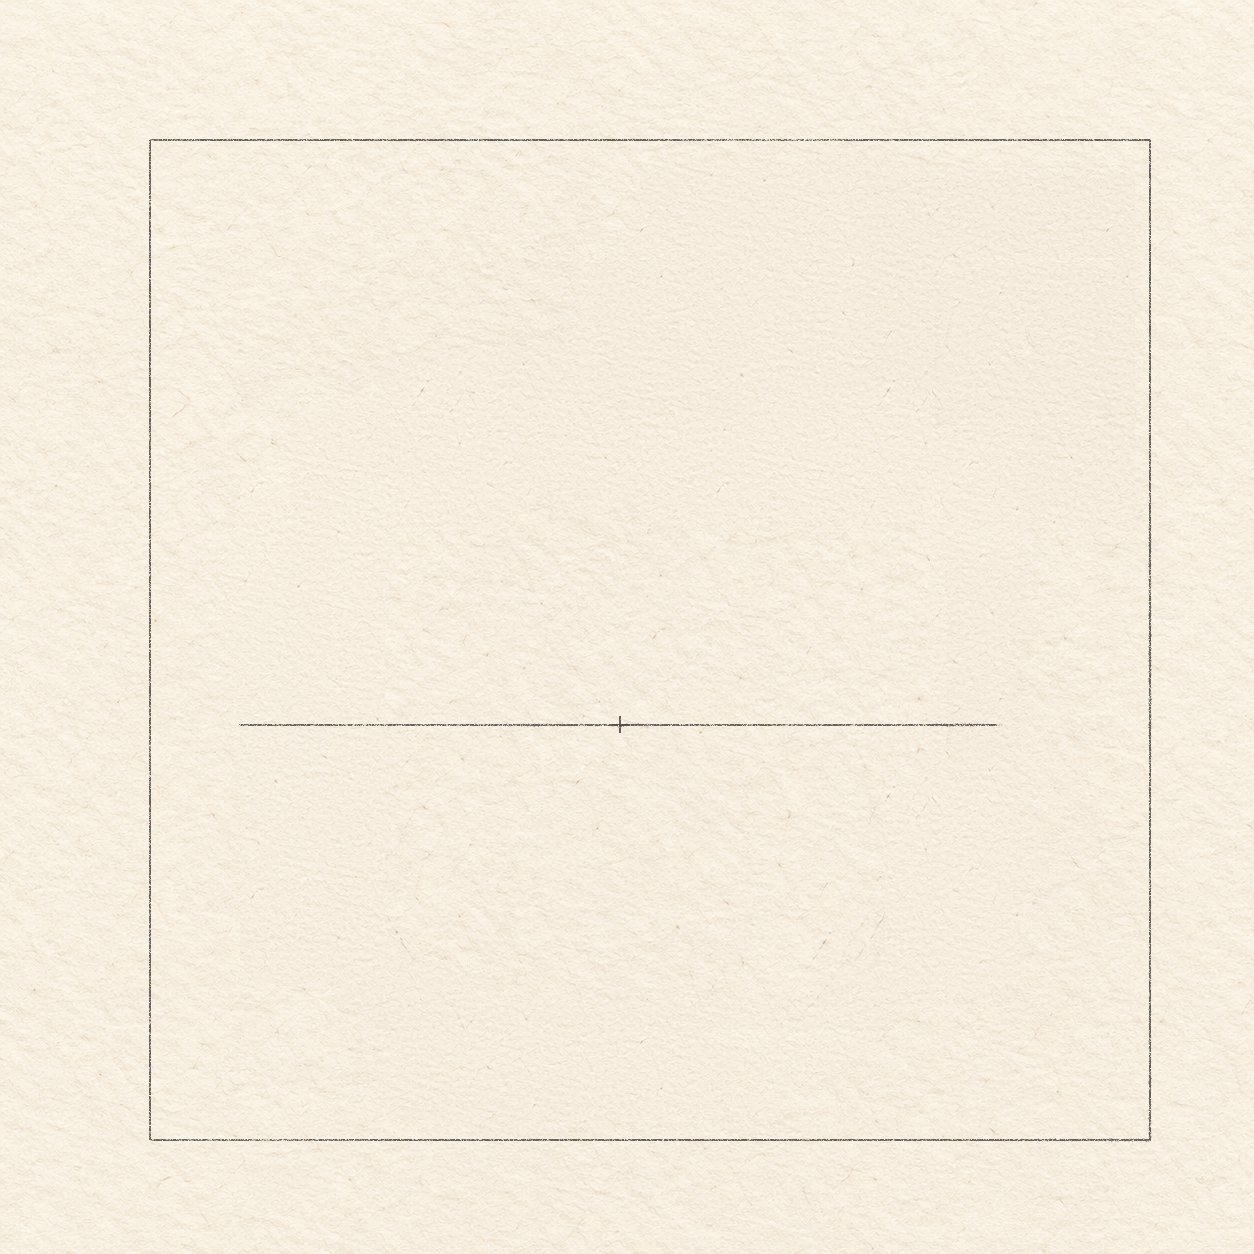
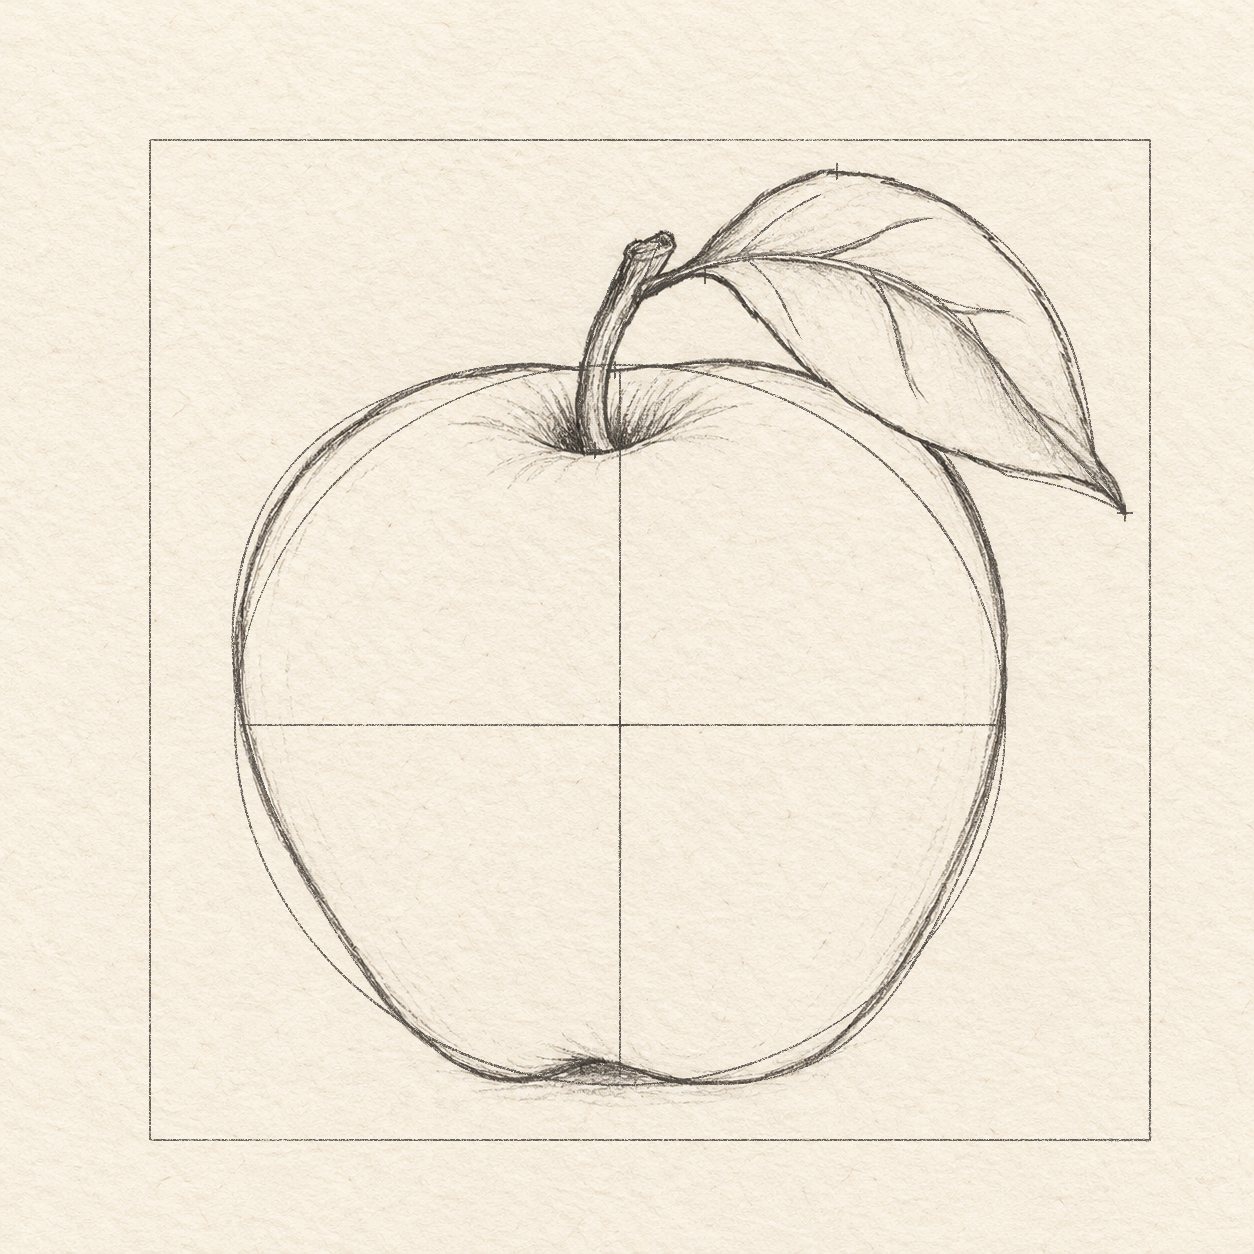
- Choose where you want the apple on your sheet. Use a ruler and light HB pencil to draw a working square 10 cm wide and 10 cm high: draw its top edge, both downward sides, then join their lower ends. Leave comfortable paper margins around it. Compare Drawing 1A — Movable working square.

Drawing 1B — Body center and width guideView larger Instructions for Drawing 1B — Body center and width guide
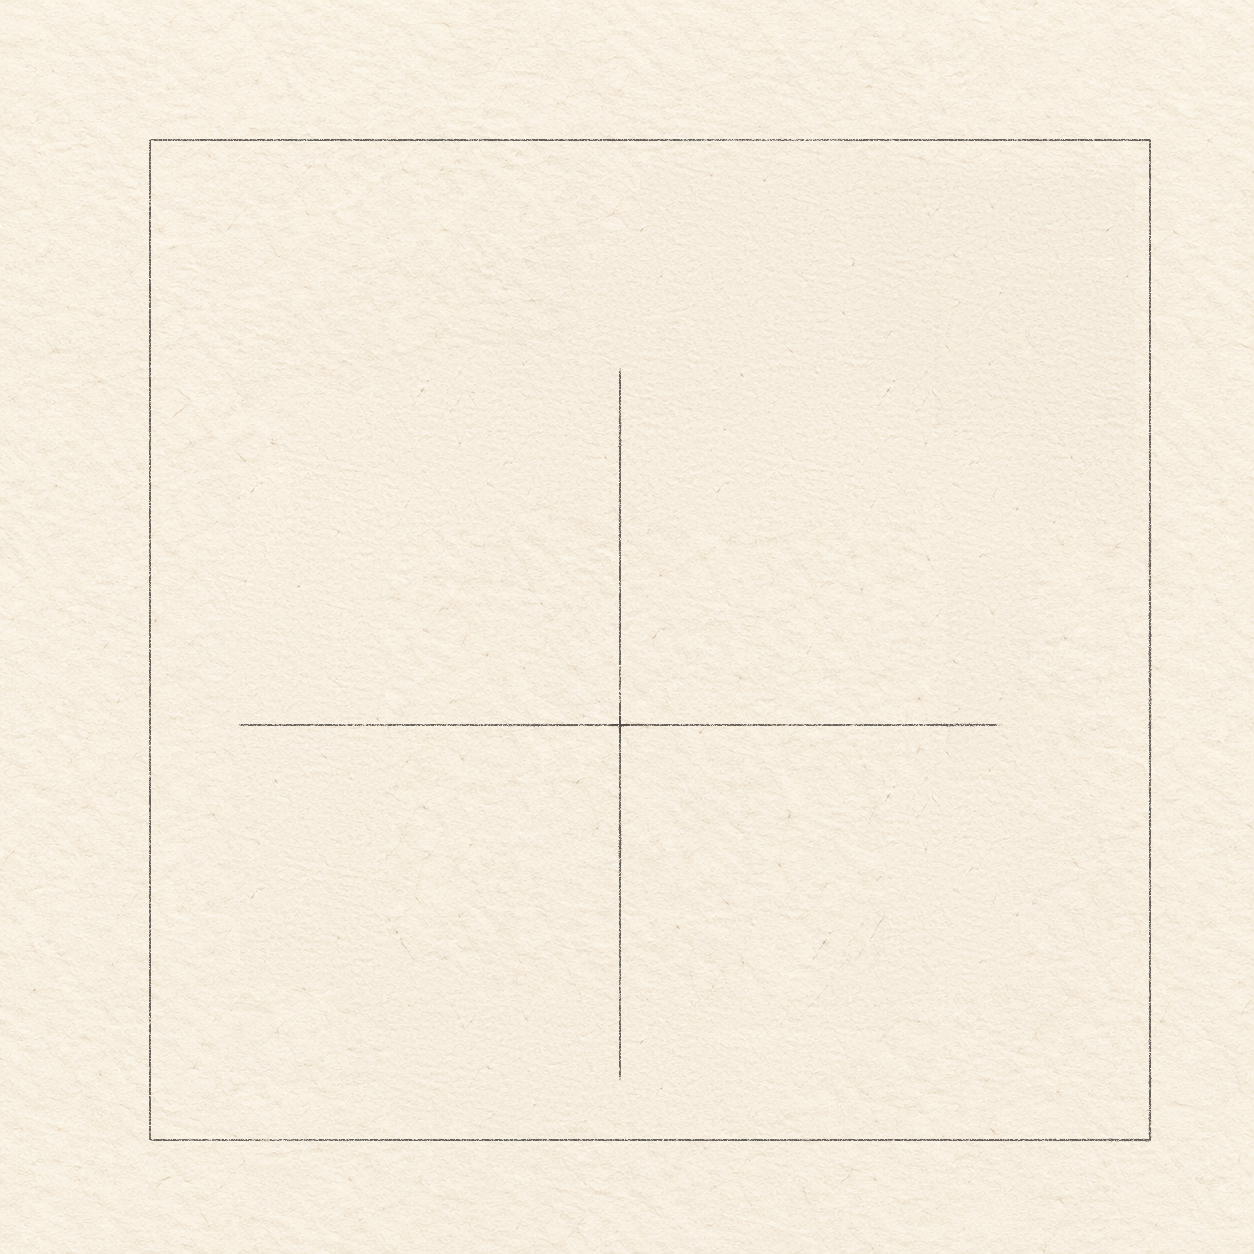
- Use two light 2 mm strokes for each placement cross. From the square’s top-left corner, mark a small cross 4.7 cm across and about 5.85 cm down. Through it, draw a light level line 7.7 cm long, extending 3.85 cm to each side. The line’s two ends will set the broad body’s left and right limits. Compare Drawing 1B — Body center and width guide.

Drawing 1C — Complete body construction crossView larger Instructions for Drawing 1C — Complete body construction cross
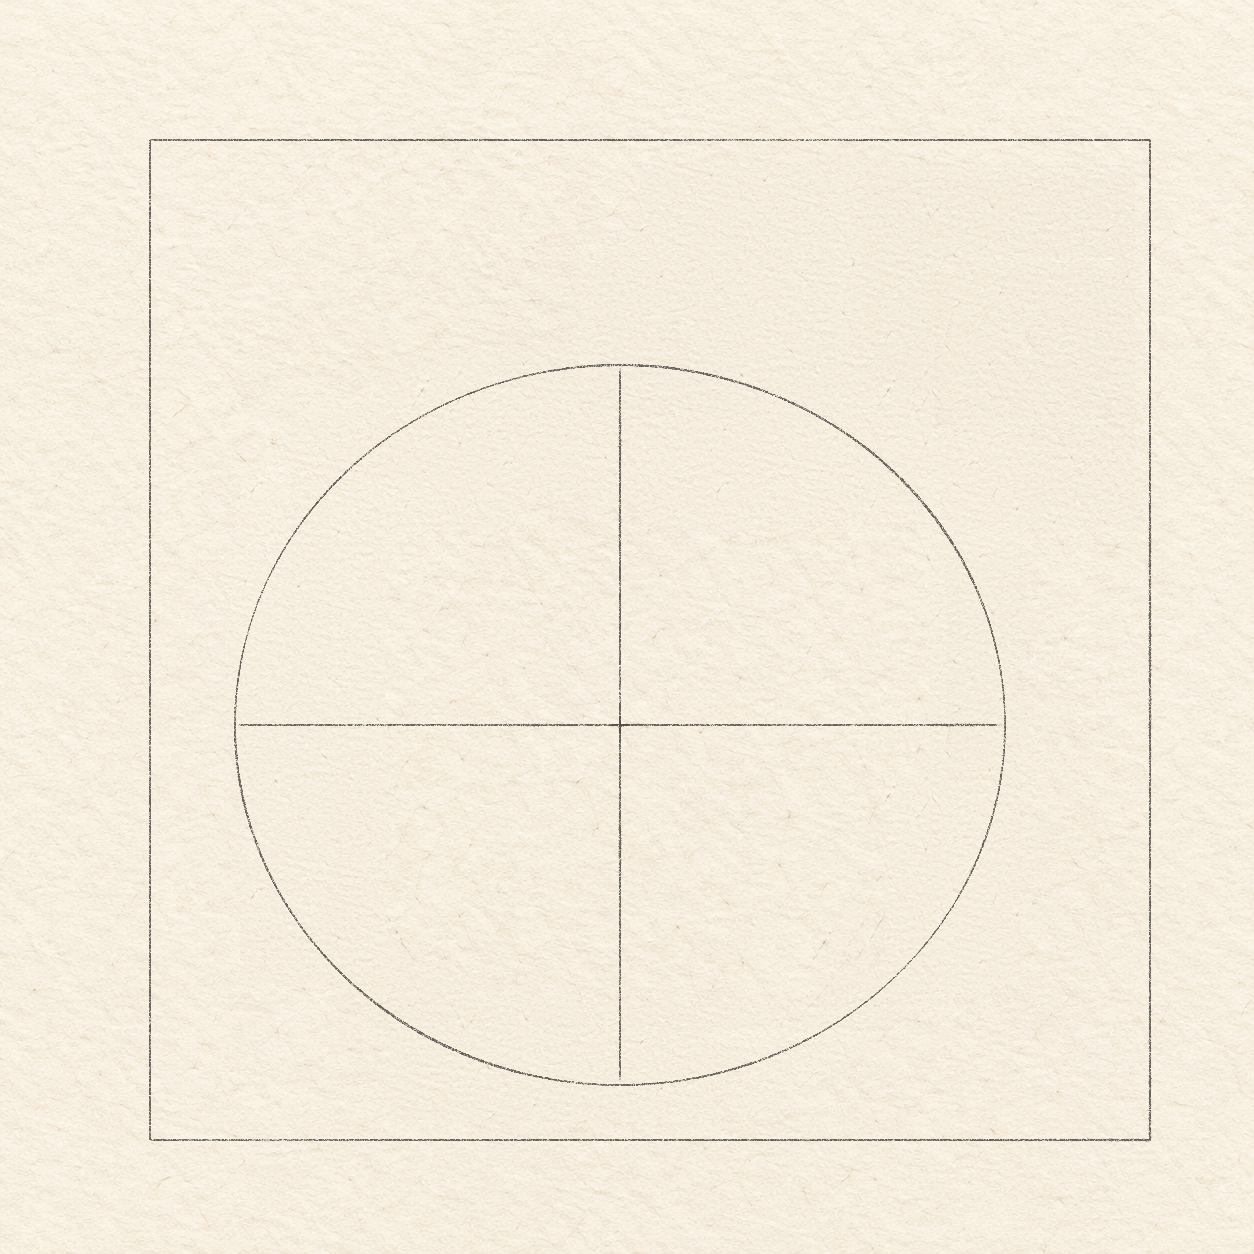
- Through that existing body-center cross, draw an upright line 7.2 cm long, with 3.6 cm above and below the center. Make it perpendicular to the level line, like a plus sign. Its upper and lower ends set the body’s height. Compare Drawing 1C — Complete body construction cross.

Drawing 1D — Broad body ovalView larger Instructions for Drawing 1D — Broad body oval
- Rehearse an oval above the paper, passing through the cross’s left, top, right and bottom ends. Then join those four ends with smooth rounded curves, drawing freehand and keeping the line light. The straight cross locates the oval; do not trace its straight lines. Compare Drawing 1D — Broad body oval.
Step 2 of 8 · Pencil
Place and sketch the curved stem

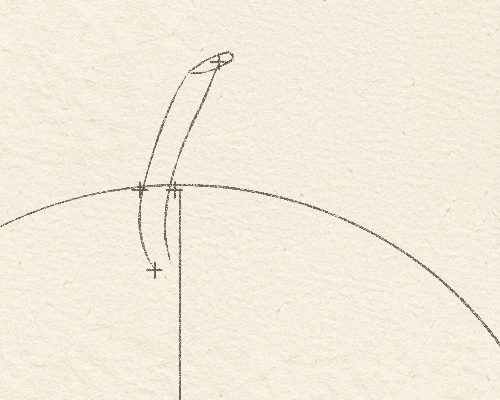
Drawing 2A — Stem contacts, foot and cut tipView larger Instructions for Drawing 2A — Stem contacts, foot and cut tip
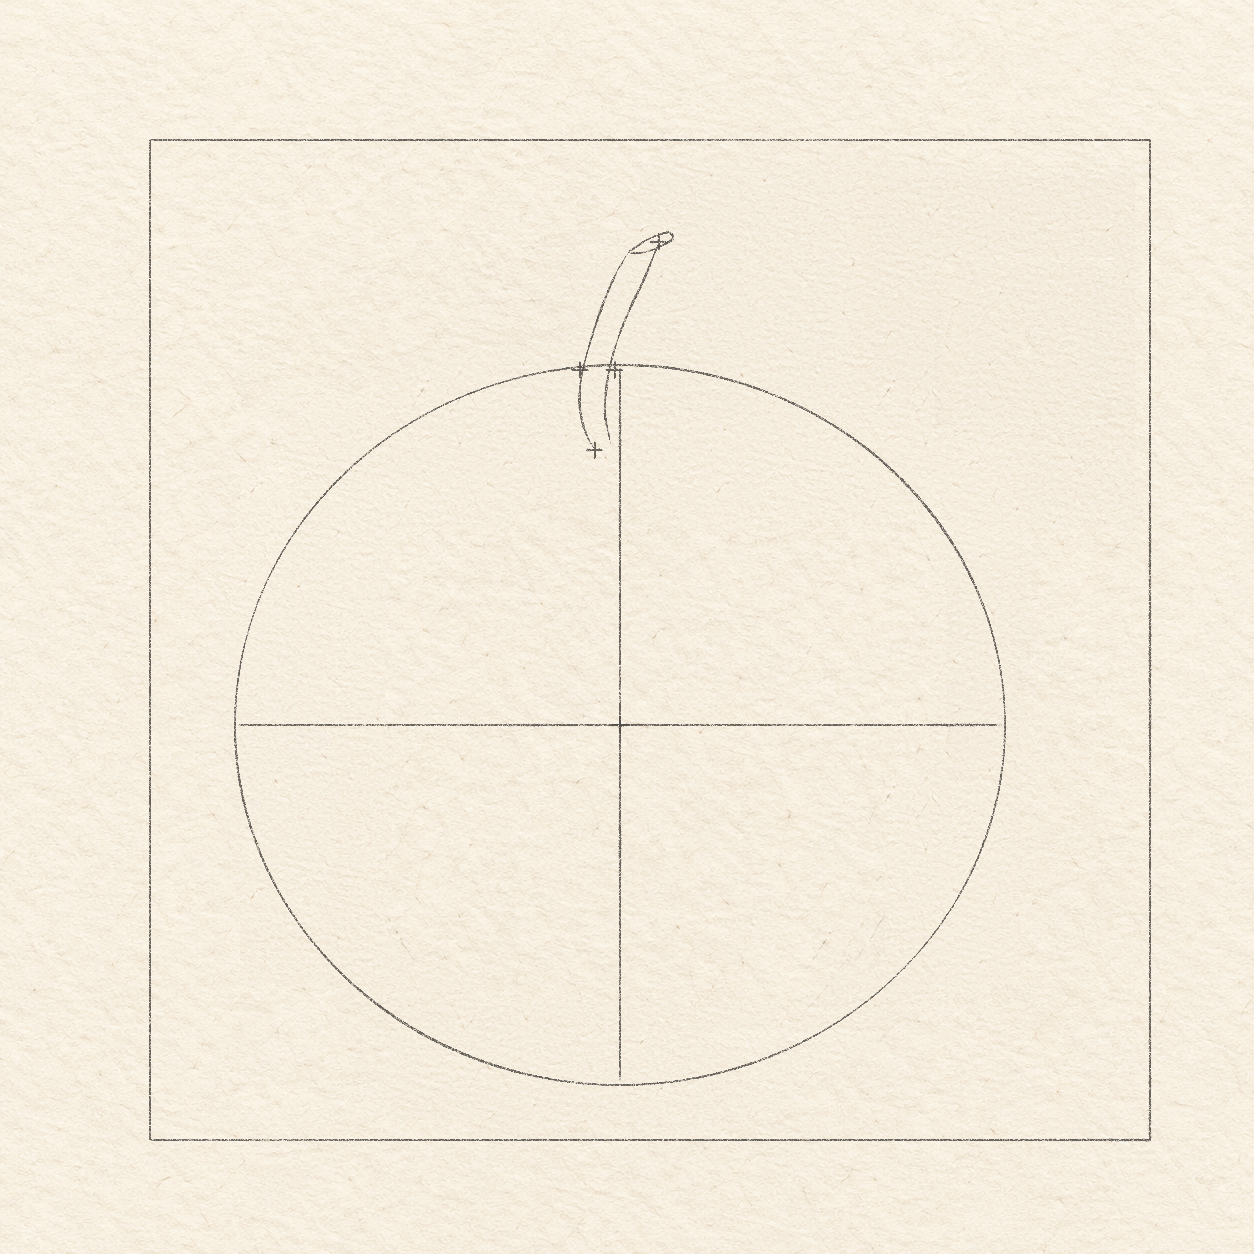
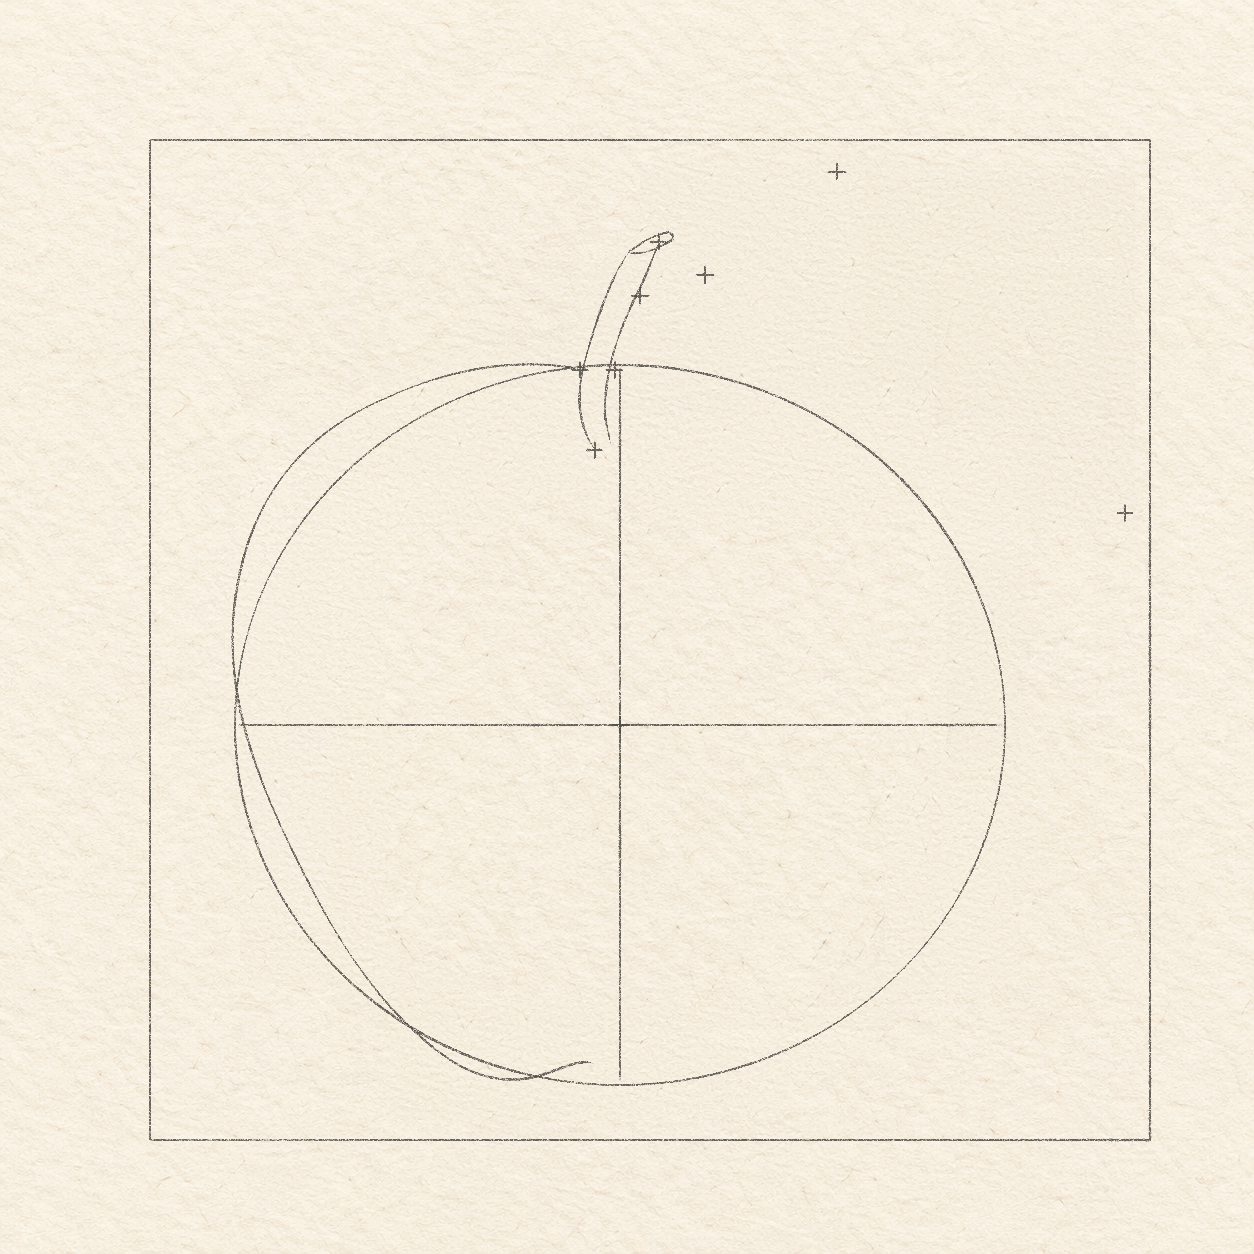
- At the oval’s top, mark the two places where the fruit’s outside crown meets the stem. From the upright guide’s top end, put one cross 4 mm left and about 0.5 mm down, and another about 0.5 mm left and 0.5 mm down. These are the left and right crown contacts.
- Using that same top end, mark the stem’s foot 2.5 mm left and 8.5 mm down. Mark its cut tip 4 mm right and about 1.2 cm above the top end. The foot sits inside the fruit; it is not a deep V in the outside crown. Compare Drawing 2A — Stem contacts, foot and cut tip.

Drawing 2B — Curved stem sketchView larger 
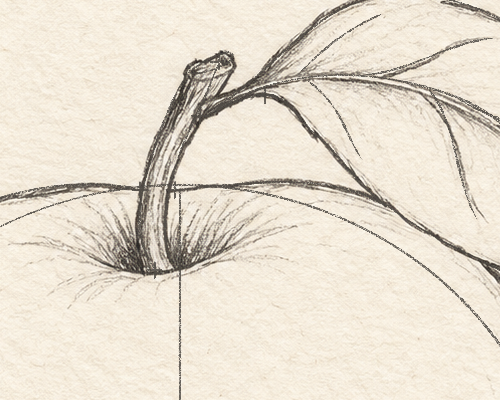
Detail 2B.1 — Stem contacts and inside footThe outside fruit crown meets the two shaft sides higher up. The stem’s lower foot sits inside the fruit; do not turn that foot into a deep notch in the outside crown. Instructions for Drawing 2B — Curved stem sketch
- From the foot cross, curve the stem’s left edge upward through the left crown-contact cross. Finish about 3 mm left and 1 mm below the cut-tip cross; that cross locates the top area, not both edges. Draw freehand, bowing slightly left below the middle before leaning right. Keep the foot inside the fruit’s oval.
- Start the stem’s right edge at the cut-tip cross. Curve it freehand down through the right crown contact, ending about 1.5 mm right of the foot cross. Keep the shaft about 2–4 mm wide. Join its two top ends with a tiny tilted oval. Leave the shaft pale; lengthwise graphite comes later. Compare Drawing 2B — Curved stem sketch.
Step 3 of 8 · Pencil
Draw the left fruit contour

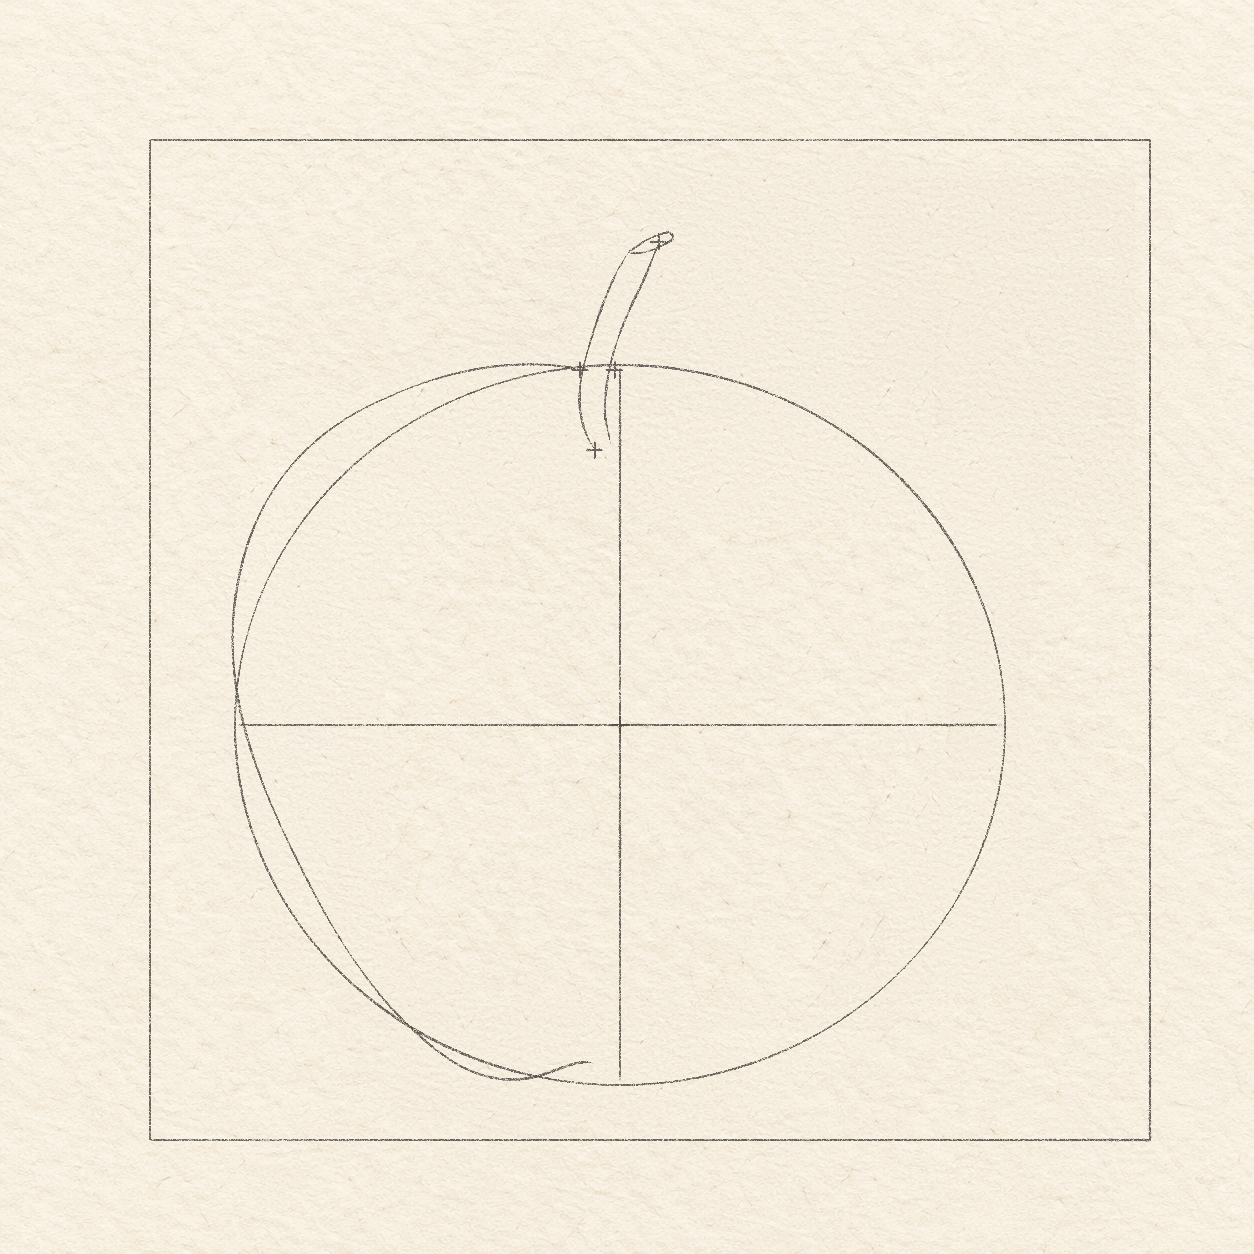
Drawing 3A — Left crown, side and baseView larger Instructions for Drawing 3A — Left crown, side and base
- Start at the stem’s existing left crown contact. Curve left in a shallow arch, then round the left side through the oval’s leftmost point. Continue down and around the lower-left body freehand, stopping about 2 cm left and 5 mm above the oval’s bottom end.
- From that curve end, round the bottom-left bulge toward a shallow base notch about 2 mm above and 2 mm left of the oval’s lowest point. Join the existing curve with a gentle freehand turn; do not make a sharp V. Stop there and leave the right side as its light oval guide for now. Compare Drawing 3A — Left crown, side and base.
Step 4 of 8 · Pencil
Draw the overlapping leaf

Drawing 4A — Leaf attachment, high point and tipView larger Instructions for Drawing 4A — Leaf attachment, high point and tip
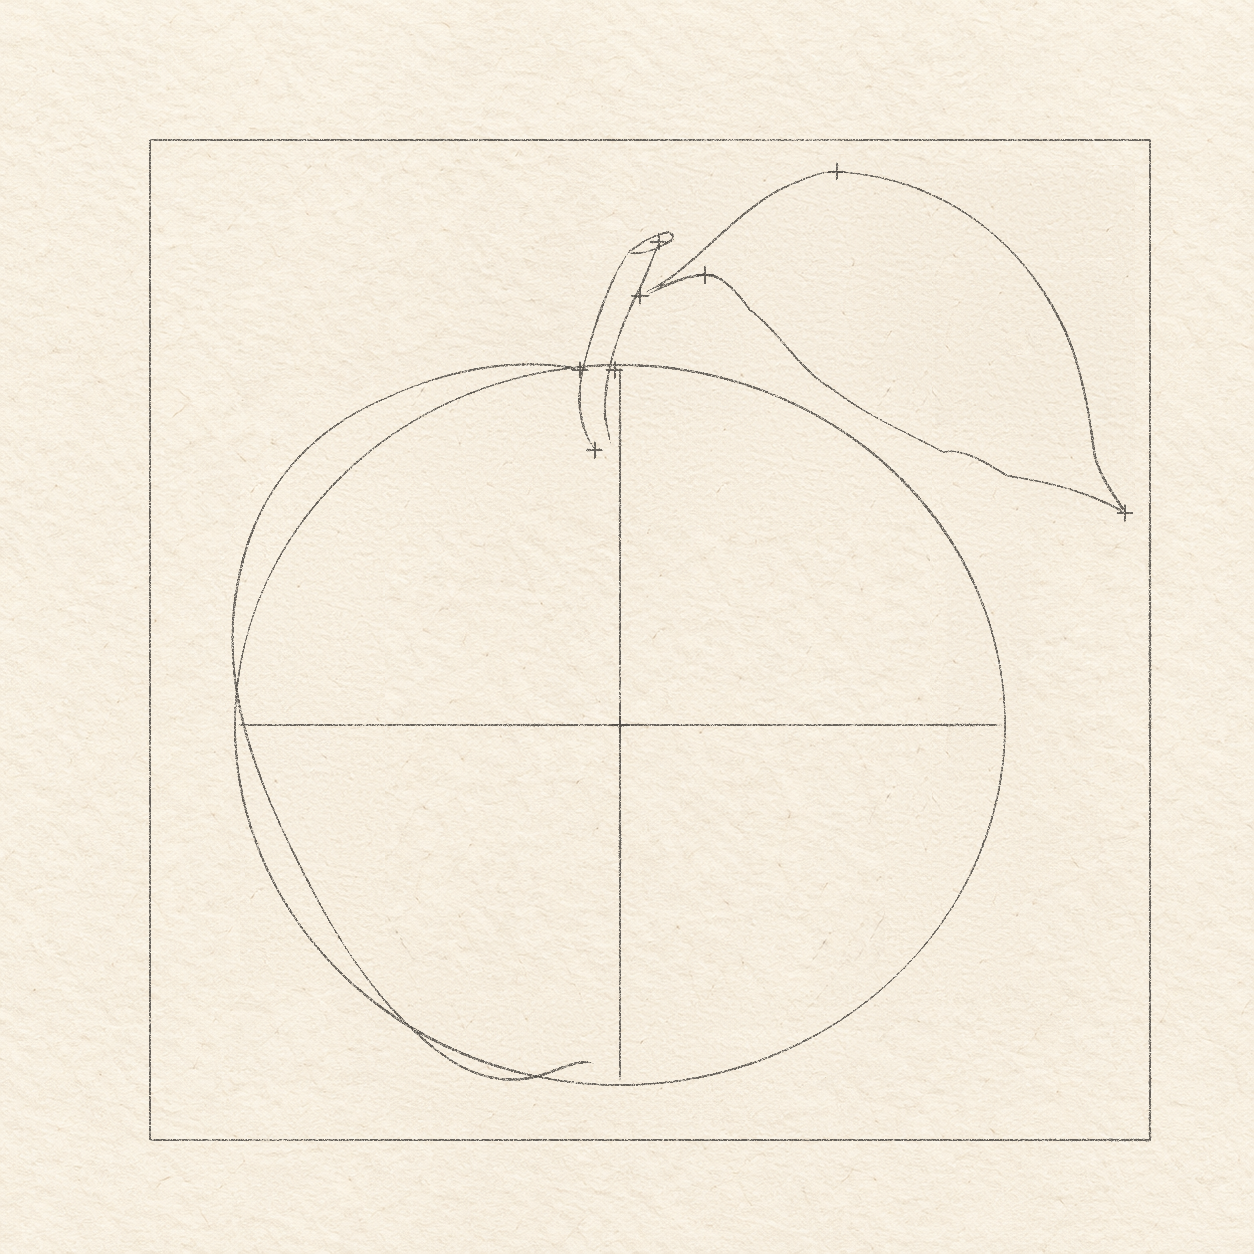
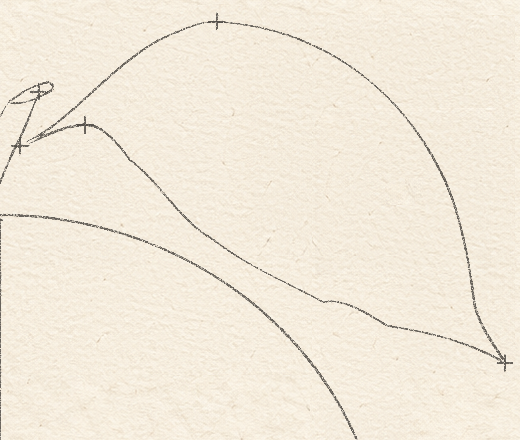
- The leaf joins the stem’s right side about 1.5 cm above its foot. Put a small cross there for the attachment. From that attachment, mark the leaf’s highest outer point about 2 cm right and 1.25 cm up. Keep these as two separate light crosses.
- From the attachment cross, mark the pointed leaf tip about 4.85 cm right and 2.2 cm down. Mark the lower return beside the attachment about 6.5 mm right and 2 mm up. This small return belongs to the folded leaf outline, not to the fruit crown. Compare Drawing 4A — Leaf attachment, high point and tip.

Drawing 4B — Complete overlapping leaf outlineView larger 
Detail 4B.1 — Folded leaf outline and attachmentThe leaf’s upper curve and lower folded return meet at the existing stem attachment. Complete these boundaries before placing the exposed right fruit edge behind the leaf. Instructions for Drawing 4B — Complete overlapping leaf outline
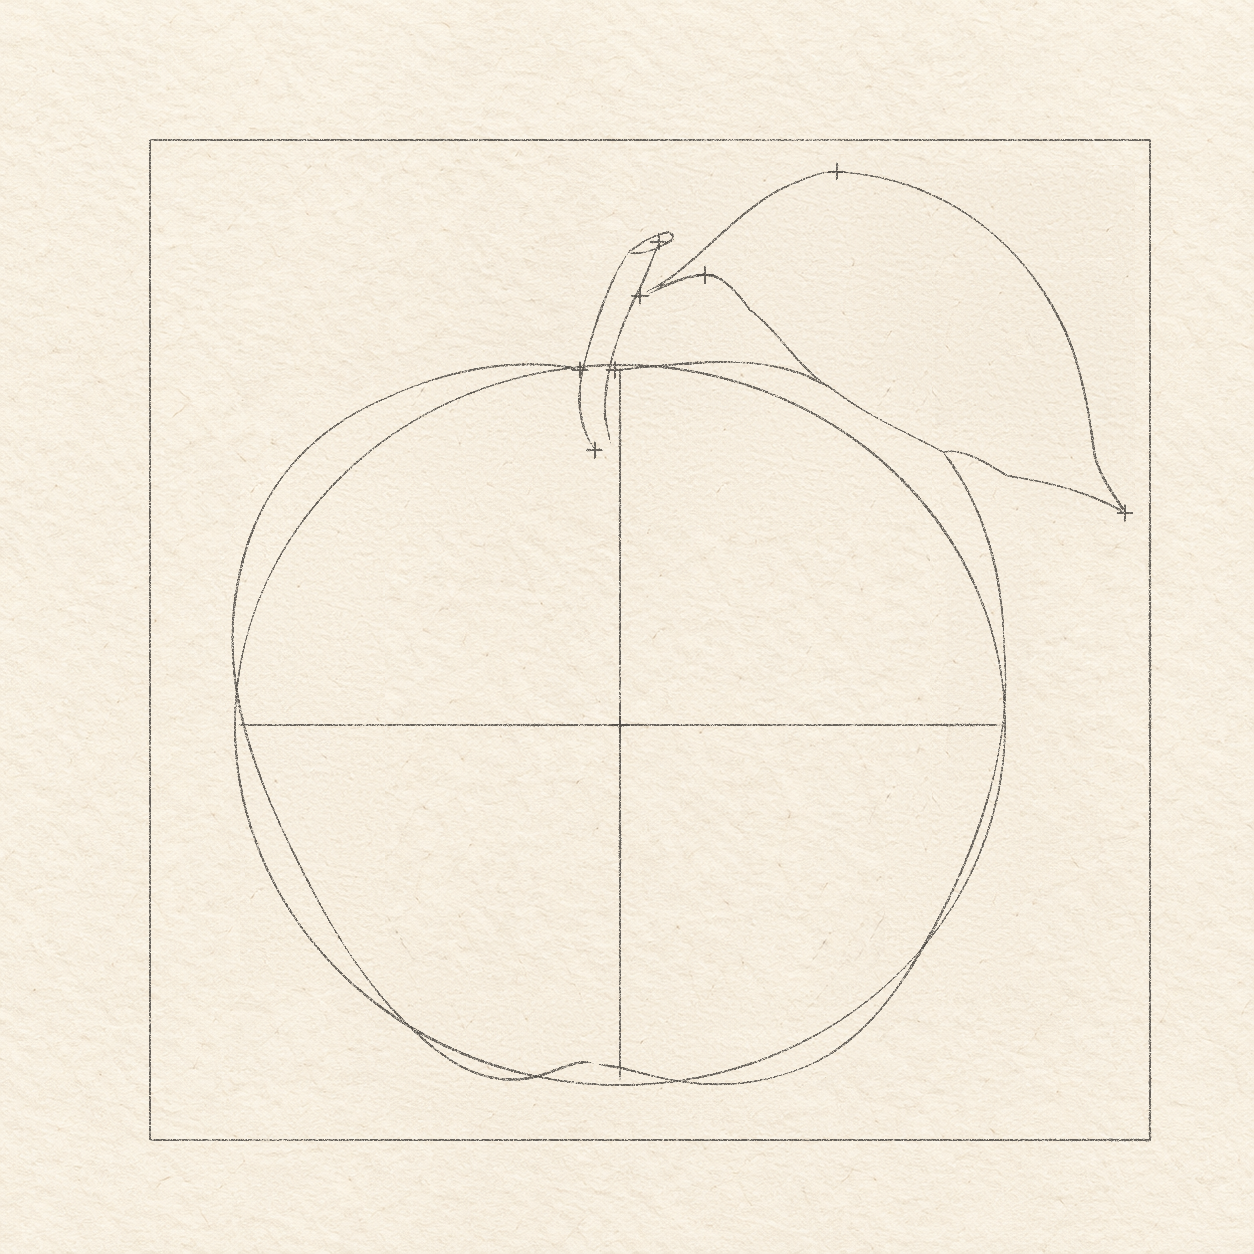
- From the leaf-attachment cross, rise gently right through the high-point cross, then curve down-right to the leaf-tip cross. Draw the upper edge freehand with a broad rounded arch. Rehearse the whole curve above the paper before drawing; keep the pointed tip in its measured position.
- From the pointed tip, curve back left along the lower edge toward the small return cross. Let this freehand edge bow outward near its right half, then rise into the return beside the attachment and join the stem. Leave the leaf interior pale; do not draw fruit through this leaf. Compare Drawing 4B — Complete overlapping leaf outline.
Step 5 of 8 · Pencil
Finish the exposed right fruit

Drawing 5A — Exposed right crown, side and baseView larger Instructions for Drawing 5A — Exposed right crown, side and base
- From the existing right crown contact on the stem, curve a shallow rightward arch toward the leaf’s lower edge. Stop when this crown meets the leaf, about 2.1 cm right of the stem contact. Do not continue the crown through the leaf or cut a V beside the stem.
- The right fruit side reappears on the leaf’s lower edge roughly level with the stem foot, about 3.5 cm to its right. Start there and curve down through the oval’s rightmost point, then round under the body to meet the existing shallow base notch. Draw this freehand contour with a fuller right shoulder, without tracing the oval exactly. Compare Drawing 5A — Exposed right crown, side and base.
Step 6 of 8 · Pencil
Add the sparse leaf veins

Drawing 6A — Long leaf vein sketchView larger Instructions for Drawing 6A — Long leaf vein sketch
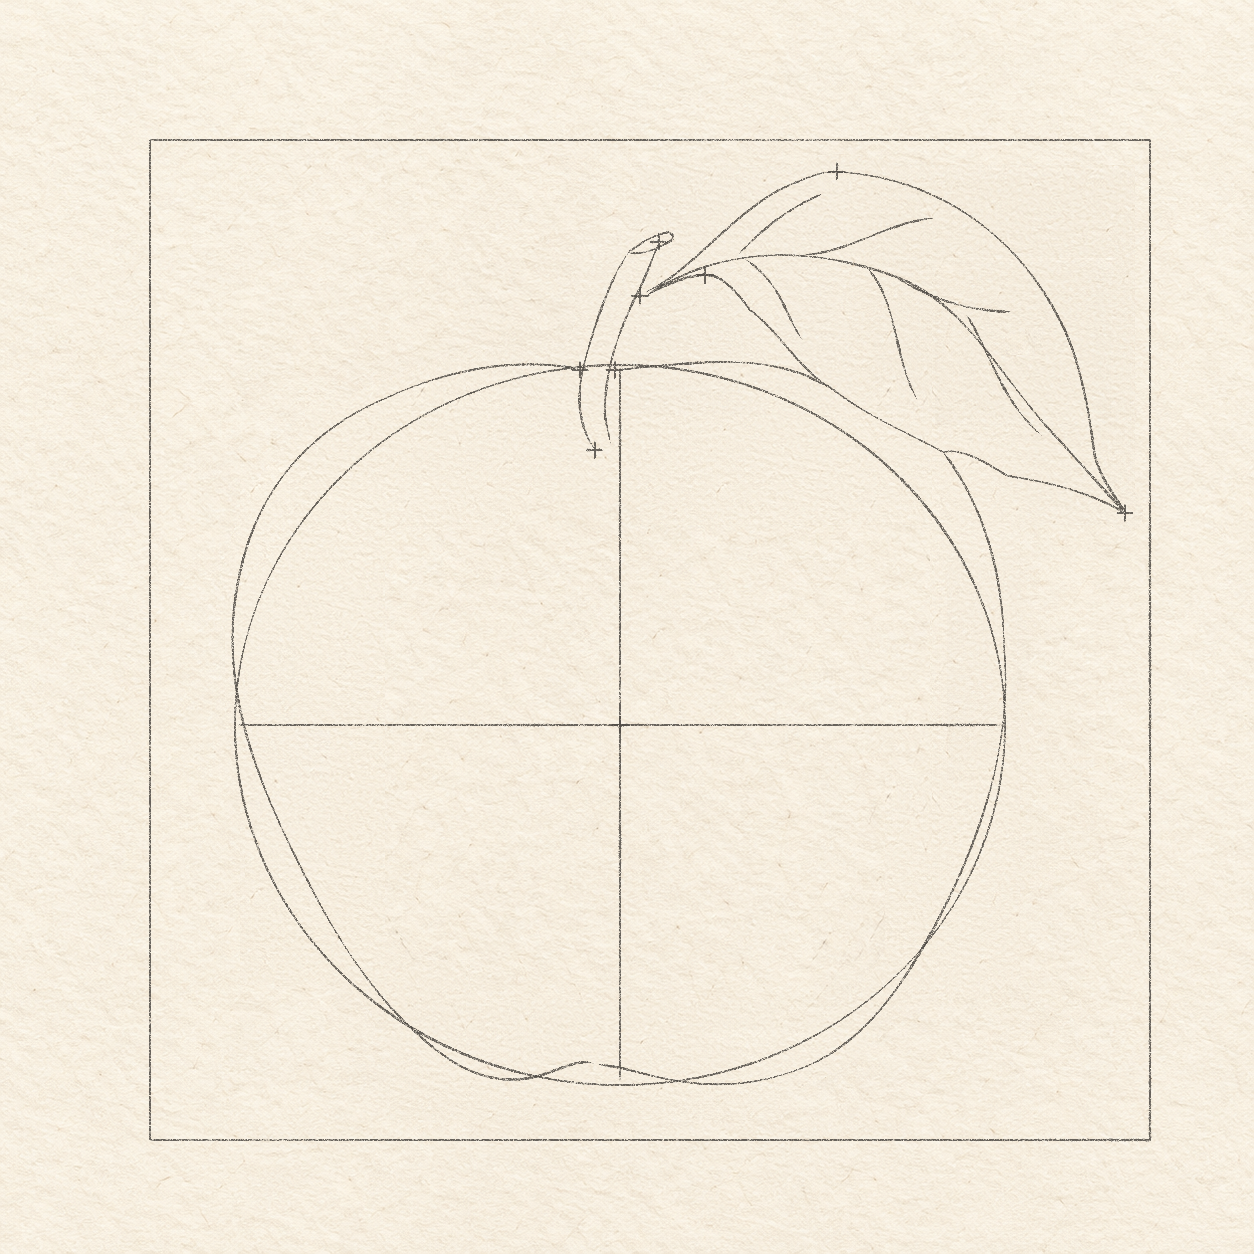
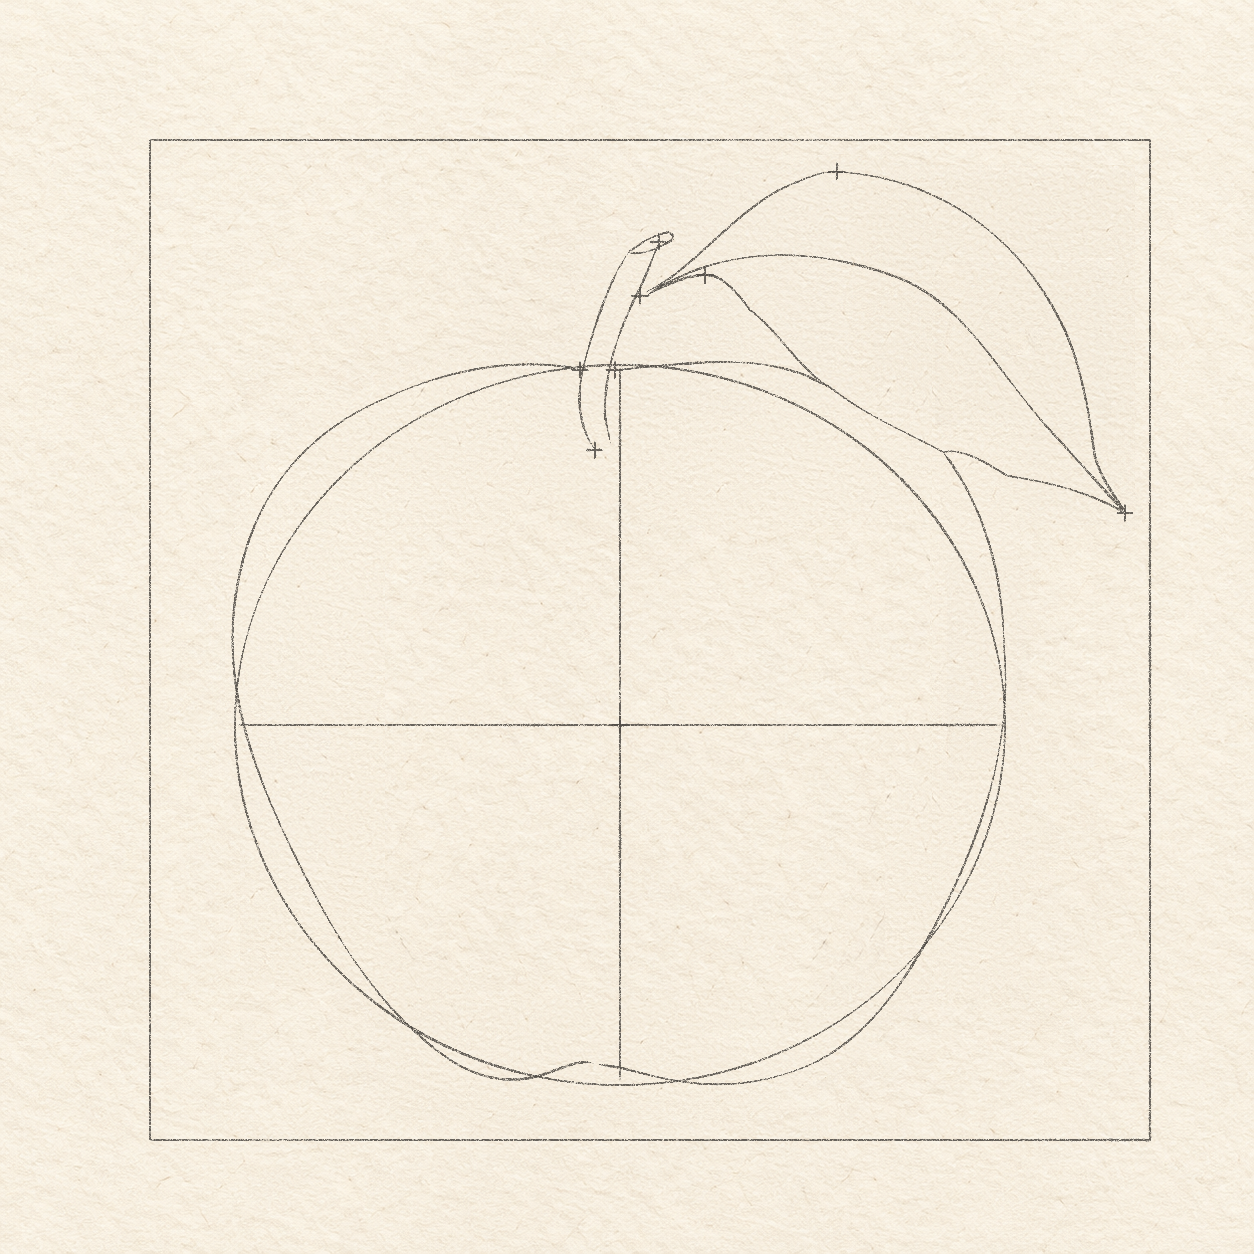
- Inside the leaf, curve a light main vein from its stem attachment to the pointed tip. Keep it freehand: about halfway across, bow it upward so it sits roughly 8–10 mm below the leaf’s top edge, then let it curve downward toward the tip. It divides the folded leaf; it is not another outside contour. Compare Drawing 6A — Long leaf vein sketch.

Drawing 6B — Six sparse leaf branchesView larger Instructions for Drawing 6B — Six sparse leaf branches
- On the main vein, locate three branch starts about 1.0 cm, 1.6 cm and 2.6 cm right of the leaf attachment. Measure rightward, not along the curved vein. From each start, draw a thin freehand curve toward the upper edge. Keep the branches inside the leaf and stop most ends about 1–2 mm before its edge.
- On the main vein, locate three lower-branch starts about 1.1 cm, 2.3 cm and 3.3 cm right of the leaf attachment, measuring rightward. Draw three short freehand curves toward the lower edge. These approximate starts allow slight spacing changes by eye. Taper the ends about 2–4 mm before the edge; leave the areas between them pale. Compare Drawing 6B — Six sparse leaf branches.
Step 7 of 8 · Graphite finish
Strengthen the pencil and add local graphite

Drawing 7A — Stronger pencil and local graphiteView larger 
Detail 7A.1 — Stem graphite and shallow wellThe narrow shaft is the darkest small feature. The short well strokes spread beside its inside foot; keep the neighboring fruit and most of the leaf pale. Instructions for Drawing 7A — Stronger pencil and local graphite
- Strengthen the fruit, stem and leaf contours with short overlapping pencil passes. Follow the complete light sketch. Keep the fruit’s crown behind the stem and leaf; keep its base notch shallow. Let the light rehearsal routes remain visible until cleanup.
- Strengthen the main vein and six branches without closing their pale stopping gaps. Then add a few very light feathered touches beside the lower leaf outline near the stem, beside the middle lower branch where it leaves the main vein, and beside the outer lower branch toward the tip. Follow those existing curves, fade outward, and keep the broad spaces between them pale.
- Inside the already outlined stem, add short lengthwise graphite strokes. Follow the bend of the shaft, leaving a narrow pale strip beside its right edge and keeping its cut-tip oval distinct. The stem is the darkest small feature; keep the neighboring fruit pale.
- Around the stem’s inside foot, draw a few short curved graphite strokes within 5–10 mm to each side. Keep them darkest nearest the foot. Add a few much lighter rays reaching up to about 1.7 cm left and right, fading into the pale fruit. Choose spacing by eye; keep all strokes inside the fruit and avoid a solid dark patch.
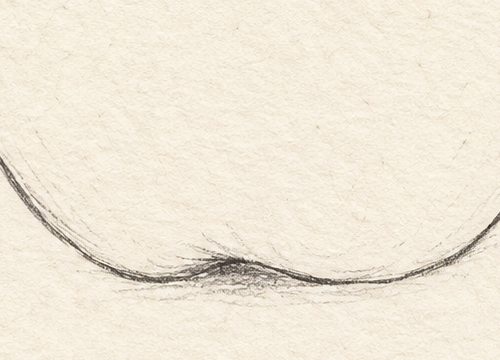
- Add a few very light broken curves just inside the side outlines, following their bends. Keep this sparse inner fringe within about 8 mm of the edge. Around the shallow base notch, add a few short fading strokes inside the fruit and just below its base curve. Keep below-curve strokes within about 4–5 mm of that curve. Choose spacing by eye; leave the broad center pale. Compare Drawing 7A — Stronger pencil and local graphite.
Step 8 of 8 · Finish
Lift the temporary guides

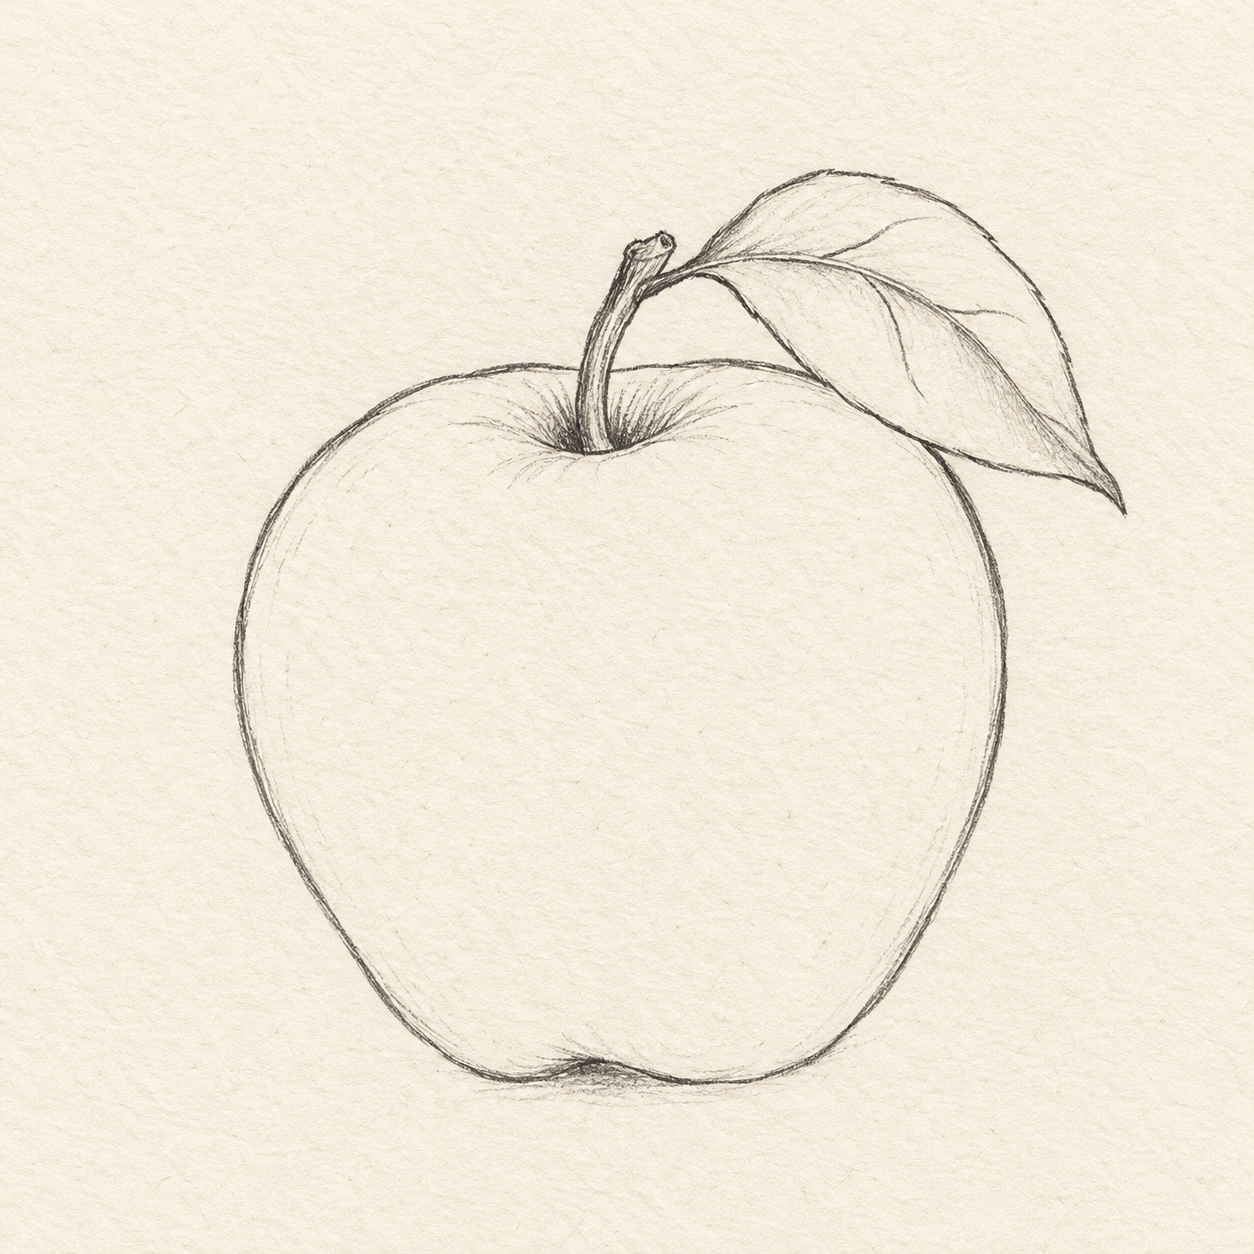
Drawing 8A — Finished apple with one leafView larger 
Detail 8A.1 — Shallow base notch and sparse accentsThe broad sides round into the shallow base notch. Keep the few light edge/base accents local and preserve the pale body. Instructions for Drawing 8A — Finished apple with one leaf
- Gently lift the square, body cross, oval, placement crosses and unwanted light rehearsal marks outside the stronger drawing with a kneaded eraser. Work beside the selected edges in short sections, preserving the darker contours and graphite. If lifting a helper softens a selected edge, restore only that short edge with the pencil. Compare Drawing 8A — Finished apple with one leaf.
If something looks off
There is a deep V at the top
The stem foot and its small graphite well sit inside the fruit. The outside crown passes behind the shaft near its upper contact marks; do not cut the inside well into that outside contour.
The right fruit edge runs through the leaf
Finish the leaf outline first. Stop the exposed upper-right crown at that existing leaf edge, then restart the right body below the overlap at the stated position.
The apple looks like a perfect oval
The broad oval is only a mass guide. Keep the shallow base notch, unequal lower bulges and actual stem/leaf overlaps when selecting the fruit contour.
The whole fruit becomes gray
Keep the broad interior pale. Use graphite only in the narrow shaft, small interior well, limited leaf-fold accents and faint strokes near the existing side/base contours.