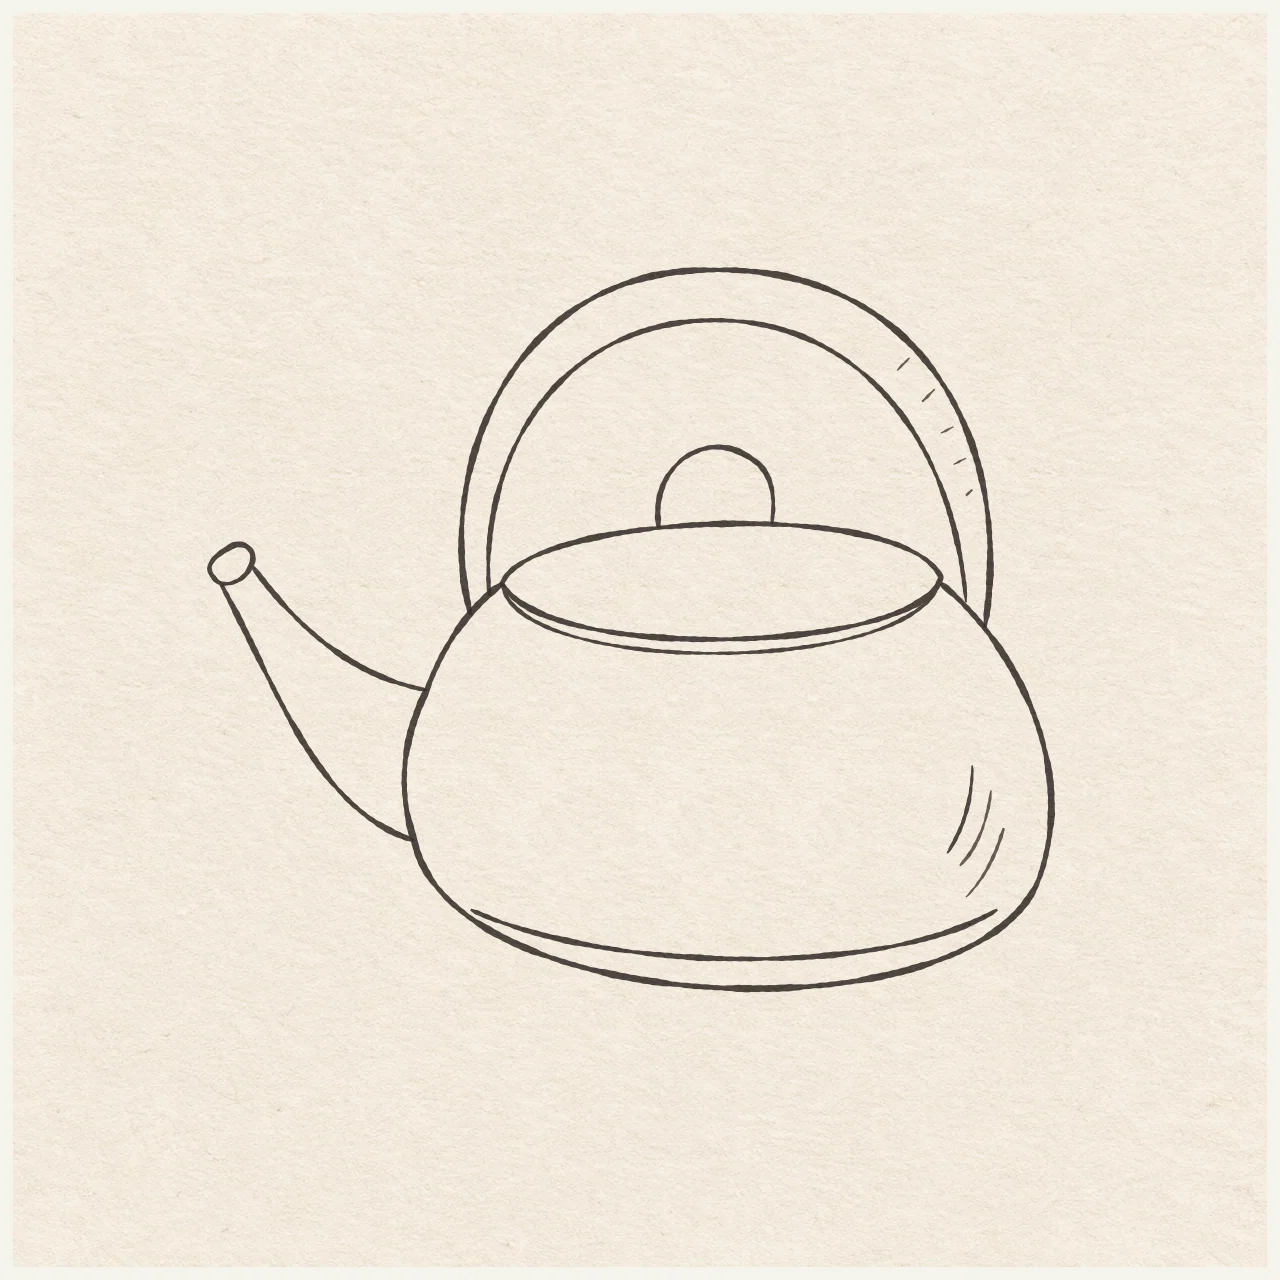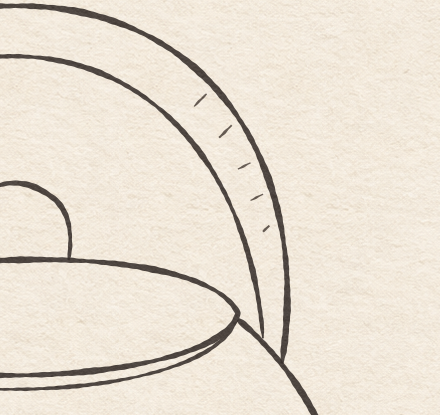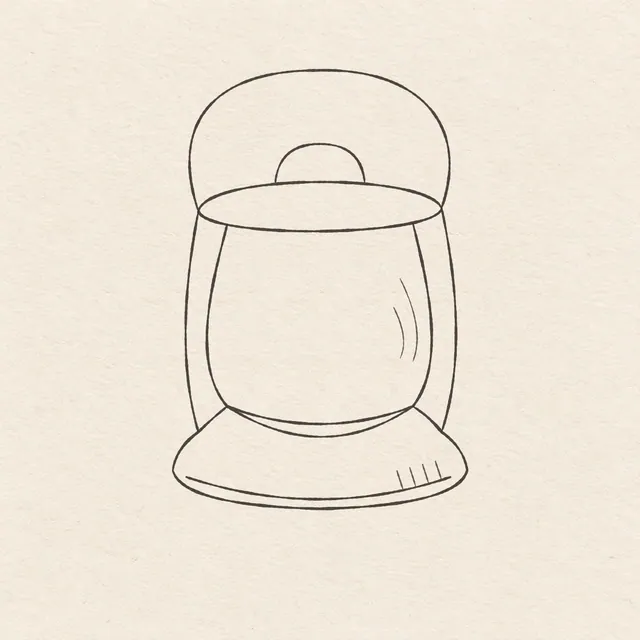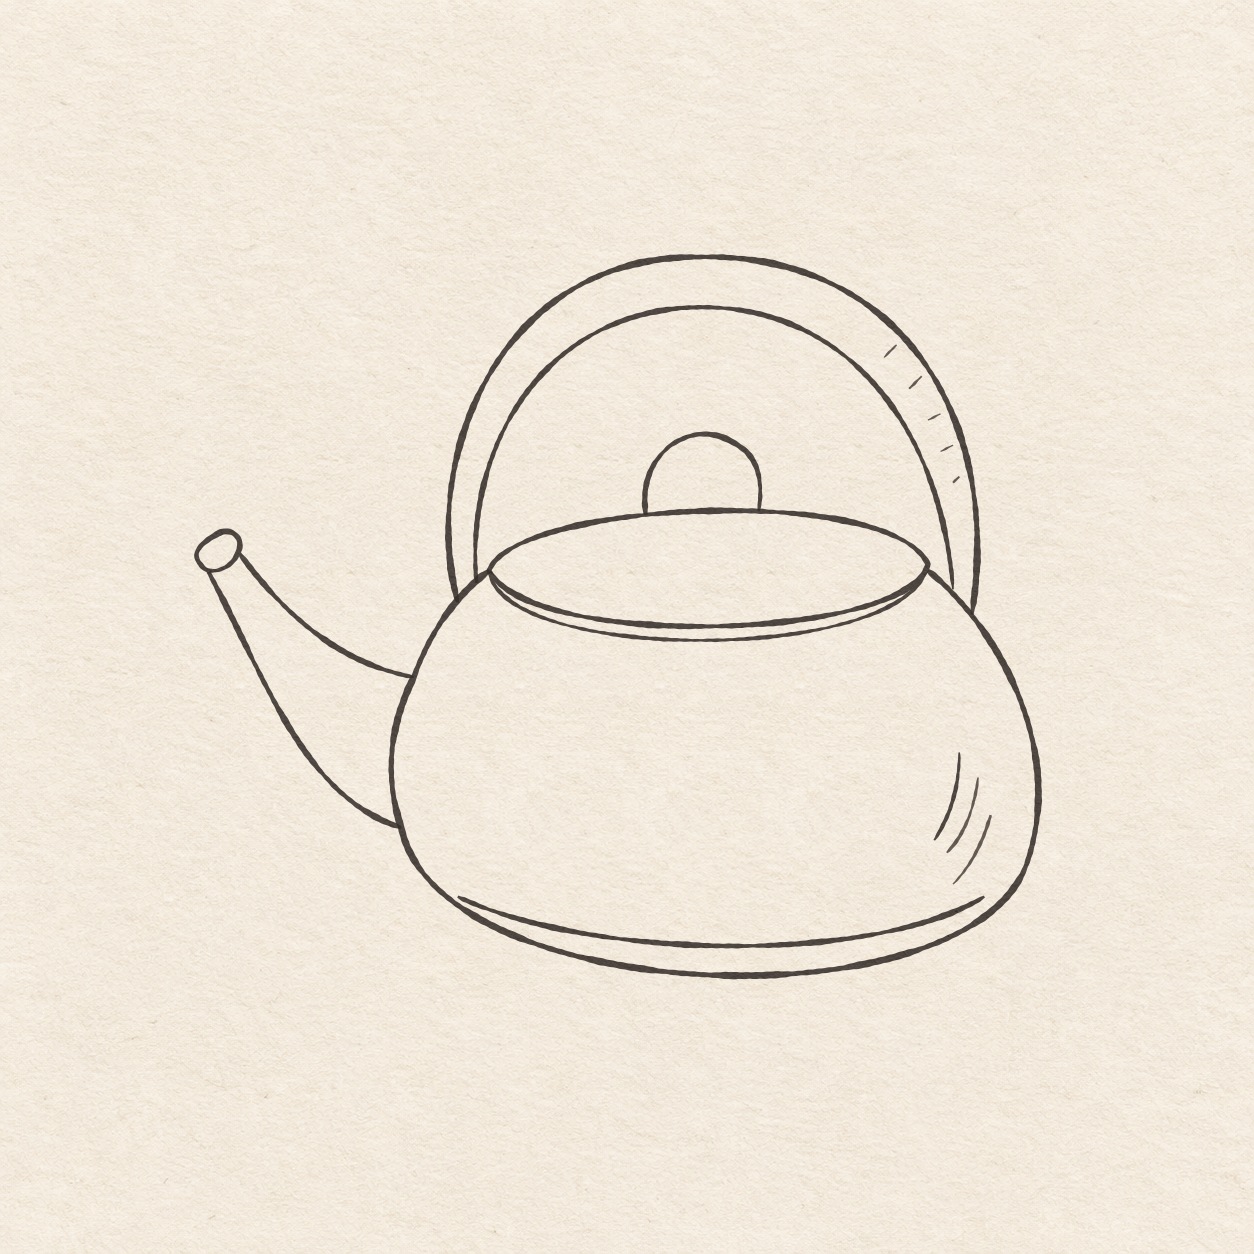
Fineliner drawing of an enamel kettle with a shallow oval lid, round pot, tilted open spout and arched handle on textured paper.
Drawing referenceAbout reference use

Enamel kettle

Draw a rounded enamel kettle with a shallow lid, curved spout and arched handle. Practice simple overlaps and sparse fineliner shading.

Everyday objectsMediumFinelinerReference practice: about 20 min
Save reference

Follow the drawing tutorial

Build a round kettle, hollow spout and arched handle in light pencil. Ink the shapes and add a little shading.

Start the 13-step tutorial

A small thing to tryCheck the spout opening and the gap above the knob while the drawing is still in pencil.

Draw it, one step at a time

Draw an enamel kettle

Build a round kettle, hollow spout and arched handle in light pencil. Ink the shapes and add a little shading.

13 illustrated steps Full tutorial: about 35 minutes, at your pace

What you’ll need

  • HB pencil
  • Eraser
  • Fine black pen
  • Ruler
  • Spare sheet with a square corner
  • Drawing paper

Before you start

The finished kettle is about 11 cm wide and 9 cm tall. Choose where you want it on your drawing paper. Keep the pencil marks light so you can adjust and erase them.
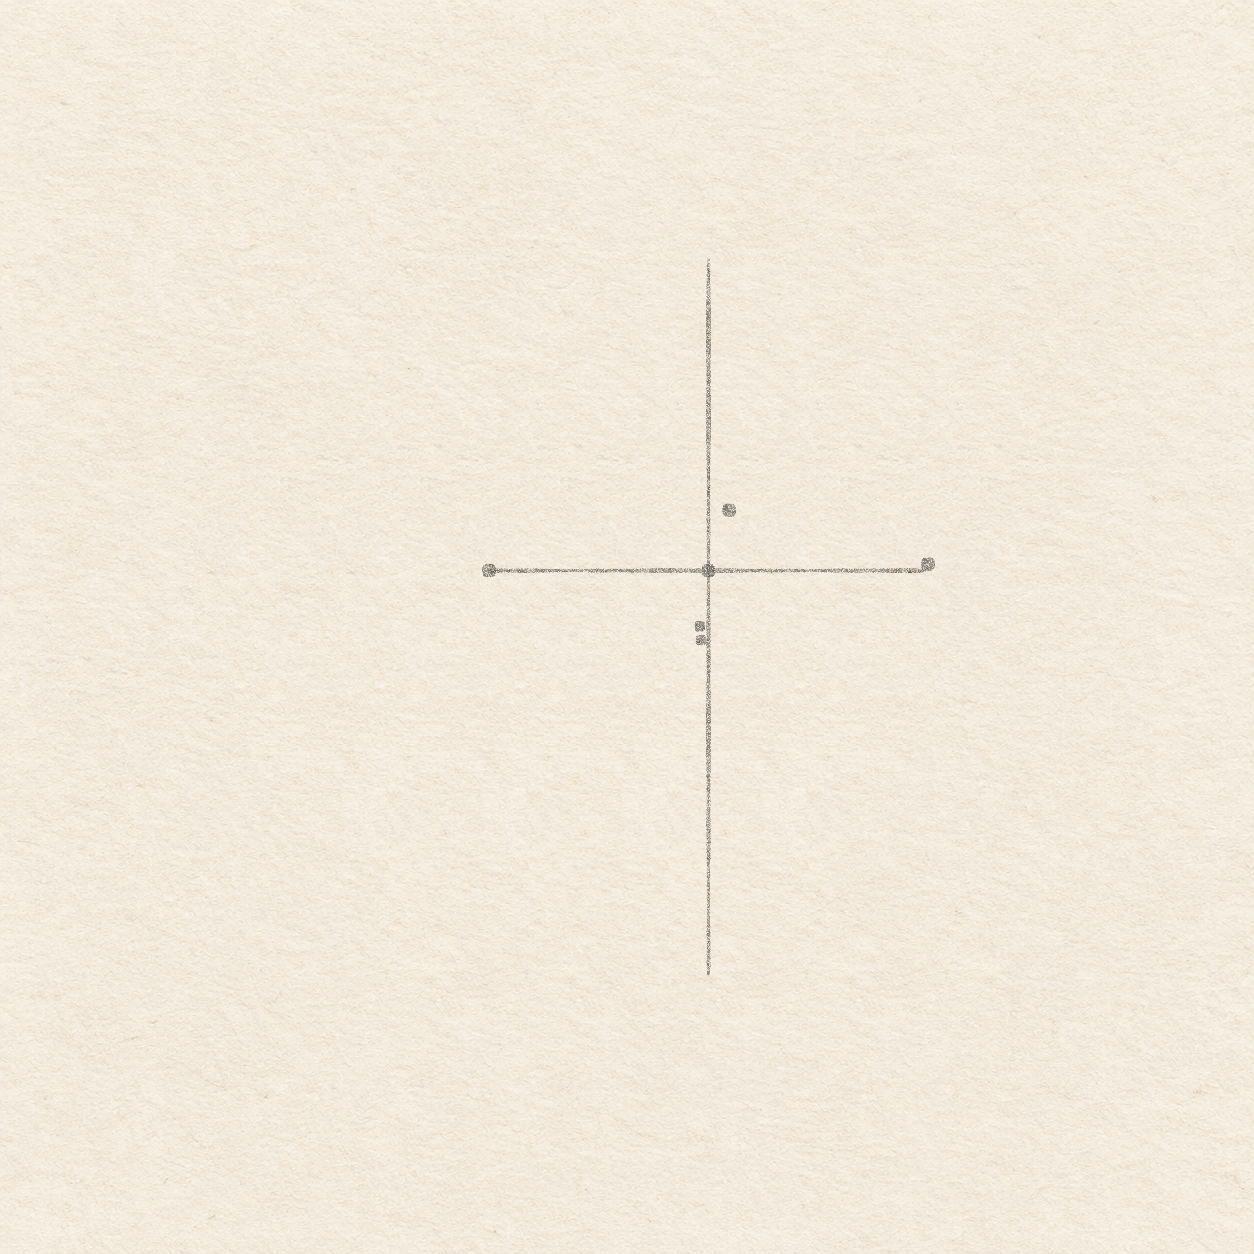
  1. Light pencil cross, two lid tip dots, one dot above the cross and two closely spaced dots below.
    Drawing 1 — Set the lid width and heightView larger
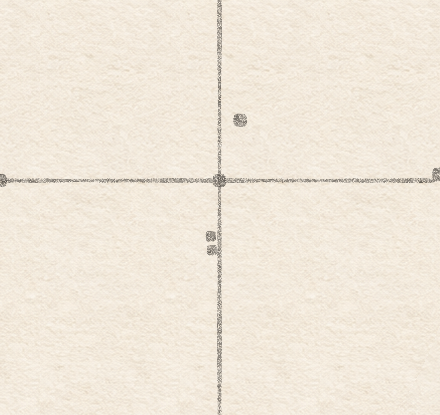
    Close-up of one pencil height dot above the cross and two below it.
    Detail 1.1 — The three lid height dotsThe back dot sits above the cross. The front dot and the lip dot sit separately below it, with the lip dot lowest.
    Pencil

    Set the lid width and height

    Instructions for Drawing 1 — Set the lid width and height
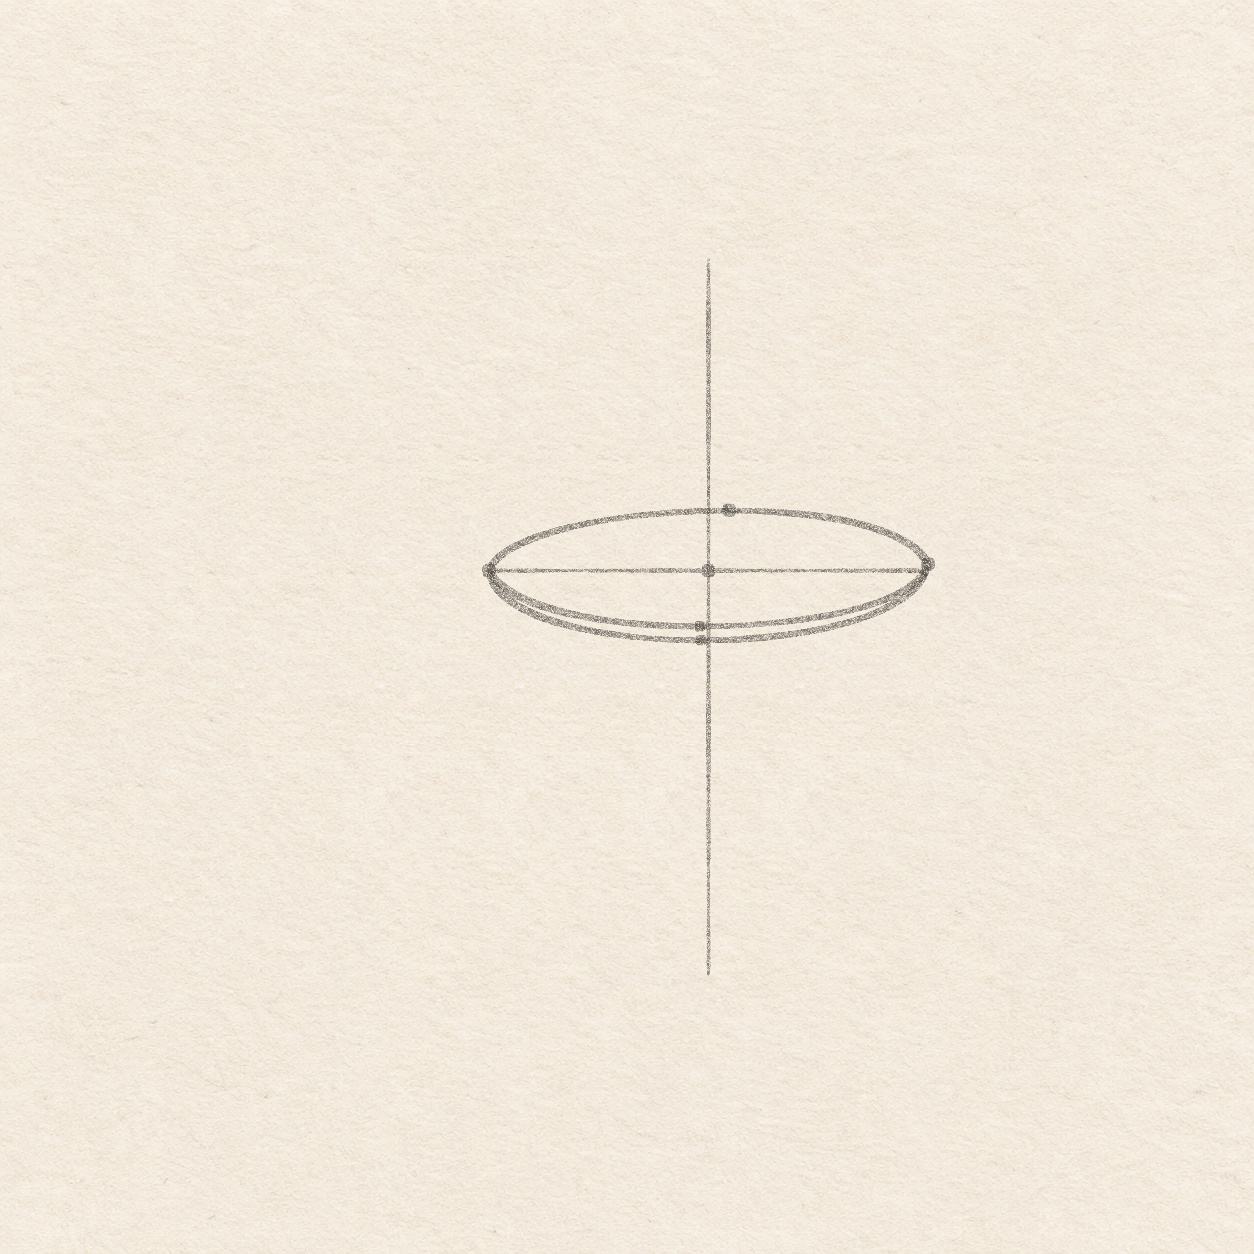
    1. Choose where the middle of the lid will sit. Check that you have at least 7 cm of paper to the left, 5 cm to the right, 4.5 cm above and 6 cm below. Mark the spot with a light pencil dot. Move the dot before drawing the guides if any side needs more room.
    2. Lay a spare sheet over your drawing paper with its bottom edge parallel to the paper’s bottom edge. Slide the spare sheet until its side edge passes through the dot. Set your ruler along that side to draw a light upright 4 cm up and 5.2 cm down. Align the ruler parallel to the spare sheet’s bottom edge and draw a light level line through the dot, 2.8 cm to each side. Use these guides for measurements and keep them until cleanup. Check that the two lines meet at the dot and form a right angle.
    3. Mark the lid’s left tip at the left end of the level guide. Mark the right tip about 1 mm above its right end. Keep the tips almost level and equally far from the upright.
    4. Measure from the center dot. Put a pencil dot for the back edge 8 mm up and about 2.5 mm right. Put a front edge dot 7 mm down and about 1 mm left. Put a lip dot another 2 mm directly below the front dot. Keep the two lower dots separate so the rim will have a narrow gap.
    Next step
  2. A shallow pencil oval with a narrow curved rim underneath and the same cross and placement dots.
    Drawing 2 — Curve the lid and its narrow rimView larger
    Pencil

    Curve the lid and its narrow rim

    Instructions for Drawing 2 — Curve the lid and its narrow rim
    1. Start at the left tip. Sweep freehand up through the back dot and down to the right tip. Return through the front dot and close at the left tip. Flatten both curves near the middle to make a wide, shallow oval. Redraw a lumpy section lightly before moving on.
    2. Start at the left tip. Draw a shallow curve freehand below the front of the oval, through the lowest dot, and back up to the right tip. Leave a thin strip between the curves and taper it closed at both tips. If the curves cross between the tips, erase just the new line and redraw it.
    Next step
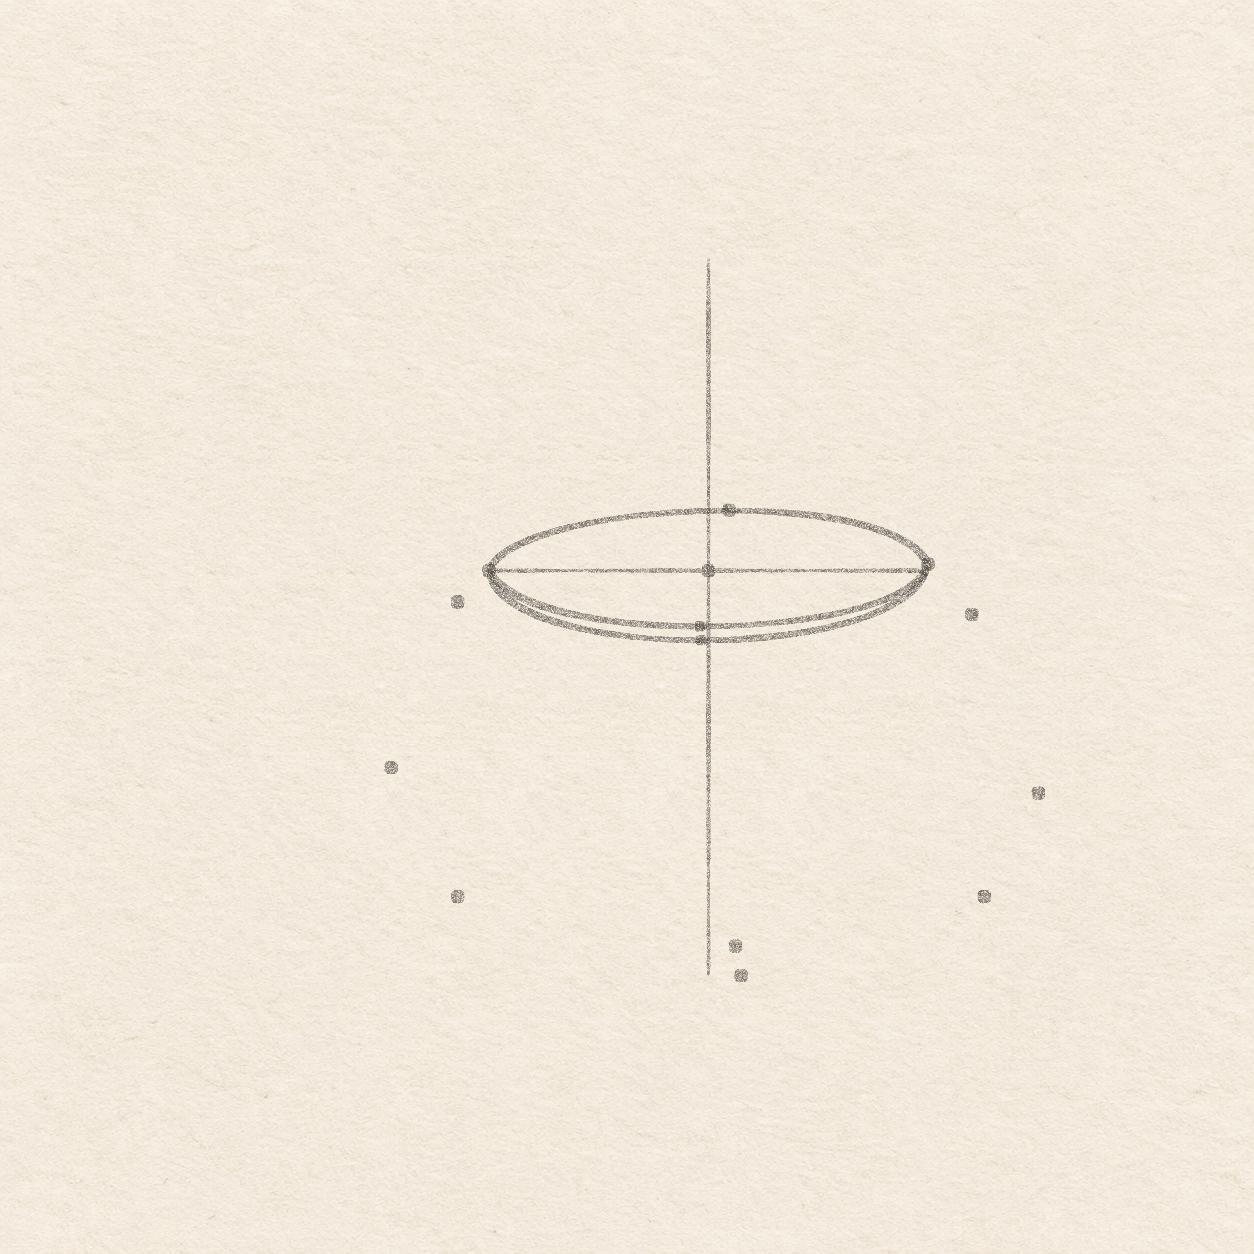
  3. Two shoulder dots below the lid tips, three dots for the body and three for the base seam.
    Drawing 3 — Plot the shoulders, body and base seamView larger
    Pencil

    Plot the shoulders, body and base seam
    Instructions for Drawing 3 — Plot the shoulders, body and base seam

    1. From the left lid tip, mark a shoulder dot 4 mm left and 4 mm down. From the right tip, mark a shoulder dot about 6 mm right and 6 mm down. Keep these two dots for the outer handle feet later. Check that each shoulder dot is just outside and below its lid tip.
    2. Measure from the lid’s center dot along the light guides. Mark the widest left point 4 cm left and 2.5 cm down. Mark the widest right point 4.2 cm right and 2.8 cm down. Mark the bottom 4 mm right and 5.2 cm down. Check that the body dots reach farther sideways than the lid tips.
    3. From the lid’s center dot, measure 4.2 cm down. At that height mark a dot 3.2 cm left and another 3.5 cm right. Put the middle seam dot about 3.5 mm right and 4.8 cm down from the center dot. The middle seam dot should sit just above the bottom dot.
    Next step
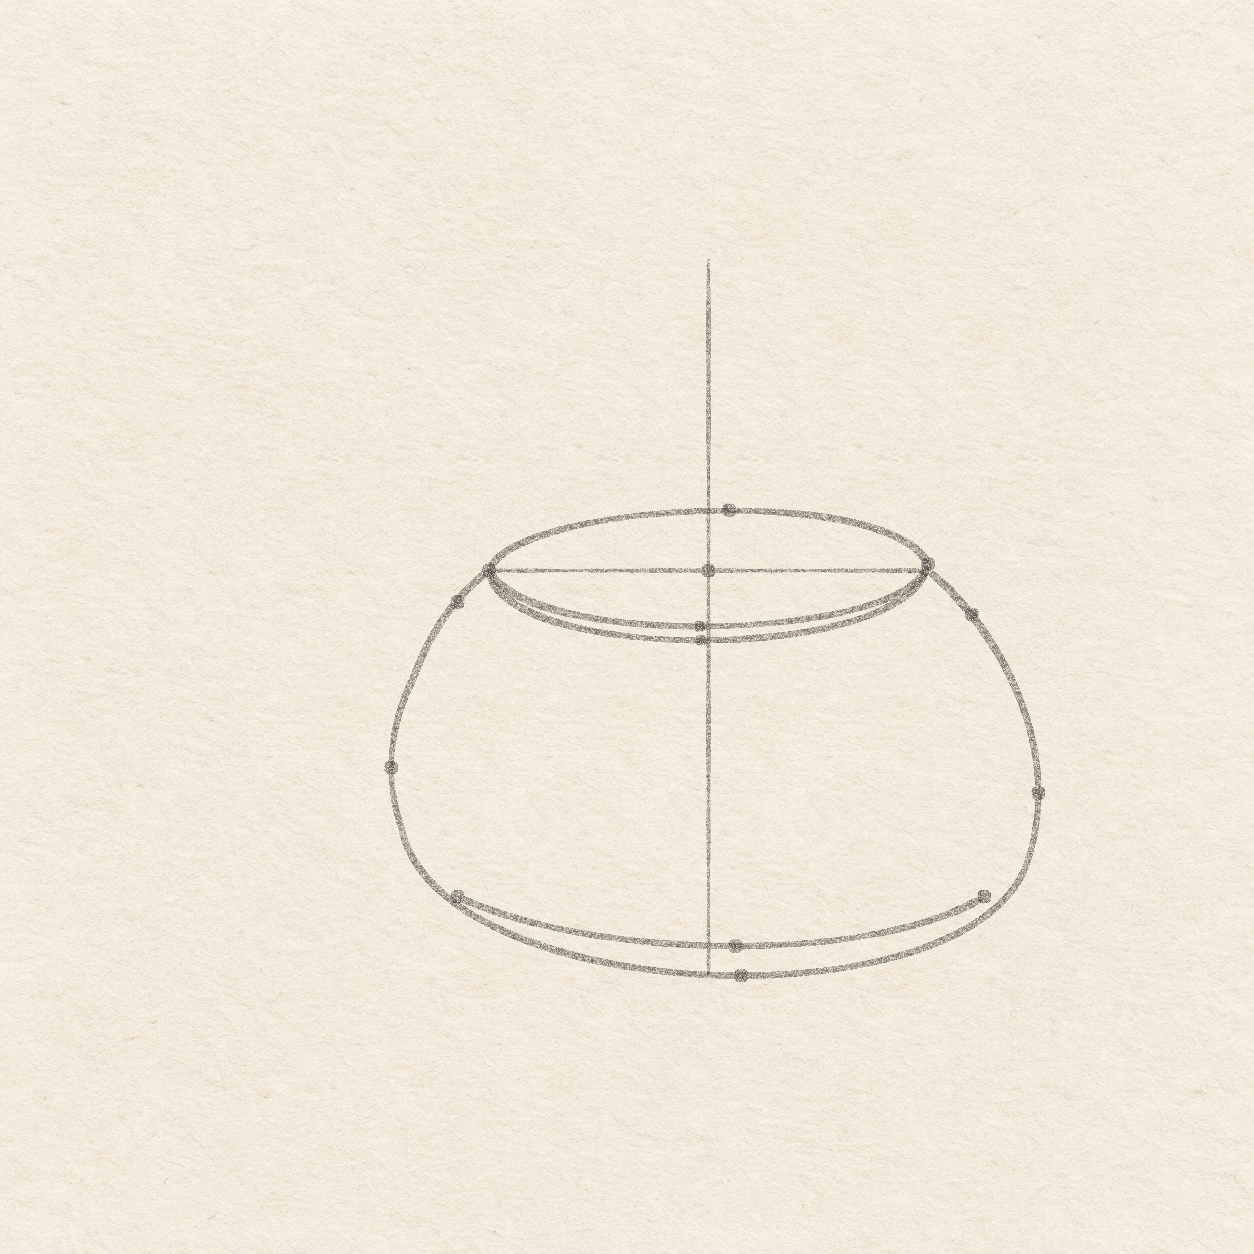
  4. The rounded pencil kettle body meets both lid tips. A shallow seam runs just inside the base.
    Drawing 4 — Round the body beneath the lidView larger
    Pencil

    Round the body beneath the lid

    Instructions for Drawing 4 — Round the body beneath the lid
    1. Start at the left lid tip and draw freehand through the left shoulder dot, then bow out to the widest left dot. Round down just outside the left seam dot, across the bottom dot and up outside the right seam dot. Keep the middle seam dot above your line. Bow up through the widest right dot. Pass through the right shoulder dot before you meet the right lid tip. Keep the shoulders close to the lid and the base broad and gently curved. Keep the seam dots just inside the body.
    2. Draw a shallow curve freehand from the left seam dot through the middle seam dot to the right one. Follow the base’s curve. Start close to the left edge, leave a slim strip of paper through the middle and stop just inside the right edge. The seam may just touch the body at the left end. Correct it if it crosses the edge.
    Next step
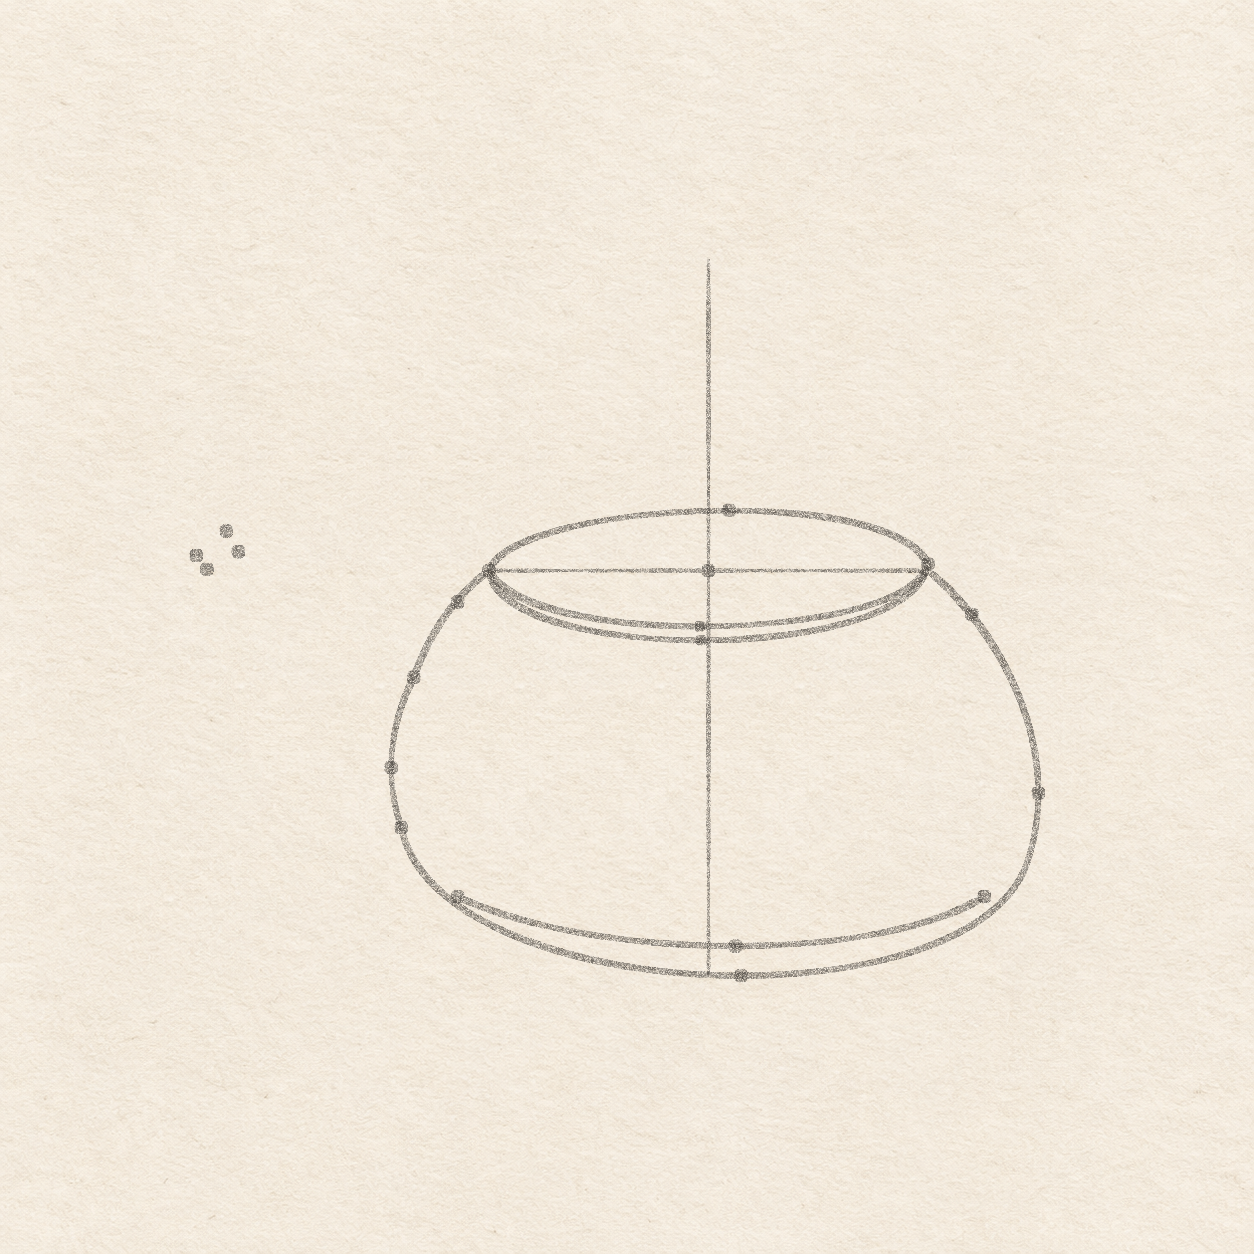
  5. Two dots on the left body edge and four small dots for the tilted mouth farther up and left.
    Drawing 5 — Locate the spout joins and mouthView larger
    Pencil

    Locate the spout joins and mouth

    Instructions for Drawing 5 — Locate the spout joins and mouth
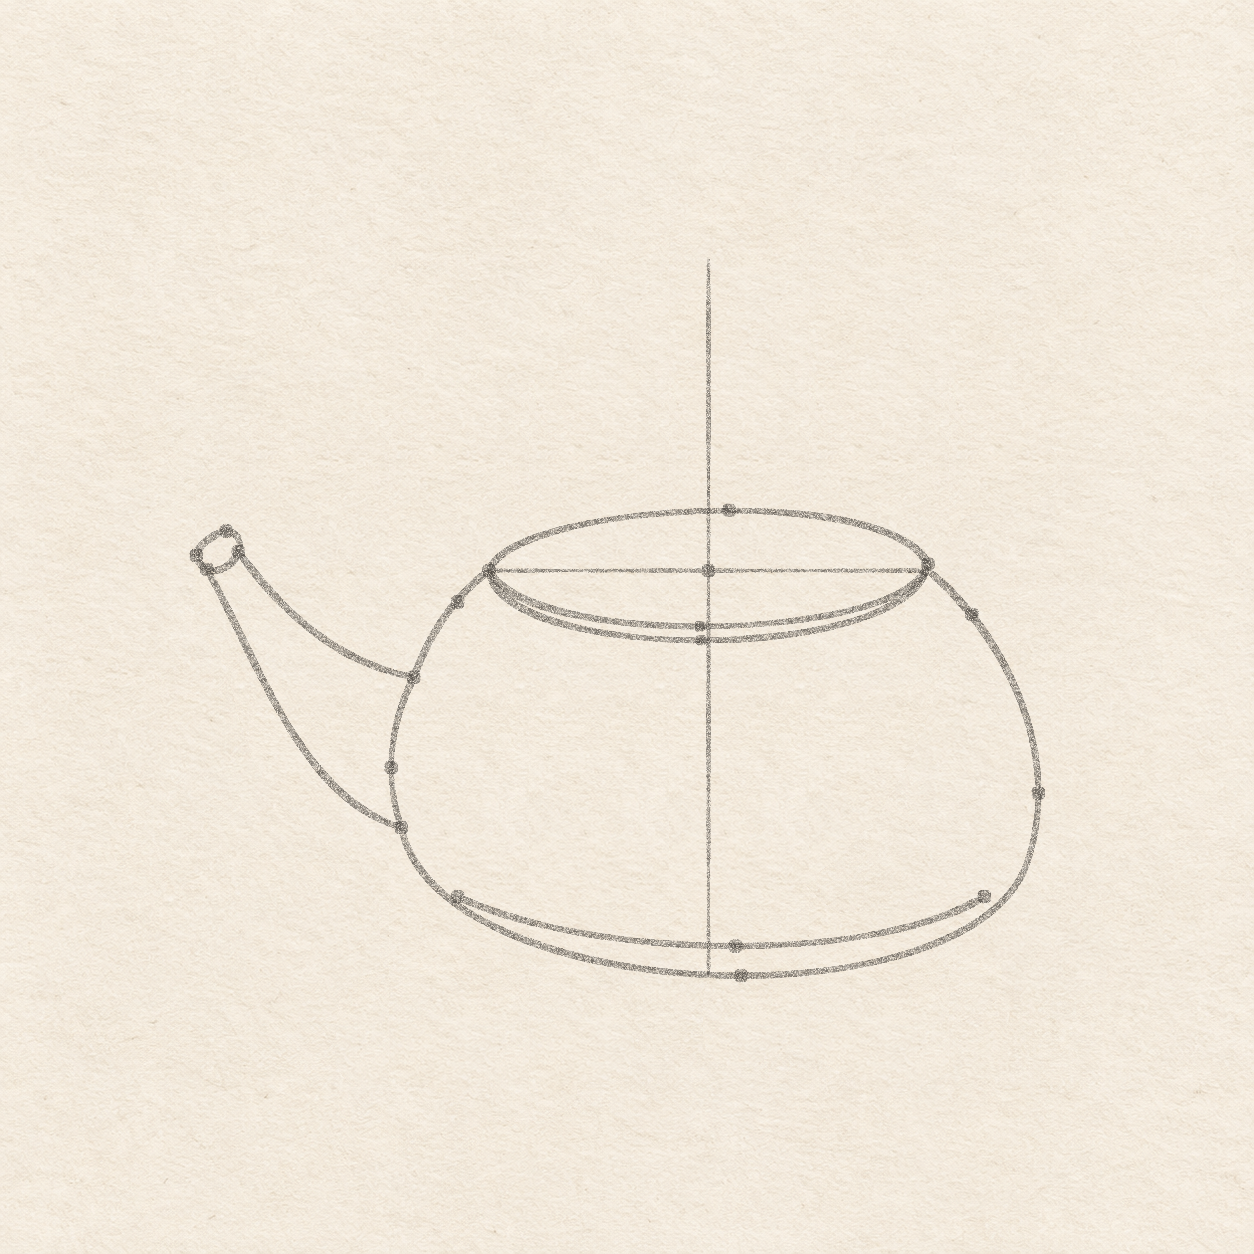
    1. Use the upright guide to measure straight down from the left lid tip. Put a dot on the left body outline about 1.4 cm below the tip, and a second dot on that edge about 3.3 cm below the tip. Move either dot that sits off the outline before drawing the spout.
    2. Measure from the upper spout join dot. Put the mouth’s upper-wall dot 2.2 cm left and 1.6 cm up. Put its lower-wall dot 2.6 cm left and 1.4 cm up from that same body dot. The lower-wall dot sits down and left of the upper-wall dot.
    3. From the upper-wall dot at the mouth, mark a dot 1.5 mm left and about 2.5 mm up. Mark a second dot about 5.5 mm left and half a millimeter down from the same upper-wall dot. These set the high and left edges of the opening. The four dots make a small tilt, with the high dot farther right than the leftmost dot.
    Next step
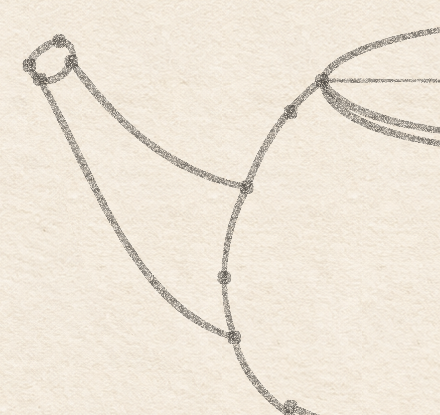
  6. Two tapering pencil walls join the left kettle body to a small tilted oval with a pale interior.
    Drawing 6 — Shape the open spoutView larger
    Close-up of the tilted pencil oval and two separate wall contacts.
    Detail 6.1 — The tilted spout openingThe top and bottom walls stop at different points on the rim. Leave the inside clear.
    Pencil

    Shape the open spout

    Instructions for Drawing 6 — Shape the open spout
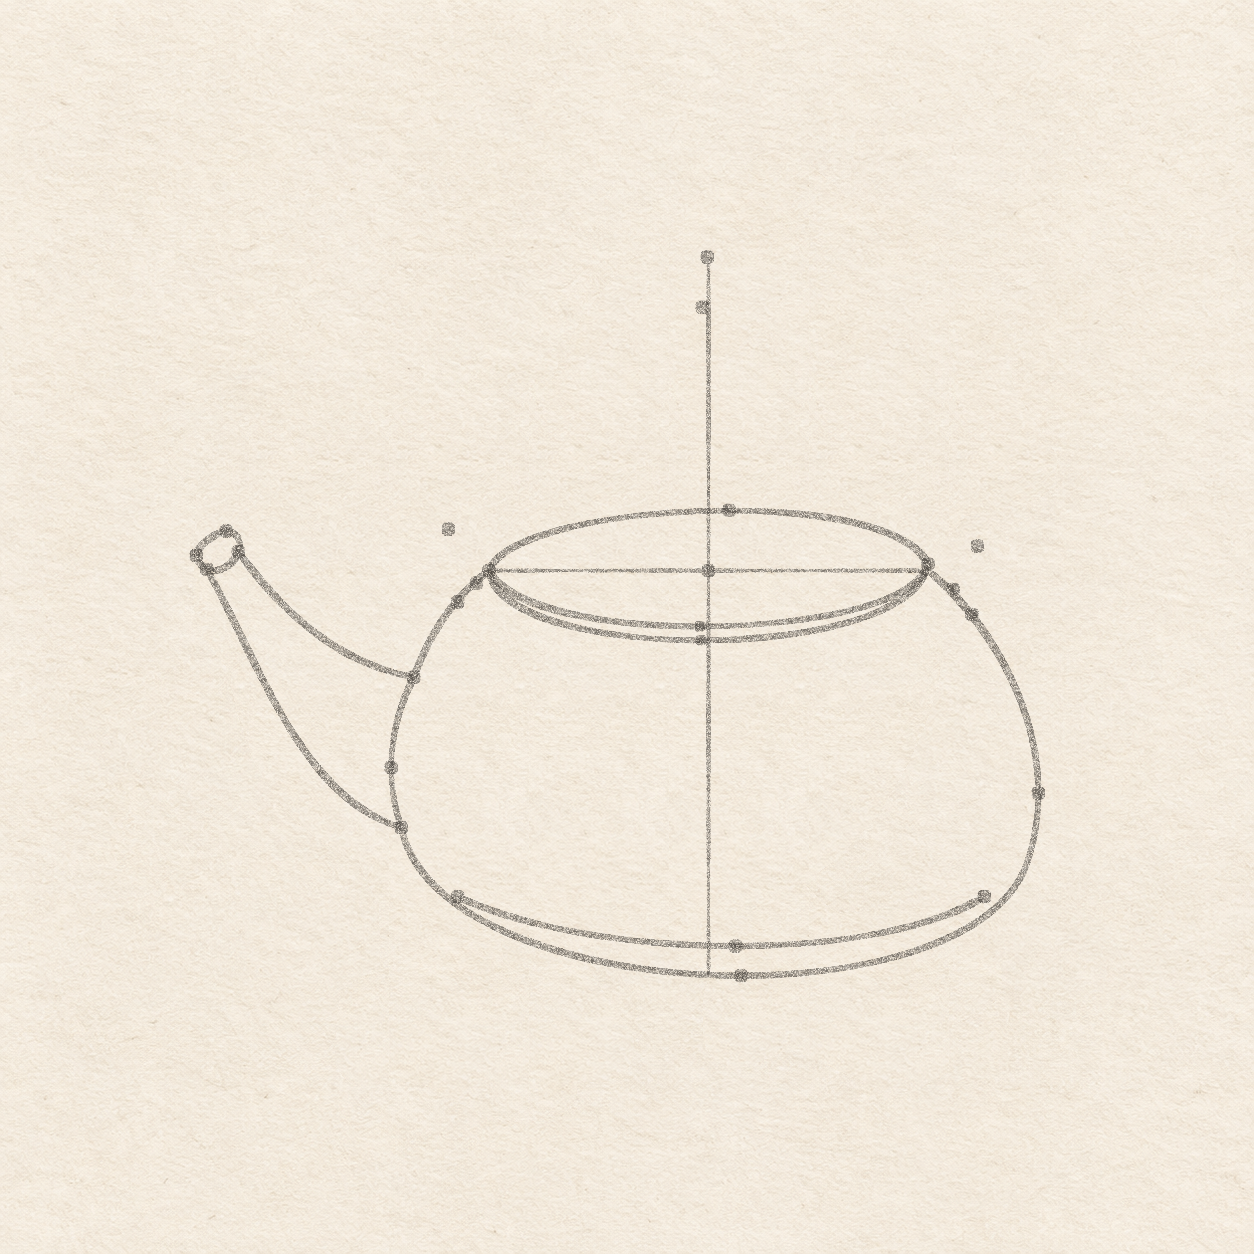
    1. Round a small tilted oval freehand through the four mouth dots. From the upper-wall dot, curve down and left through the lower-wall dot. Round up through the left dot, across the high dot and back to the start. Leave the opening as clear paper. Keep the two wall dots on the new oval.
    2. Draw the top wall freehand from the upper body dot to the upper-wall dot on the mouth. Leave the pot almost level, then bend more steeply up and left. Draw the lower wall from the lower body dot to the lower-wall dot on the mouth. Let it rise gently first, then steepen so the walls narrow toward the opening. Stop each curve at the mouth outline. Keep the body edge visible between the two joins.
    Next step
  7. Pencil dots on both shoulders and above the lid locate the feet, crowns and wide bends of the handle.
    Drawing 7 — Set the feet and height of the handleView larger
    Pencil

    Set the feet and height of the handle

    Instructions for Drawing 7 — Set the feet and height of the handle
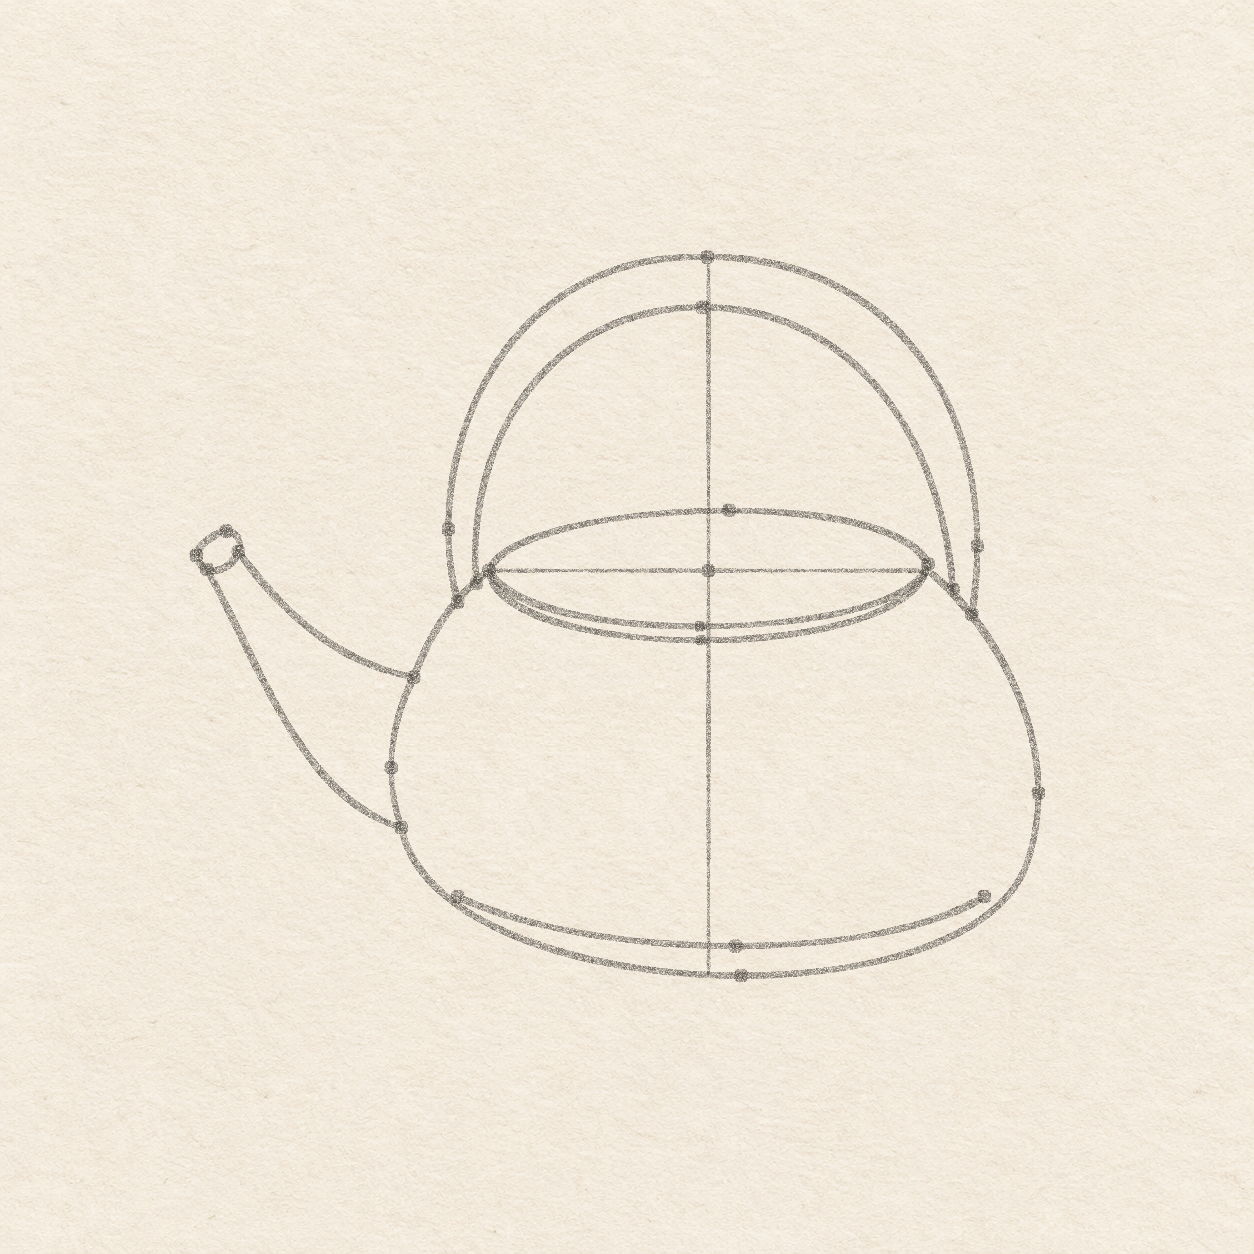
    1. Keep the two shoulder dots from the body setup as the outer feet. Measure straight down from each lid tip. Mark the inner foot on the body outline about 2 mm below the left tip and 3 mm below the right. Check both pairs on the kettle edge. Each inner dot must sit nearer its lid tip.
    2. From the lid’s center dot, mark the outer arch 4 cm up the upright. Mark the inner arch 6 mm below the first dot, just to the left of the upright. Keep both dots well above the back of the lid.
    3. From the lid’s center, mark the left bend 3.3 cm left and 5 mm up. Put the right bend 3 mm above the lid’s level line and just under 1 mm to the right of the outer right foot. These two dots show where the outer handle is widest. The bend dots sit above and slightly outside their outer feet.
    Next step
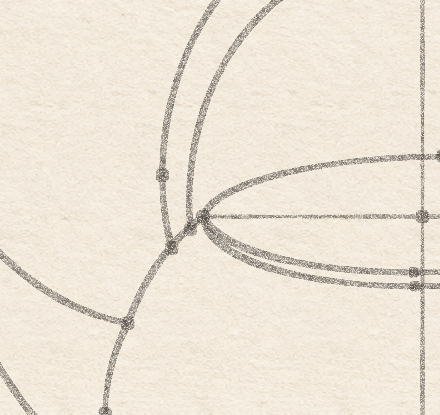
  8. Two broad pencil arcs form the handle. Their four ends stop separately at the body shoulders.
    Drawing 8 — Arch the handle over the lidView larger
    Close-up of the two separate pencil handle contacts at the left shoulder.
    Detail 8.1 — The left handle feetBoth arcs stop on the body shoulder. The inner arch ends closer to the lid tip.
    Pencil

    Arch the handle over the lid

    Instructions for Drawing 8 — Arch the handle over the lid
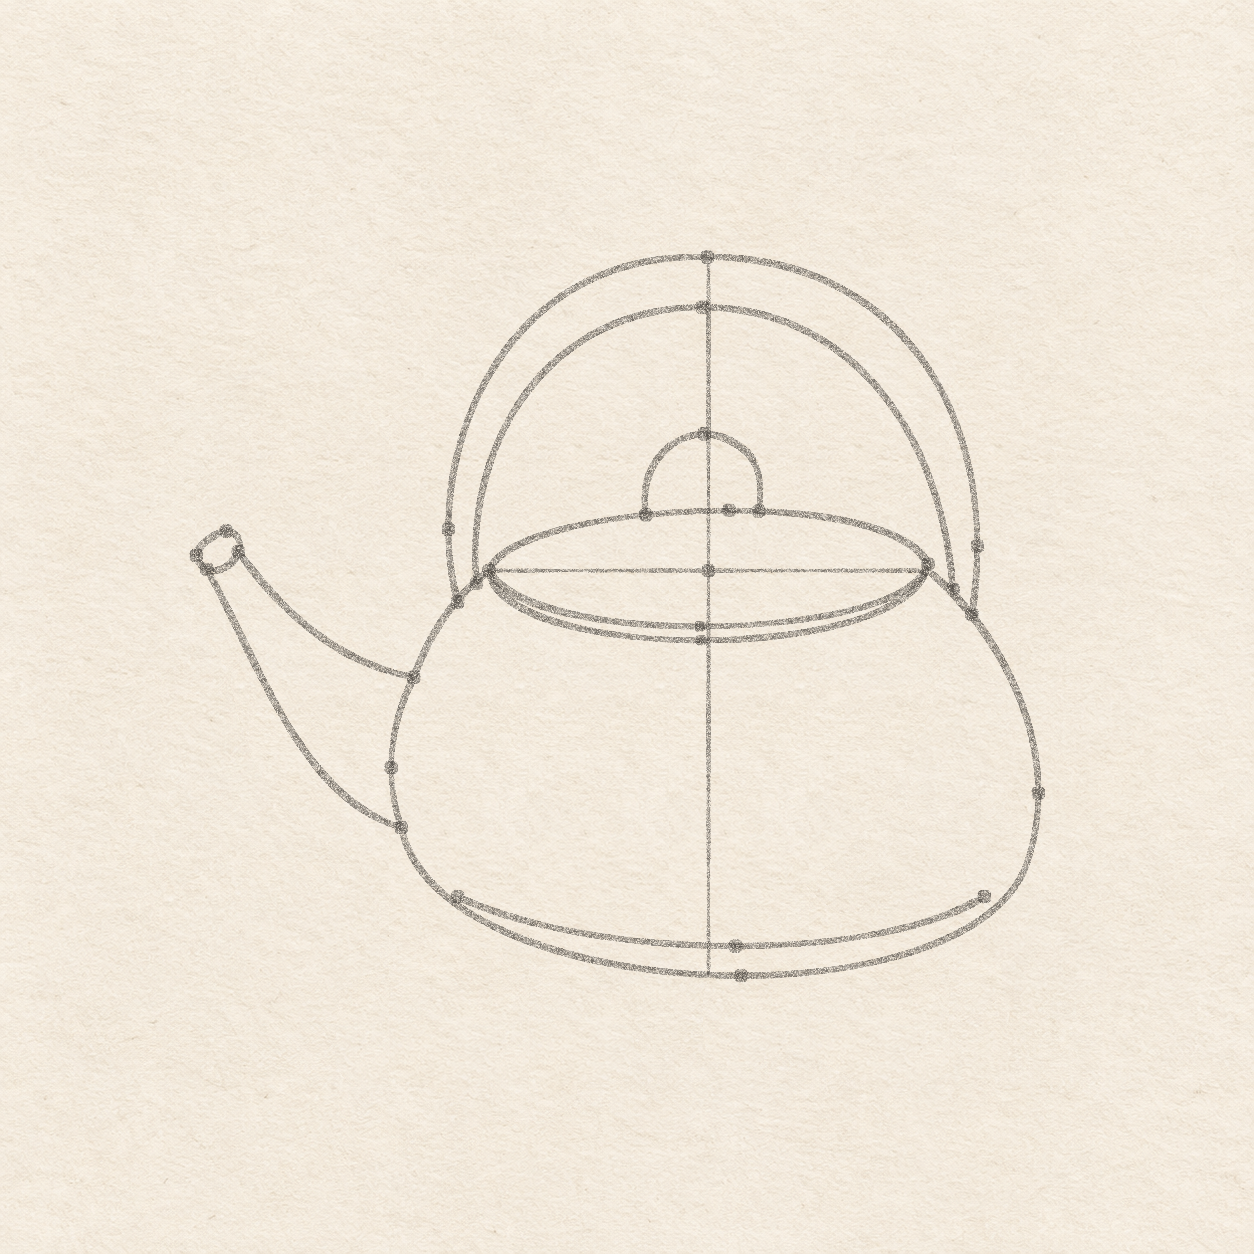
    1. Start at the left outer foot. Curve freehand up through the left bend, round over the high dot and come down through the right bend to the right outer foot. Round the top so it does not form a point. Stop both ends on the shoulders. If one falls short, lightly correct that end before inking.
    2. From the left inner foot, draw a second arc freehand through the lower crown dot and back to the right inner foot. Keep the arc inside the first, with about a 3 to 6 mm band between them. Let the gap narrow near the shoulders. Keep the measuring cross in pencil until cleanup. If the two arcs touch, adjust the inner one before inking.
    Next step
  9. A small rounded pencil knob rises from the back of the lid and stays below the inner handle arc.
    Drawing 9 — Draw the small knob on the lidView larger
    Pencil

    Draw the small knob on the lid

    Instructions for Drawing 9 — Draw the small knob on the lid
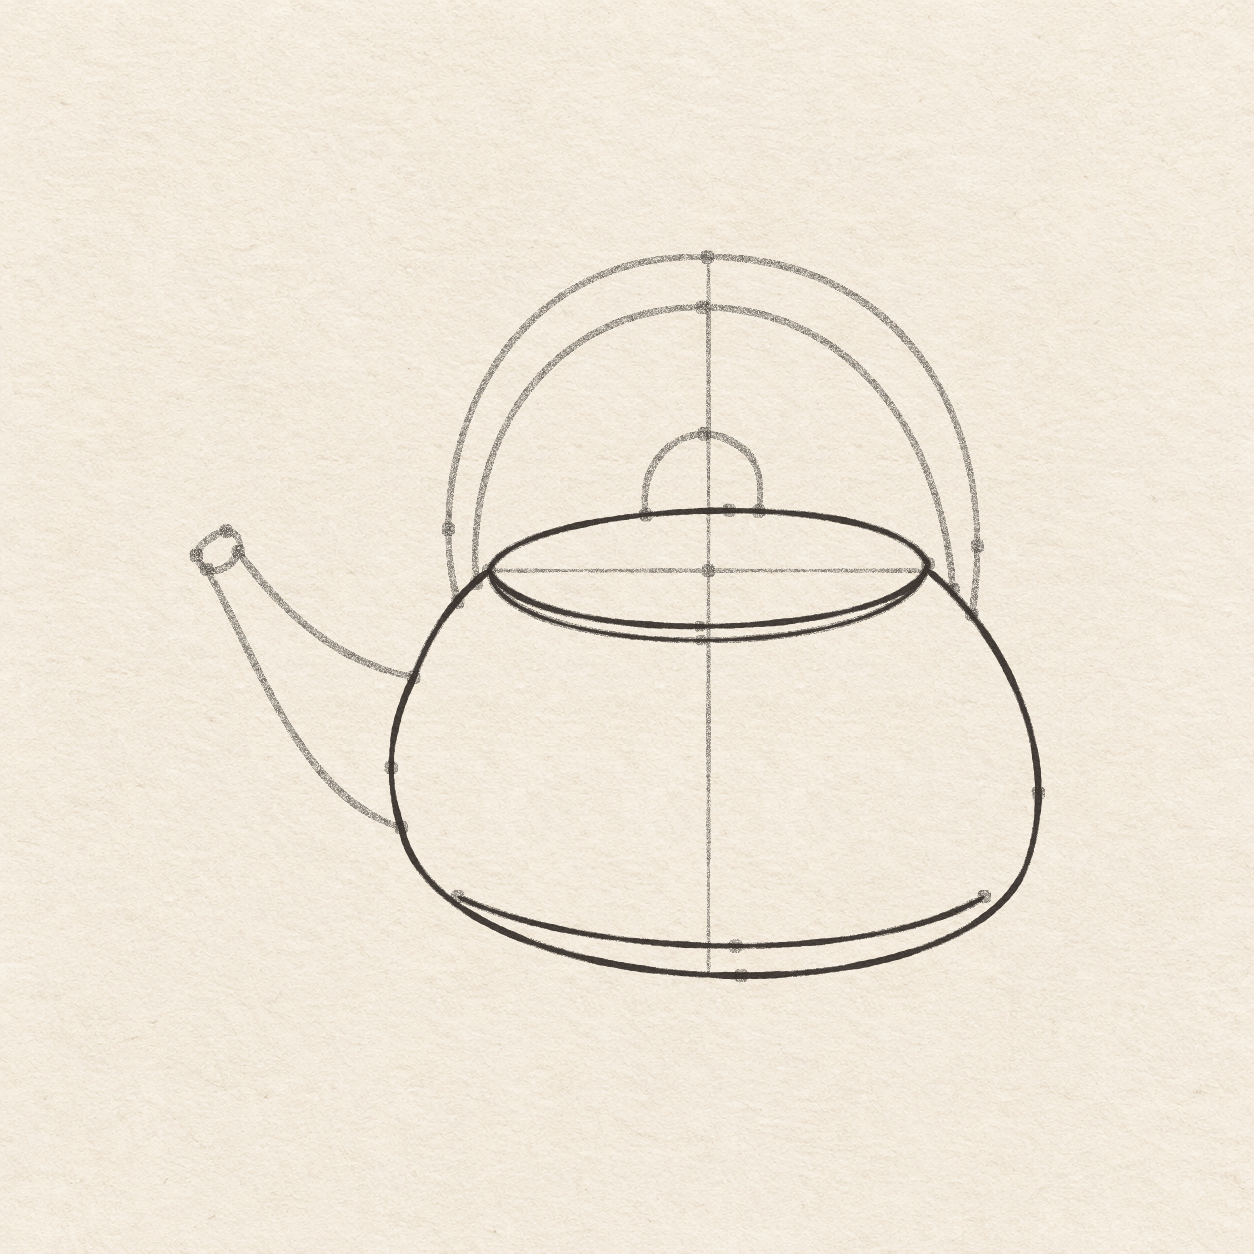
    1. Measure sideways from the lid’s center. On its back curve mark the knob’s left foot about 8 mm left and the right foot about 6.5 mm right. Mark its highest point about 1 cm above the lid’s back dot and about 3 mm left of that dot. Keep both feet on the lid and the highest point well below the handle.
    2. From the left foot, draw a small rounded arch freehand through the high dot and back to the right foot. Bring both sides down to the lid’s back curve. Leave a clear gap above the knob. Keep the lid line as its base. Correct only a stray knob stroke. Leave the measuring cross and dots for cleanup.
    Next step
  10. The lid and kettle body are now inked. The spout, handle, knob, dots and guides are still in pencil.
    Drawing 10 — Ink the lid and bodyView larger
    Fineliner

    Ink the lid and body

    Instructions for Drawing 10 — Ink the lid and body
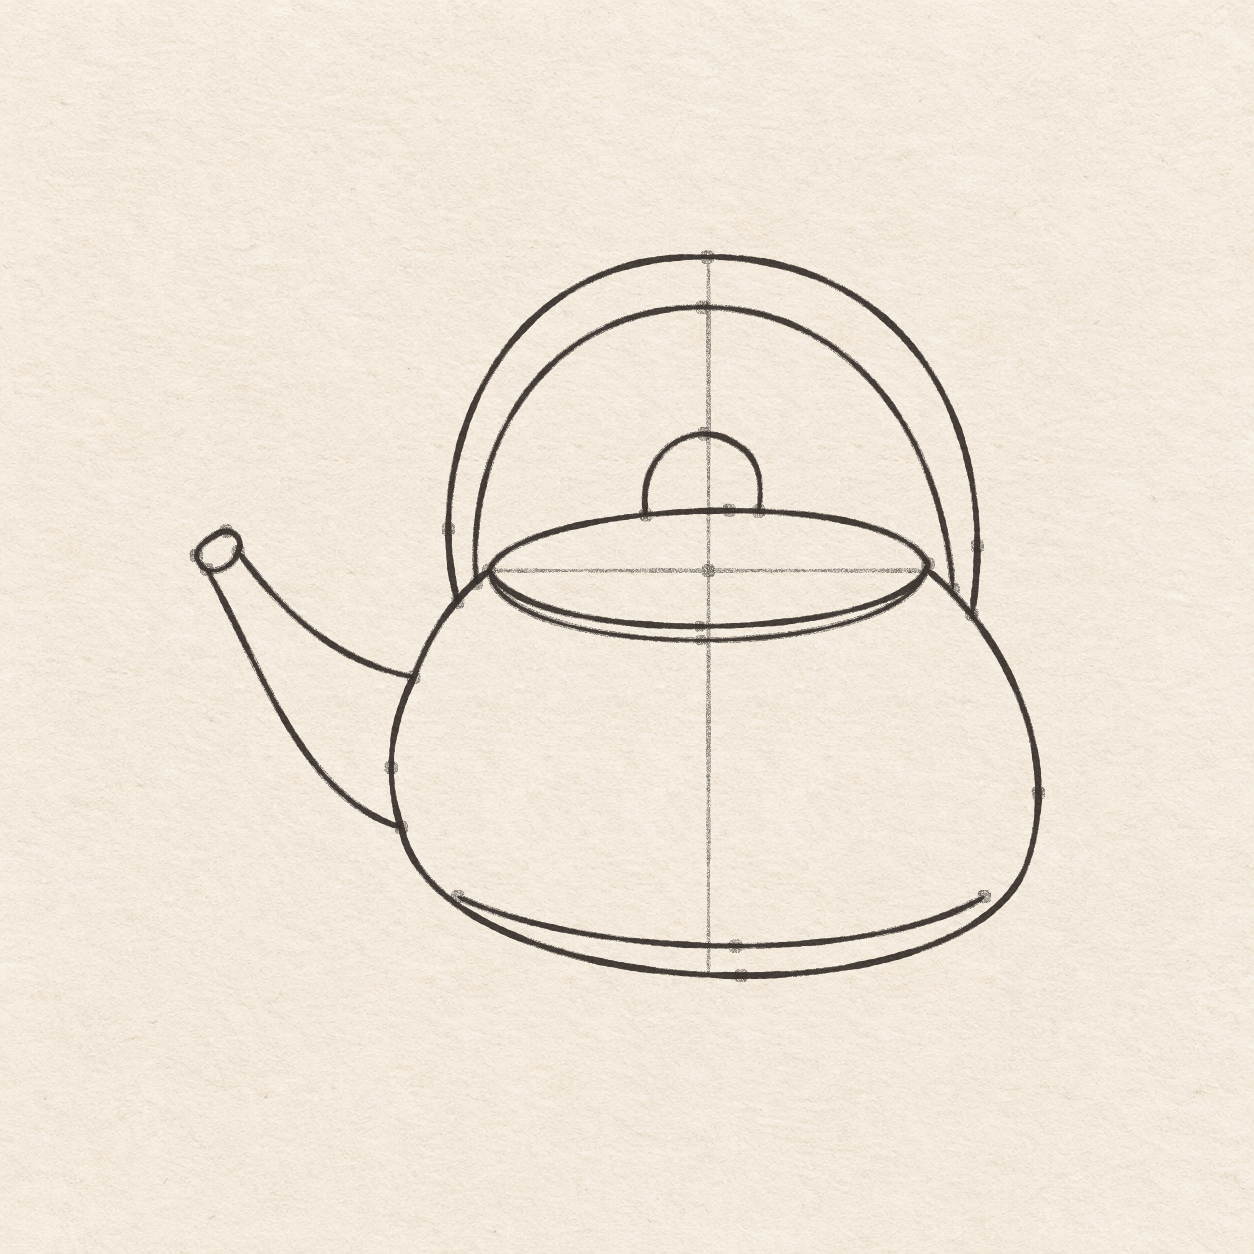
    1. Follow the lid oval with a fine black pen. Trace the lower rim curve from tip to tip with a lighter touch. Leave the narrow strip clear. Keep the pencil cross and dots for now.
    2. Trace the outer body from the already inked left lid tip, around the base, and back to the inked right lid tip. Ink the shallow seam inside the base with a slightly lighter touch. Preserve the space below the seam. Leave the spout, handle and knob in pencil for the next drawing.
    Next step
  11. The inked kettle has an open spout, a hollow arched handle and a small knob, with the pencil cross and dots retained.
    Drawing 11 — Ink the spout, handle and knobView larger
    Fineliner

    Ink the spout, handle and knob

    Instructions for Drawing 11 — Ink the spout, handle and knob
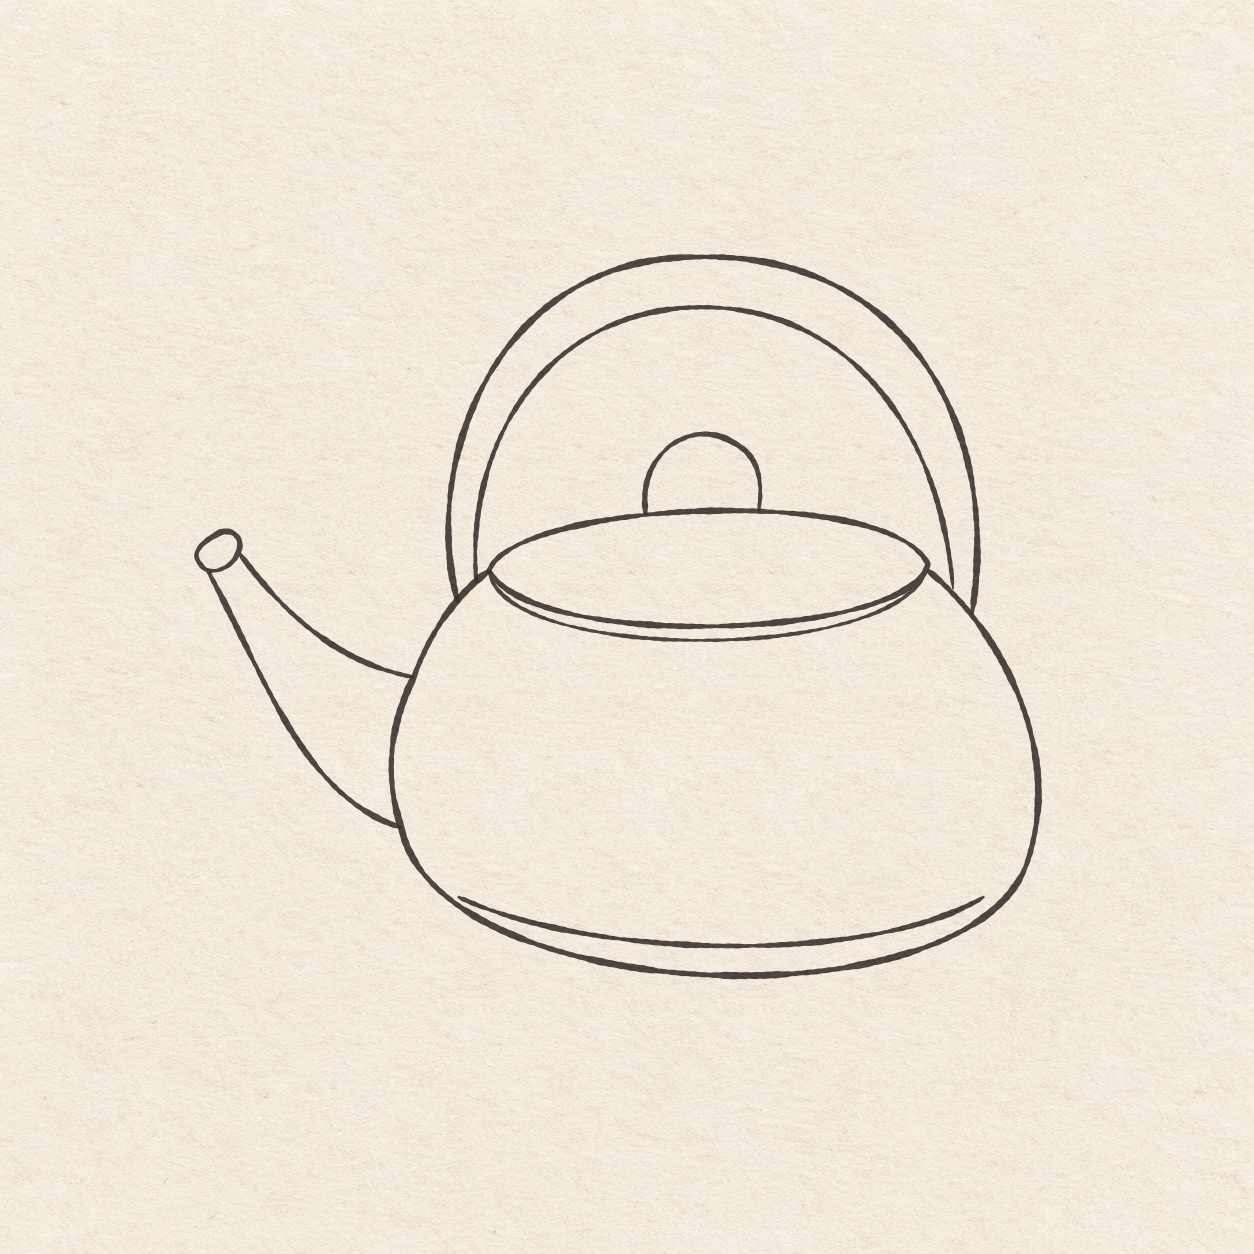
    1. Trace both pencil walls of the spout from their separate joins on the inked body edge to the mouth. Ink the mouth oval once, keeping its inside clear. Keep the two body joins separate. Leave the placement dots in pencil until cleanup.
    2. Trace the outside handle arc from shoulder to shoulder. Follow the inside arc with a slightly lighter touch. Stop each end at its own contact on the inked body shoulder. Keep the opening between the inner arc and the lid free of ink.
    3. Trace the knob from one foot to the other. Stop at the already inked back curve of the lid without adding a separate bottom edge. Leave the gap above the knob clear. Keep all pencil guides until the ink is dry.
    Next step
  12. The inked kettle on textured paper, with the pencil cross and placement dots removed.
    Drawing 12 — Erase the pencil after the ink driesView larger
    Cleanup

    Erase the pencil after the ink dries

    Instructions for Drawing 12 — Erase the pencil after the ink dries
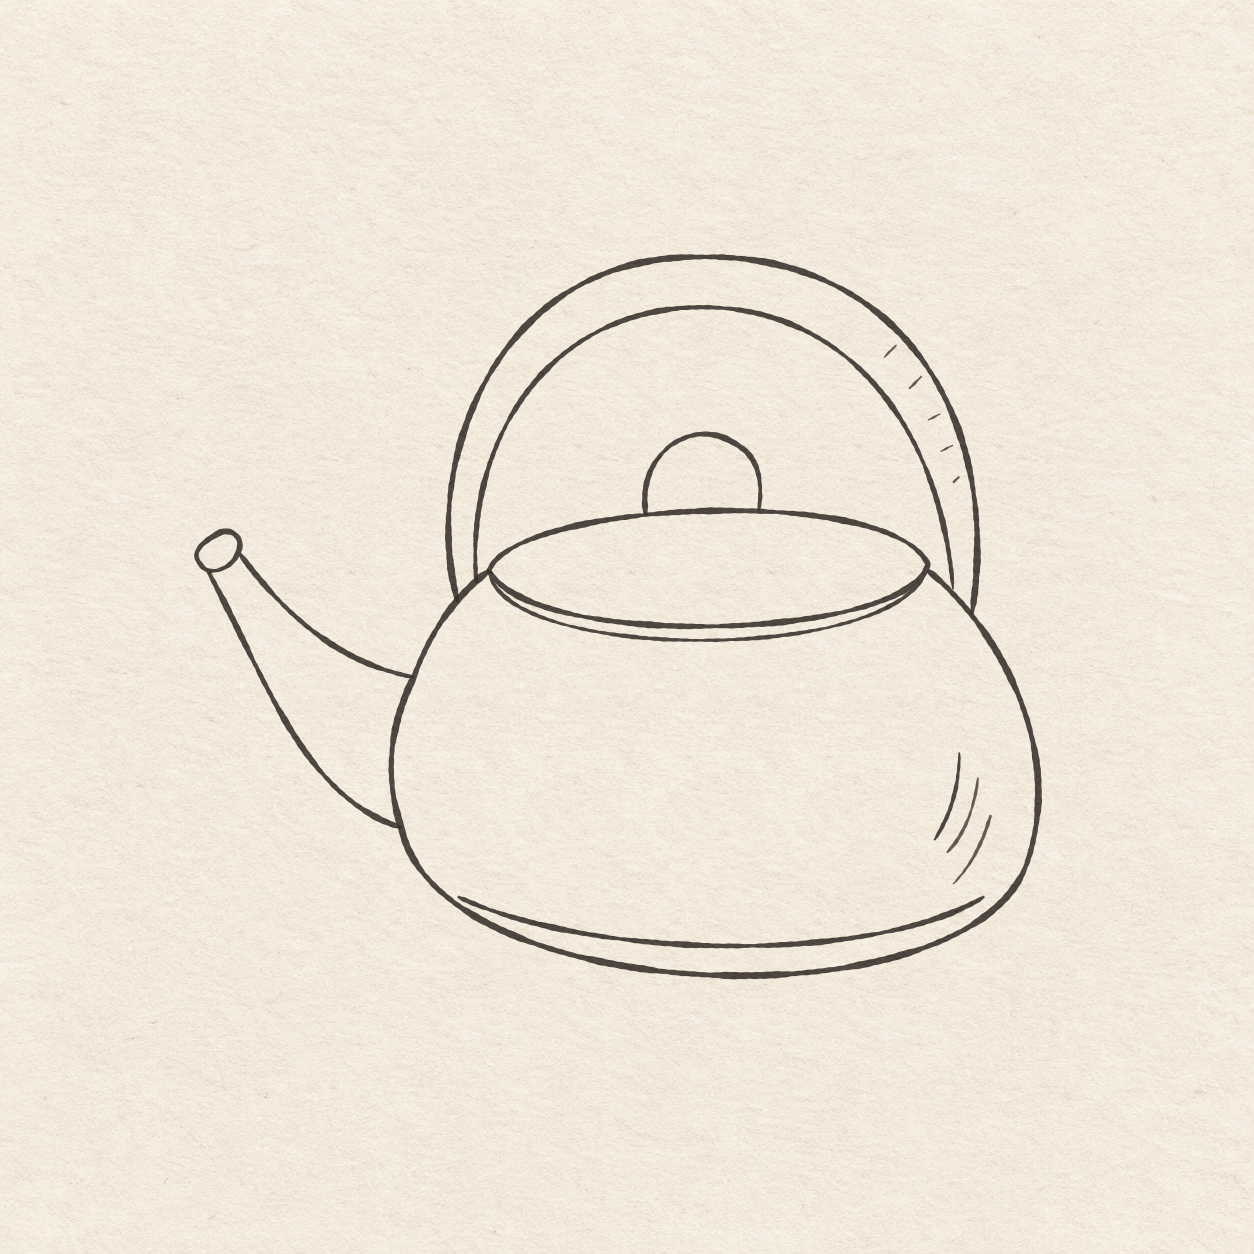
    1. Fill a small patch on a scrap of the same paper with the same pen. Rub the patch gently with your eraser. If it smears, wait and test again. Once the patch stops smearing, erase the light cross, all placement dots and any pencil showing beside the dry ink.
    Next step
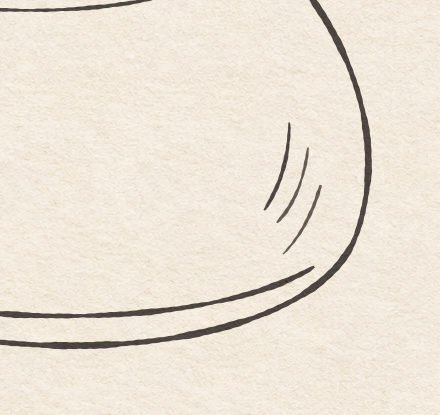
  13. The finished kettle has three curved lines inside the lower right body and five small slanted strokes inside the right handle band.
    Drawing 13 — Add a little shadingView larger
    Close-up of three curved ink strokes inside the kettle’s lower right edge and above the seam.
    Detail 13.1 — Curved shading beside the baseThree short strokes follow the lower right side. Leave space between them and the seam.
    Close-up of five short slanted ink strokes in the upper right handle band.
    Detail 13.2 — Short strokes in the right handle bandFive little strokes slant up and right. Each sits between the two handle edges.
    Fineliner

    Add a little shading

    Instructions for Drawing 13 — Add a little shading

    1. Inside the lower right edge of the kettle, draw three short curved strokes freehand, about 1 cm long. Start the next stroke a little lower and farther right each time. Bend them down and left to follow the body. Leave a little clear paper between the strokes, the outer edge and the base seam.
    2. On the upper right half of the handle band, draw five tiny slanted strokes freehand. Make them about 1 to 2 mm long and angle them up and right. Leave space between them as they step down the band. Keep each stroke inside the band. Leave the handle opening and the broad lid clear.
    Back to the steps

If something looks off

If the handle closes up

Before inking, erase the part of the inner pencil curve that crowds the knob and redraw it a little farther away. Keep both feet in place and leave a clear gap between the two handle curves.