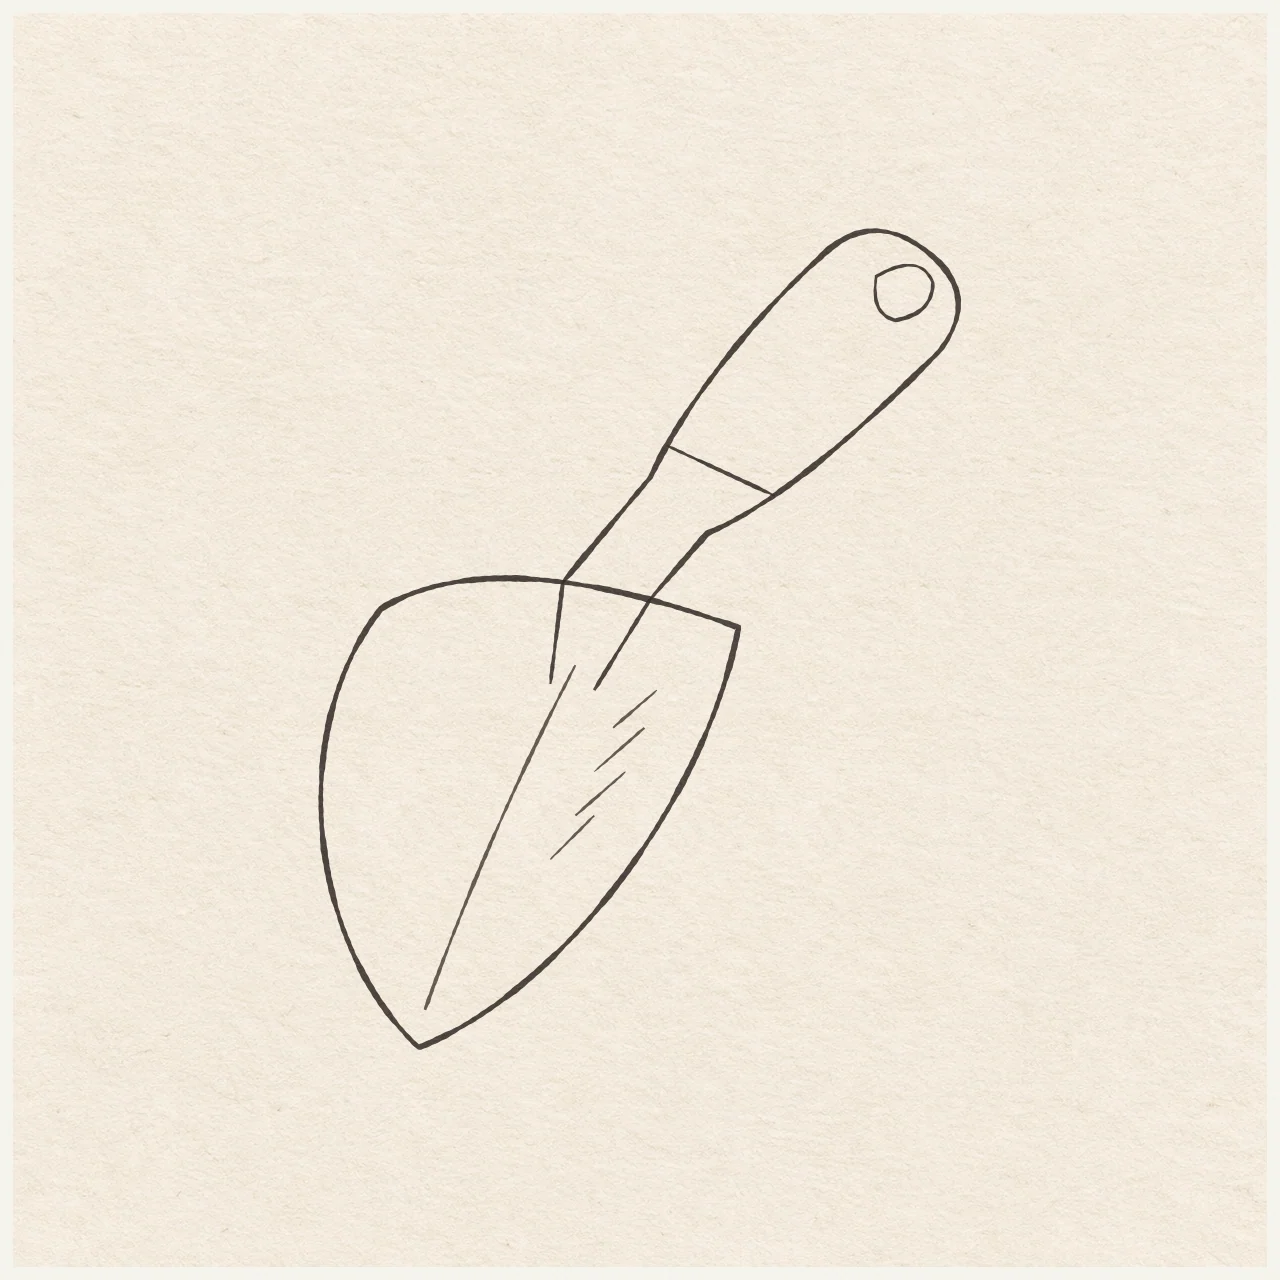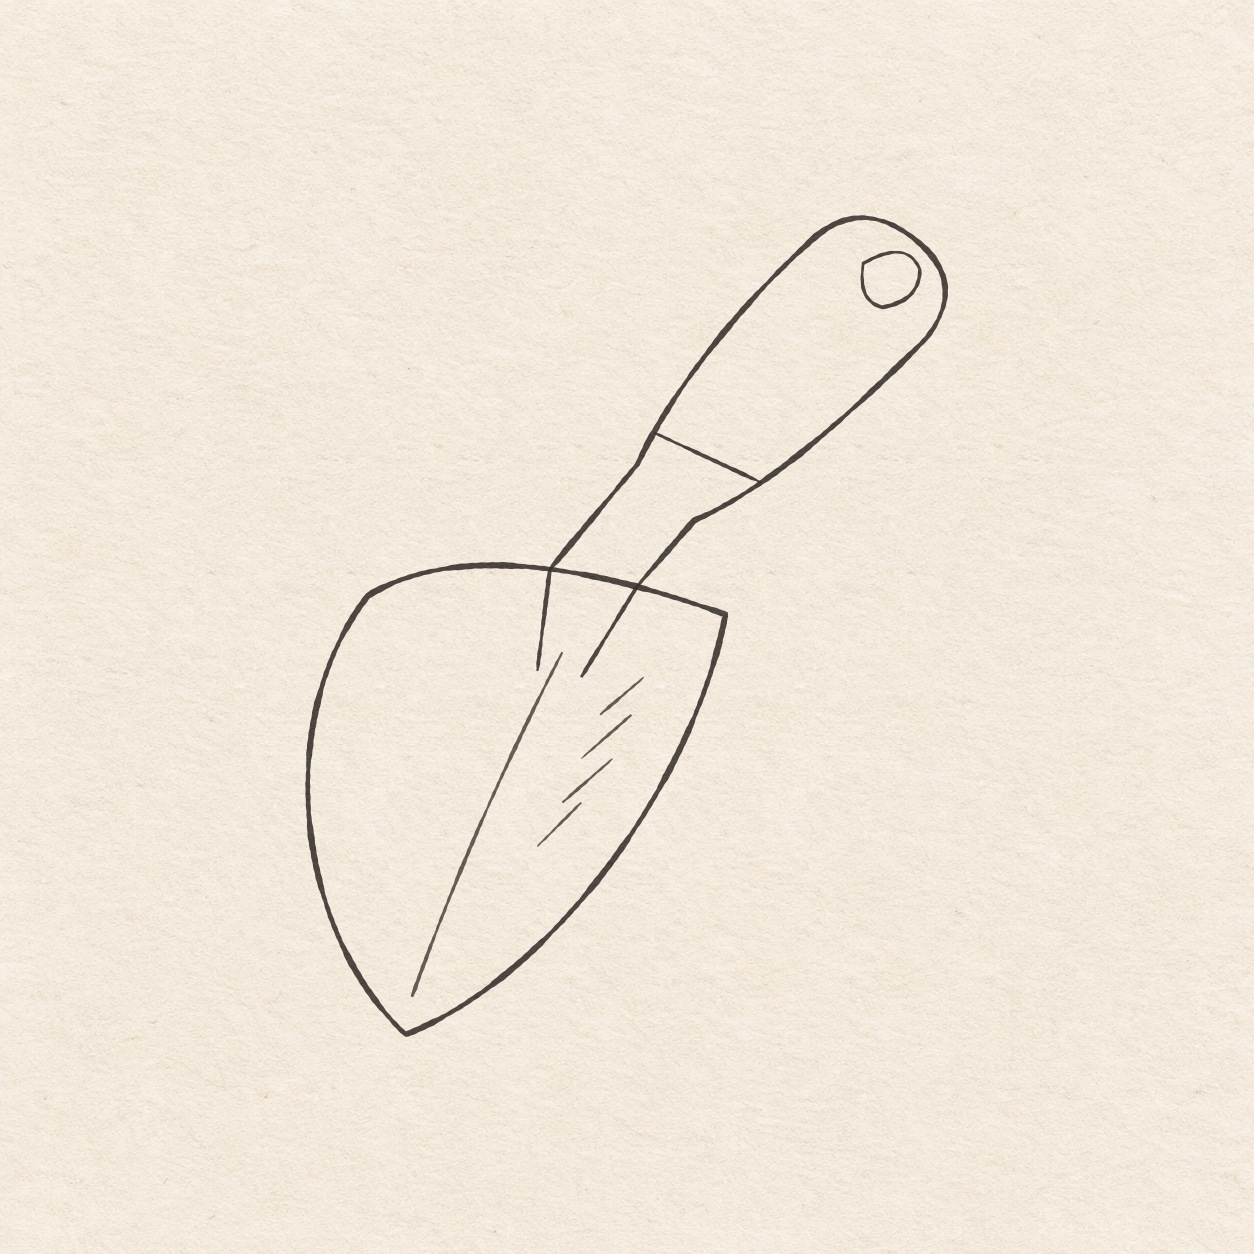
A pointed trowel with a diagonal rounded grip, a hanging hole and four small hatches, in black fineliner.
Drawing referenceAbout reference use

Garden trowel

Plot a pointed blade, the two handle joins and a rounded grip before inking a garden trowel.

Everyday objectsEasyFinelinerReference practice: about 14 min
Save reference

Follow the drawing tutorial

Plot a pointed blade, the two handle joins and a rounded grip before inking a garden trowel.

Start the 8-step tutorial

A small thing to tryPlace both neck contacts on the actual blade seam, then connect each handle edge to its own contact.

Draw it, one step at a time

Draw a garden trowel

Plot a pointed blade, the two handle joins and a rounded grip before inking a garden trowel.

8 illustrated steps Full tutorial: about 28 minutes, at your pace

What you’ll need

  • HB pencil
  • Eraser
  • Fine black pen
  • Ruler
  • Spare sheet with a square corner
  • Drawing paper

Before you start

This trowel reaches about 10.5 cm from its blade tip to the top of the handle. Choose its place on the page with the handle angled up to the right.
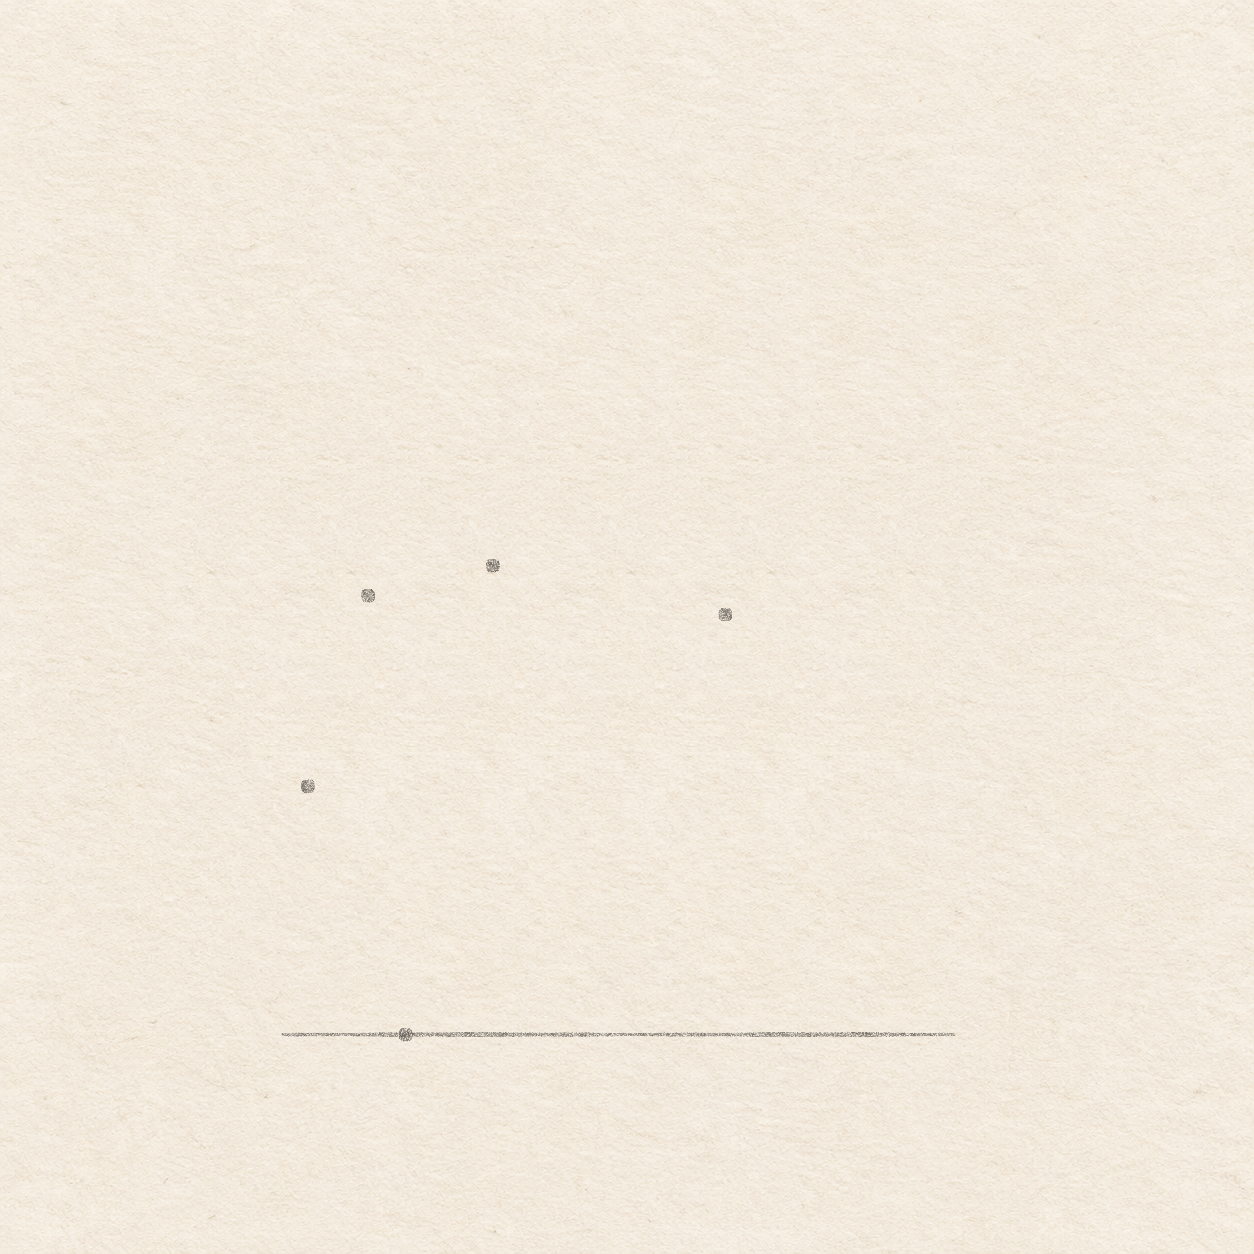
  1. Light pencil tip, level line and four dots locating the left bow and three upper points of the blade.
    Drawing 1 — Plot the blade tip and shouldersView larger
    Pencil

    Plot the blade tip and shoulders

    Instructions for Drawing 1 — Plot the blade tip and shoulders
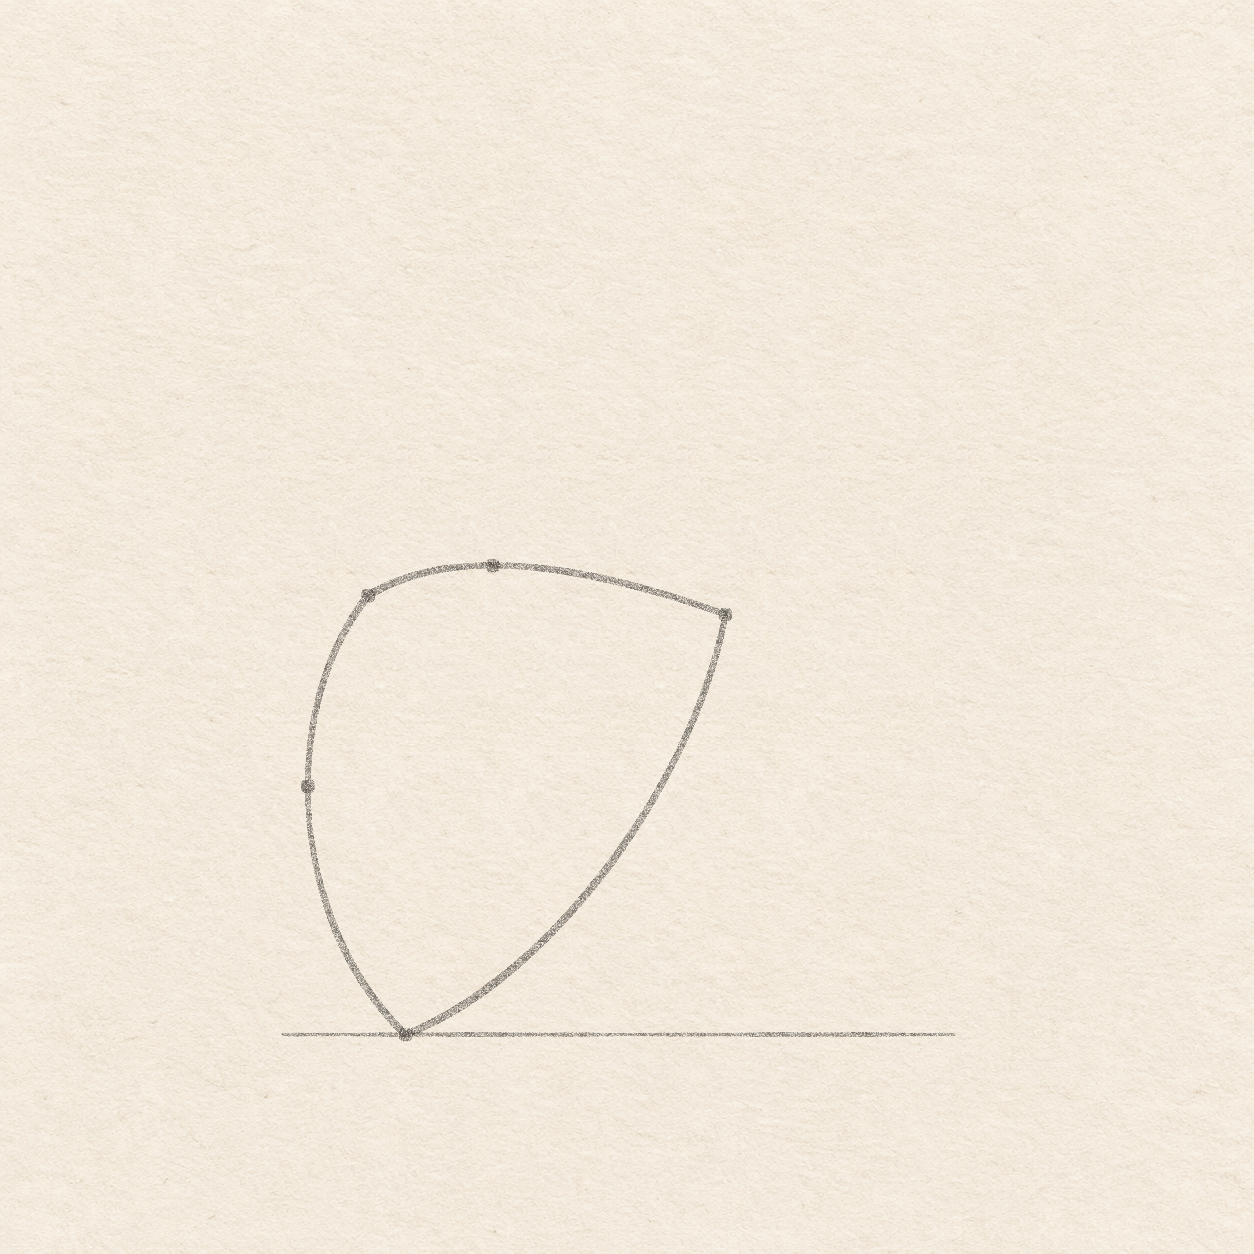
    1. Choose where the blade tip will sit and mark a light dot. Leave at least 2 cm to its left, 7.2 cm to its right and 11 cm above it. Move the dot if the grip would crowd the upper edge of the paper.
    2. Rule a very faint level line through the tip dot, about 1.6 cm left and 7 cm right. Set one edge of a spare sheet along the line and slide its square corner to each measured spot before using its upright edge. Hold the ruler against that upright edge when measuring upward from the line.
    3. Measure along the line from the tip dot. Set the square corner at each distance and measure up. Place the wide left dot about 1.25 cm left and 3.2 cm up. Put the left shoulder about 5 mm left and 5.6 cm up. Place the high seam dot about 1.1 cm right and 6 cm up. Put the right shoulder about 4.1 cm right and 5.4 cm up. Check that the high seam dot lies between the two shoulder dots and a little above them.
    Next step
  2. A closed pencil blade with a pointed bottom and a soft upper shoulder seam.
    Drawing 2 — Curve around the pointed bladeView larger
    Pencil

    Curve around the pointed blade

    Instructions for Drawing 2 — Curve around the pointed blade
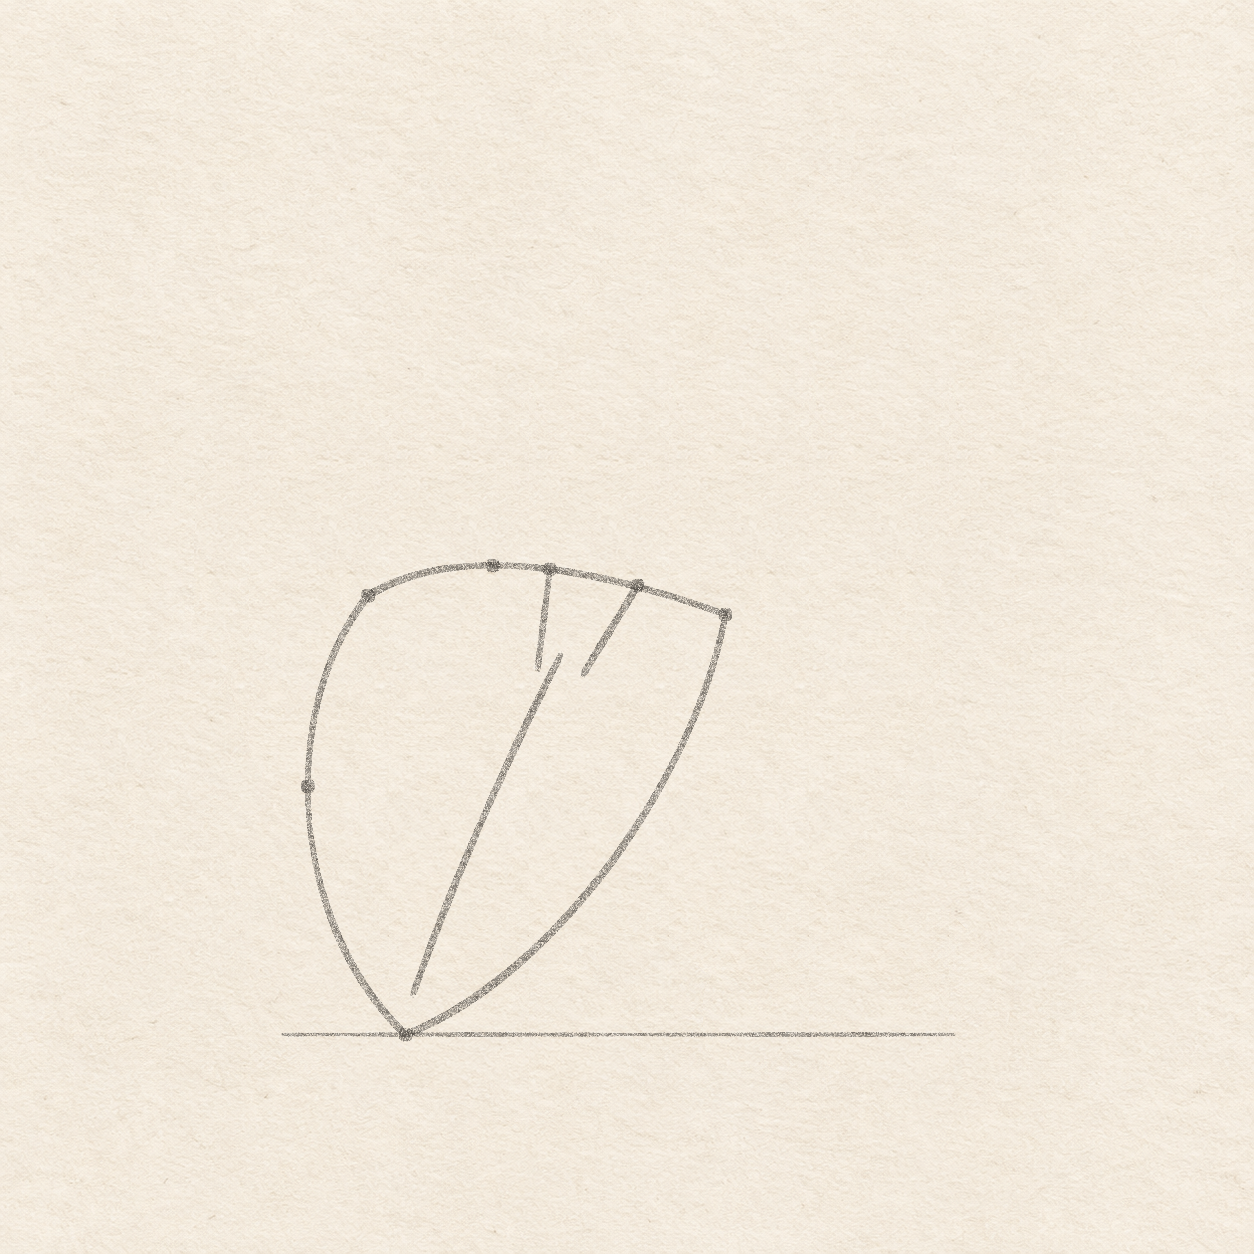
    1. Start at the tip. Curve freehand out through the wide left dot and turn inward to the left shoulder dot. Sweep across the high seam dot to the right shoulder. Then curve down and left, narrowing all the way back to the tip. Keep the blade full across the upper half and lift any stray line past the tip before moving on.
    Next step
  3. The blade has two narrow neck projection lines touching its upper seam and one short internal blade crease.
    Drawing 3 — Place both neck contacts and the blade creaseView larger
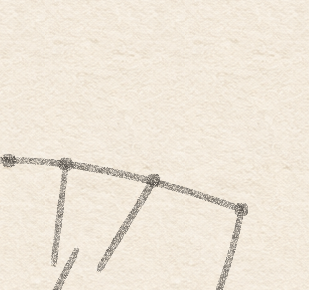
    Native trowel detail showing the two contacts where the handle neck meets the blade’s curved upper edge.
    Detail 3.1 — Two separate neck contacts on the bladeThe narrow neck meets the curved blade in two places. The contacts sit at slightly different heights.
    Pencil

    Place both neck contacts and the blade crease
    Instructions for Drawing 3 — Place both neck contacts and the blade crease

    1. On the level line, measure about 1.8 cm and 3 cm right from the tip. Place the square corner at each spot and follow the upright edge up to the seam. Mark the two crossings on the seam itself. Check that each dot is on your actual curved edge. The right touch can sit slightly lower.
    2. From the left contact, rule about 1.3 cm almost straight down, a little left. From the right contact, rule about 1.4 cm down and left. Inside the blade, begin a light curve about 5 mm above the tip. Sweep up and right so it ends between and just above the two lower stops. Keep those three short ends distinct. The long sweep stays inside the blade and begins above the tip.
    Next step
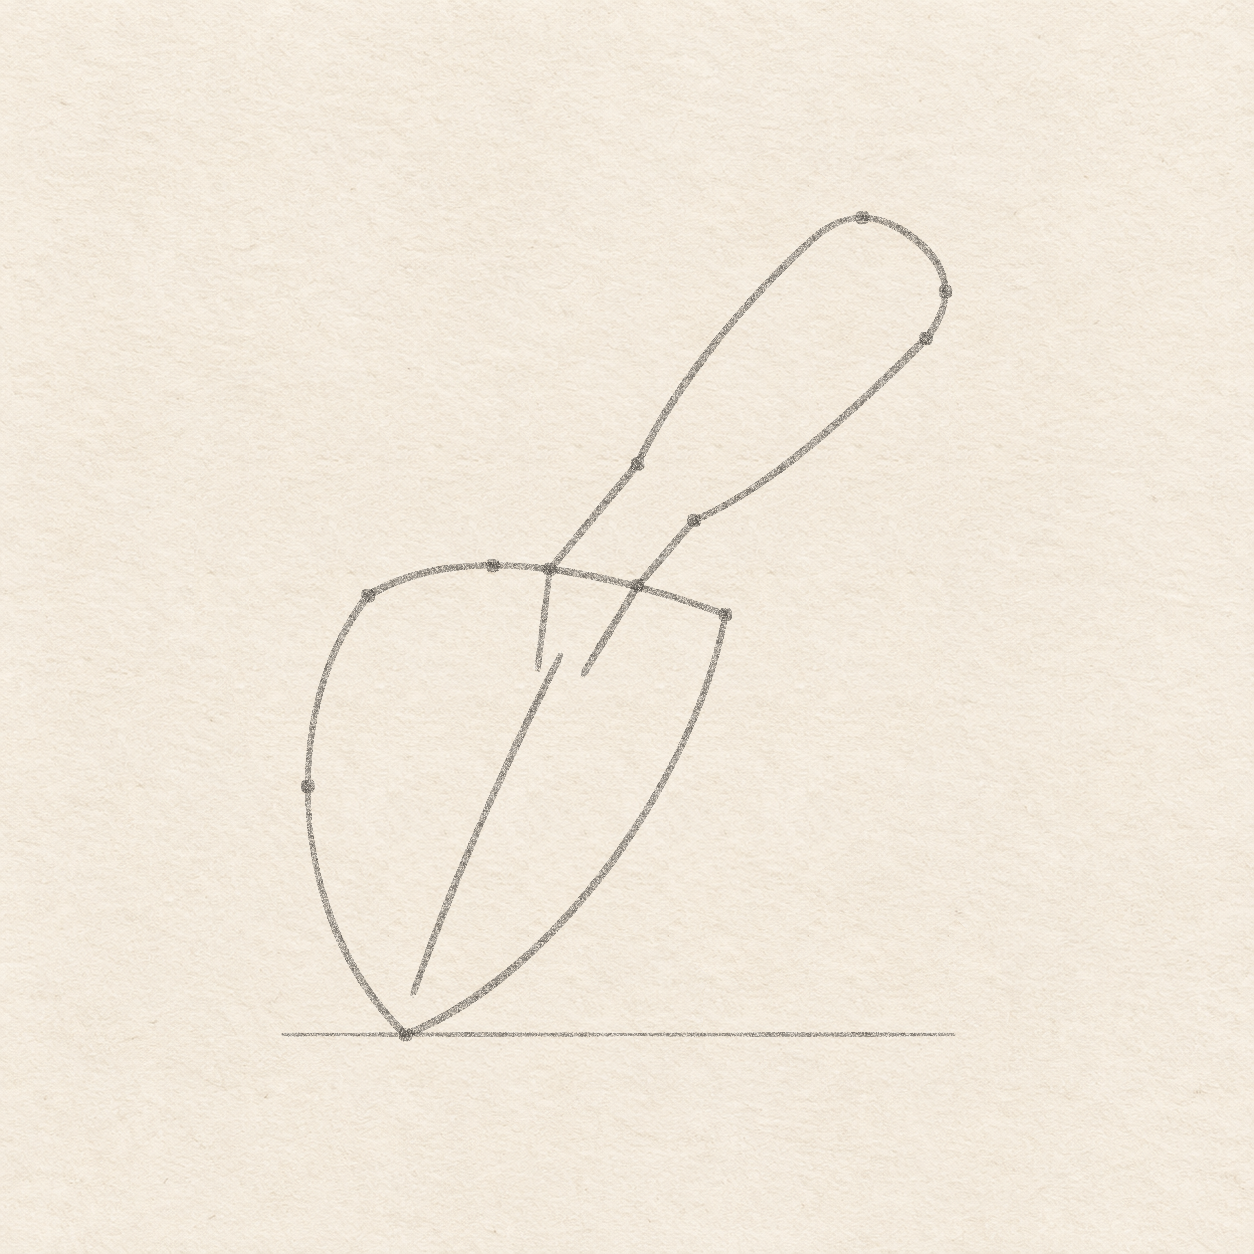
  4. A bent pencil handle angles up to the right, widening away from the two separate blade joins.
    Drawing 4 — Plot and draw the bent gripView larger
    Pencil

    Plot and draw the bent grip

    Instructions for Drawing 4 — Plot and draw the bent grip
    1. Hold the ruler through the left neck contact, level with the faint baseline direction. Measure 1.1 cm right along it, set the square corner there and mark about 1.35 cm up. Reset the level ruler through the right contact and use the same transfer to mark a dot 7 mm right and 8 mm up. Return the ruler to the baseline. From the tip dot plot the top of the grip 5.8 cm right and 10.4 cm up, the far right dot 6.9 cm right and 9.5 cm up, and the turn underneath about 6.6 cm right and 8.9 cm up. Use the same square-corner transfer as before. Check that the two near dots are separate, and the far right dot sits below the high dot.
    2. From the left touch, rule to its near dot. Curve freehand up and right, widening gradually as you sweep through the high dot to the far right dot. Round down through the turn under the grip. Move back down and left through the other near dot and finish at the right touch. Check that both ends meet their own blade contacts. Keep the neck narrow and the remote end rounded.
    Next step
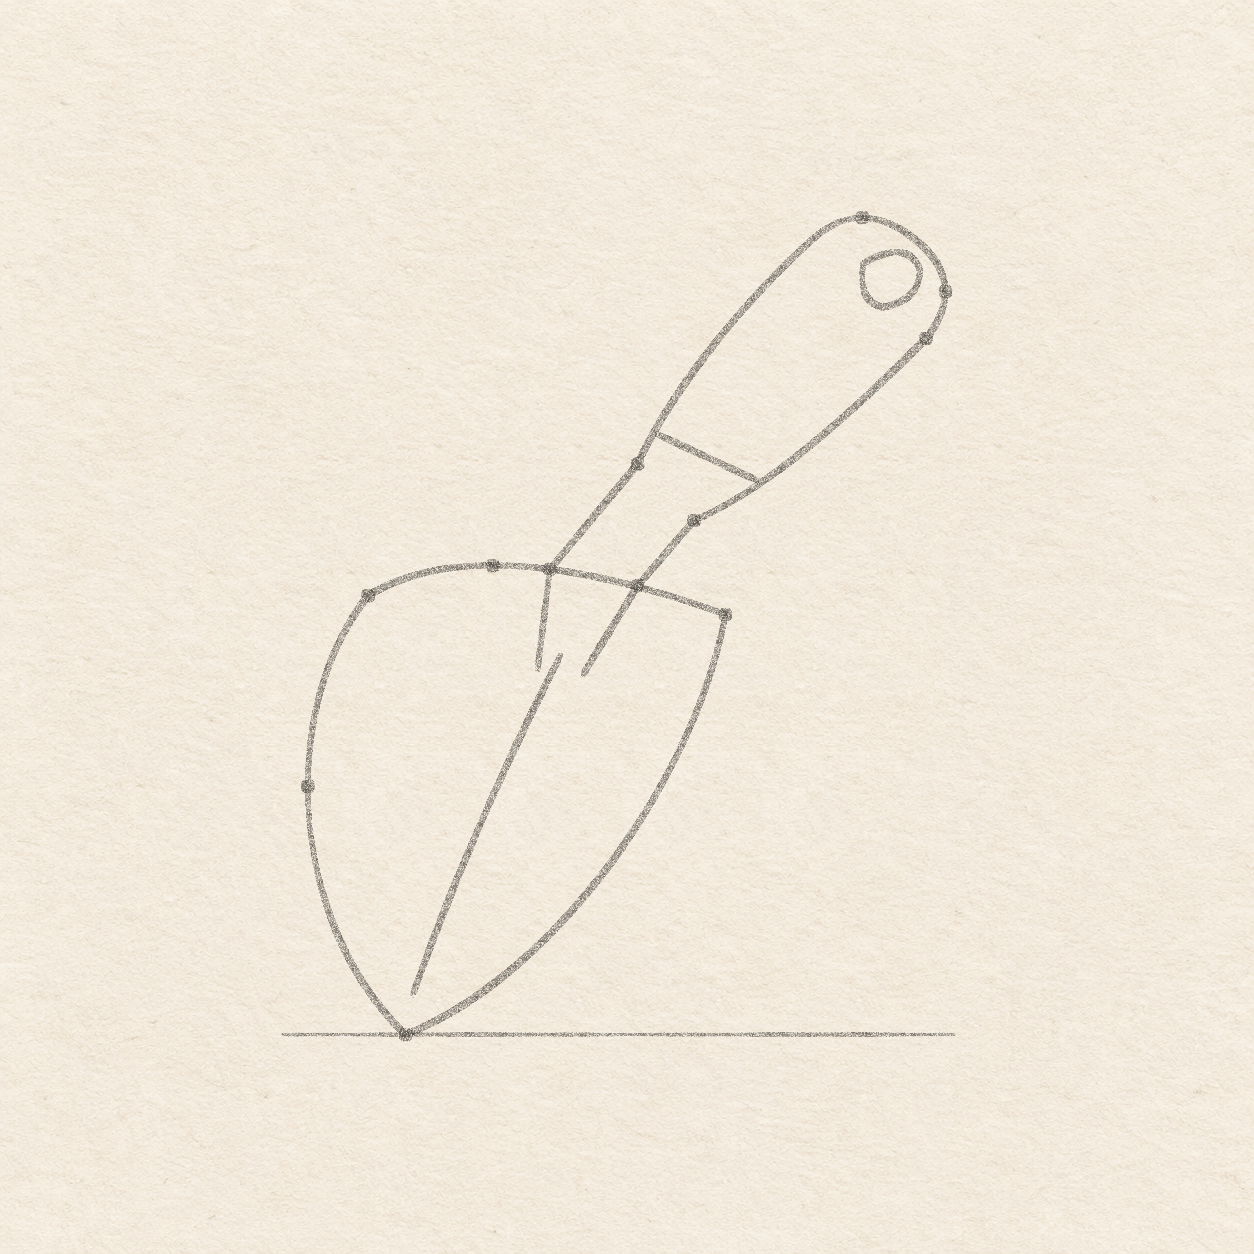
  5. The pencil grip has one thin cross line near its shoulder and a small inset oval near its rounded tip.
    Drawing 5 — Mark the collar and hanging holeView larger
    Pencil

    Mark the collar and hanging hole

    Instructions for Drawing 5 — Mark the collar and hanging hole
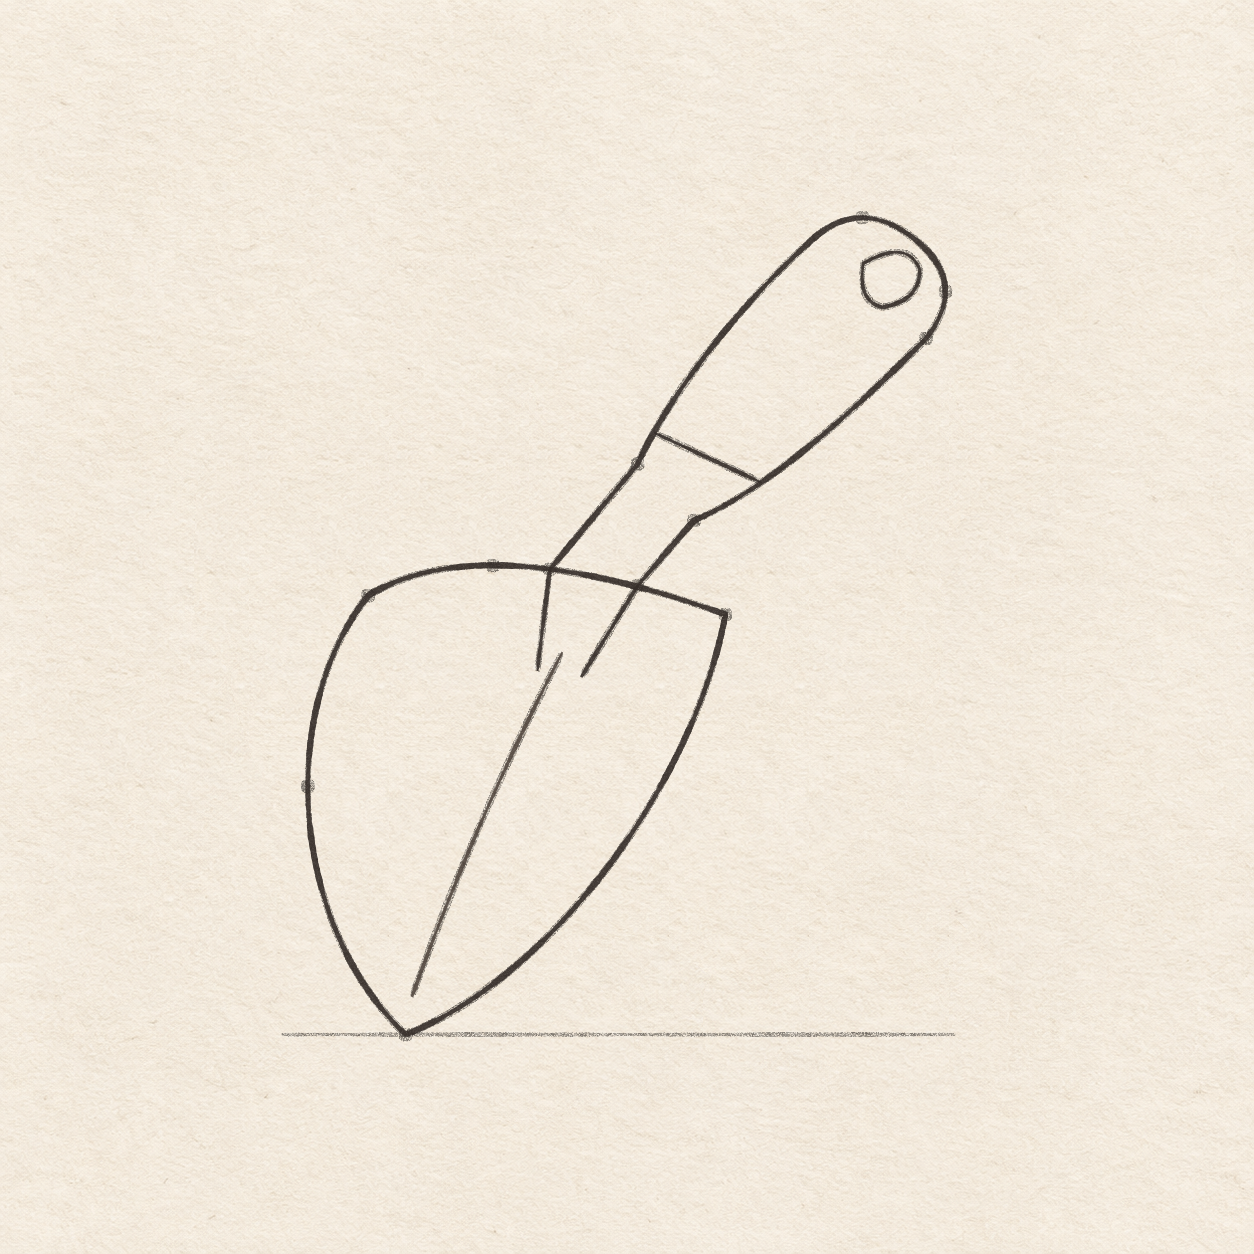
    1. Find the left grip edge just beyond the neck bend. Rule a short line down and right across the grip to its opposite edge, about 1.5 cm long. Meet both existing edges and keep the collar well below the round end of the grip.
    2. Near the rounded end, locate a space about 7 mm wide and 6 mm high. Keep at least 2 mm between that space and the rim of the handle. Draw a small freehand curve from the left side through the top and right, then around the bottom back to the start. Close the hole inside the grip. Lift and move it slightly inward if it touches the outline.
    Next step
  6. The trowel is inked with connected neck joins, a diagonal rounded grip and a small paper hole. Some graphite remains.
    Drawing 6 — Ink the blade, joints and handleView larger
    Fineliner

    Ink the blade, joints and handle

    Instructions for Drawing 6 — Ink the blade, joints and handle
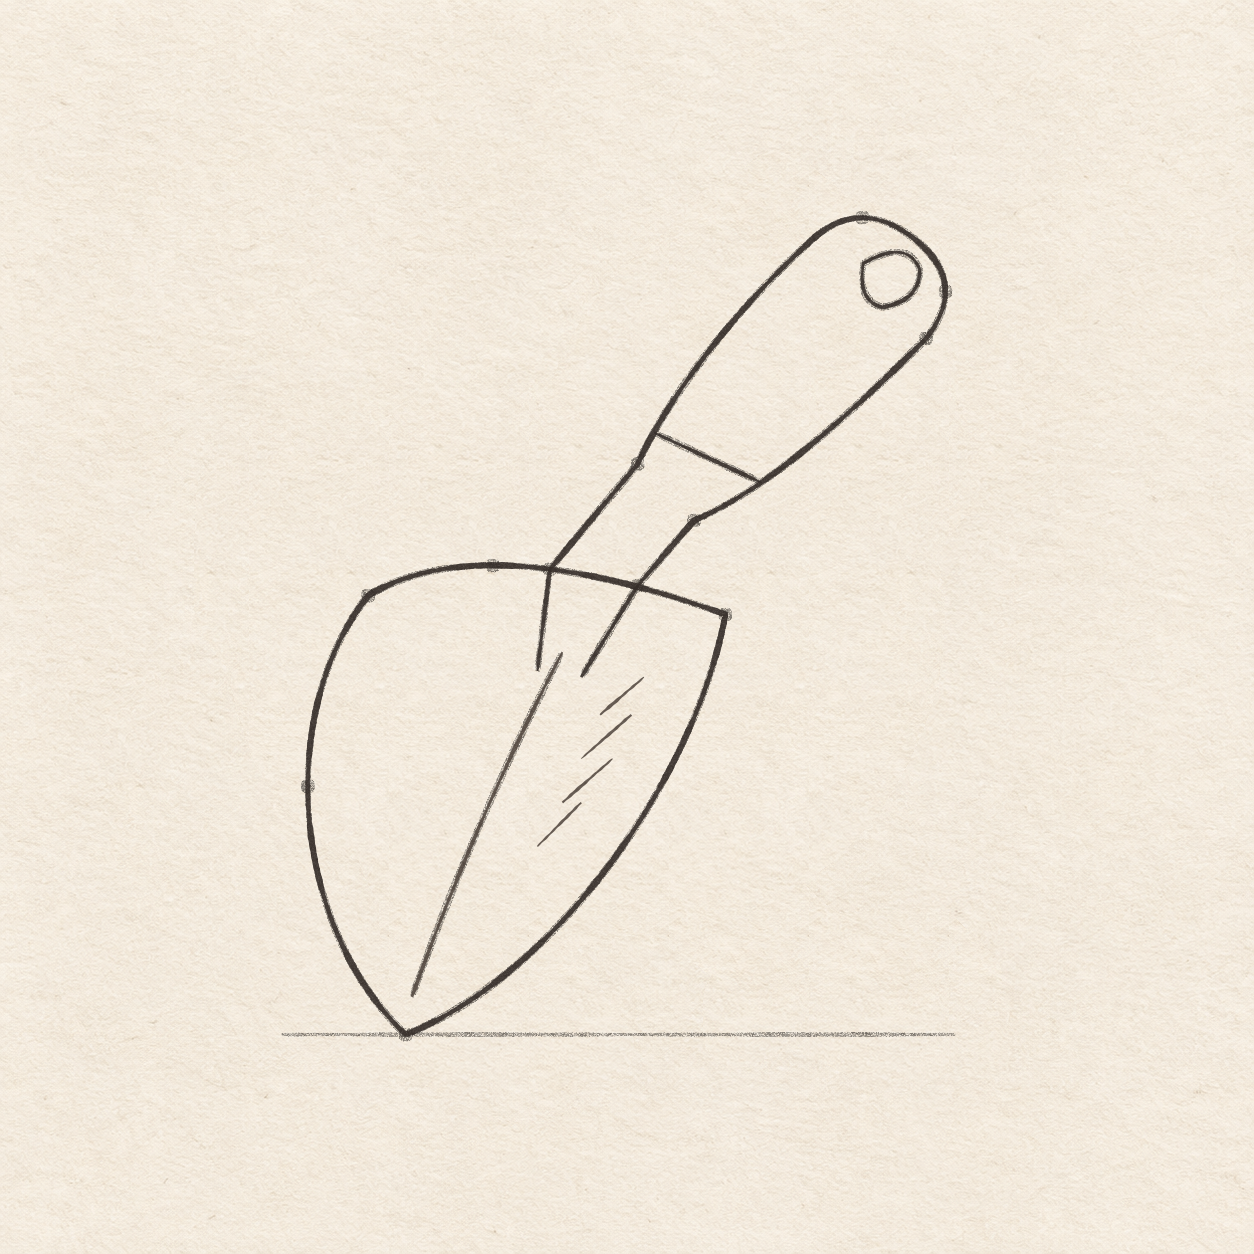
    1. Trace around the outer blade in pen from the tip and back around the seam. Close the stroke cleanly at the tip. Keep the blade interior pale for its few finishing strokes.
    2. Trace the interior crease and the two short neck lines that meet the blade seam. Keep the three lower ends distinct and meet the seam only at the two upper points.
    3. Trace up from the left blade contact, around the grip and back down to the right contact. Check that each end touches its own point on the blade seam.
    4. Ink the short collar across the grip and trace the small hole closed. Keep the hole and the paper around it open, and leave ink only on the intended collar route.
    Next step
  7. Four short slanted lines sit in the right part of the blade while its left side remains pale.
    Drawing 7 — Place a few short blade hatchesView larger
    Fineliner

    Place a few short blade hatches

    Instructions for Drawing 7 — Place a few short blade hatches
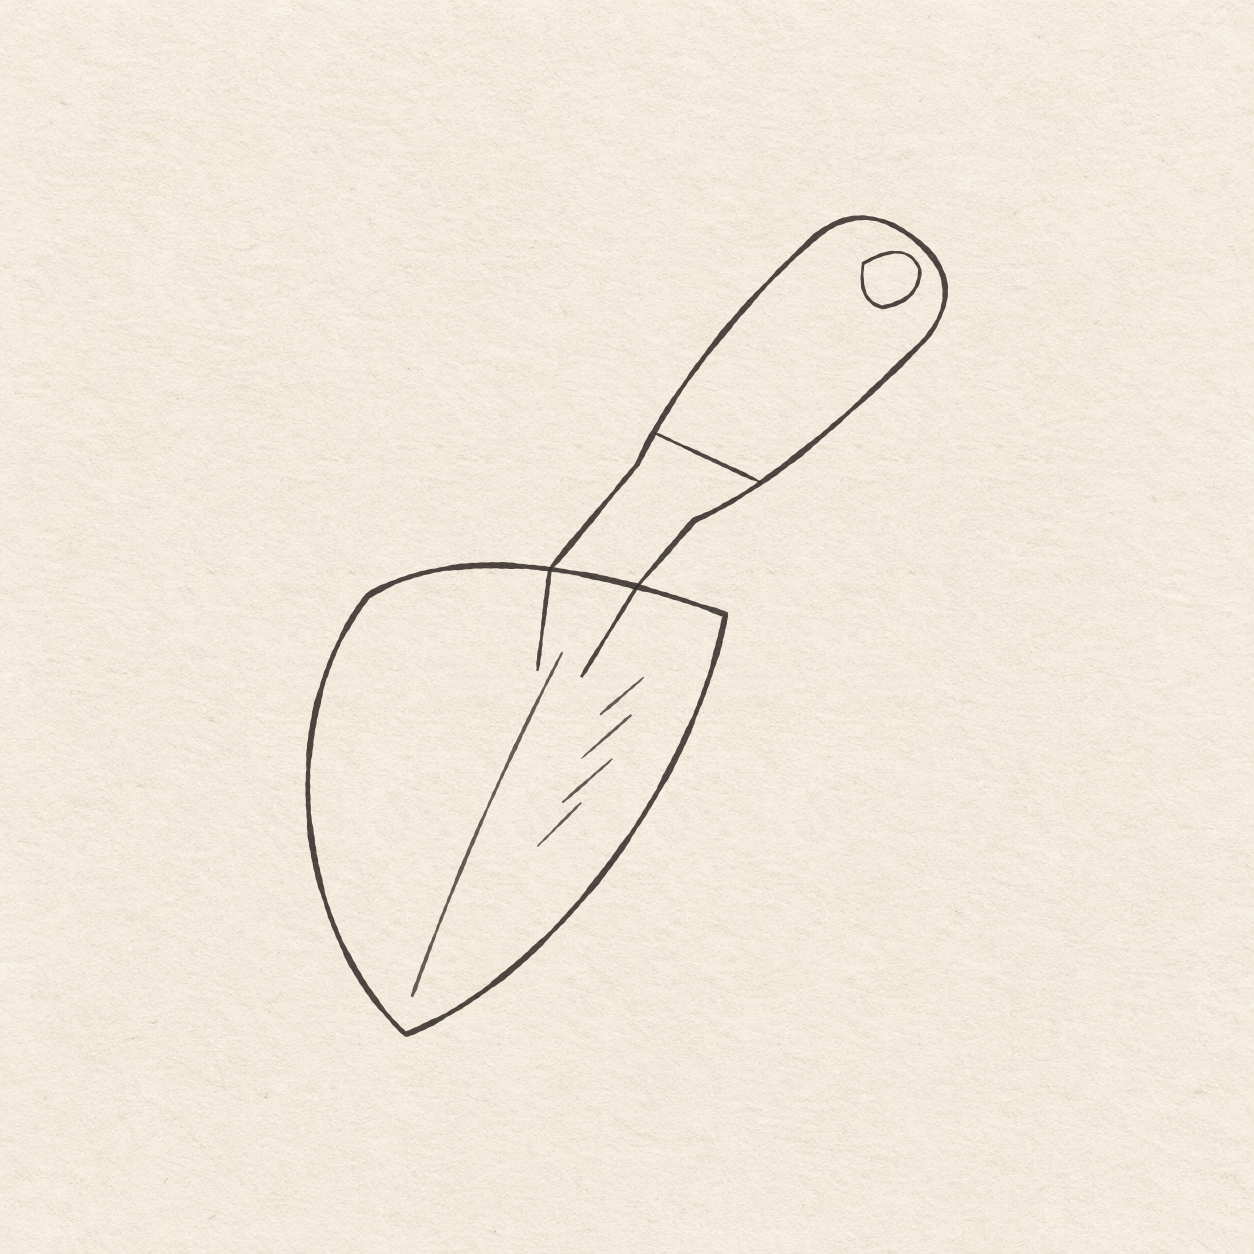
    1. Between the crease and the right blade edge, add four short down-left slashes. Begin under the neck, then step each one slightly down and left. Make the last one a little shorter as the blade narrows. Leave clear paper between the hatches, the crease and the outer blade edge.
    Next step
  8. Finished fineliner trowel with a connected bent grip, paper hole, pointed blade and four sparse hatches. The placement graphite is gone.
    Drawing 8 — Erase the dry pencil guidesView larger
    Cleanup

    Erase the dry pencil guides

    Instructions for Drawing 8 — Erase the dry pencil guides

    1. Fill a small patch on a scrap of the same paper with the same pen. Rub the patch gently with your eraser. If it smears, wait and test again. Once the patch stops smearing, erase the faint level line, placement dots and any pencil beside the dry ink.
    Back to the steps

If something looks off

If the neck seems to float

Check the two pencil neck edges against the actual curved blade seam. Extend a short edge only as far as its contact, then ink the corrected shape.