FinelinerEasy

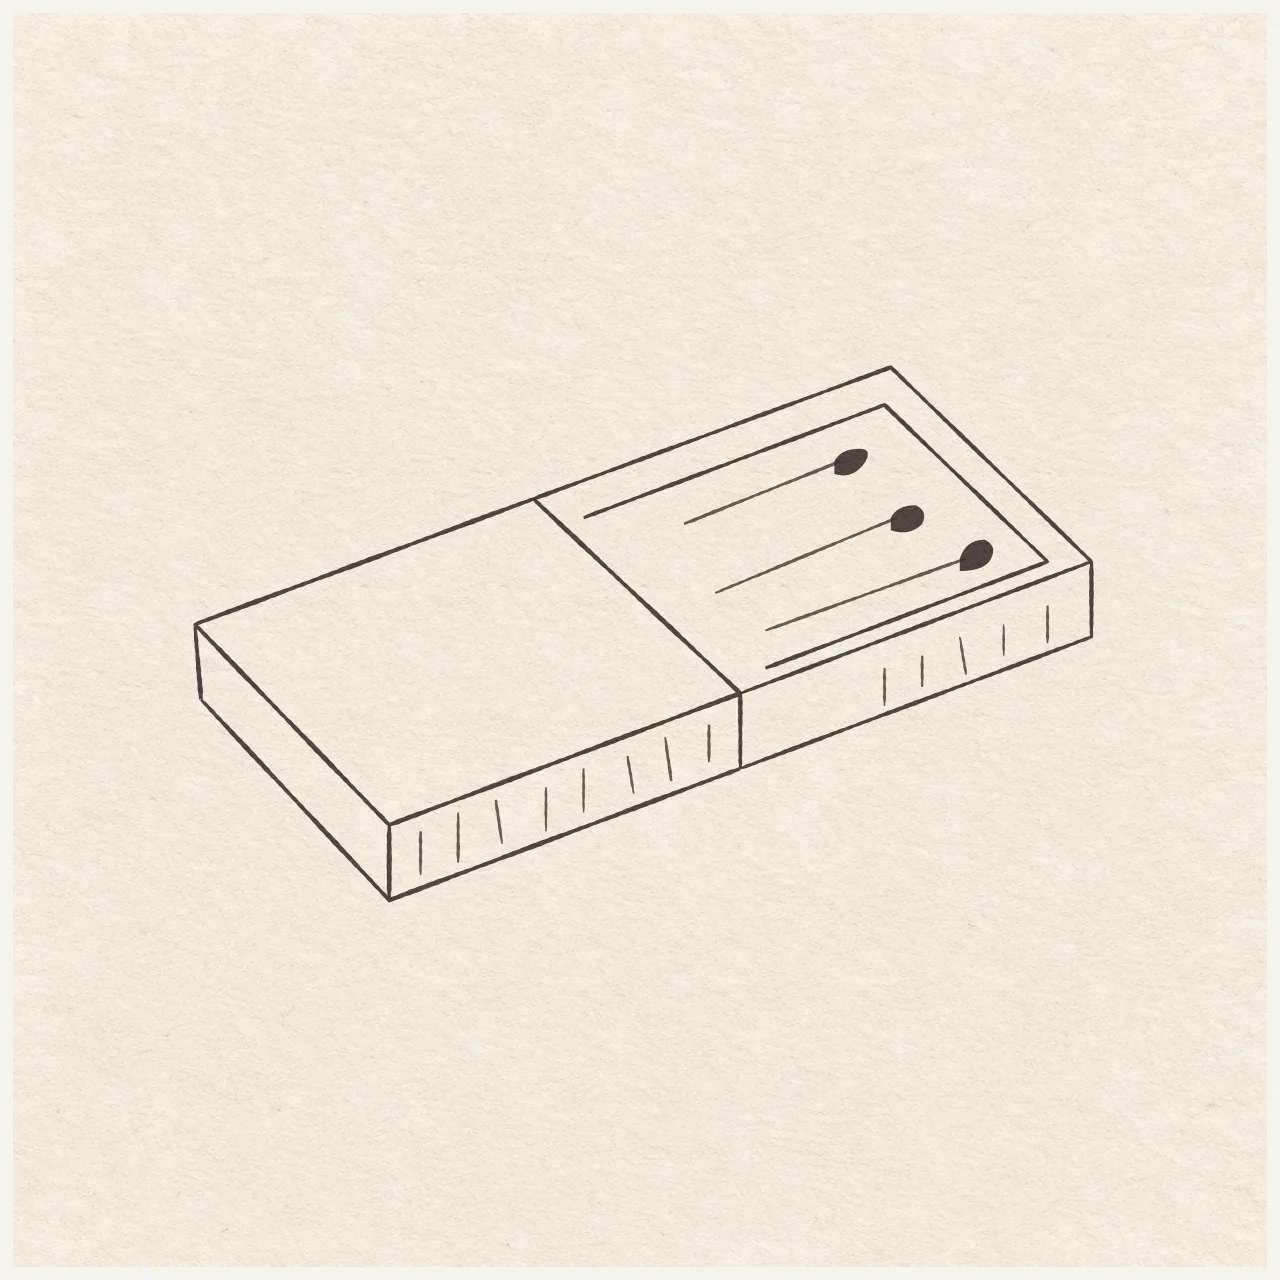
Open matchbox
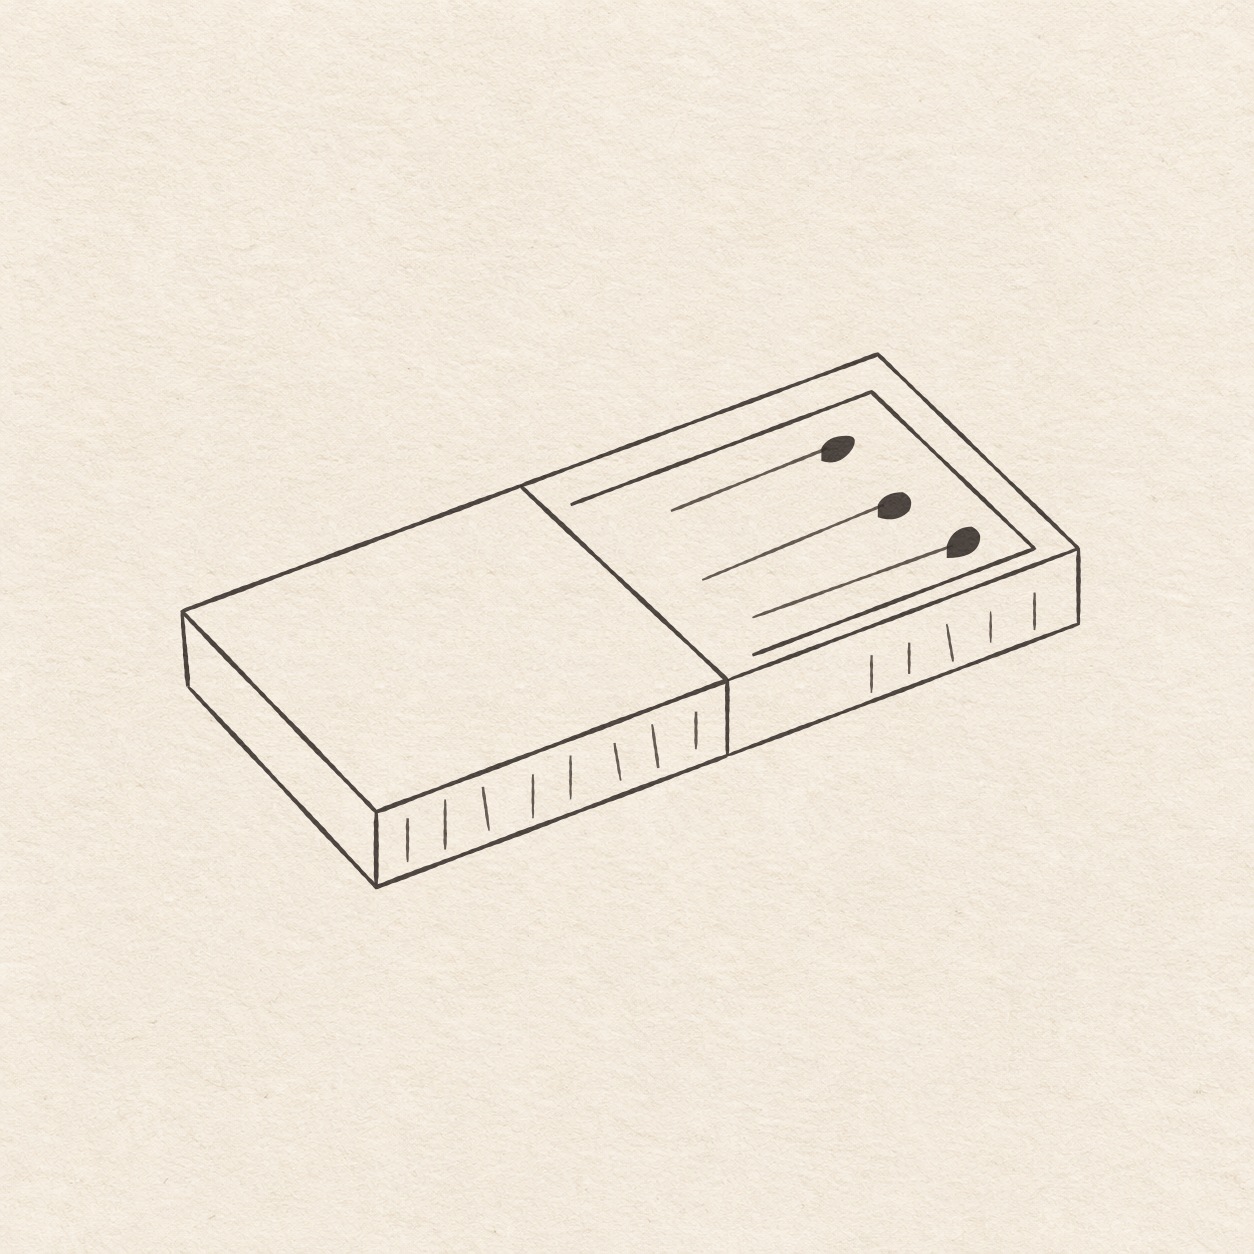
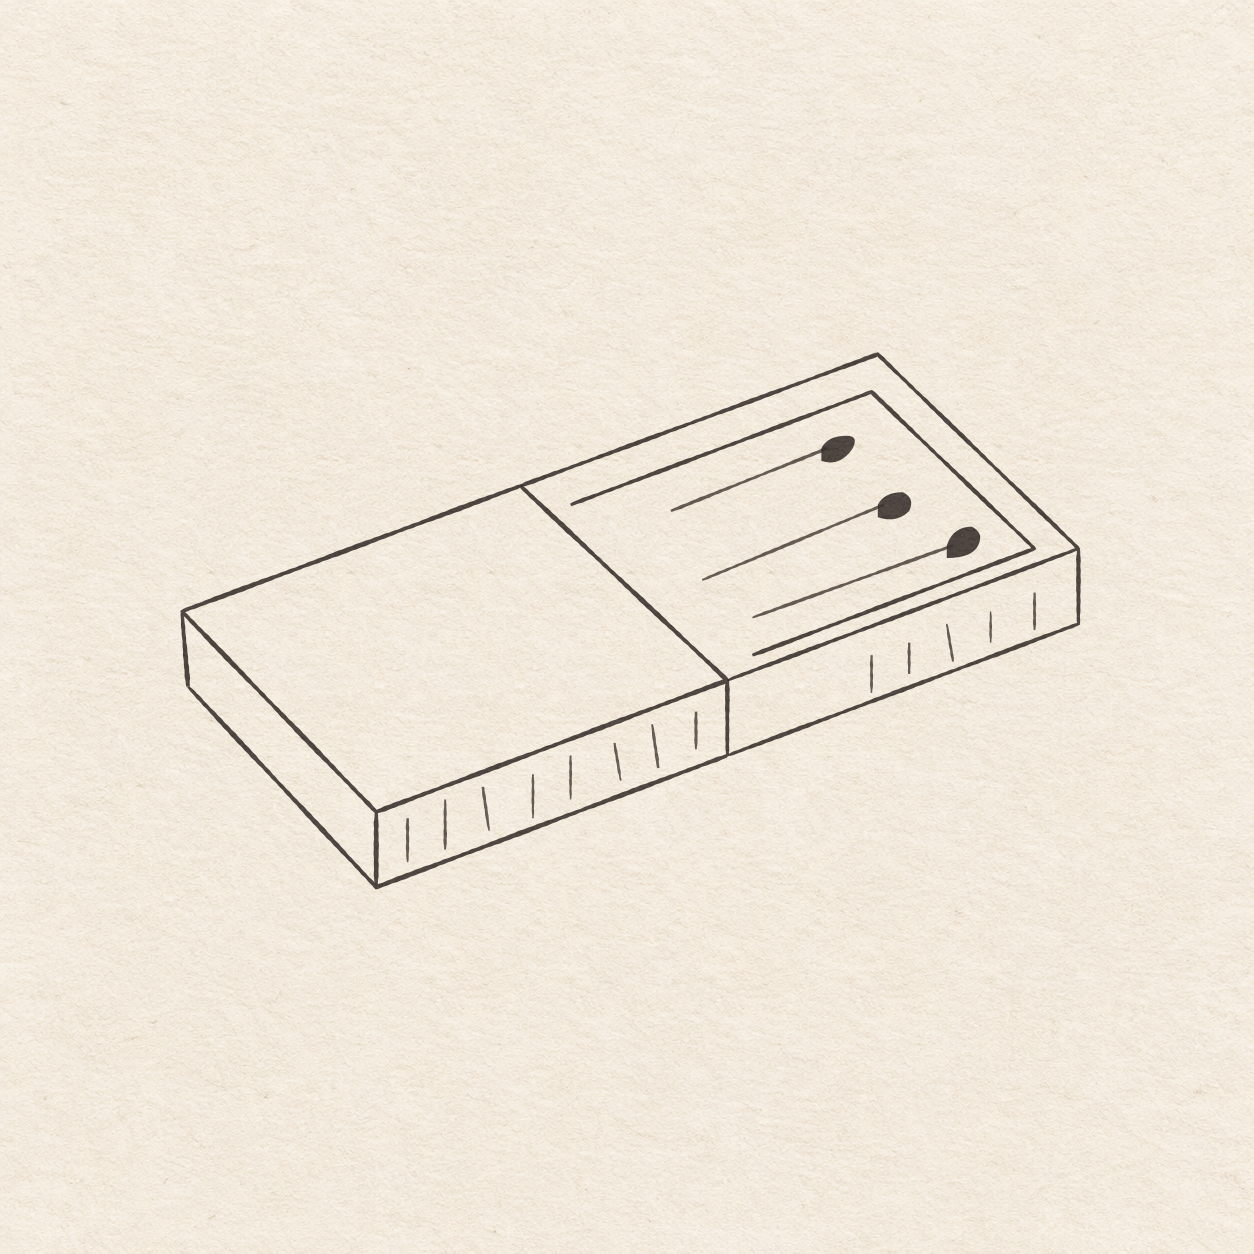
An open matchbox with three matches in its sliding tray. Practice slanted edges, shallow walls and light fineliner hatching.
Follow the drawing tutorial
Plot the corners in light pencil, draw the sliding tray and ink the finished matchbox.
Start the 12-step tutorialA small thing to tryCheck the tray against the long box edges while both are still in pencil.
Draw it, one step at a time
Draw an open matchbox
Plot the corners in light pencil, draw the sliding tray and ink the finished matchbox.
What you’ll need
- HB pencil
- Eraser
- Fine black pen
- Ruler
- Spare sheet with a square corner
- Drawing paper
Before you start
The finished drawing is about 12 cm across and 7 cm tall. Choose a spot on your paper with room for the tray to extend to the right. Keep all the setup marks light enough to erase.
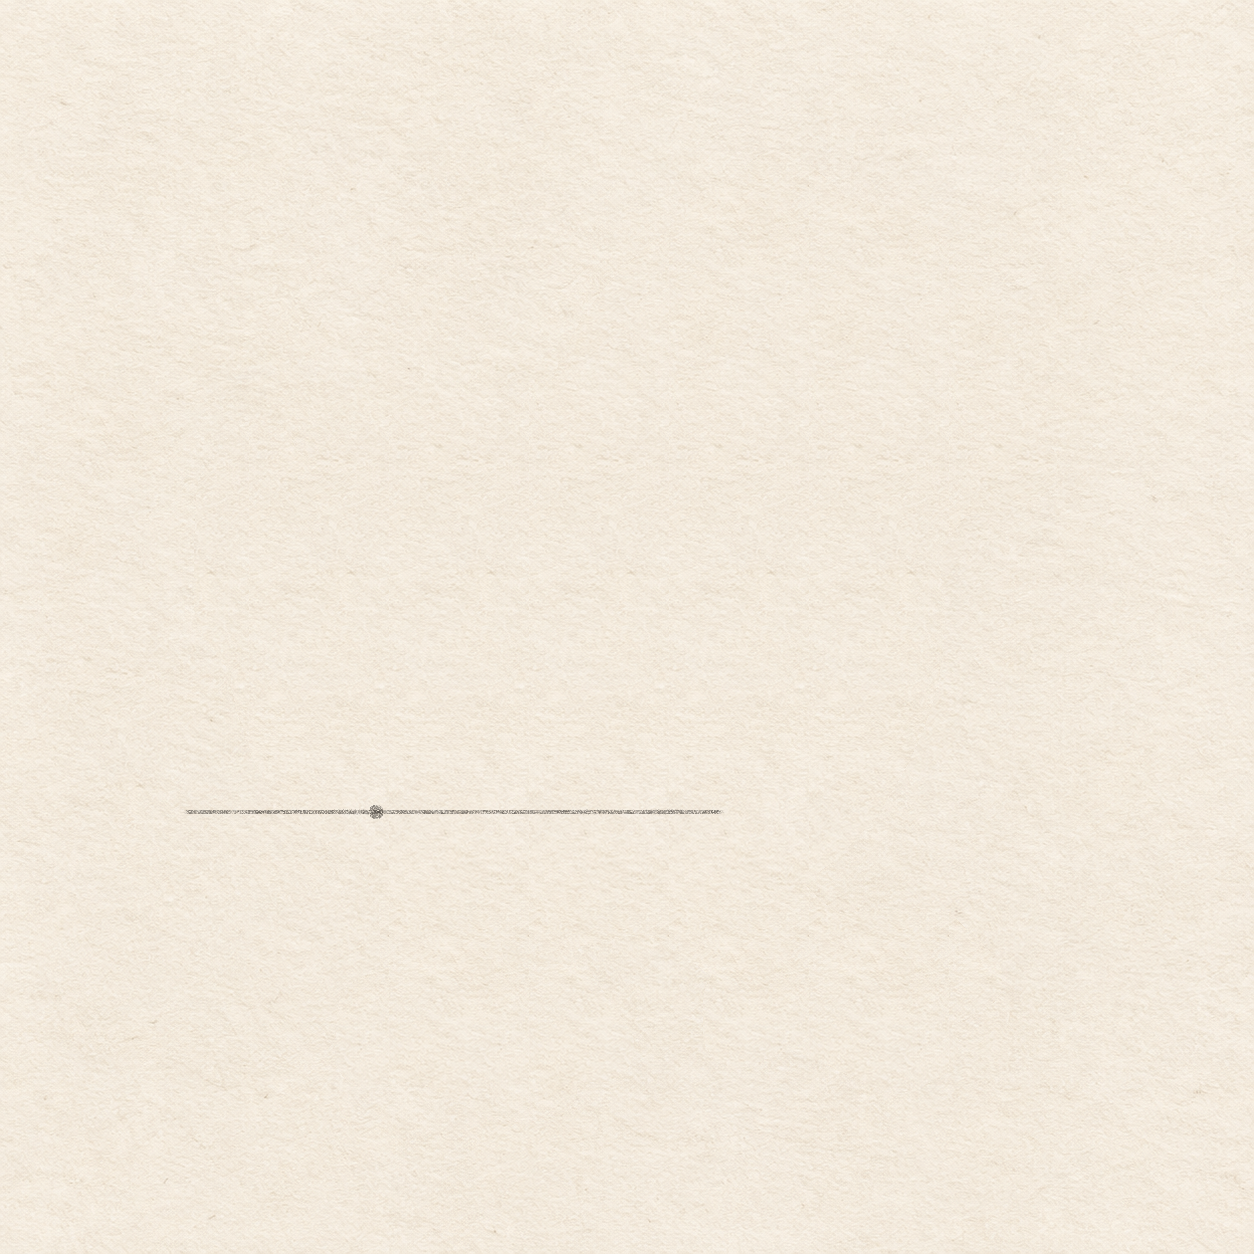
Drawing 1 — Set the starting point and baselineView larger PencilSet the starting point and baseline
Instructions for Drawing 1 — Set the starting point and baseline
- Put a small pencil dot where the lower-left corner of the box top will sit. Leave at least 3 cm to its left, 10 cm to its right, 7 cm above it and 2 cm below it. Before drawing the line, move your dot if there is too little room for the tray on the right.
- Set your ruler through the dot, parallel to the bottom edge of your paper. Draw a light line 2.5 cm to the left of the dot and 4.5 cm to its right. Check both lengths from the dot and adjust the ends while the line is light.

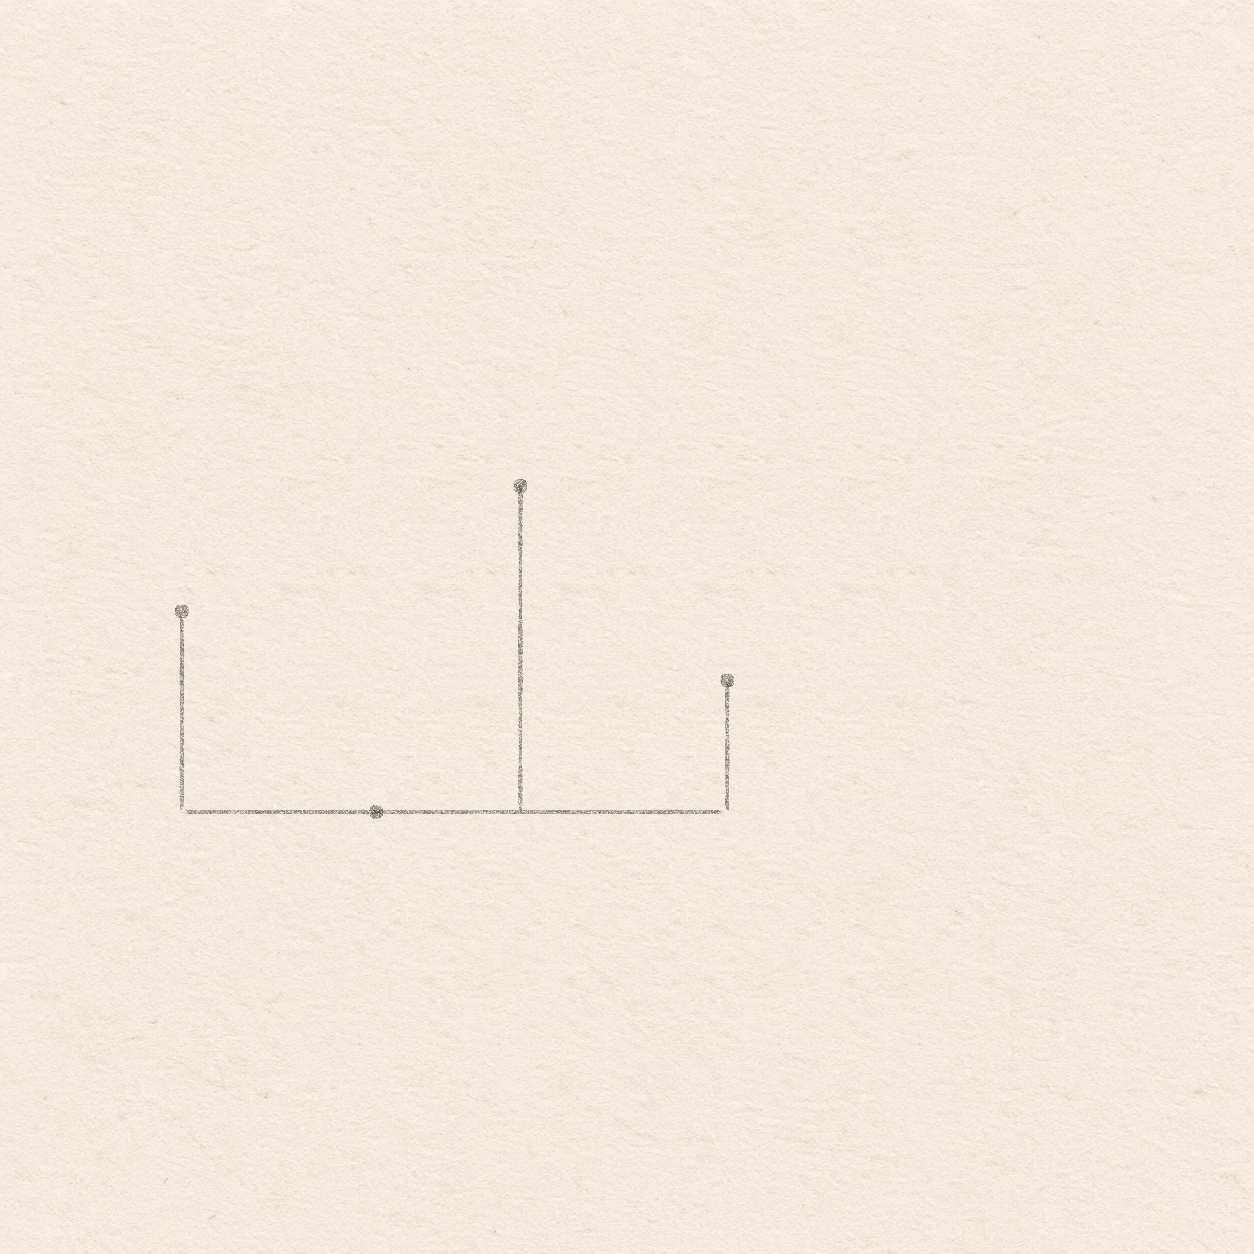
Drawing 2 — Mark the other three cornersView larger PencilMark the other three corners
Instructions for Drawing 2 — Mark the other three corners
- Use the square corner of a spare sheet. Align one edge with the baseline and draw up along the adjacent edge. At the left end of the baseline, draw up 2.6 cm. At 1.8 cm right of the starting dot, draw up 4.2 cm. At the right end of the baseline, draw up 1.7 cm. Keep all three lines upright. Recheck their heights from the baseline.
- Put a pencil dot at the top of each upright. Keep the starting dot at the baseline. The middle upright has the highest dot. Move any misplaced dot before joining them.

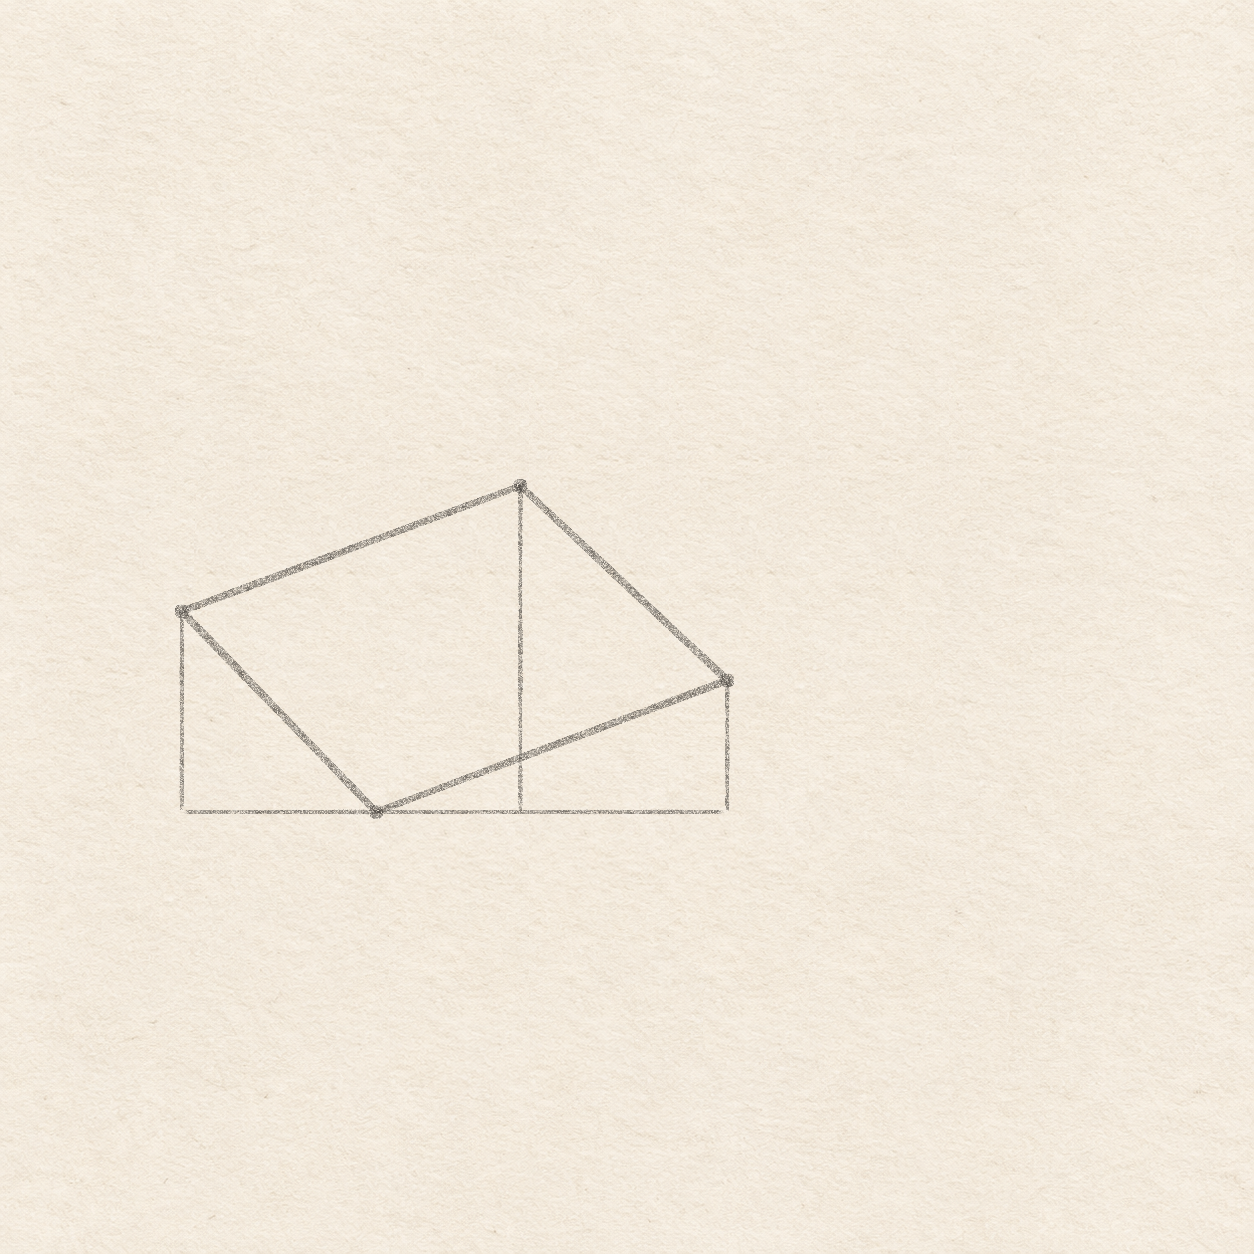
Drawing 3 — Join the dots for the box topView larger PencilJoin the dots for the box top
Instructions for Drawing 3 — Join the dots for the box top
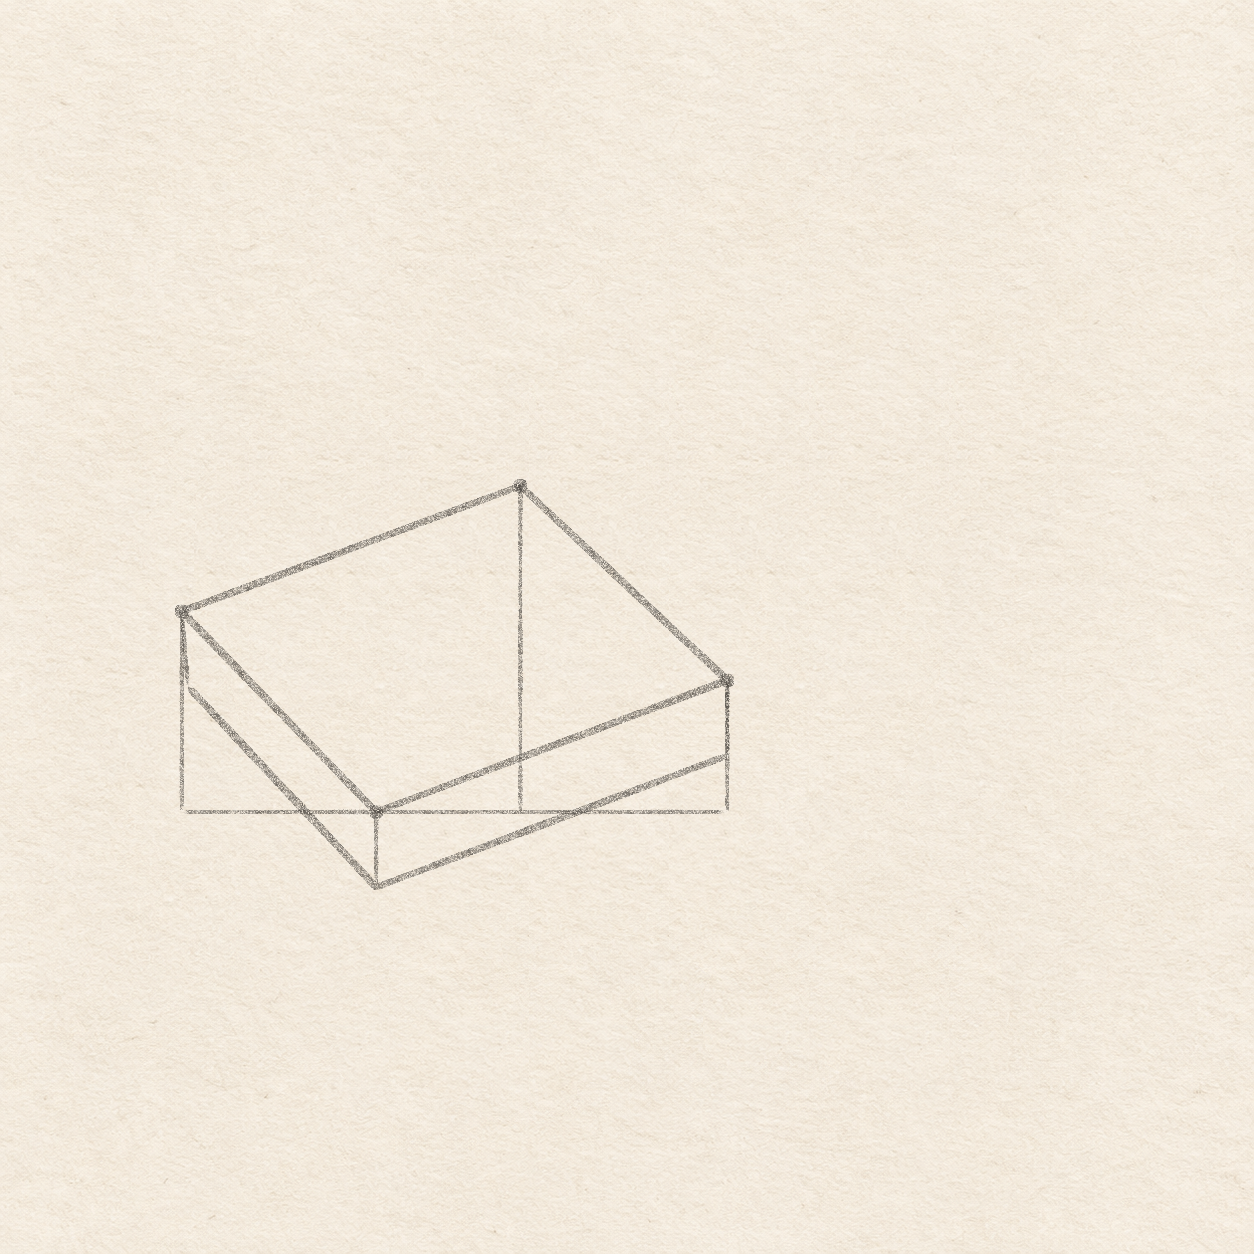
- Use a ruler to join the starting dot to the right dot, then the highest dot, then the left dot, then back to the start. The two long edges should rise to the right at almost the same angle. If they differ noticeably, check the upright heights before going on.

Drawing 4 — Give the box its thicknessView larger PencilGive the box its thickness
Instructions for Drawing 4 — Give the box its thickness
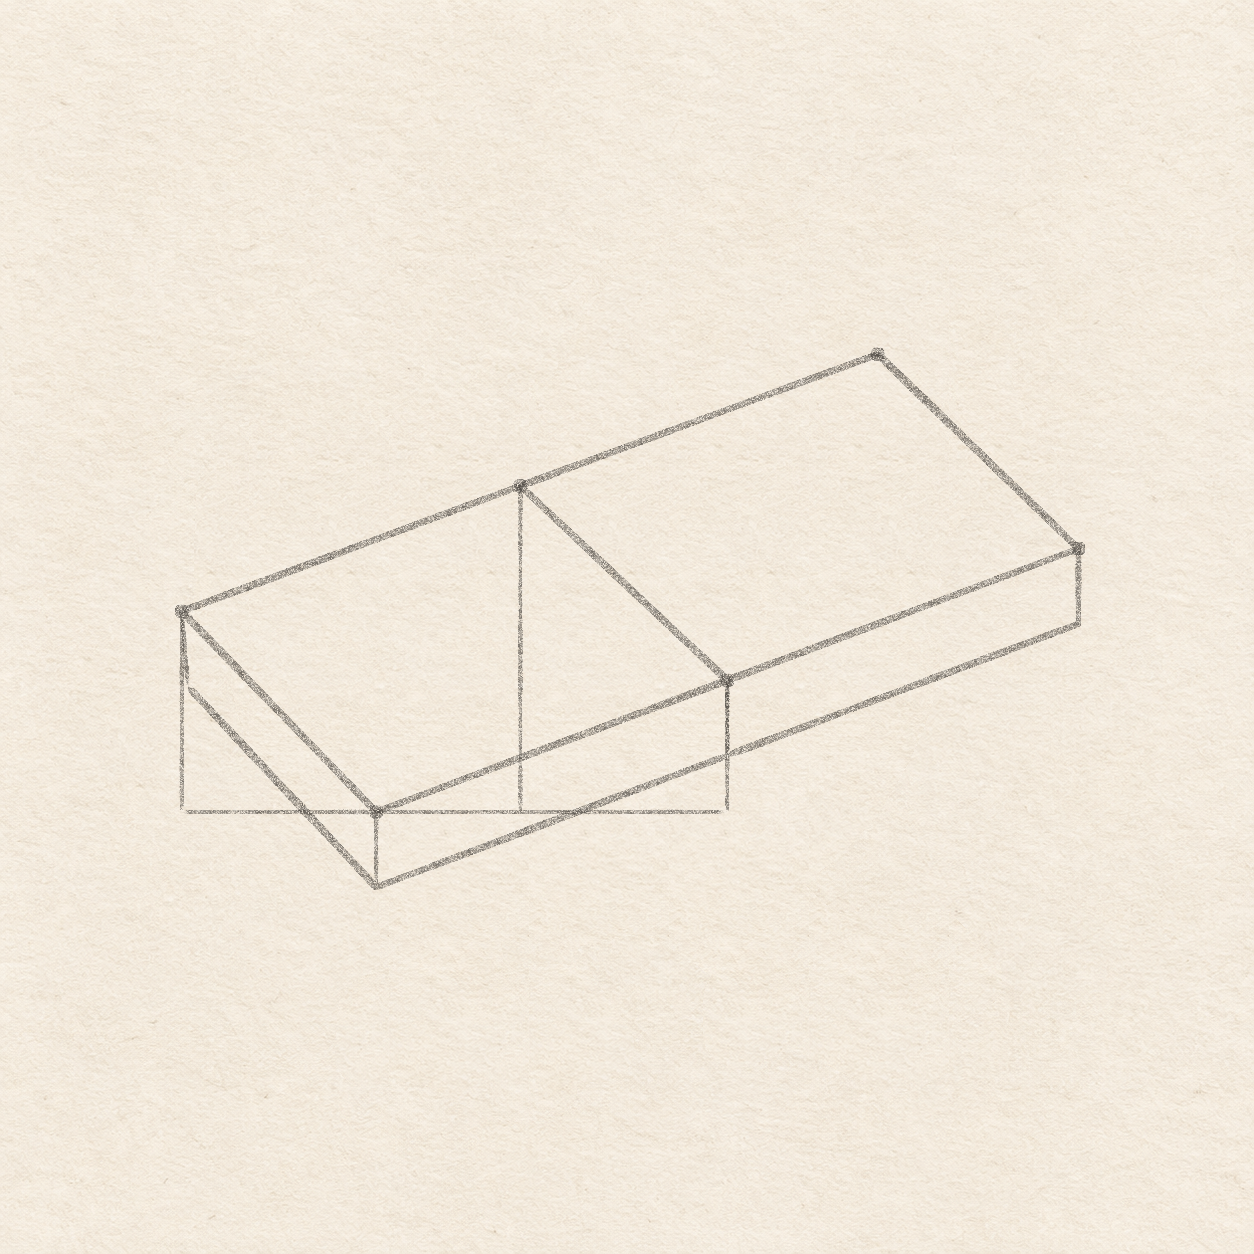
- Draw 1 cm straight down from the starting corner and from the right corner. From the left corner, draw 1 cm down with the bottom end about 1 mm to the right. Check that the three drops are about the same height. Leave the highest corner alone.
- Join the bottom of the left drop to the bottom of the starting drop. Then join the bottom of the starting drop to the bottom of the right drop. Compare the two lower edges with their top edges. Adjust them in pencil if either one changes slope noticeably.

Drawing 5 — Extend the tray out to the rightView larger PencilExtend the tray out to the right
Instructions for Drawing 5 — Extend the tray out to the right
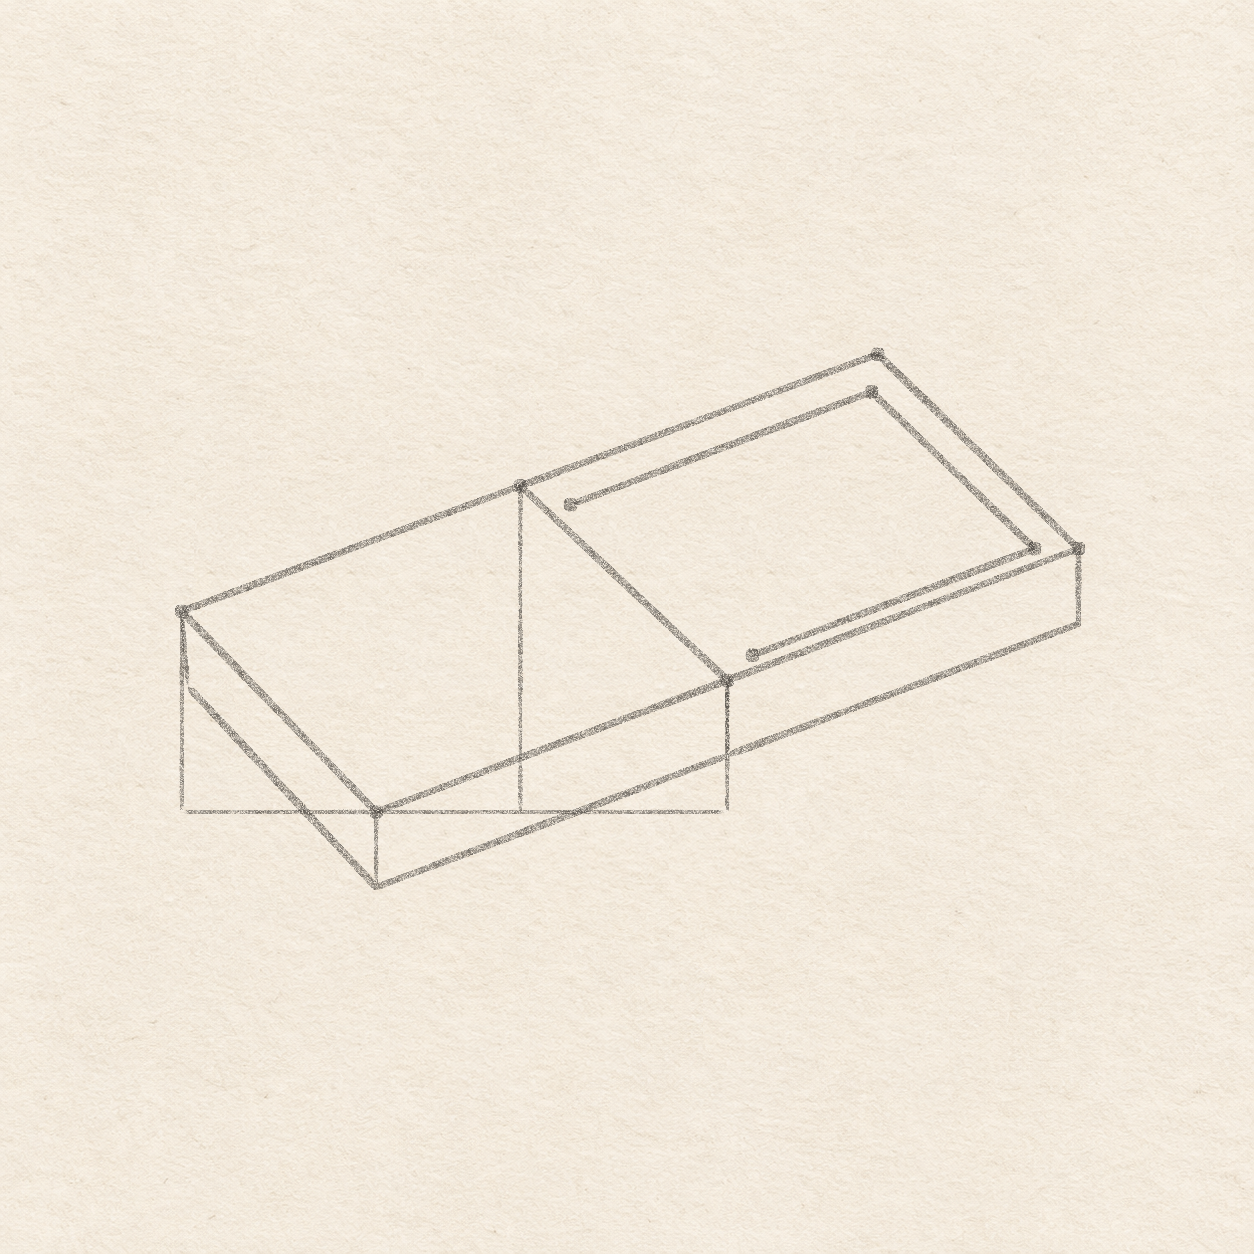
- From the right corner of the box top, plot a dot 4.5 cm right and 1.7 cm up. Repeat from the highest corner, using the ruler and square to measure the same offsets. Check both offsets before joining the dots. The dot from the highest corner should still be higher.
- Use a ruler to extend each long box edge to its own dot, then join the two new dots. The new end edge should lean the same way as the short edge between the right and highest corners of the box top. Move a tip if the slopes differ.
- From the lower tray tip, draw 1 cm straight down. Join the bottom of that drop to the lower-right corner of the box wall. The long bottom edge of the tray should follow the slope of the tray edge above it. Adjust its drop before adding the rim.

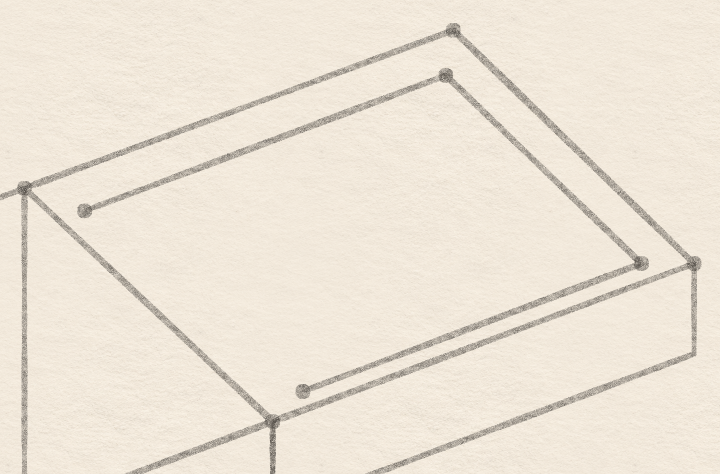
Drawing 6 — Place and join the inner rimView larger 
Detail 6.1 — The open inner rimThe inner rim follows three edges of the tray and stops on both sides near the box. PencilPlace and join the inner rim
Instructions for Drawing 6 — Place and join the inner rim
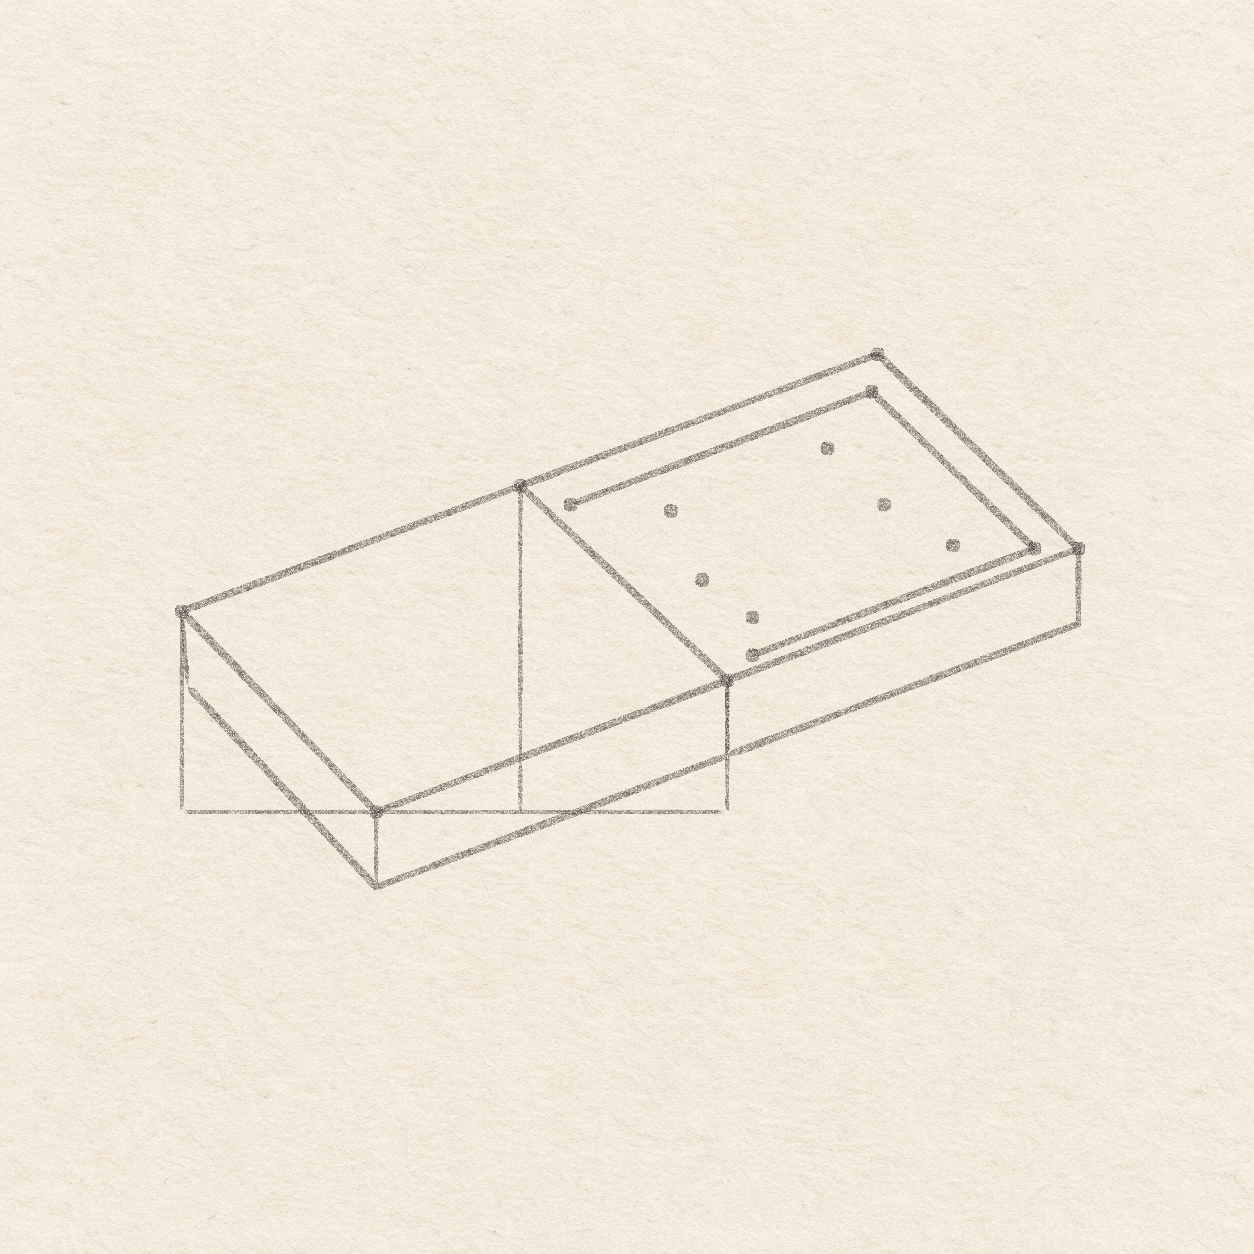
- Starting at the lower join where the tray leaves the box top, mark 3 mm right and 3 mm up. From the lower tray tip, mark 6 mm left at the same height. From the upper tray tip, mark 1 mm left and 5 mm down. From the upper join where the tray leaves the box top, mark 6 mm right and 2.5 mm down. All four dots should sit inside the tray opening. Move a dot if it touches the outer edge.
- With a ruler, join the four rim dots in the order you marked them. These three inside edges make the inner rim. Leave the end next to the box open. Check the gap along each rail before moving on. The lower gap should be narrower than the upper gap.

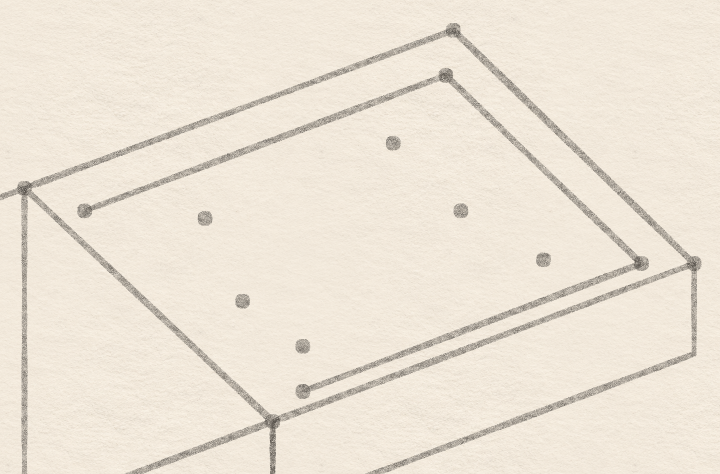
Drawing 7 — Mark the ends of the matchesView larger 
Detail 7.1 — Three pairs of match dotsThe three pairs sit along the tray. Each right dot has room for a head. PencilMark the ends of the matches
Instructions for Drawing 7 — Mark the ends of the matches
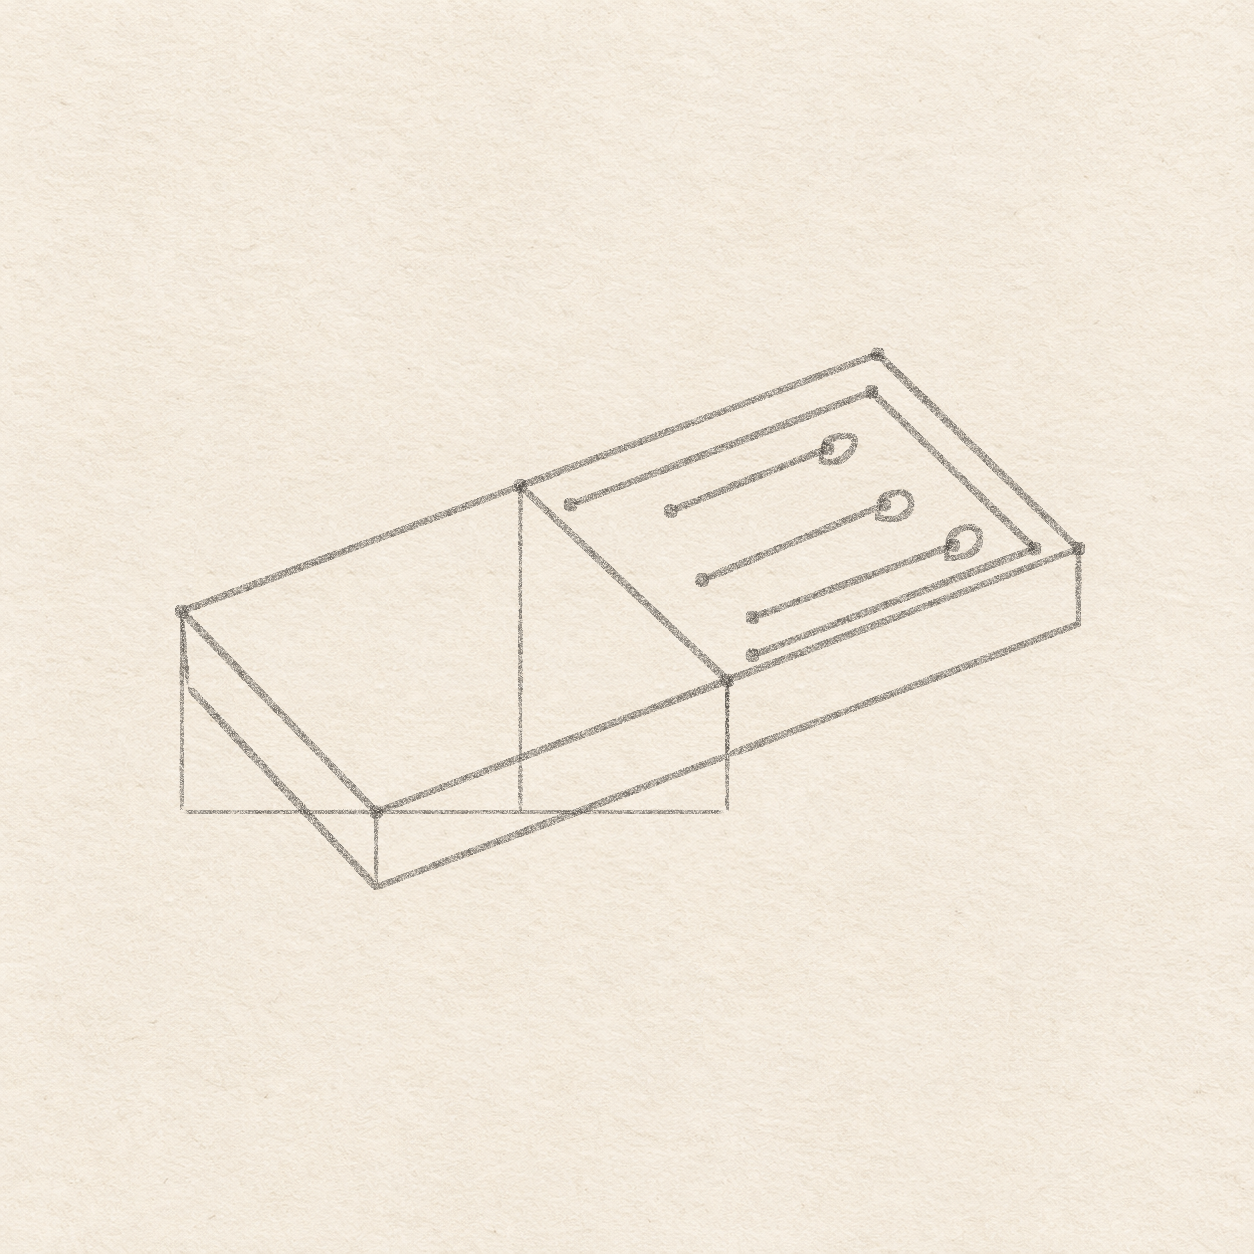
- From the upper rim stop next to the box, mark 1.3 cm right and 1 mm down for the first shaft start. From that dot, mark 4 mm right and 9 mm down for the second. From the second, mark 6.5 mm right and 5 mm down for the third. Check that the three dots step down and right inside the rim. Move any dot that touches it.
- From the first start dot, mark its right end 2 cm right and 8 mm up. From the second start dot, go 2.3 cm right and 1 cm up. From the third start dot, go 2.6 cm right and 9 mm up. Leave about 4 mm to the right of each end dot for a head. Adjust a dot if a head would touch the rim or the next match.

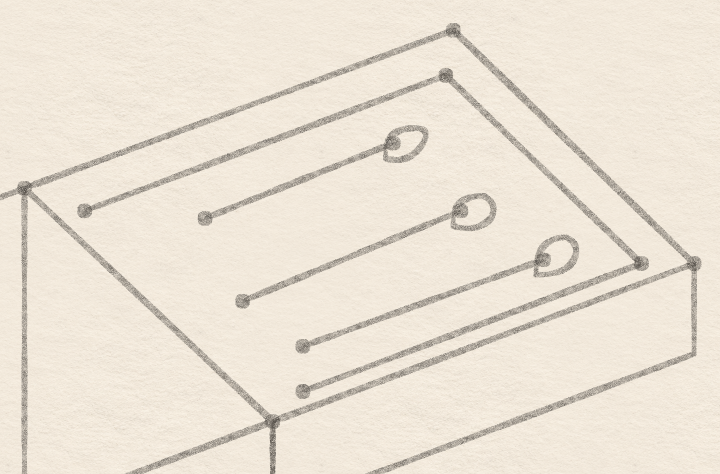
Drawing 8 — Join the shafts and round the headsView larger 
Detail 8.1 — Room around the match headsThe rounded heads meet their own shafts and leave a little bare paper at the inner rim. PencilJoin the shafts and round the heads
Instructions for Drawing 8 — Join the shafts and round the heads
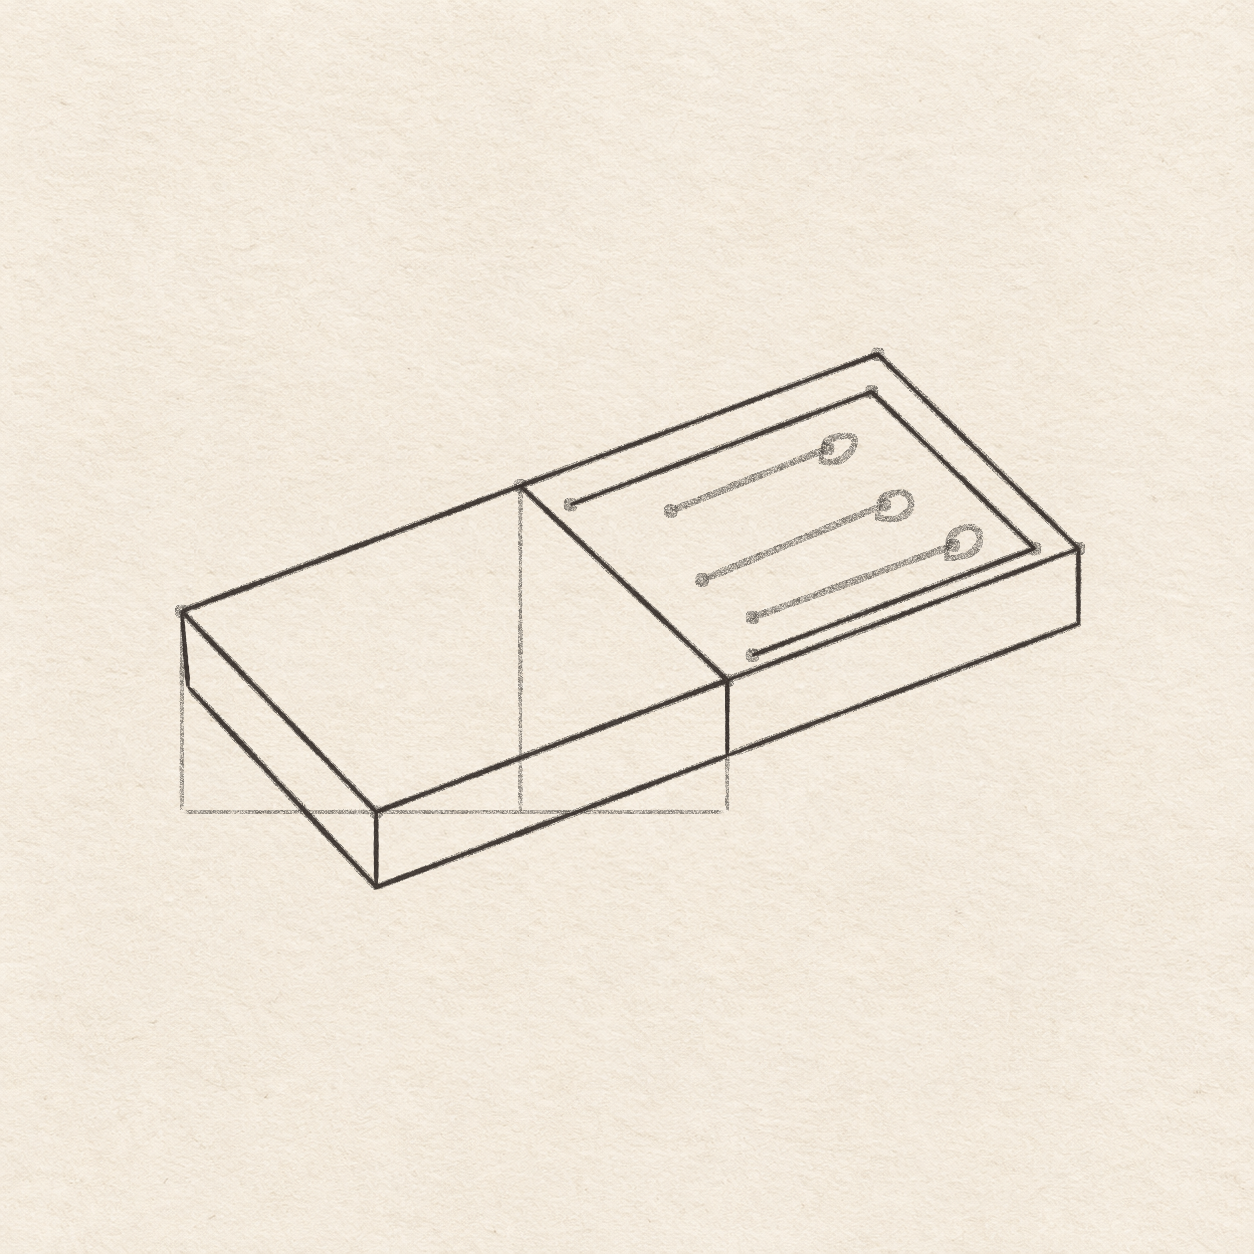
- Join each start dot to its own end dot with a thin pencil line. Work from the farthest shaft to the nearest. The shafts should follow the slant of the long tray rails and leave a little paper between them.
- Draw a small rounded head freehand around each right-hand dot. Let it follow the shaft’s slant and end about 4 mm to the right of the dot. Keep its outline light and leave paper between it and the rim. Check that each head meets its own shaft and has space around it before using the pen.

Drawing 9 — Ink the box and trayView larger FinelinerInk the box and tray
Instructions for Drawing 9 — Ink the box and tray
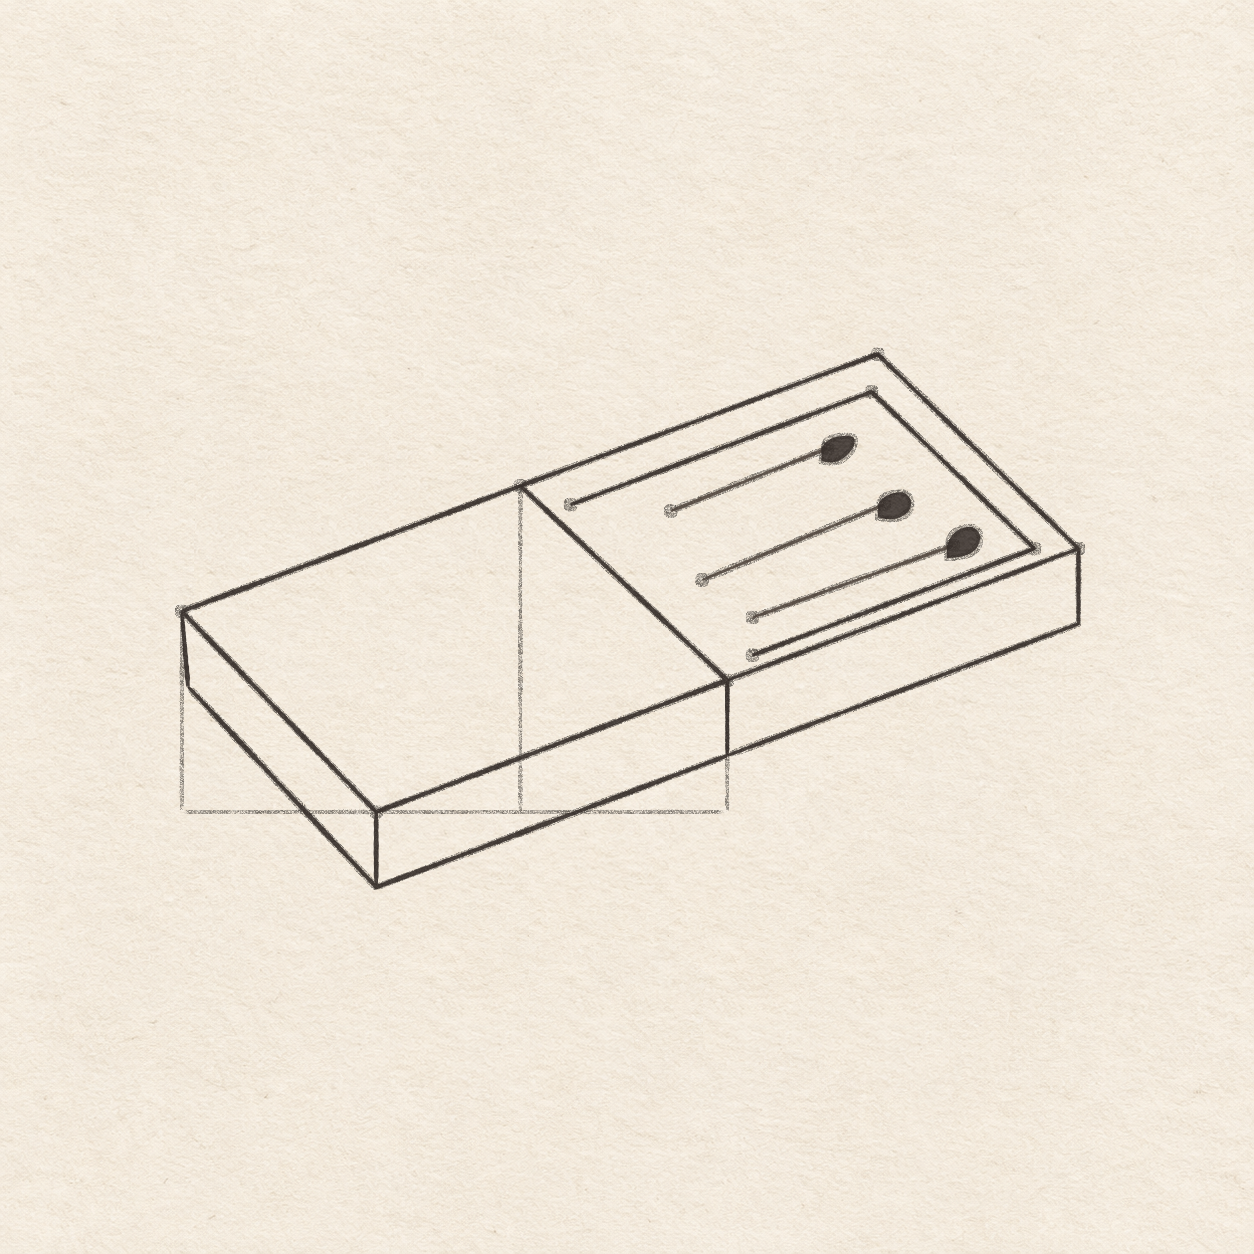
- Follow the four pencil top edges with the fineliner, one steady line at a time. Then trace the three short drops and the two lower wall edges. Leave the light measuring lines and dots in pencil. Check that every wall edge meets its drop and that the top stays clear.
- Trace the outer tray and its front wall in pen. Then trace the three inner rim edges, keeping their two stops open by the box. Leave the pale gaps between the inner and outer edges visible. Keep the matches in pencil for now.

Drawing 10 — Ink the shafts and headsView larger FinelinerInk the shafts and heads
Instructions for Drawing 10 — Ink the shafts and heads
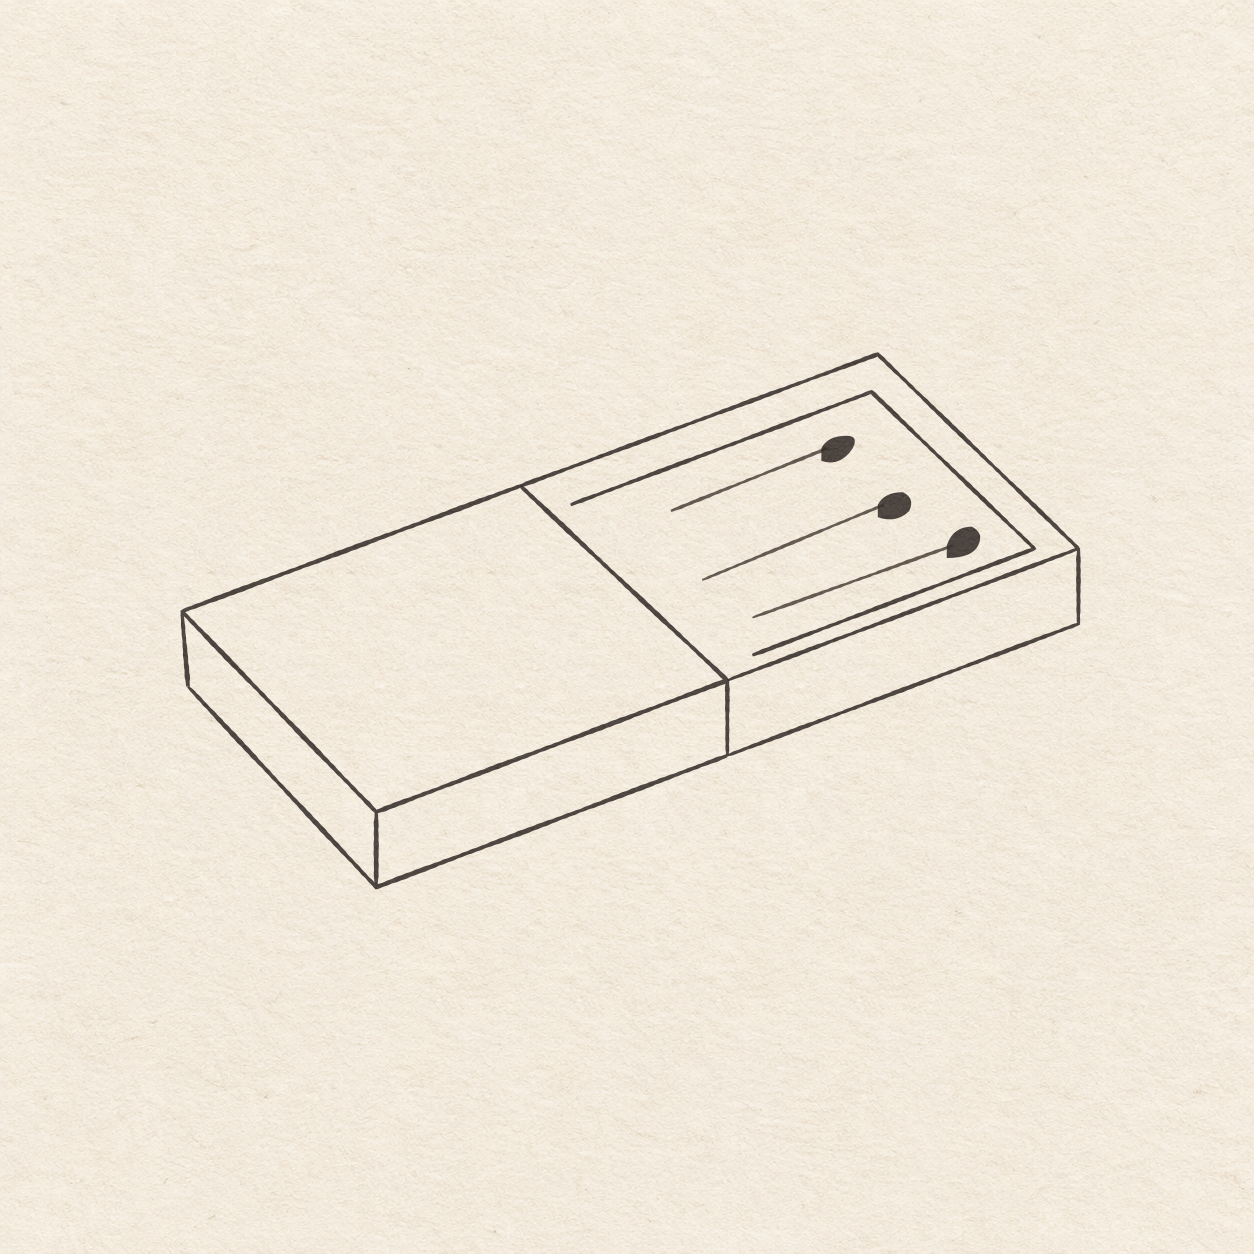
- Follow each shaft’s pencil line with one light pen stroke. Stop at the pencil head. Keep the shafts separate and leave the rim clear.
- Trace each small pencil head, then fill its center with the same fineliner. Keep the fill inside its outline and joined to its shaft. Check that each dark head is surrounded by clear paper on the tray side. Let the ink dry before erasing.

Drawing 11 — Erase the pencil after the ink driesView larger CleanupErase the pencil after the ink dries
Instructions for Drawing 11 — Erase the pencil after the ink dries
- On a scrap of the same paper, fill a small patch with the same pen. Rub the patch gently with your eraser. If it smears, wait and test again. When it stops smearing, erase the baseline, measuring lines, dots and any pencil beside the ink. Keep every ink line and filled head.

Drawing 12 — Finish with light hatchingView larger FinelinerFinish with light hatching
Instructions for Drawing 12 — Finish with light hatching
- Draw a loose row of short upright hatches freehand inside the box’s long front wall. Keep a sliver of paper above and below each mark, and keep the top of the box clear. If a hatch would meet an outline, end it a little early.
- Add a few shorter hatches freehand inside the tray’s front wall near the outer tip. Leave a pale strip along the top edge and a space before the box. Stop while both walls still have clear paper between the hatches.
If something looks off
If the tray looks twisted
Compare both long tray edges with the long edges of the box top. Move a tray tip in pencil if its edge tilts at a noticeably different angle.