FinelinerEasy

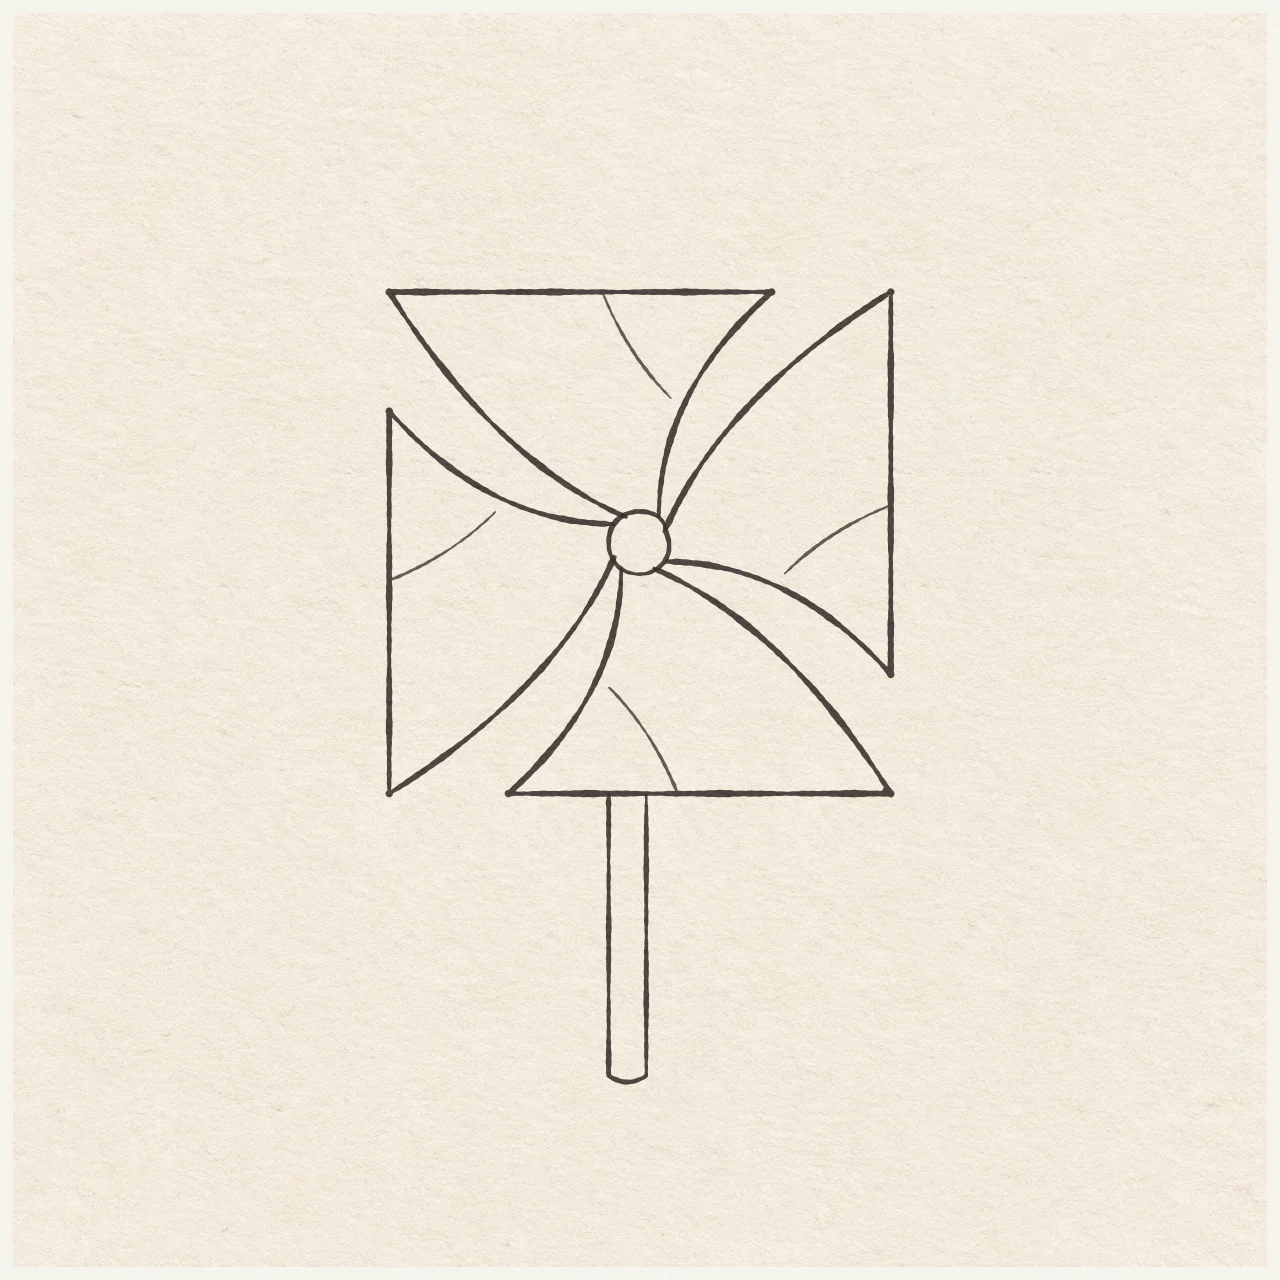
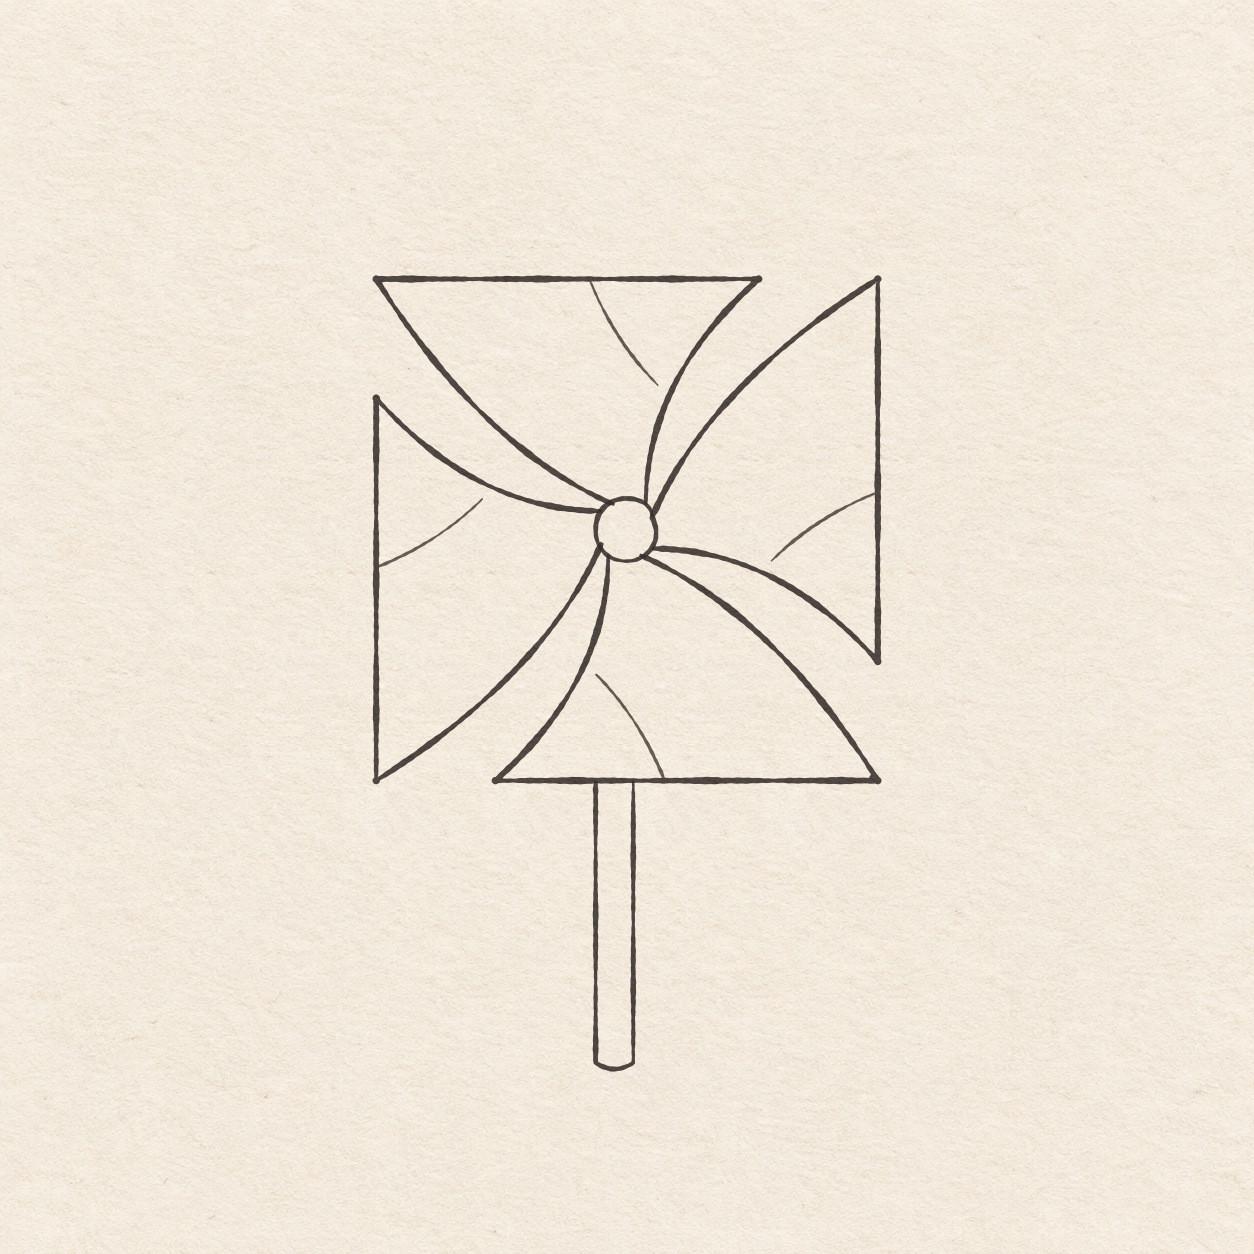
Paper pinwheel
Place four folded paper blades around a small fastener and curve them so they turn in the same direction.
Follow the drawing tutorial
Place four folded paper blades around a small fastener and curve them so they turn in the same direction.
Start the 8-step tutorialA small thing to tryIn pencil, check that the top blade goes right, the right blade goes down, the bottom blade goes left and the left blade goes up. Fix its straight outer edge first, then reconnect its curves to the fastener.
Draw it, one step at a time
Draw a paper pinwheel
Place four folded paper blades around a small fastener and curve them so they turn in the same direction.
What you’ll need
- HB pencil
- Eraser
- Ruler
- Scrap of paper with a square corner
- Fine black pen
- Drawing paper
Before you start
This example is about 8 cm wide and 12.5 cm tall. Choose where the hub will sit on your page and leave a margin around the entire wheel and handle.
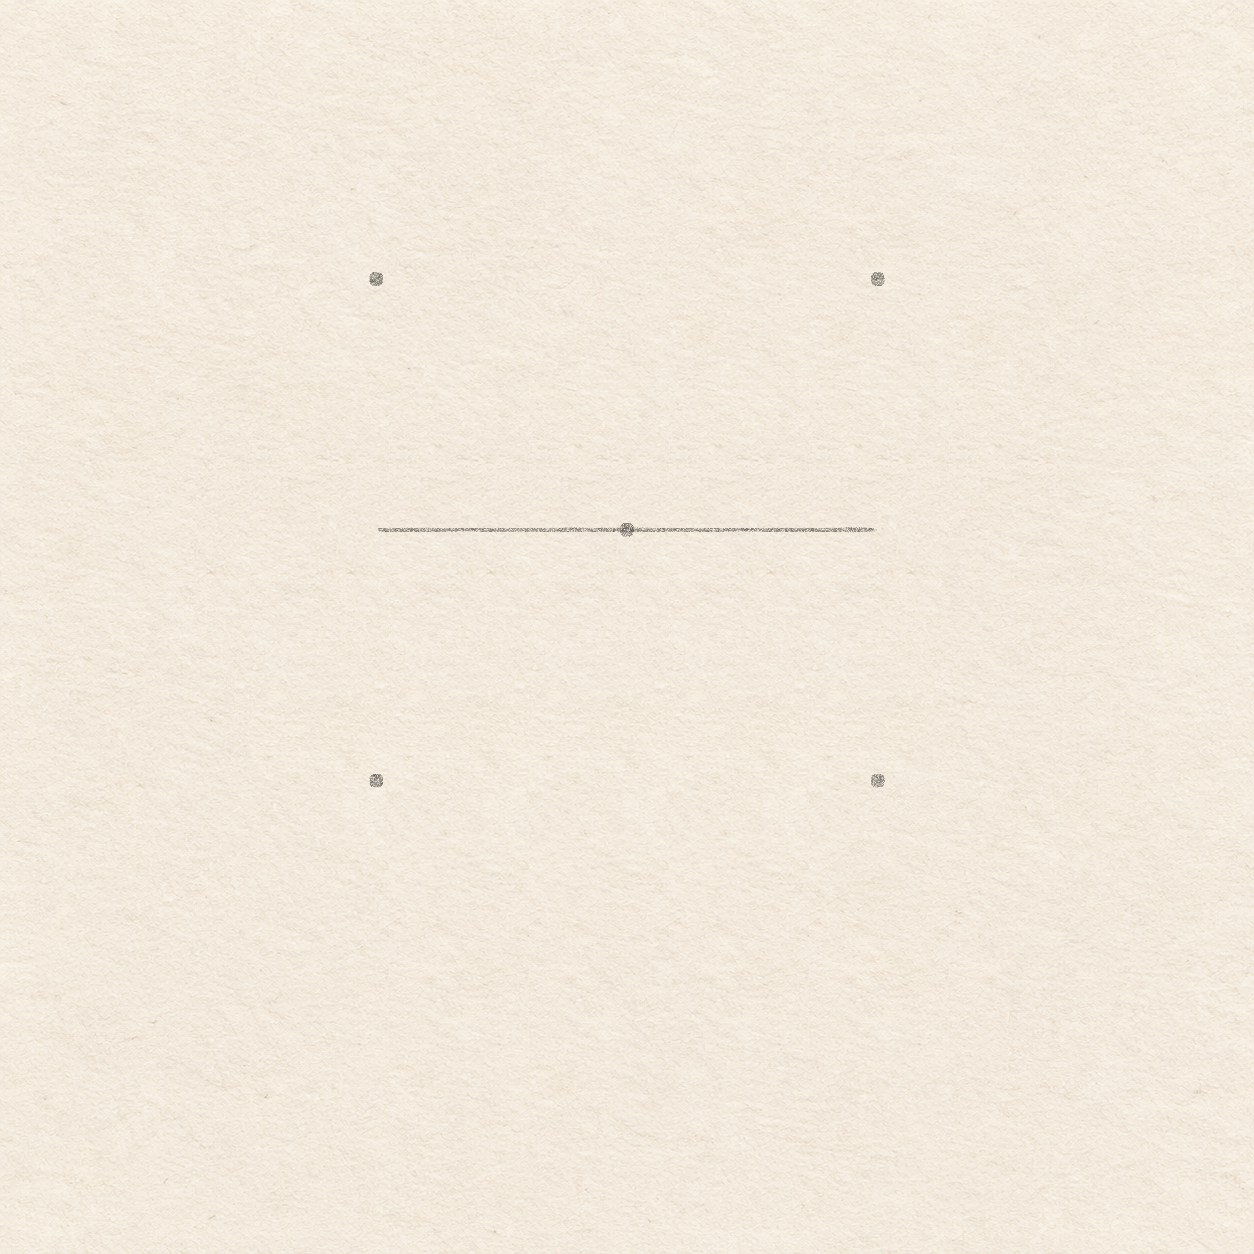
Drawing 1 — Place the center and the square cornersView larger PencilPlace the center and the square corners
Instructions for Drawing 1 — Place the center and the square corners
- Choose a place for the center and make a light dot. Leave about 4.2 cm or more above and to each side of it, and at least 9 cm below, plus a paper margin. Move the center dot if you need more room below it for the stick.
- Rule a faint level line through that dot, extending 4 cm each way. Use the two ends for the corner measurements. Keep both halves of the line faint enough to erase later.
- Hold a square corner of scrap paper against the light line. From each end of the line, use the square to put a dot 4 cm up and another 4 cm down. Check that the four dots make an 8 cm square around the center.

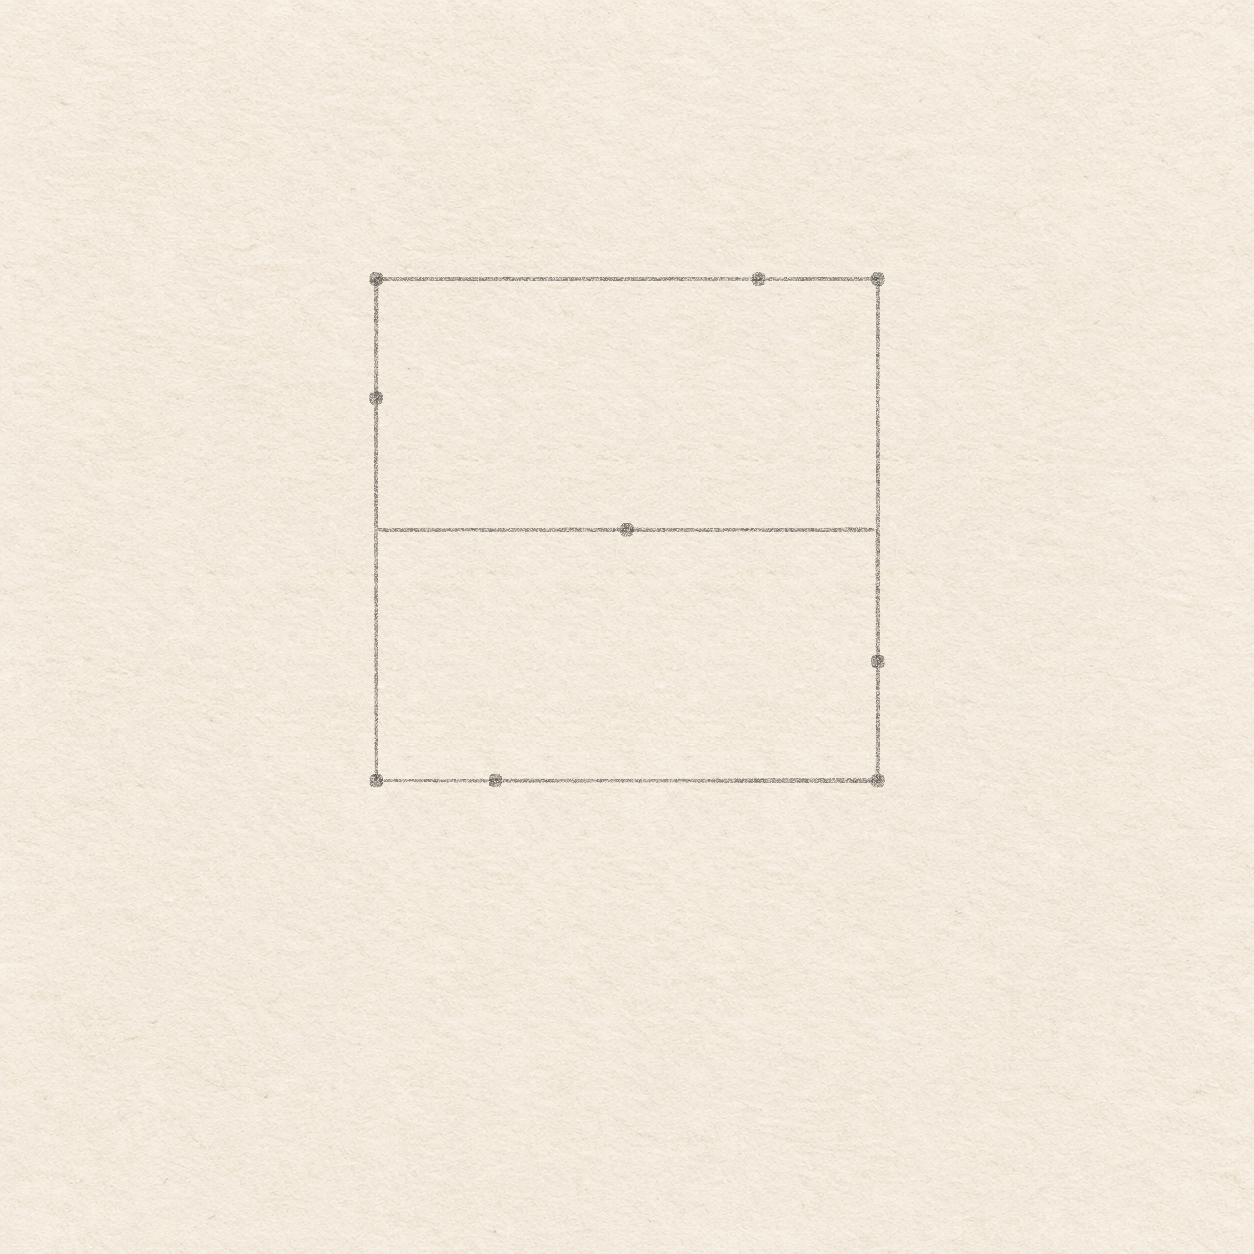
Drawing 2 — Rule the square and place blade stopsView larger PencilRule the square and place blade stops
Instructions for Drawing 2 — Rule the square and place blade stops
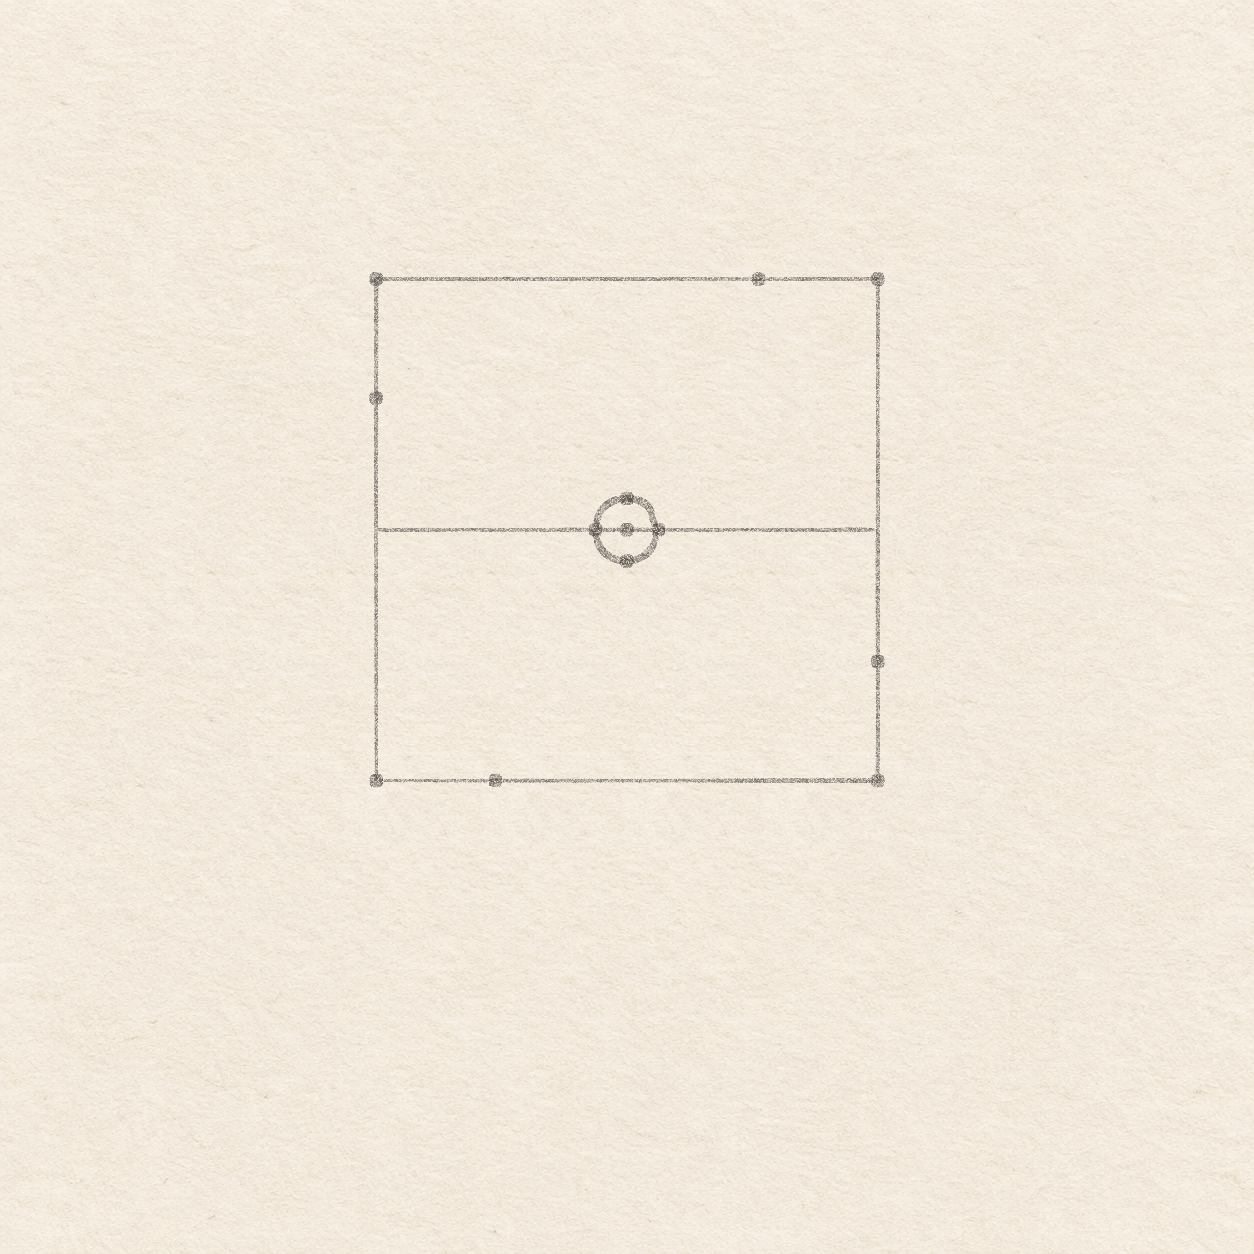
- Rule around the four dots to make a faint square. This sets the outside edges of the blades. Erase the square later, after the pen dries.
- Mark a stop on each side about 2 cm short of the next corner. On the top edge, put it left of the top-right corner. On the right edge, put it above the bottom-right corner. On the bottom edge, put it right of the bottom-left corner. On the left edge, put it below the top-left corner. Leave a short space of about 2 cm between every stop and the next corner.

Drawing 3 — Draw the small fastenerView larger PencilDraw the small fastener
Instructions for Drawing 3 — Draw the small fastener
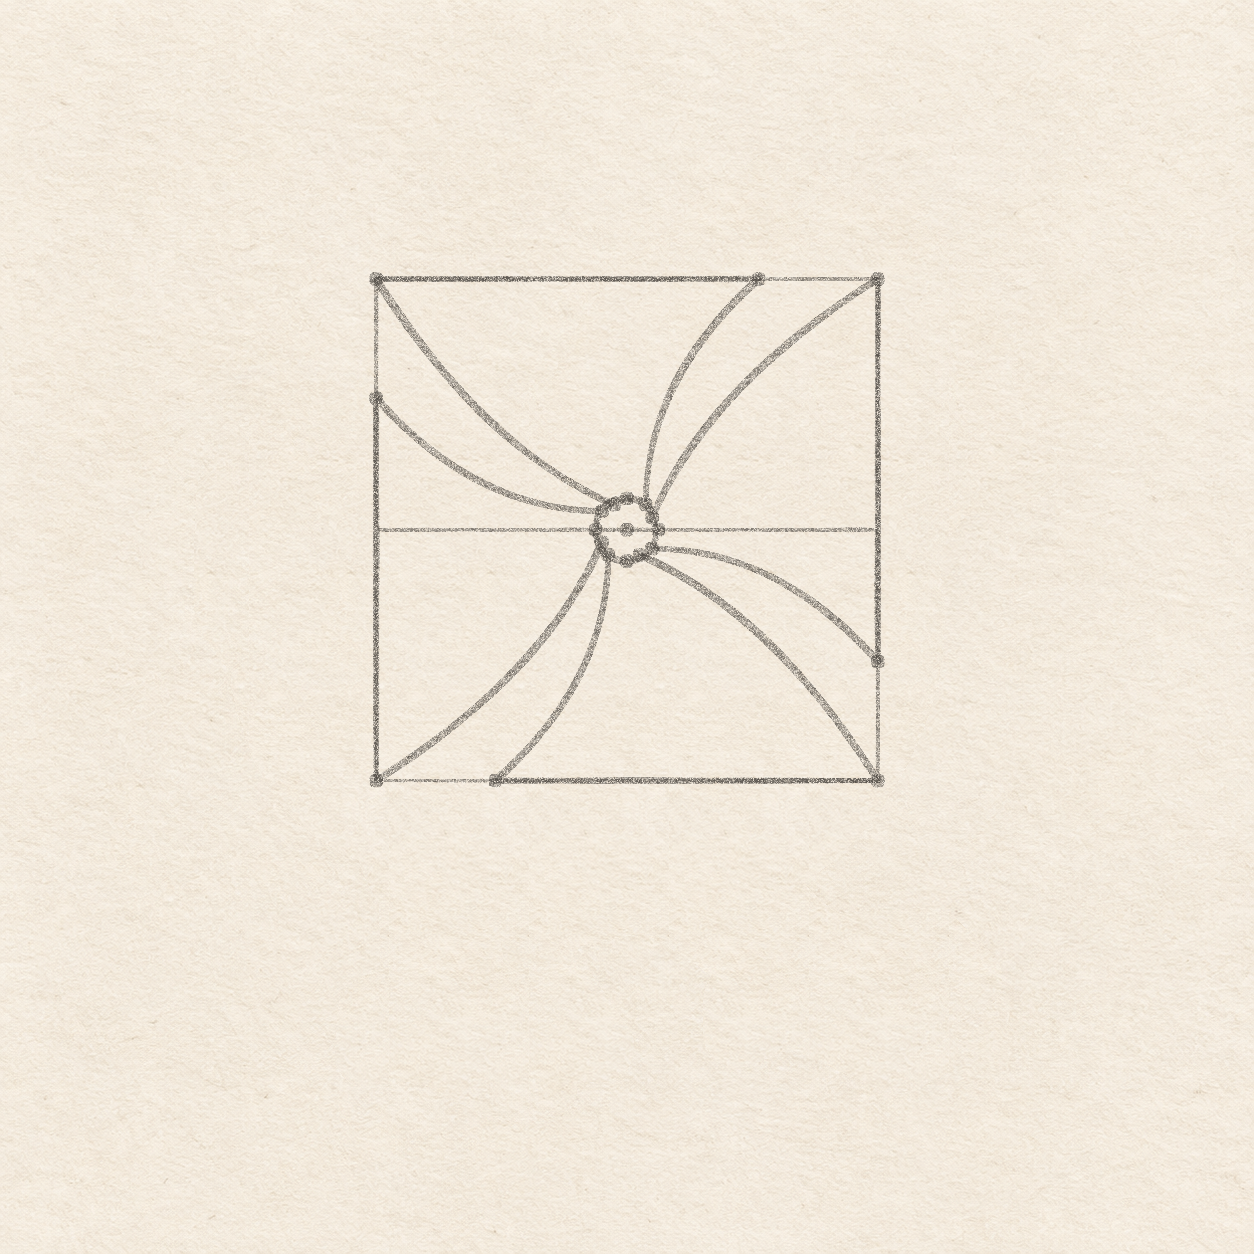
- Put faint dots 5 mm left and right of the center along the faint line. Put two more dots 5 mm above and below the center. The four dots locate the edge of the fastener.
- Start at the left dot and curve through the top, right and bottom dots freehand. Bring the curve back to the left dot. Close the circle and keep it about 1 cm across.

Drawing 4 — Curve the four paper bladesView larger 
Detail 4.1 — Two curved edges from each blade meet the hubEach blade has its own pair of rim contacts. Stop both pencil curves on the rim to keep the middle of the fastener clear. PencilCurve the four paper blades
Instructions for Drawing 4 — Curve the four paper blades
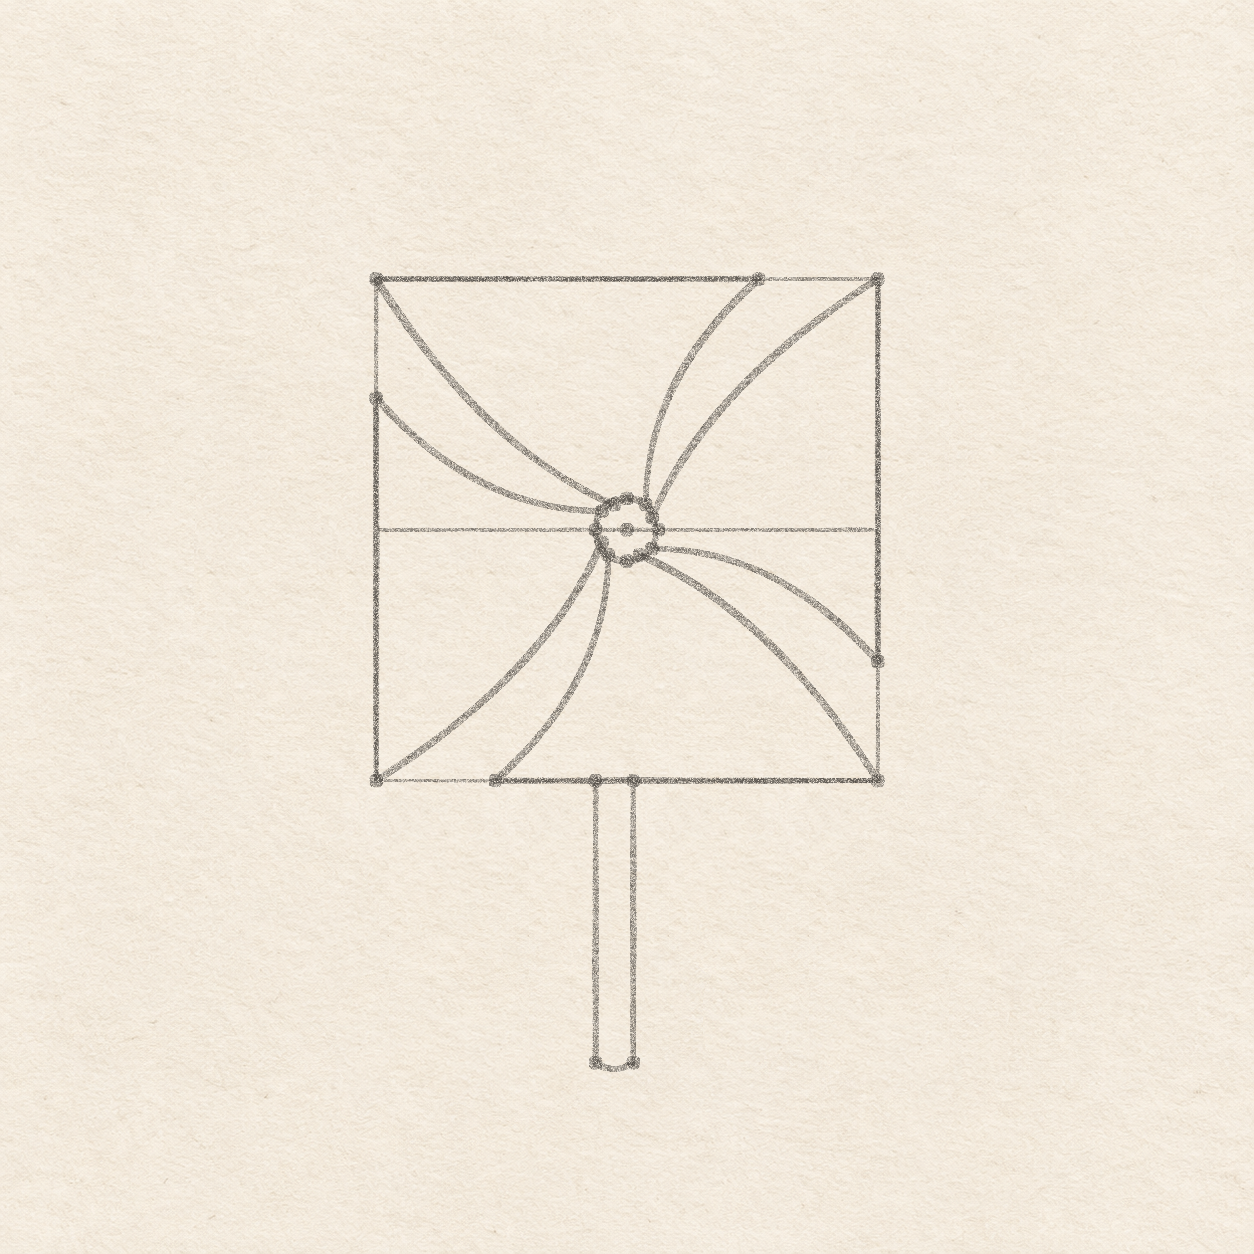
- Put eight very light dots on the circle. Put two near the top, one just left and one just right of the highest point. Put two near the right edge, one just above and one just below its widest point. Do the same on the bottom and the left. Each dot sits about 2 to 3 mm along the rim from its nearest extreme. Leave an open gap between each pair and the next pair around the circle.
- Rule right from the top-left corner to the stop on the top edge. Sweep a curve from the corner to the left dot of the fastener’s top pair. Make a tighter curve from the stop to the right dot. Lift at both dots so the center of the fastener stays clear.
- Rule down from the top-right corner to the stop on the right edge. Sweep a curve from the corner to the upper dot of the fastener’s right pair. Make a tighter curve from the stop to the lower dot. Keep both curves on the right and stop at the fastener rim.
- Rule left from the bottom-right corner to the stop on the bottom edge. Sweep a curve from the corner to the right dot of the fastener’s bottom pair. Make a tighter curve from the stop to the left dot. Keep both curves below the fastener and leave its middle clear.
- Rule up from the bottom-left corner to the stop on the left edge. Sweep a curve from the corner to the lower dot of the fastener’s left pair. Make a tighter curve from the stop to the upper dot. Keep both curves on the left and lift when you reach the rim.

Drawing 5 — Draw the handle below the wheelView larger PencilDraw the handle below the wheel
Instructions for Drawing 5 — Draw the handle below the wheel
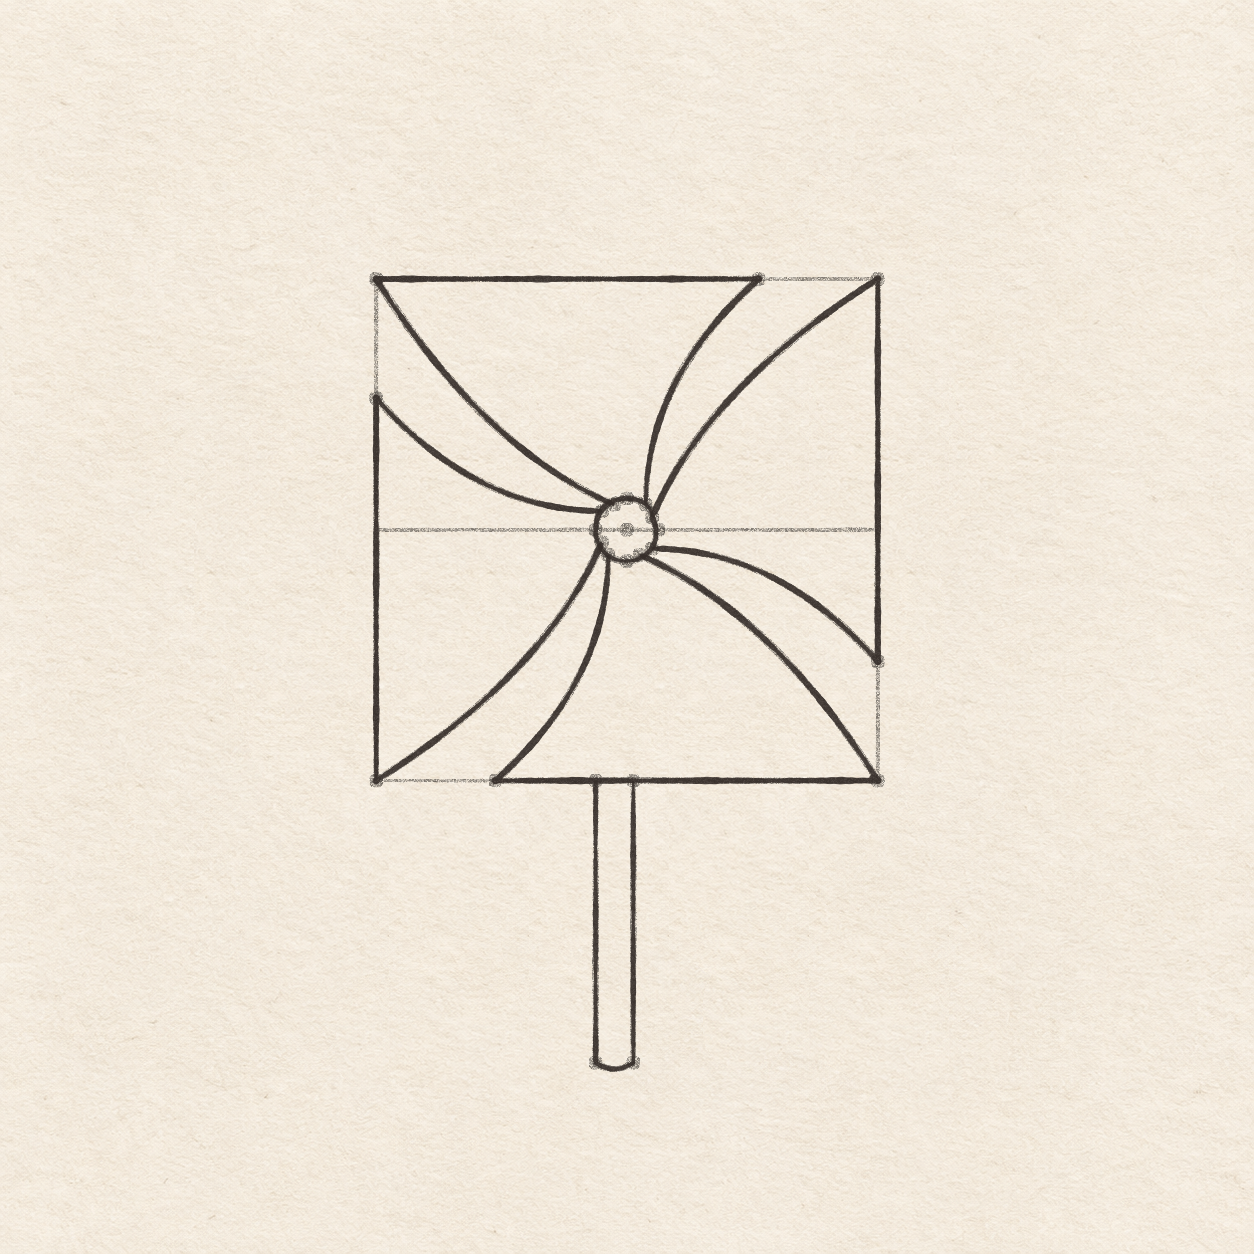
- Rest a square paper corner against the bottom blade’s straight edge. Slide it until the upright edge lines up with the center dot above. At the blade edge, mark a dot 5 mm left of that spot and another 1 mm right of it. Use a square paper corner on the blade edge to mark a second dot 4.5 cm straight down from each one. Keep the pair a little left of center and the same width at top and bottom.
- Rule down from the two dots on the bottom blade edge to the two lower dots. Join the lower ends with a small freehand curve so the tip is slightly round. Stop at the edge of the blade without drawing the stick through it.

Drawing 6 — Ink the blades, center and handleView larger InkInk the blades, center and handle
Instructions for Drawing 6 — Ink the blades, center and handle
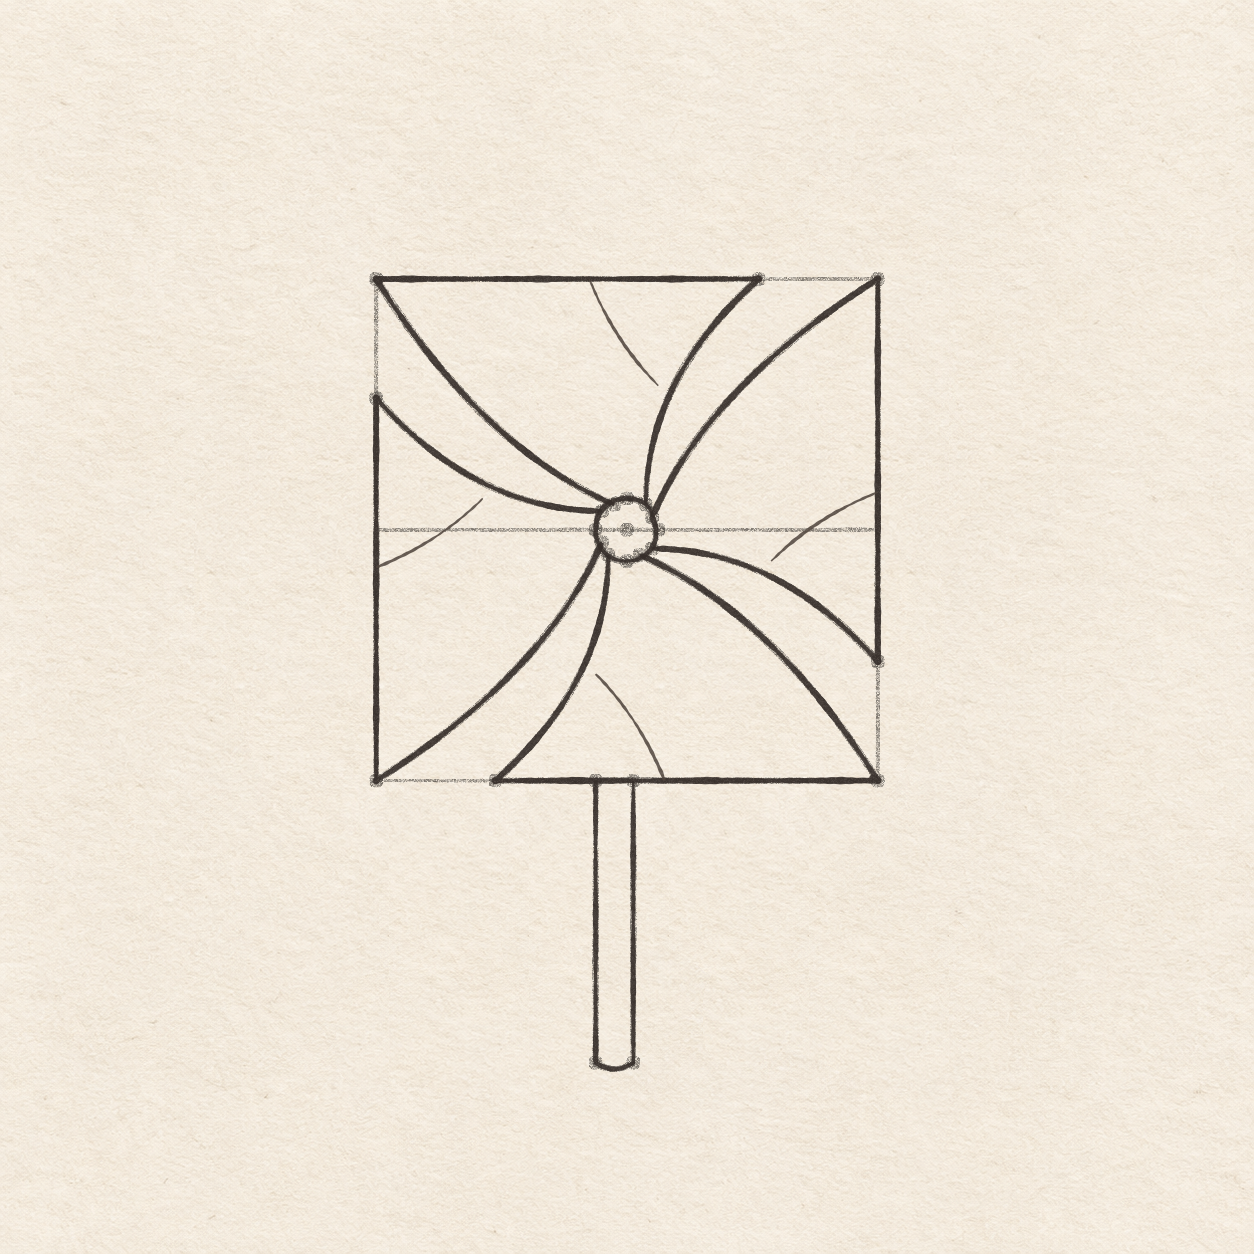
- Trace the long and short curves of each blade in pen. Ink the straight part from each corner to its stop dot. Leave the extra guide line between the stop and the next corner in pencil.
- Trace the outline of the round fastener in pen. Keep the middle of the fastener open as you join its inked edge.
- Ink both exposed sides of the stick and its curved bottom. Stop both pen lines at the bottom edge of the blade.

Drawing 7 — Add one crease per bladeView larger InkAdd one crease per blade
Instructions for Drawing 7 — Add one crease per blade
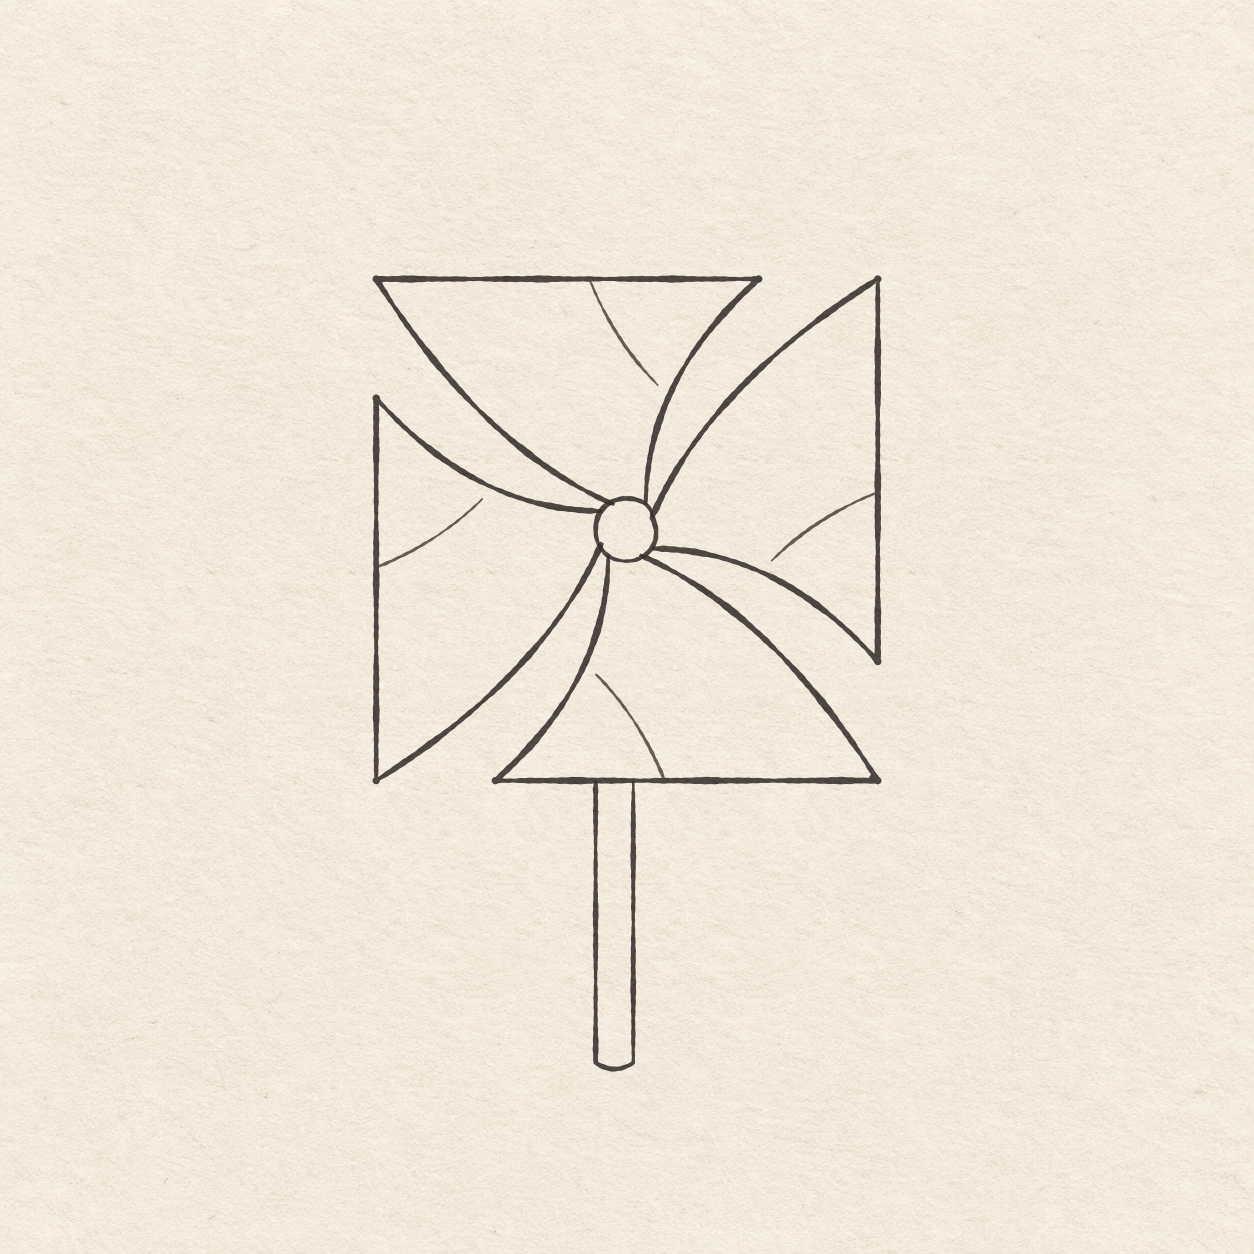
- For each blade, make a short freehand crease starting roughly midway along its straight edge. Bend it into the blade toward the fastener, but stop while there is still open paper before the hub. Use one crease per blade and keep the four interiors mostly open.

Drawing 8 — Erase the dry pencil guidesView larger CleanupErase the dry pencil guides
Instructions for Drawing 8 — Erase the dry pencil guides
- Fill a small patch on a scrap of the same paper with the same pen. Rub the patch gently with your eraser. If it smears, wait and test again. Once the patch stops smearing, erase the square, center line, dots and pencil outlines beside the dry ink.
If something looks off
If one blade turns the other way
In pencil, check that the top blade goes right, the right blade goes down, the bottom blade goes left and the left blade goes up. Fix its straight outer edge first, then reconnect its curves to the fastener.