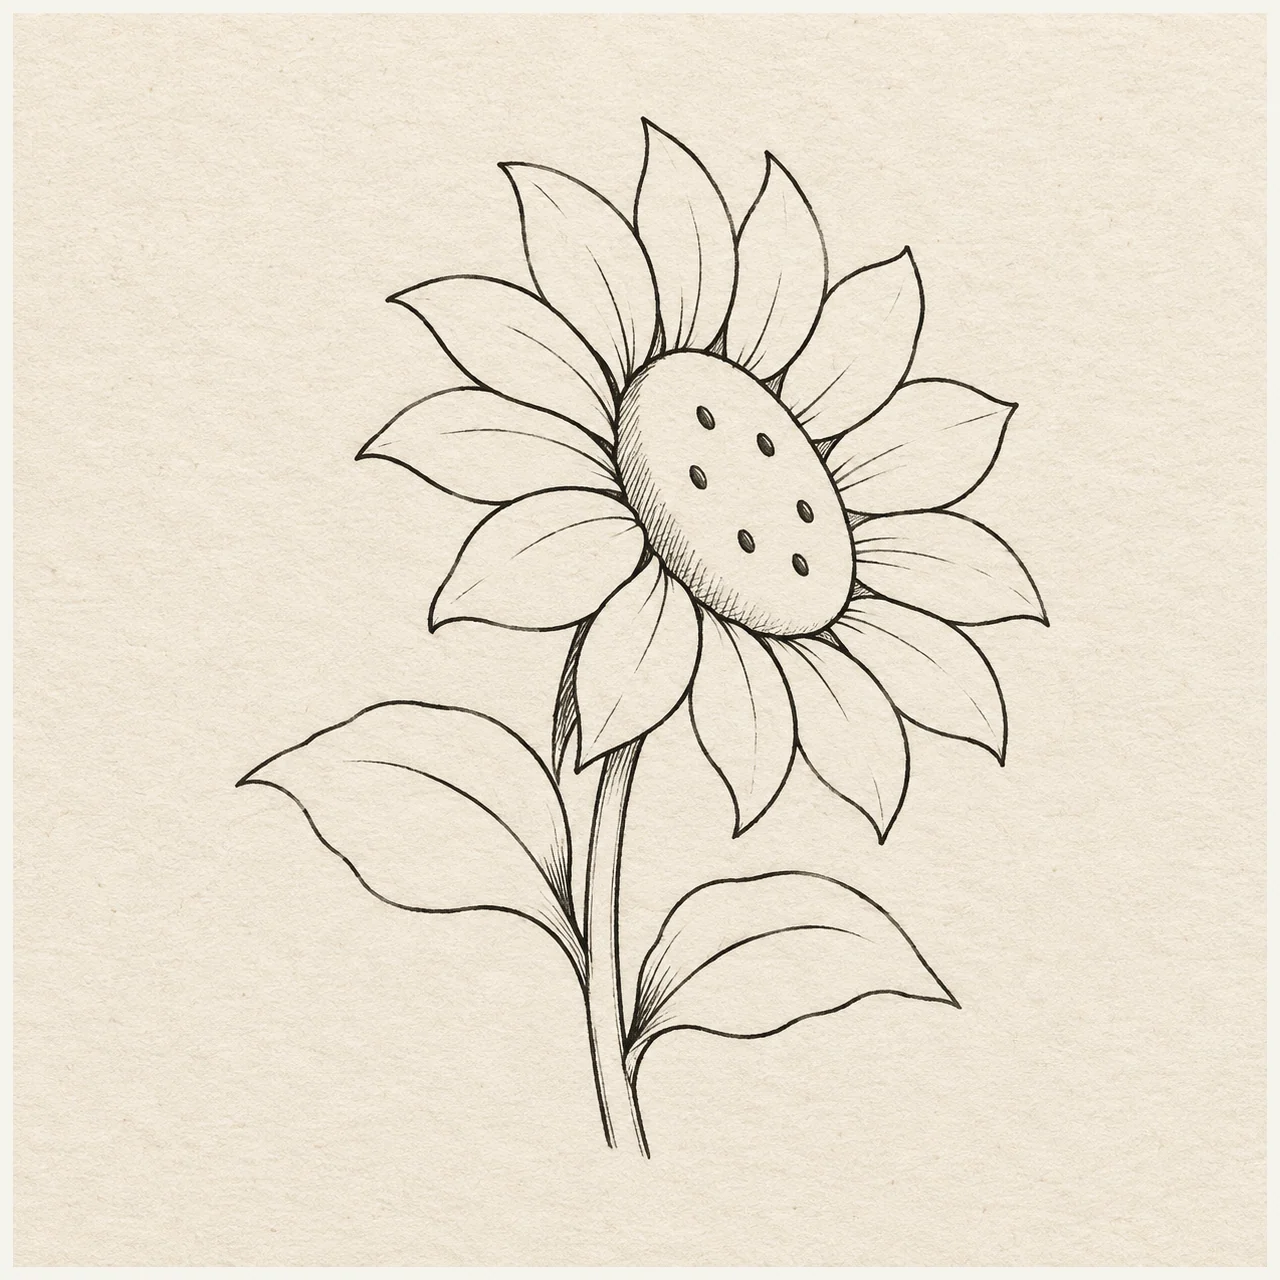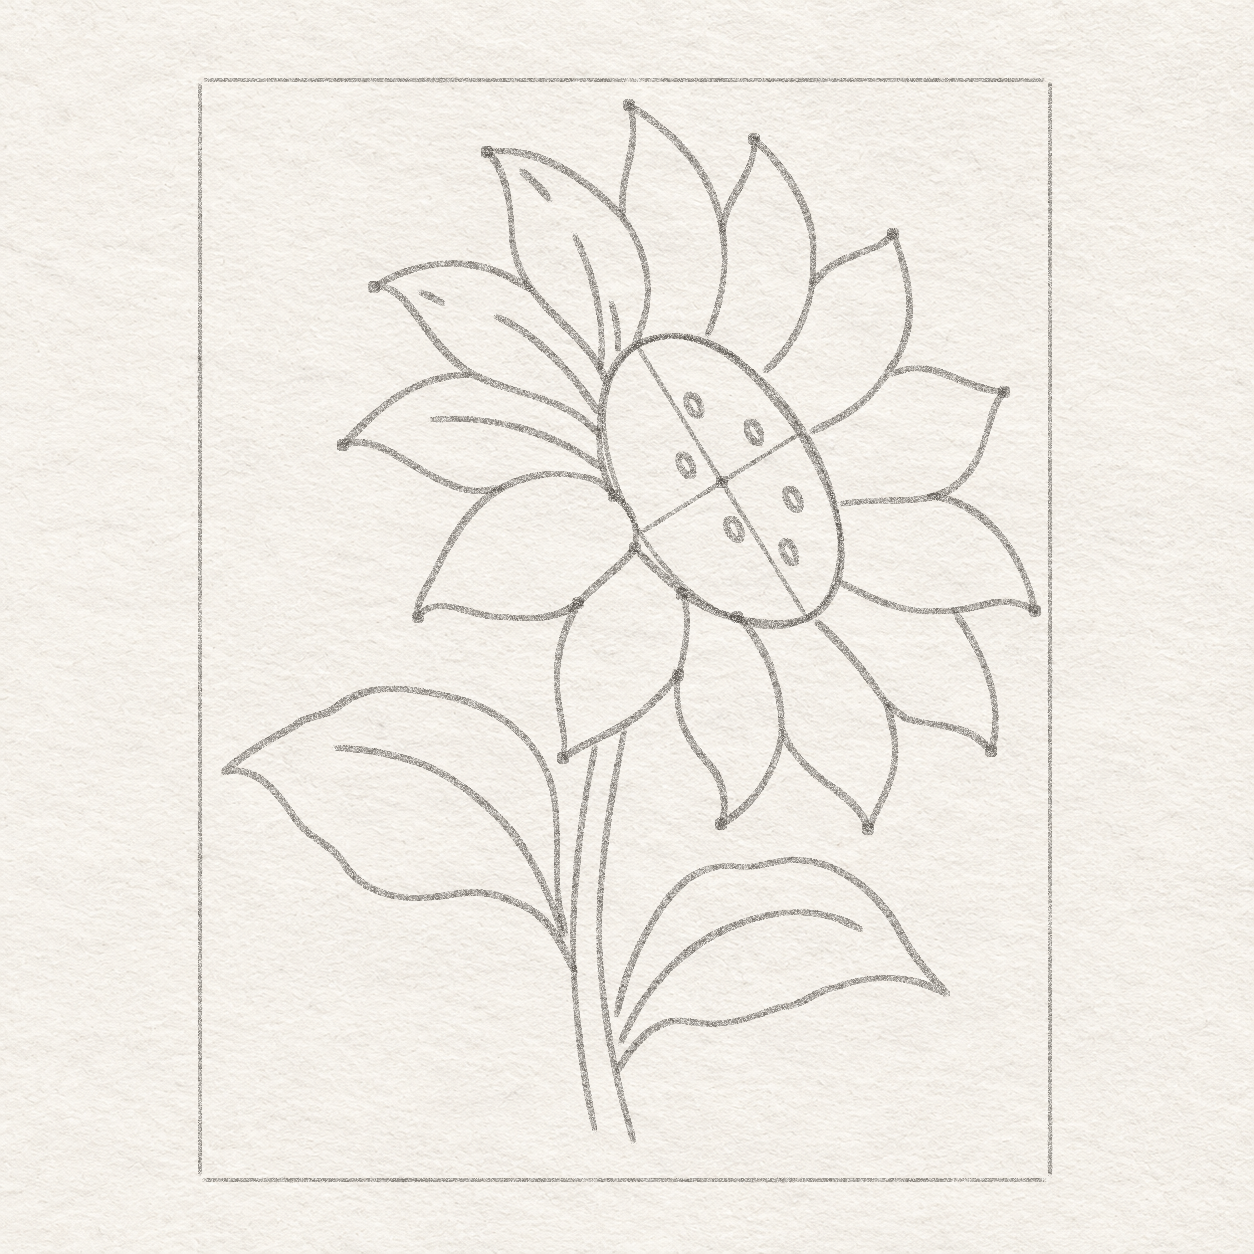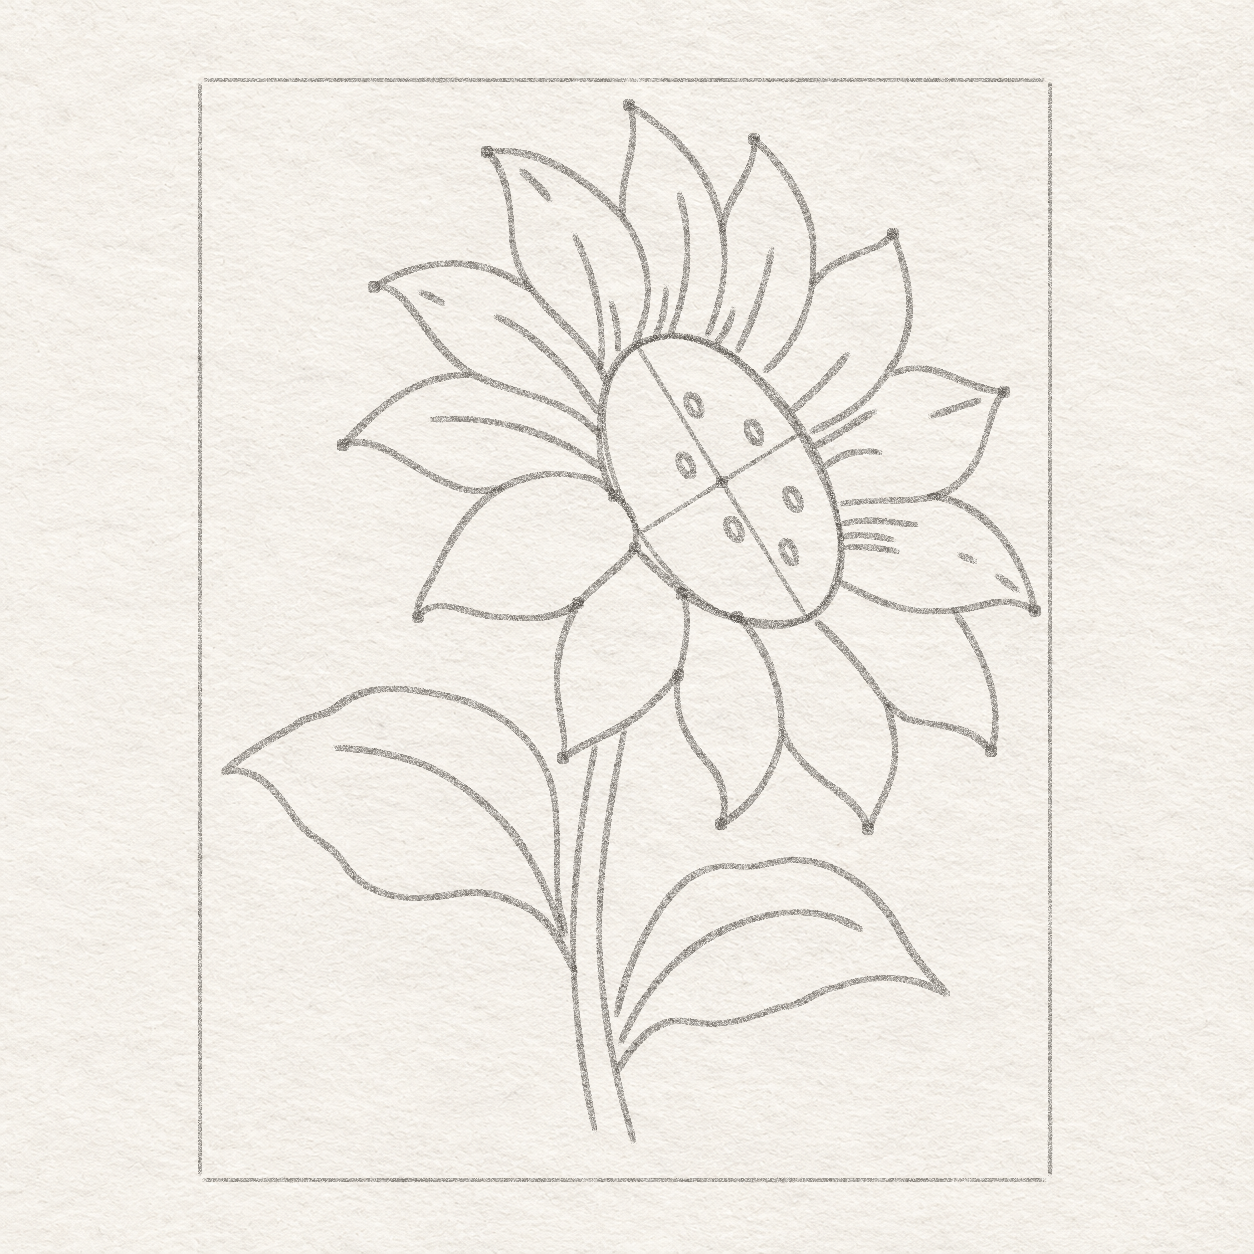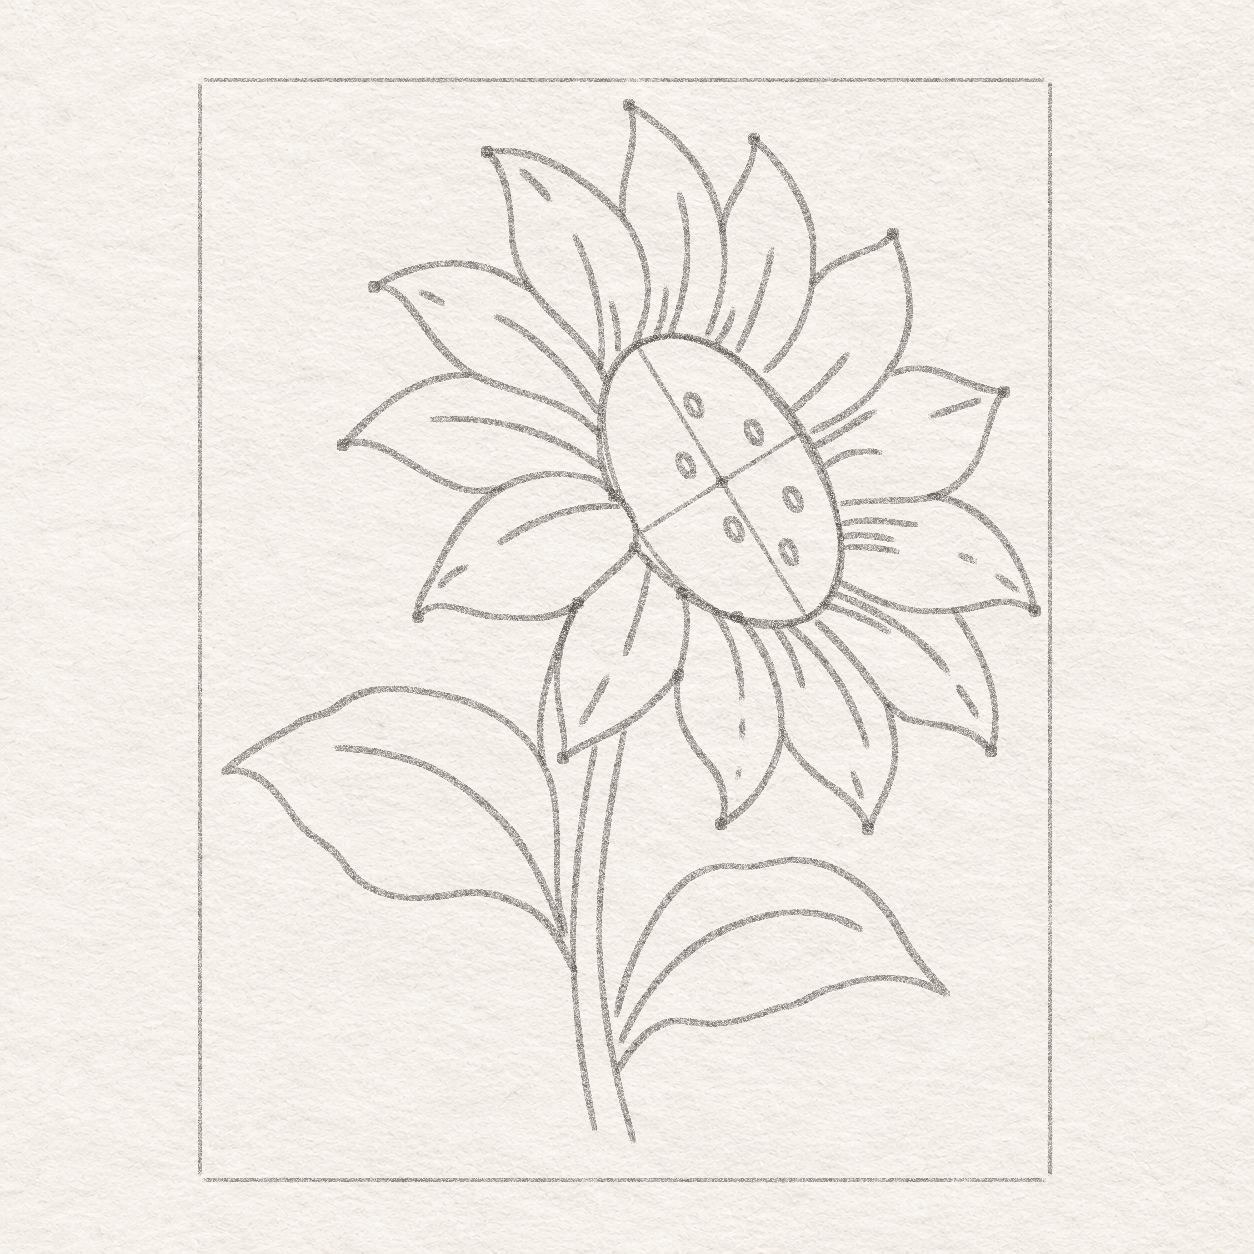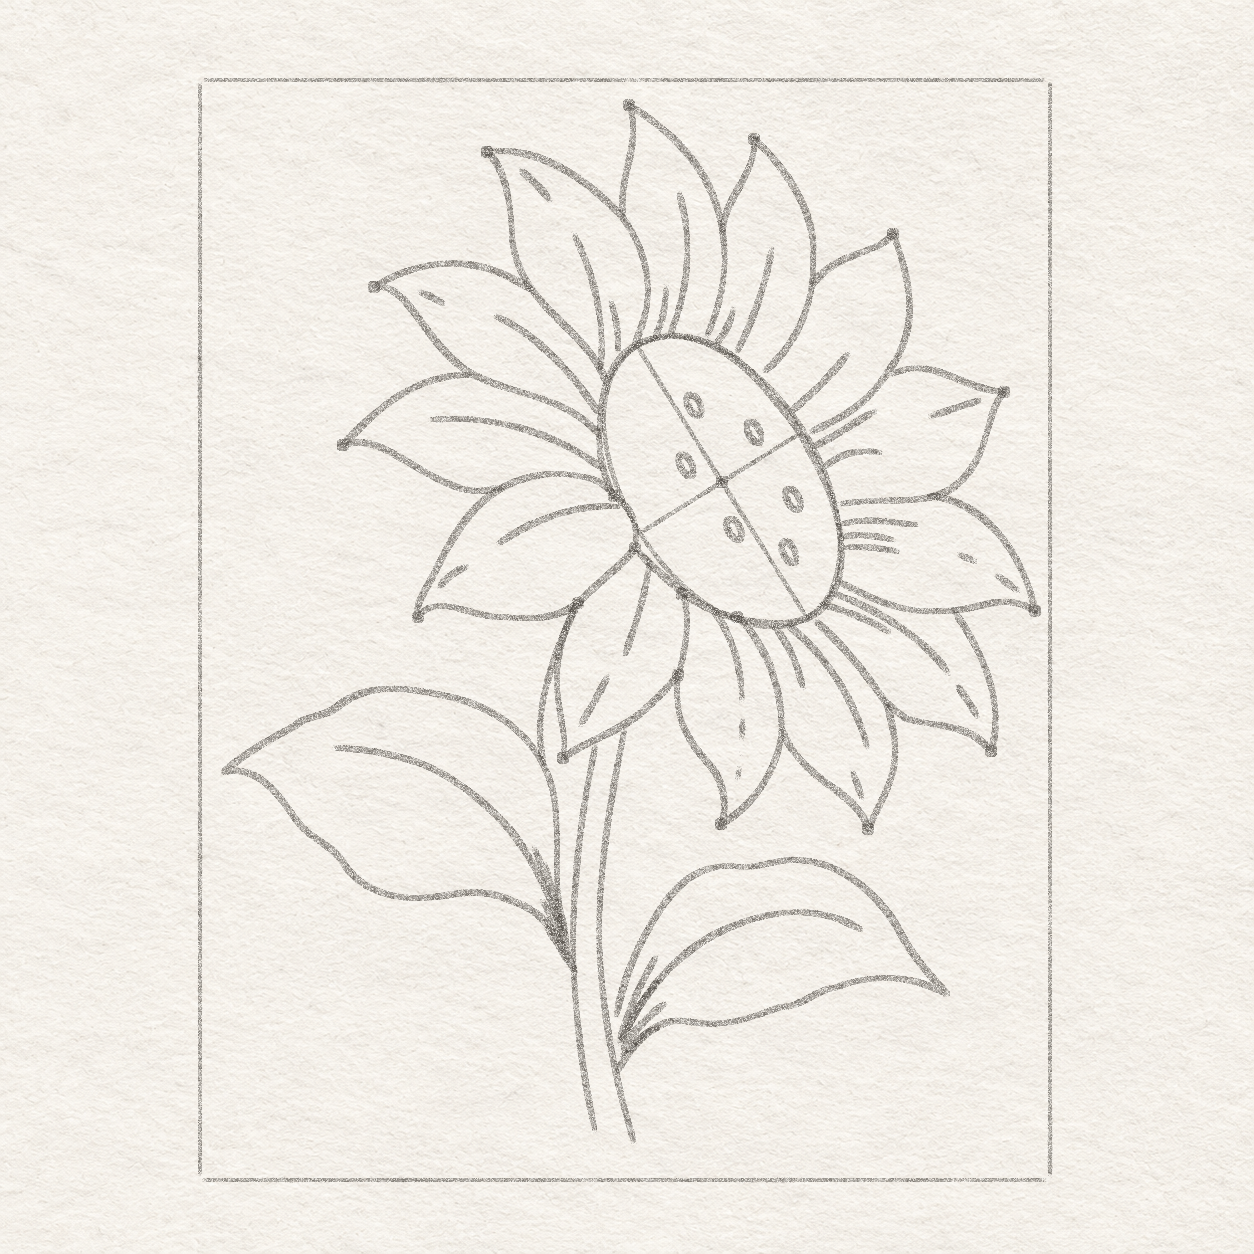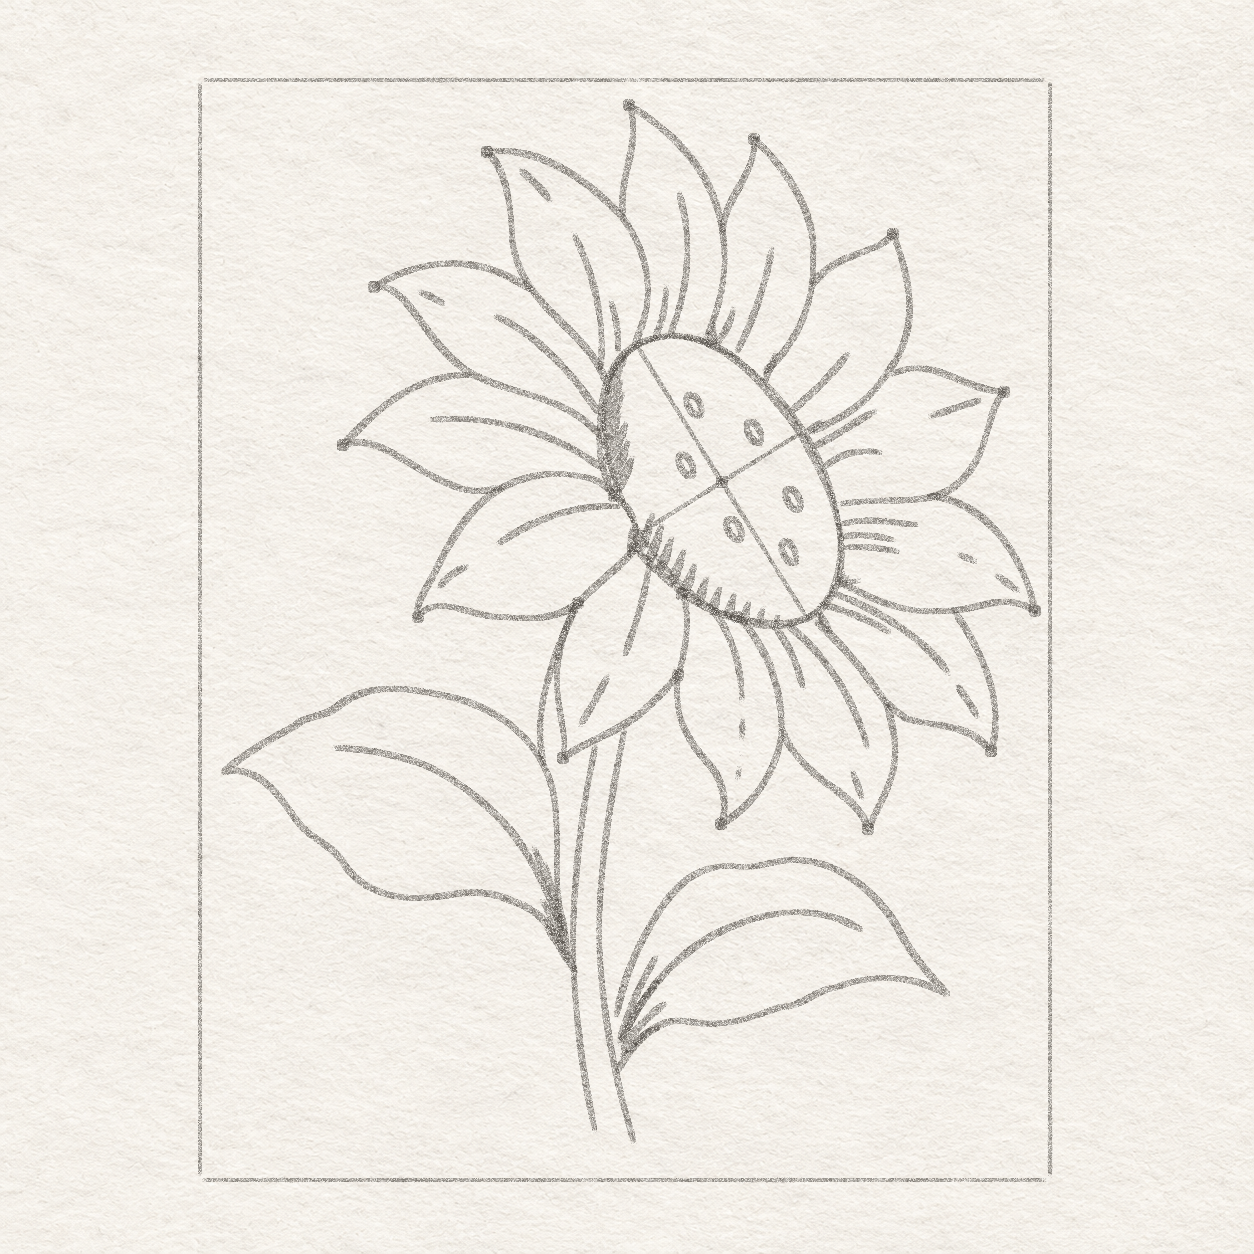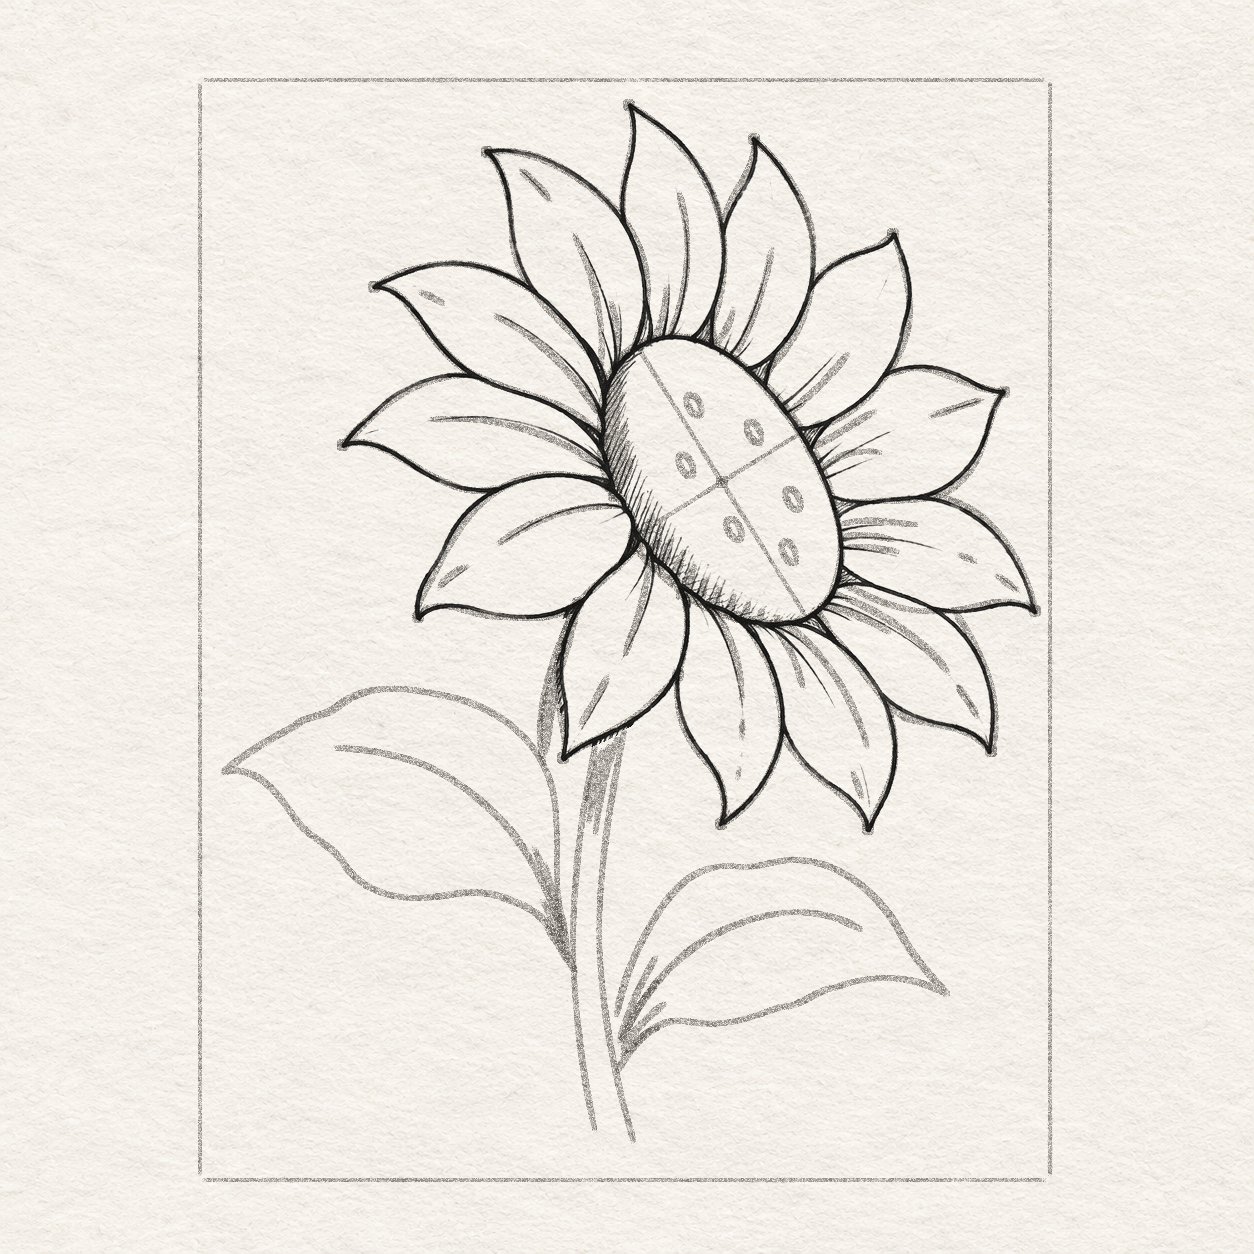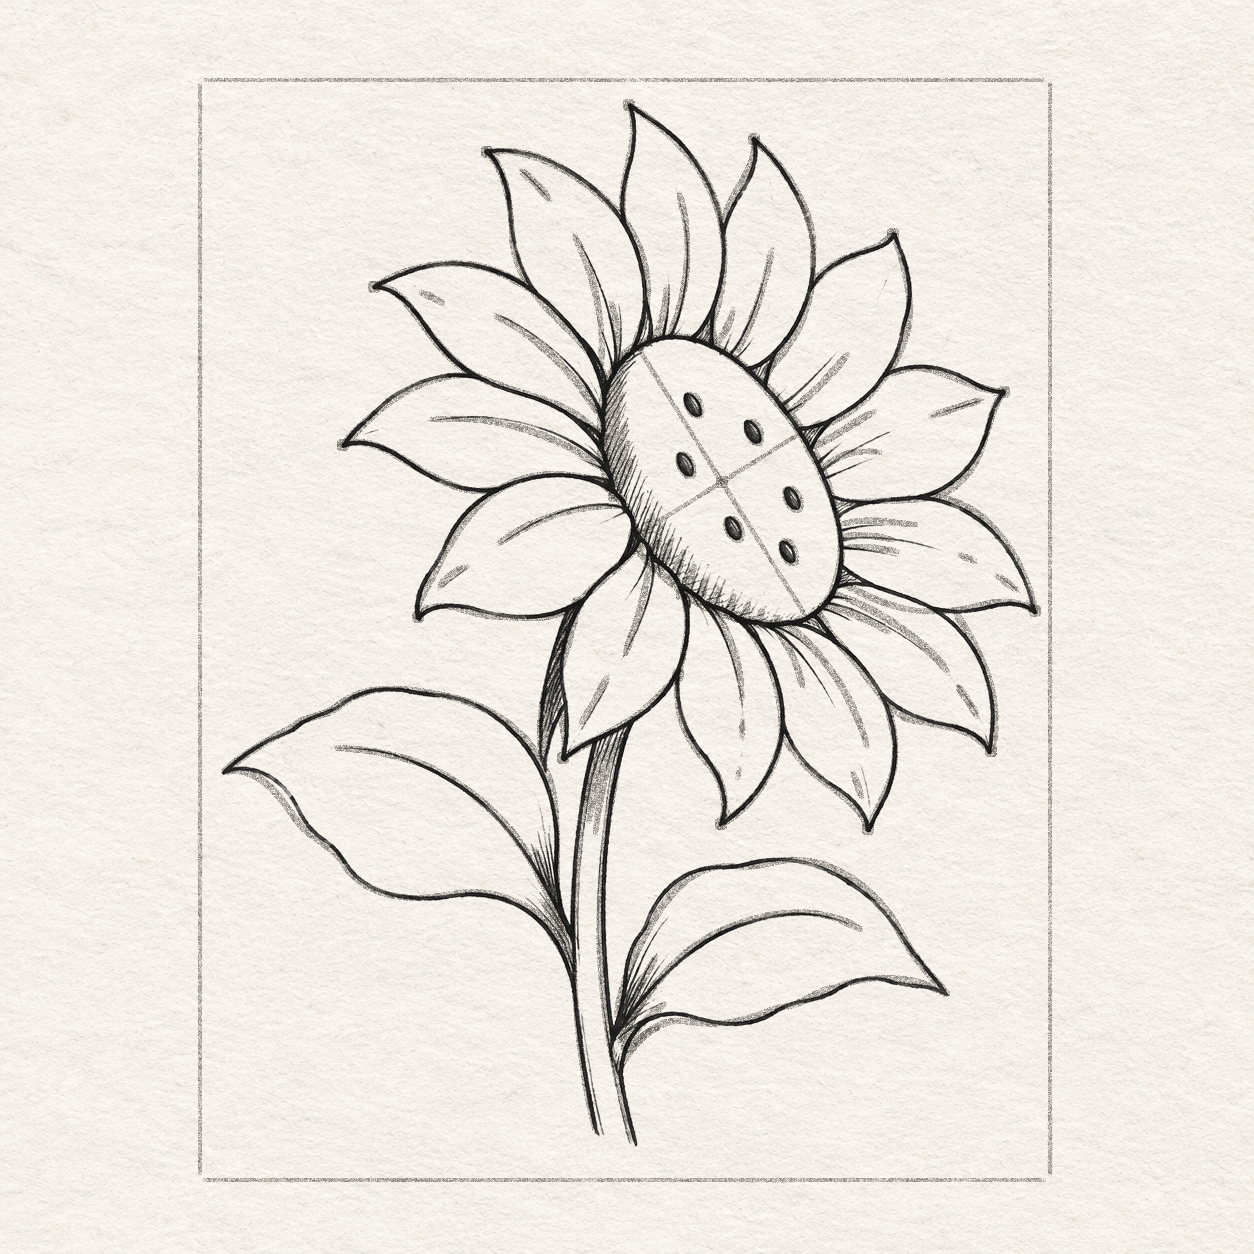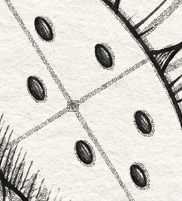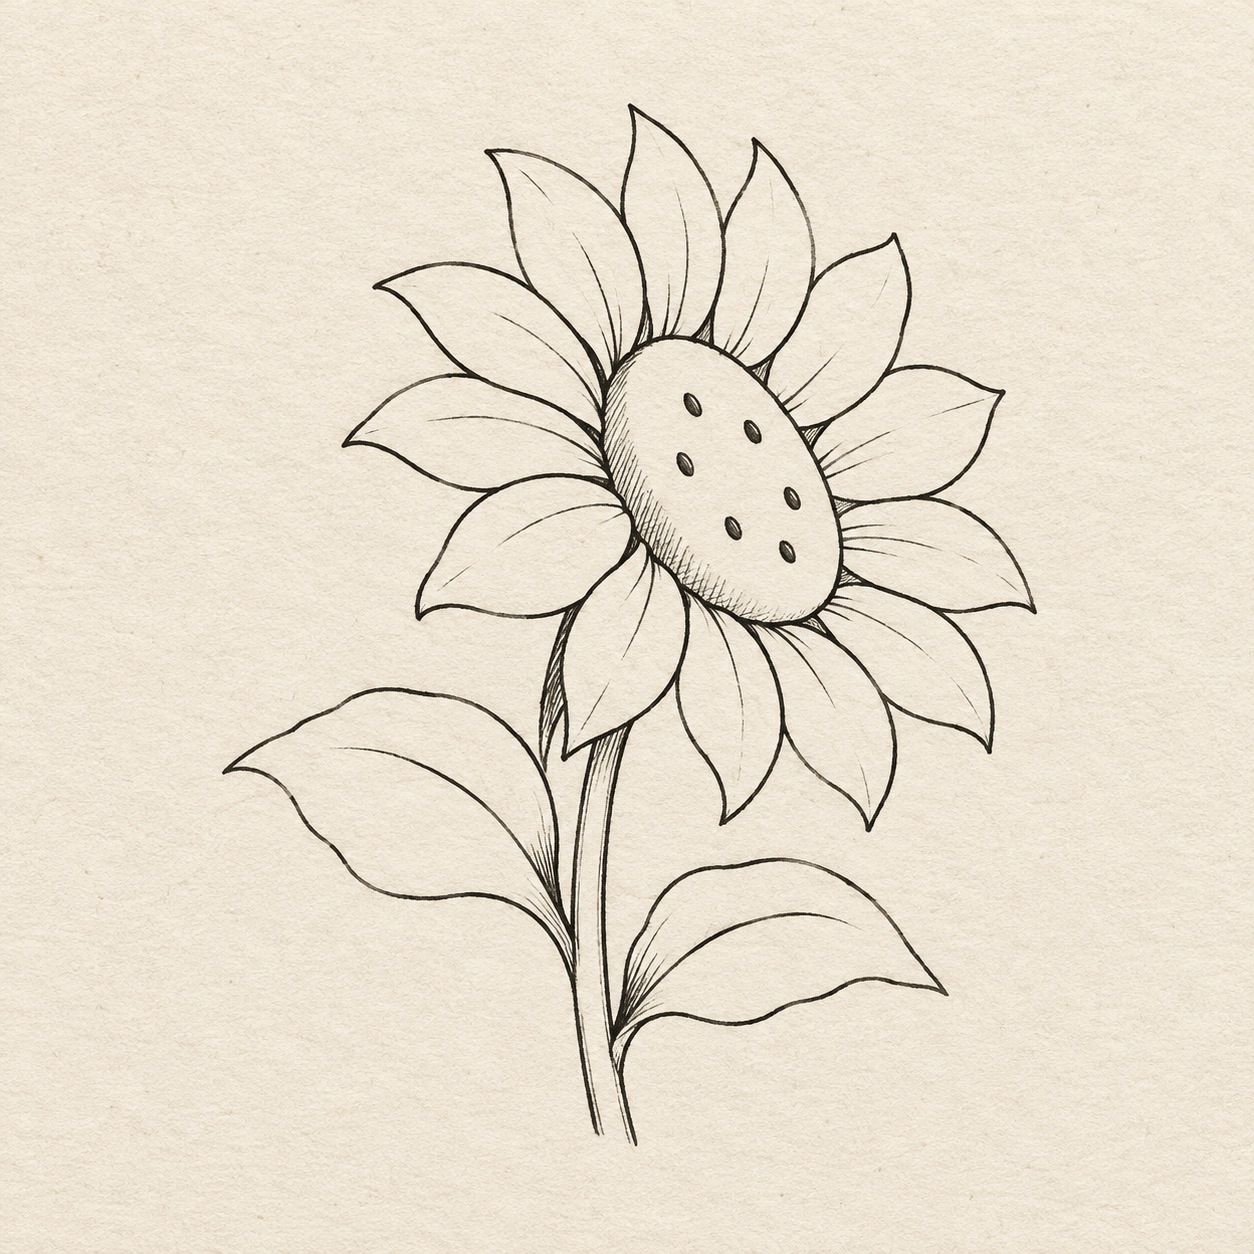
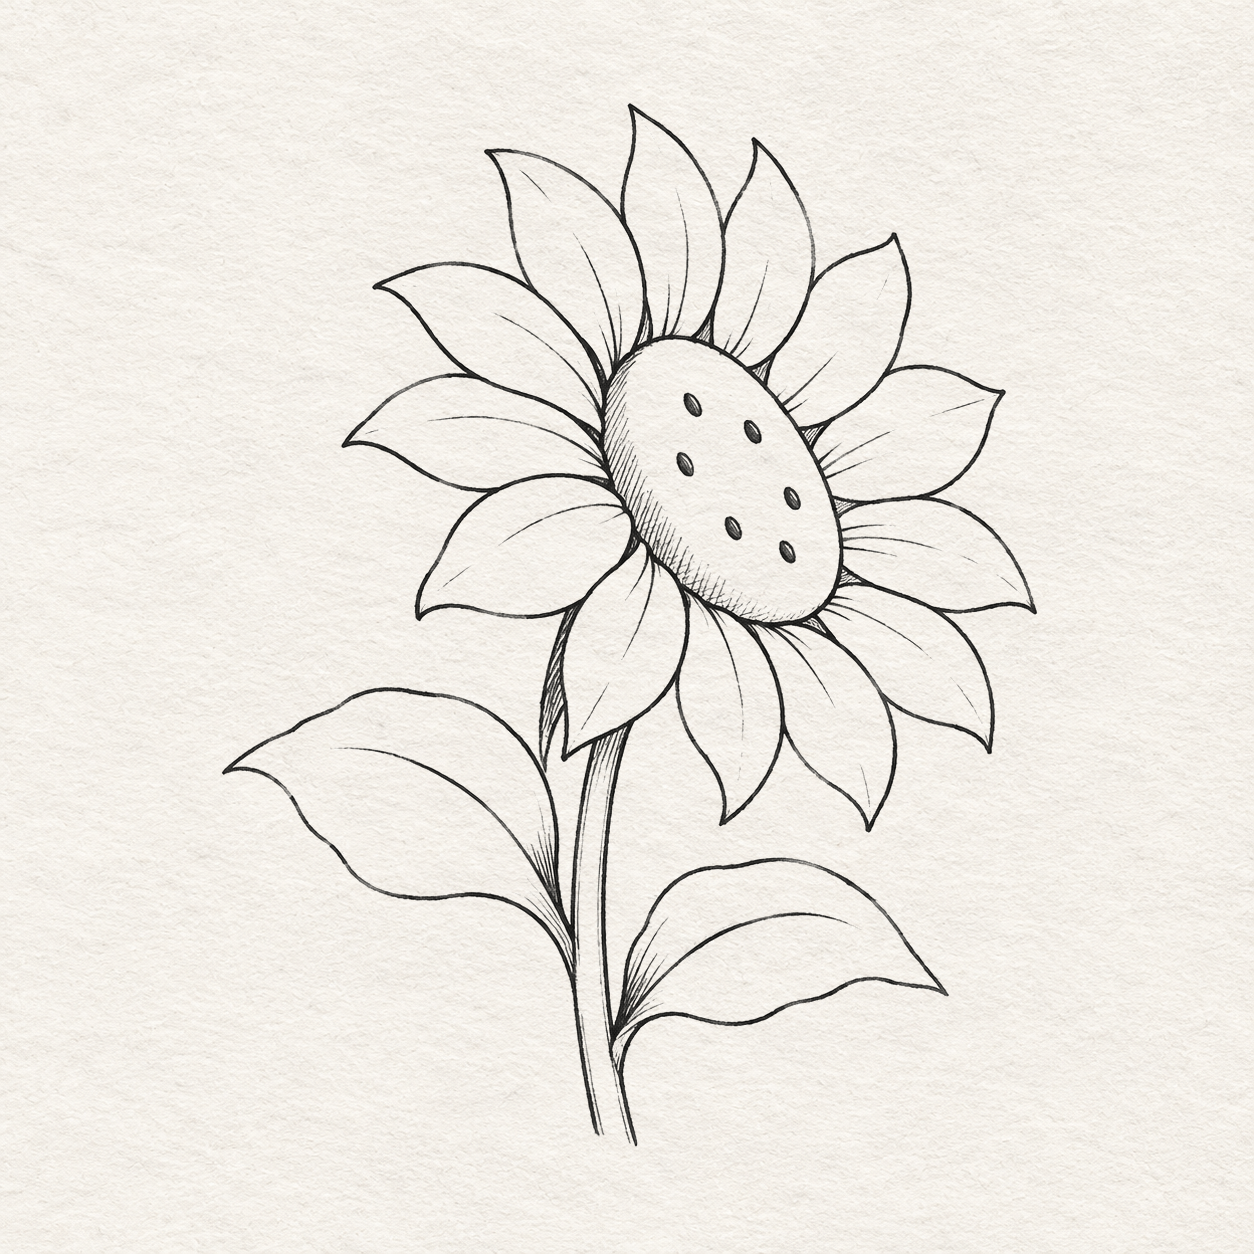
One sunflower bloom facing slightly sideways, an oval seed center, surrounding petals, a short stem and two leaves. Black and gray fineliner drawing on warm textured sketchbook paper.
Drawing referenceAbout reference use

Sunflower fine ink study

One sunflower bloom facing slightly sideways, an oval seed center, surrounding petals, a short stem and two leaves. Practice clear contours and a few local shadows in fine ink.

Nature & plantsEasyFinelinerReference practice: about 20 min
Save reference

Follow the drawing tutorial

Place the tilted seed head, draw the overlapping petals and two leaves, then add the thin folds and leaf-root details.

Start the 17-step tutorial

A small thing to tryLet the far petals compress with the tilted flower head.

Draw it, one step at a time

How to draw a sunflower with fineliner

Place the tilted seed head, draw the overlapping petals and two leaves, then add the thin folds and leaf-root details.

17 steps · 5 chapters · 39 progress drawings Full tutorial: about 55 minutes, at your pace

What you’ll need

  • HB pencil
  • Ruler marked in centimeters and millimeters
  • Soft eraser
  • Fine black fineliner
  • Spare sheet with a square corner
  • Scrap of your drawing paper for drying tests
  • Ordinary drawing paper with room around the working box

Before you start

Choose where the study should sit on your sheet. The working box in this example is 13.6 cm wide and 17.6 cm high. Leave spare paper all the way around it. Use a ruler and the square corner of a spare sheet to transfer measurements. Hold one spare-sheet edge level with the top of the box and use its other edge to measure straight down. Slide the corner along the ruler to transfer each distance without drawing extra lines. Keep all guides light. When a step says to find a join with the ruler, use where the ruler meets the named line you drew. Do not add a guide line unless the step asks you to draw it.

Each numbered step is one drawing task. Follow its A/B/C drawings and continuous action numbers in order. Take a break between steps or chapters whenever you need one.

Chapter 1 — Place the flower

2 steps · 5 progress drawings · Pencil
  1. Step 1 of 17 · Pencil

    Set the drawing size and tilt

    A light rectangular working box on the drawing paper.
    Drawing 1A — Place the working boxView larger

    Instructions for Drawing 1A — Place the working box
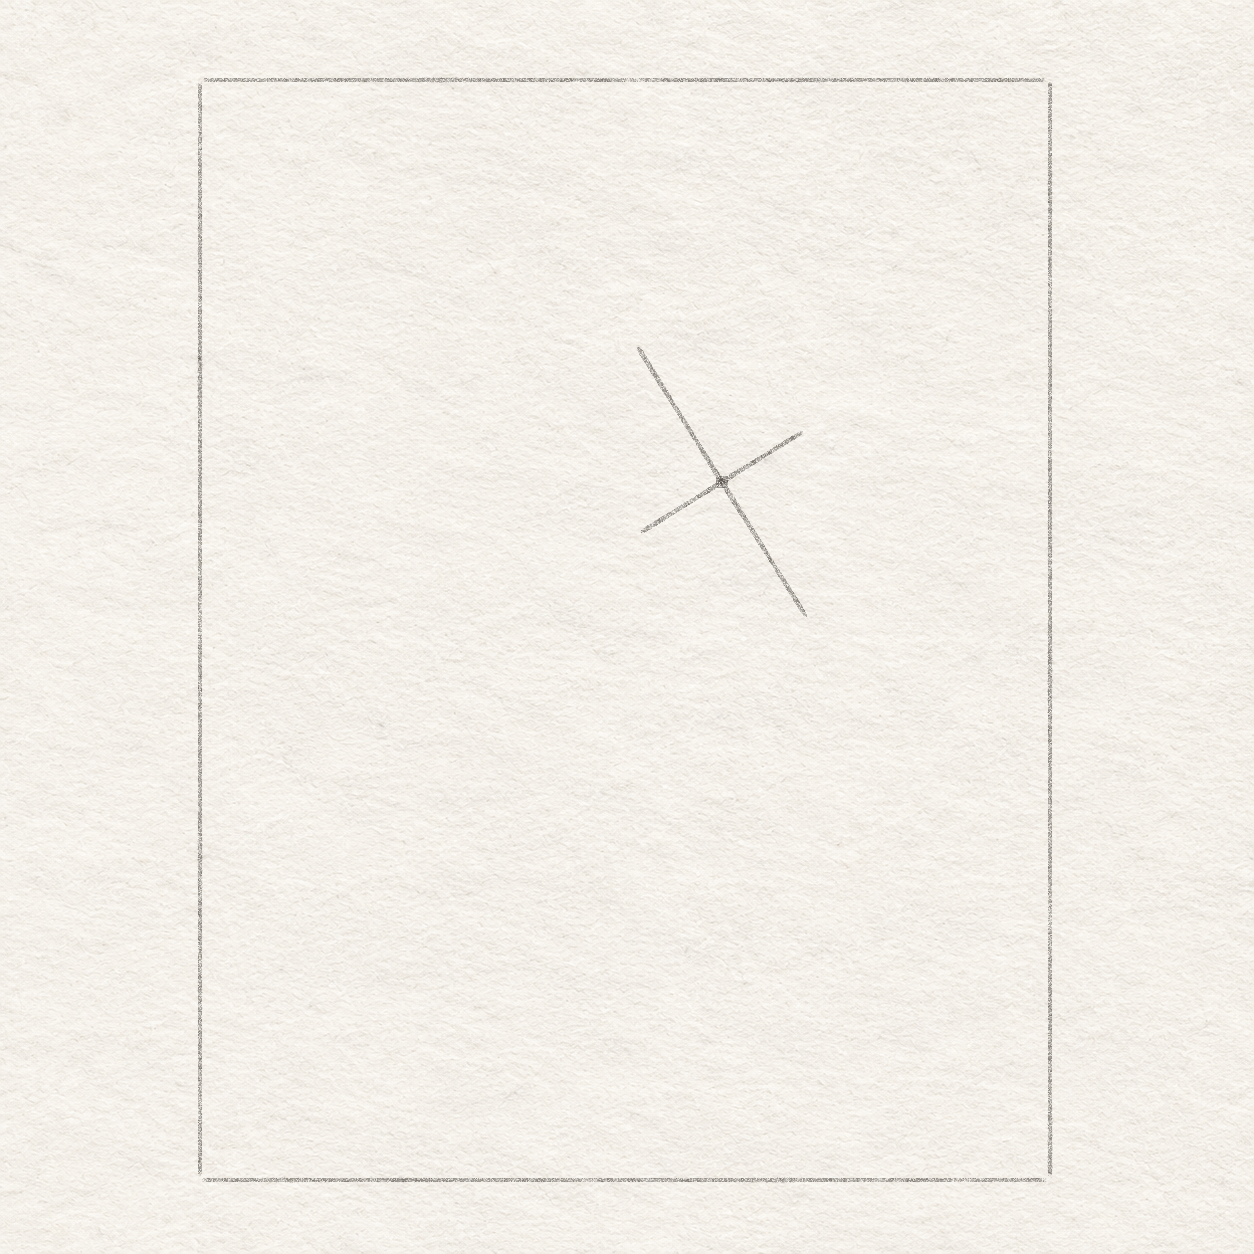
    1. Choose where the top-left corner of the study will sit. With the ruler, draw a very light level pencil line 13.6 cm to the right. Keep room for another 17.6 cm below it.
    2. Set the square corner of a spare sheet against each end of the top line. Align one spare-sheet edge with the line. Use its second edge to line up your ruler and draw a light side 17.6 cm straight down from each end.
    3. Use the ruler to join the lower ends of the two sides with a light pencil line.
    4. Check that opposite sides agree and that you still have clear paper around the whole box.
    A center dot and two tilted ruler lines inside the working box.
    Drawing 1B — Aim the center of the flowerView larger

    Instructions for Drawing 1B — Aim the center of the flower
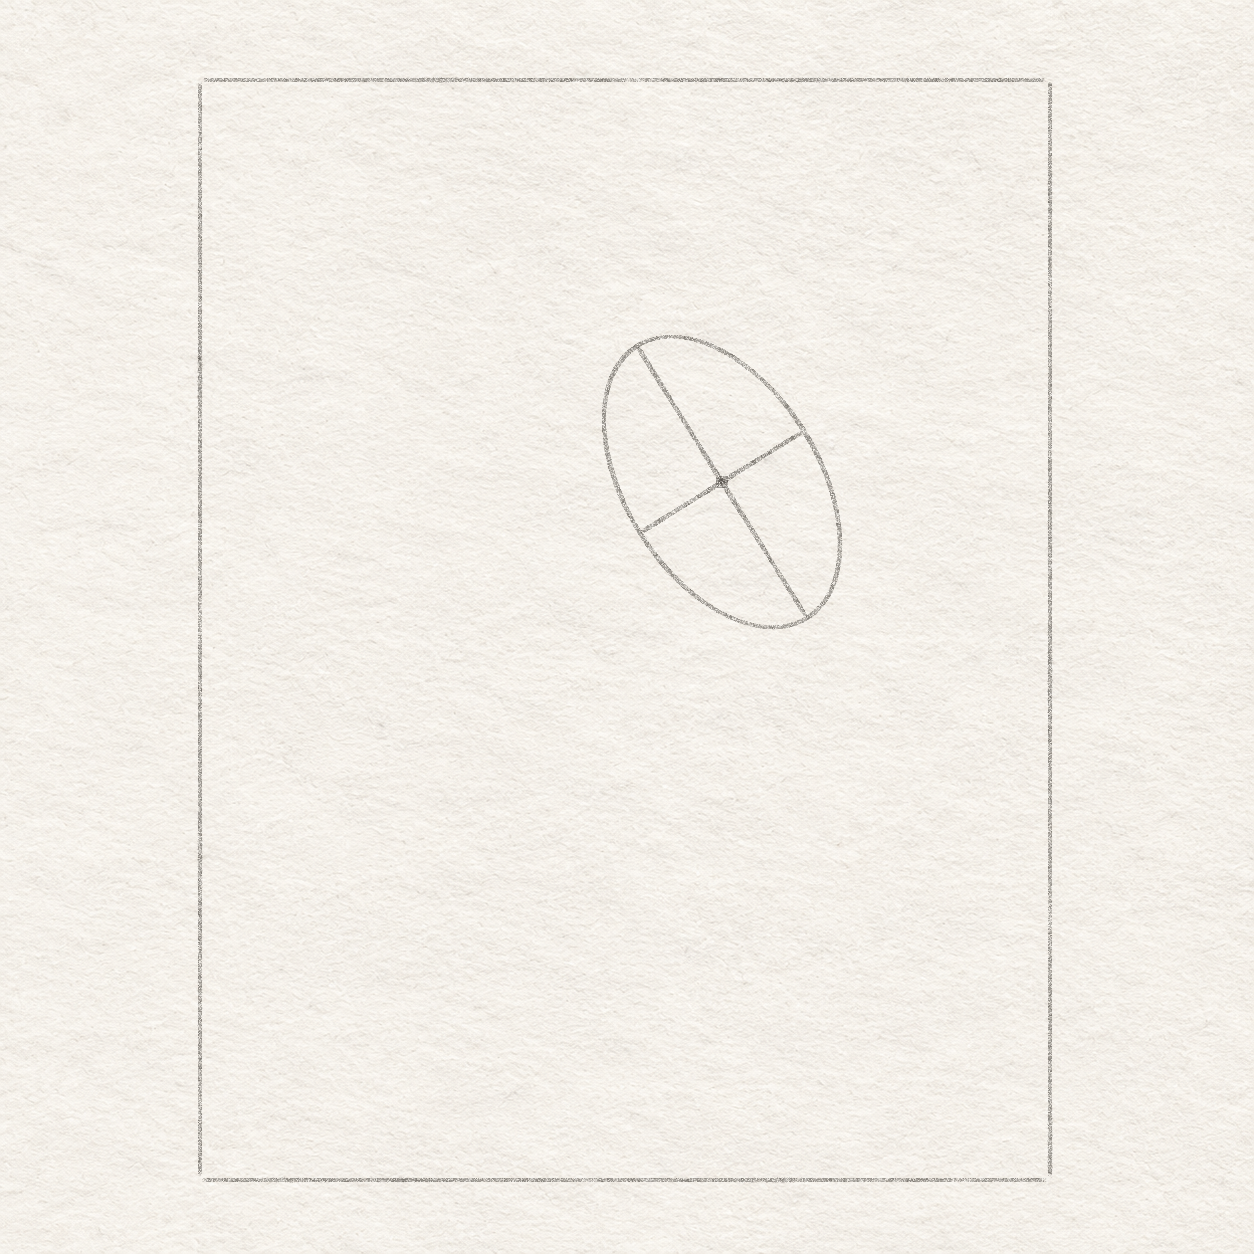
    1. Measure about 8.4 cm to the right along the top edge of the box. Hold the ruler parallel to the left box edge at that position. Use the spare sheet’s square corner to check the angle, then measure 6.4 cm straight down and put a light dot there.
    2. Keep the ruler level when you measure across from the center dot and upright when you measure down. The upper end is about 1.4 cm left and 2.2 cm up. The lower end is about 1.4 cm right and 2.2 cm down. Connect those positions through the dot with one light ruler line.
    3. From the same dot, locate one end about 1.3 cm left and 8 mm down, and the other about 1.3 cm right and 8 mm up. Use the ruler to join them through the dot with a light line.
    4. Both lines pass through the same dot. The long line falls to the right, and the short line rises to the right.
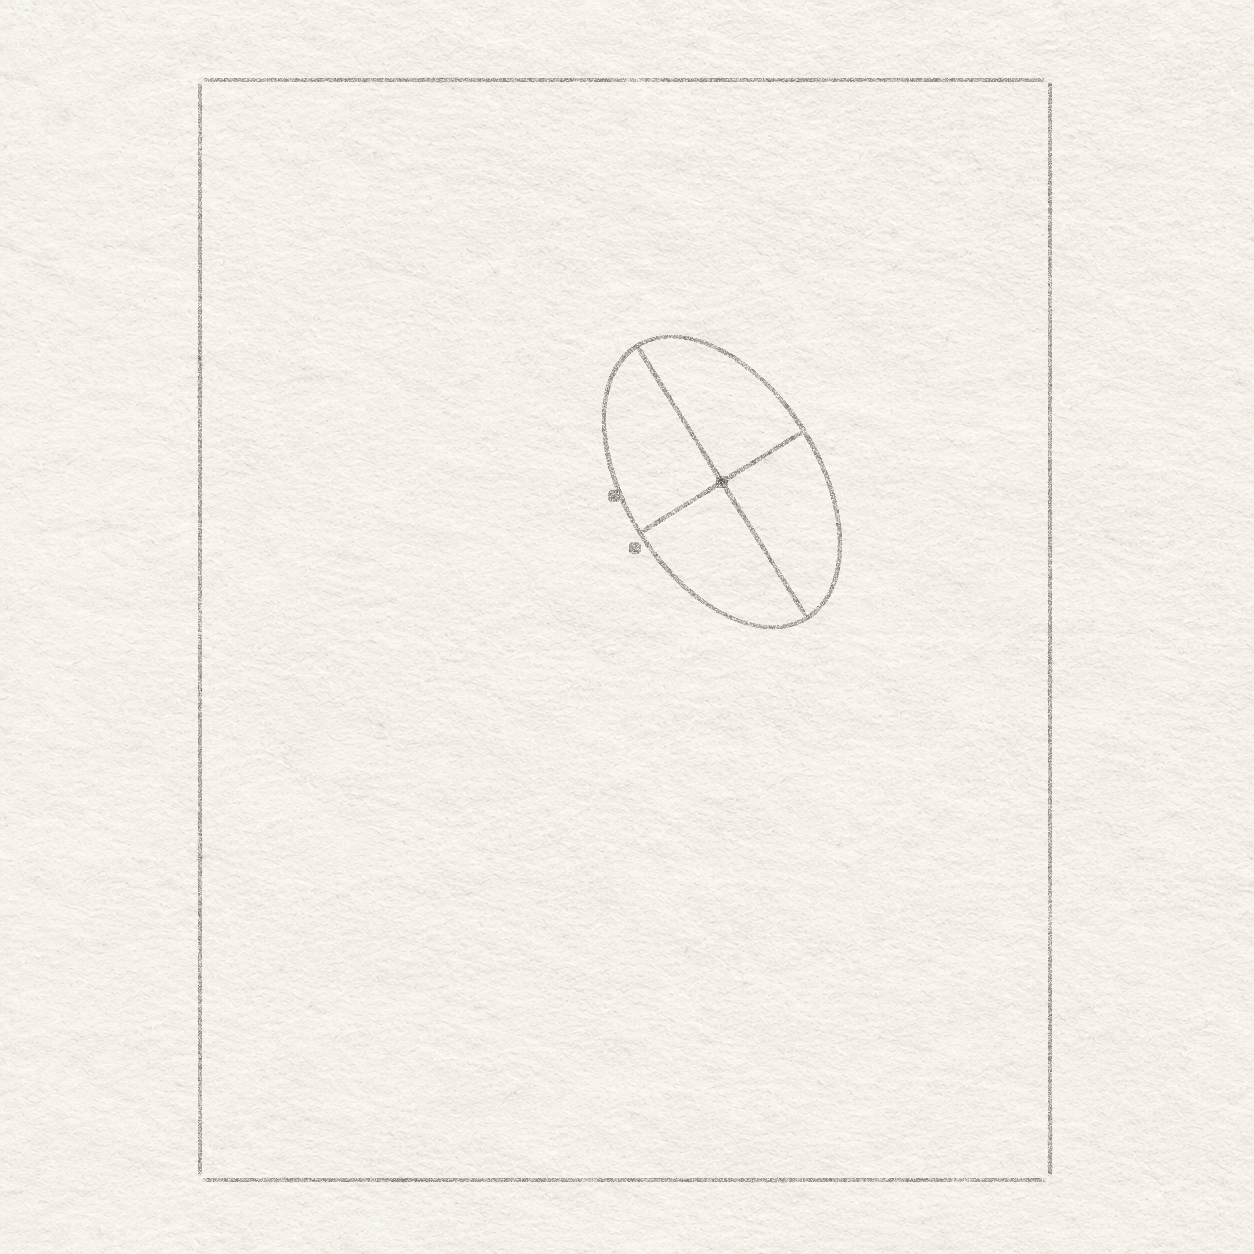
    An oval guide tilted down-right through the four ends of the pencil cross.
    Drawing 1C — Round the tilted head guideView larger

    Instructions for Drawing 1C — Round the tilted head guide

    1. Use the center dot to check that the long and short guides cross inside the oval. With the four guide ends as your limits, rehearse an oval above the sheet. Draw it freehand in light pencil, rounding through the ends and keeping its middle wider than either end.
    2. The four ends are on the oval and the light oval is still open inside.
    Next step — Draw the rim around the overlap
  2. Step 2 of 17 · Pencil

    Draw the rim around the overlap

    Two small pencil contacts mark the hidden stretch along the left side of the light oval.
    Drawing 2A — Locate the two rim stopsView larger

    Instructions for Drawing 2A — Locate the two rim stops
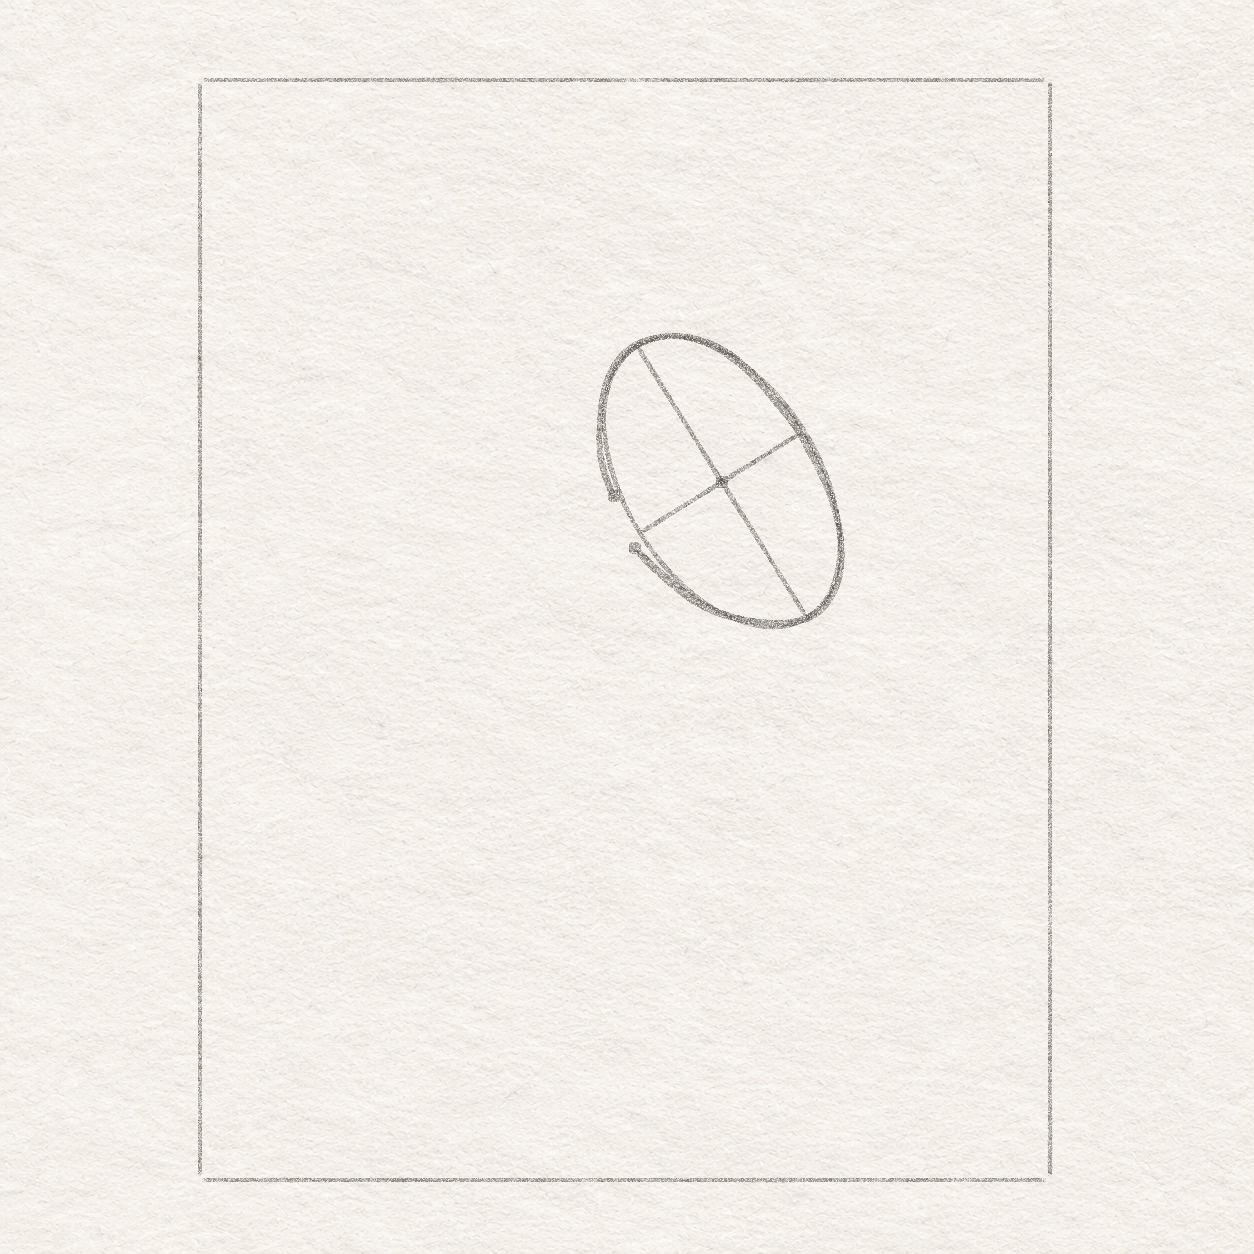
    1. Use the top-left corner of the box to place a pencil dot about 6.6 cm across and 6.7 cm down. This is the higher stop on the left of the head. Use the measured spot even if it falls just beside the light oval. The darker rim will reach it next.
    2. From the same box corner, place a second small dot about 7 cm across and 7.5 cm down. This lower stop marks where the darker rim comes back into view. The pale oval is a shape guide for the rim, so the dot does not have to sit on it.
    3. The upper point lies above and slightly left of the lower one. Keep the oval light between them.
    A darker curved pencil rim goes around the head, stopping on both sides of the light stretch at lower left.
    Drawing 2B — Select the visible seed-head rimView larger

    Instructions for Drawing 2B — Select the visible seed-head rim

    1. Start at the higher dot. With a slightly firmer pencil line, curve freehand up the left side of the guide oval, over the top, around the broad right side and under the bottom to the lower dot. Make the crest about 4.1 cm down from the box top and the far-right turn about 10.3 cm across from the box’s left side. Stop at the lower dot and keep the short stretch between the two dots light.
    2. The left gap belongs to the broad foreground petal. The selected line follows the oval’s slant without darkening the hidden stretch.
    Next step — Draw the broad front petal

Chapter 2 — Draw overlapping petals

6 steps · 13 progress drawings · Pencil
  1. Step 3 of 17 · Pencil

    Draw the broad front petal

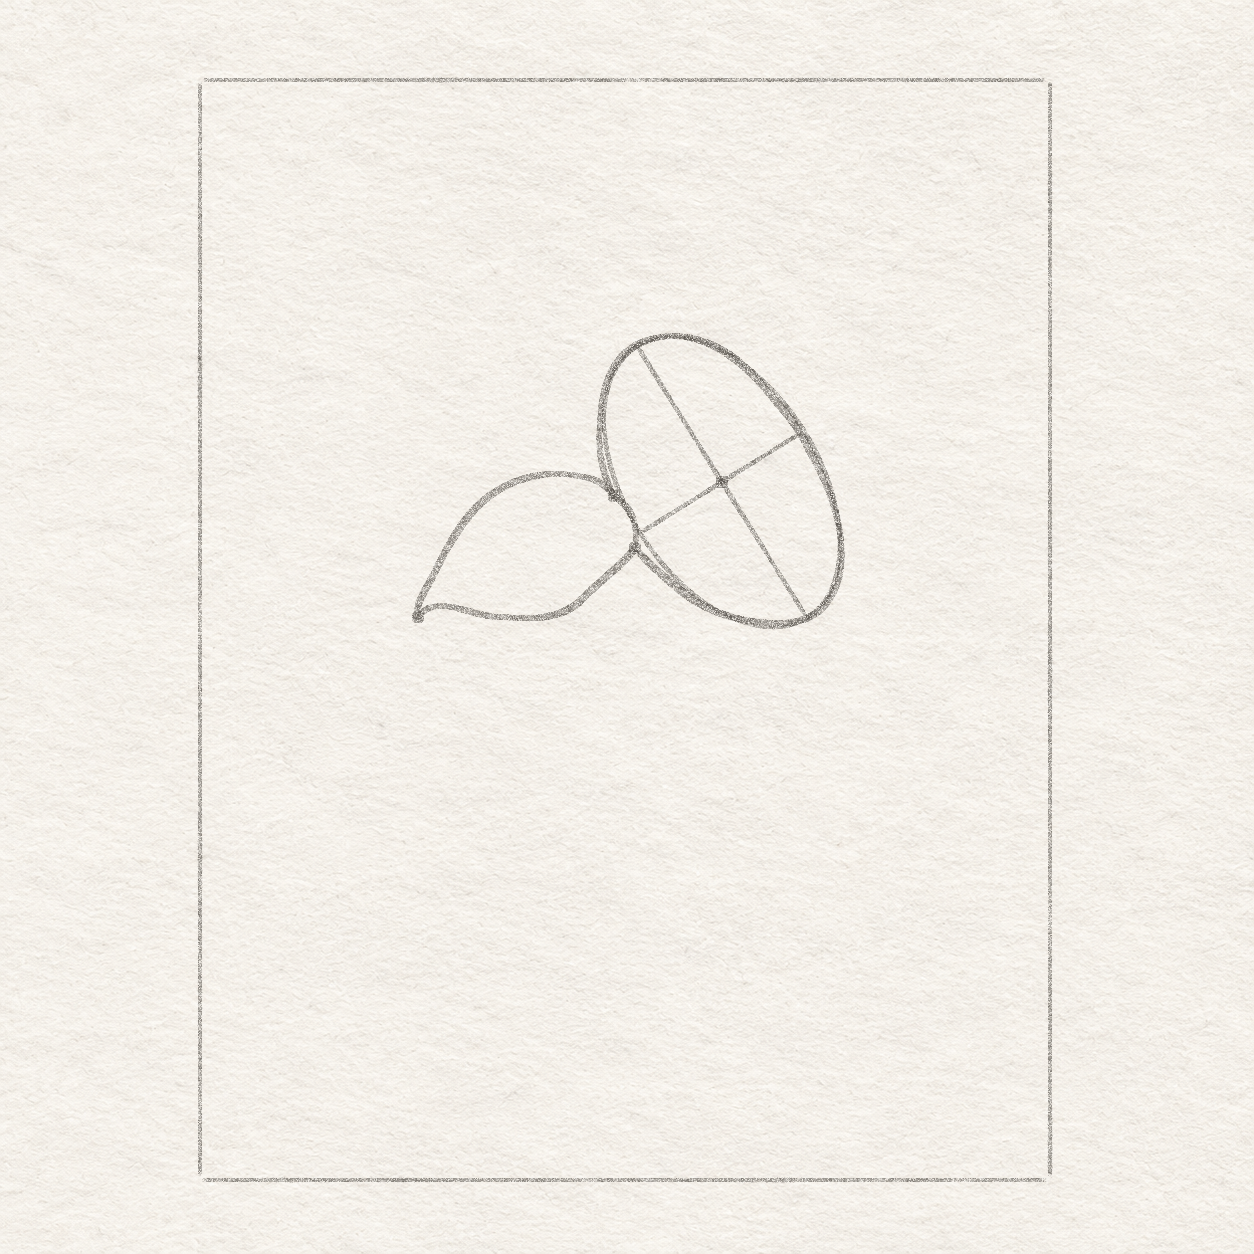
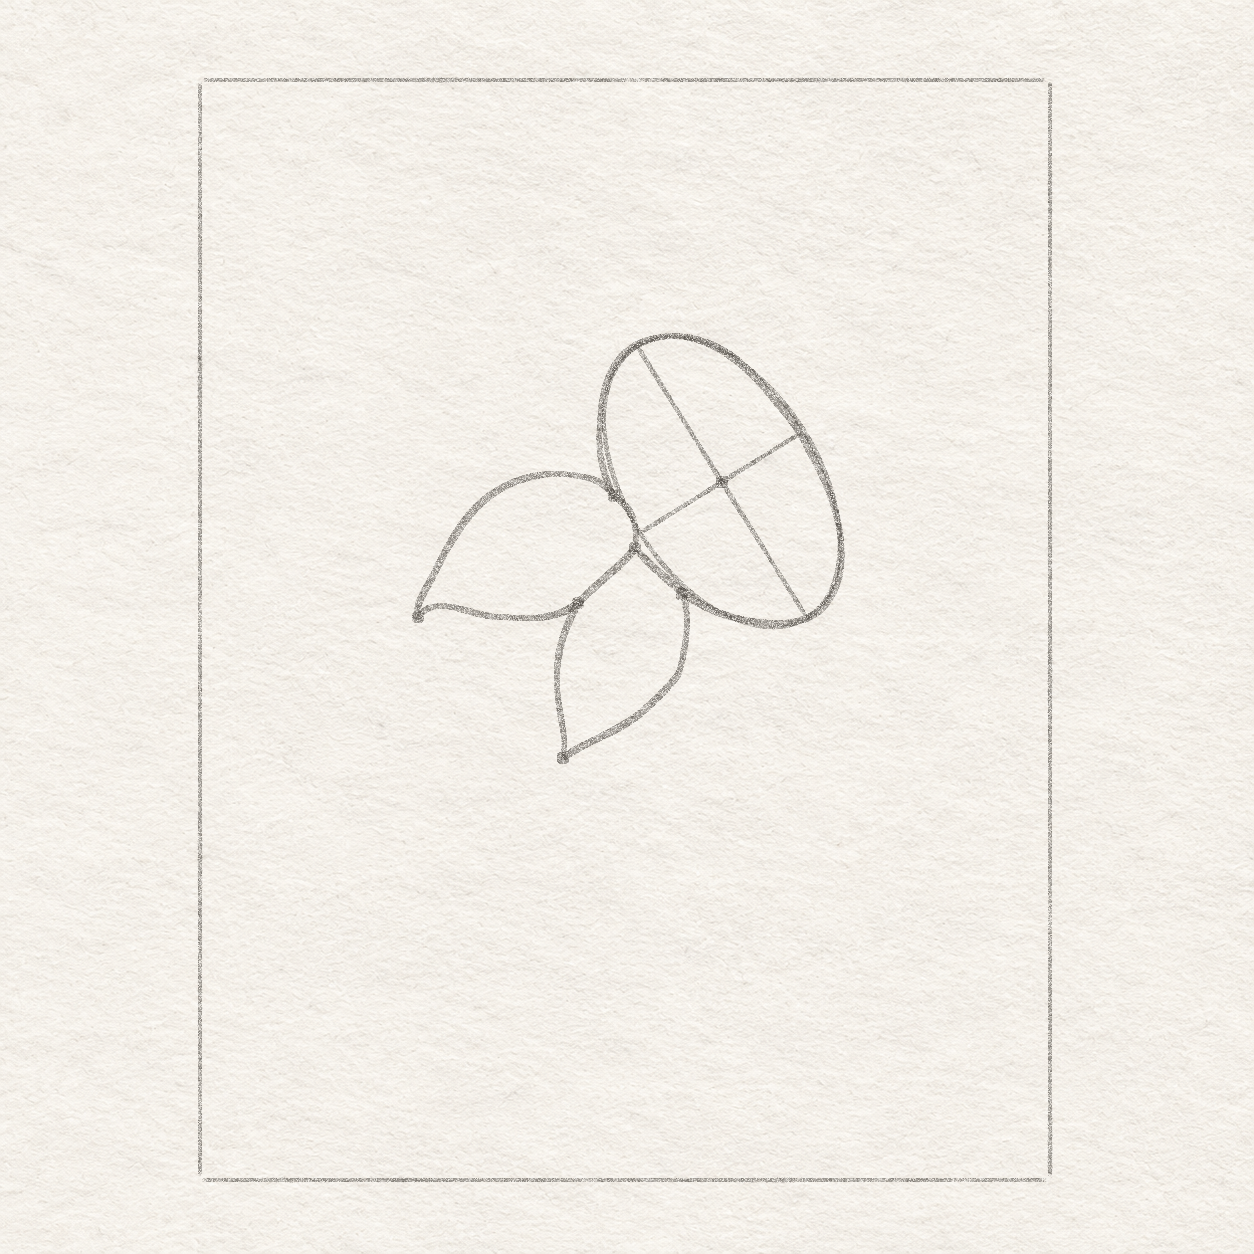
    A broad petal spans the left rim opening and hooks back from its pointed lower-left tip.
    Drawing 3A — Draw the broad foreground petalView larger
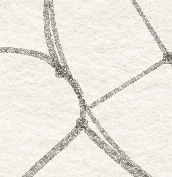
    Pencil close-up showing the head rim stopping above and below the broad front petal, with the faint construction oval behind it.
    Detail 3A.1 — Where the head rim stops and reappearsThe broad front petal covers the seed-head edge between the two stops. The faint oval still shows the head’s tilt.

    Instructions for Drawing 3A — Draw the broad foreground petal

    1. Find the broad petal’s outer tip about 3.5 cm across and 8.6 cm down from the top-left corner of the box. Put a light dot there.
    2. From the higher rim stop, draw the petal’s upper edge freehand. Bow it left and slightly up, then sweep down-left to the marked tip. Turn that tip back to the right with a tiny hooked bend. Run the lower edge almost level toward the head, then curve up-right to the lower rim stop. Round the short inner turn from that stop back up to the higher stop, keeping the darker line on the petal edge.
    3. The two petal contacts close the near edge. The older oval guide inside the petal stays very light.
    Next step — Draw the two lower petals
  2. Step 4 of 17 · Pencil

    Draw the two lower petals

    A narrower petal begins below the broad petal and curves back to a lower part of the seed-head rim.
    Drawing 4A — Draw the long down-left petalView larger

    Instructions for Drawing 4A — Draw the long down-left petal
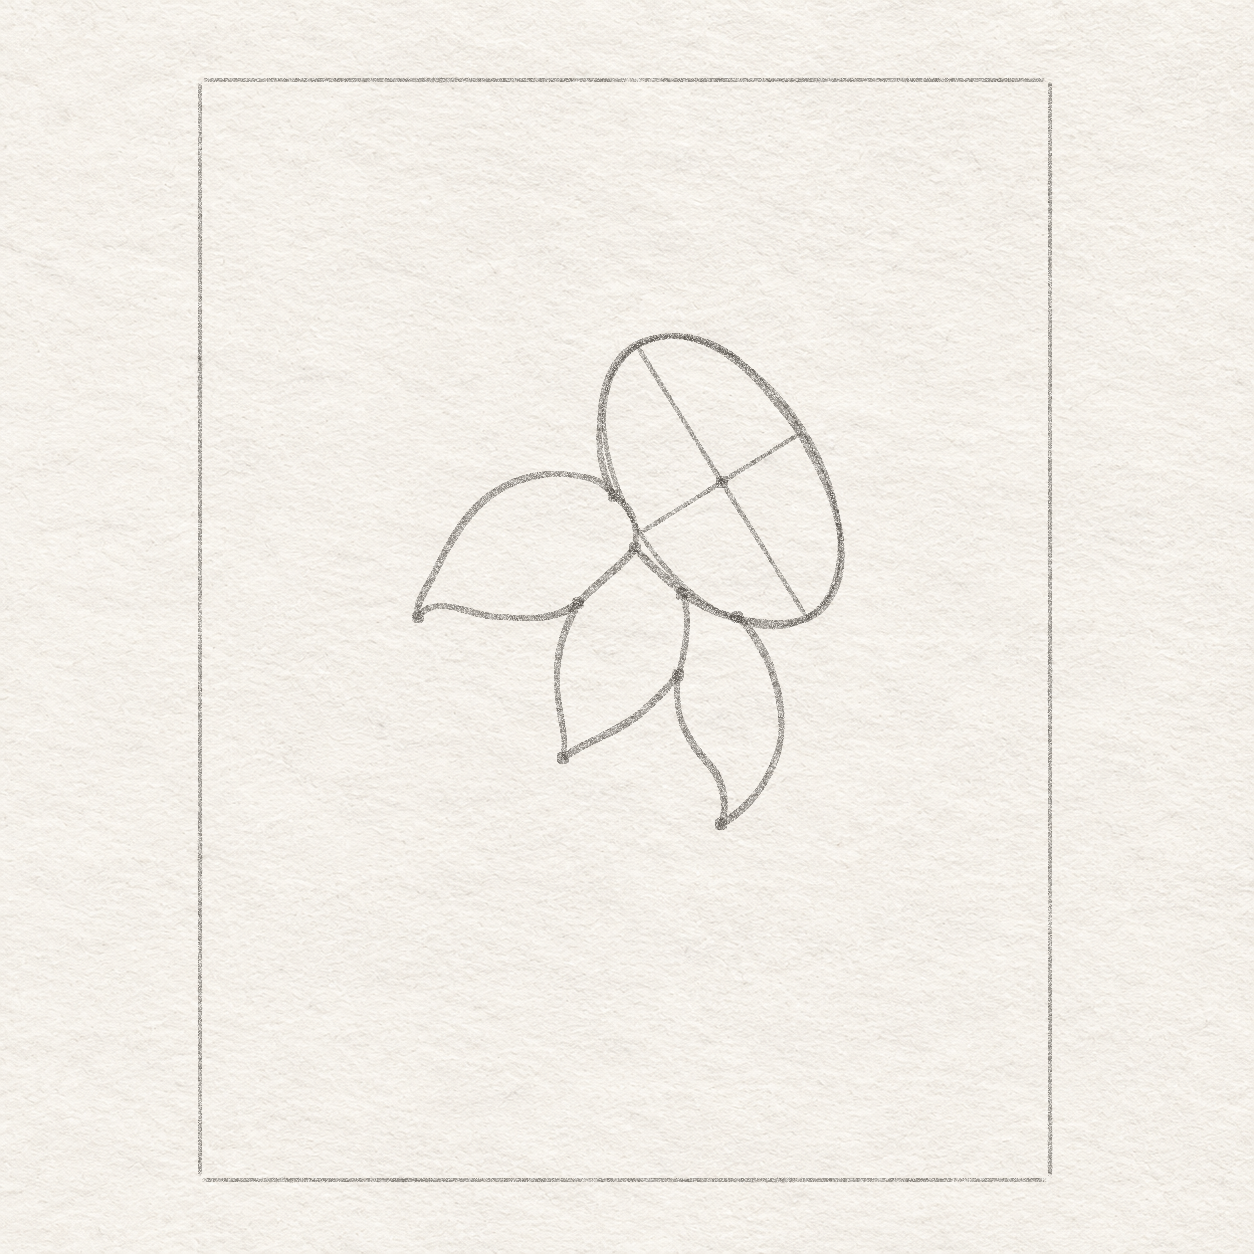
    1. From the top-left corner of the box, place a light dot about 5.8 cm across and 10.9 cm down. This is the tip of the long down-left petal.
    2. Measure 6 cm across the top of the box. Hold the ruler straight down from there and mark the actual lower edge of the broad front petal where it meets the ruler.
    3. At 7.7 cm across the box top, look straight down to the lower-left rim. Dot the lower curve where it meets the upright ruler. Leave the rim toward the right clear for the next petal.
    4. From the dot on the broad petal’s lower edge, draw the next edge freehand down and a little left. Let it turn back toward the plotted tip before you reach it. Turn neatly through that tip, then sweep up-right into the full outward bow and gradually bend up-left to the dot on the seed-head rim. Stop at both existing outlines.
    5. The new petal starts on the drawn edge of the broad petal. Its right-hand outline bends smoothly toward the rim and gives the next petal a place to start.
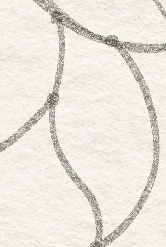
    The bottom petal branches from the earlier down-left petal and returns to the rim with a different outer curve.
    Drawing 4B — Draw the lower petal’s two curvesView larger
    Pencil close-up of the two lower petal edges, their branch and the long curved return toward the pointed bottom.
    Detail 4B.1 — Where the two lower petal edges separateThe bottom petal begins where its edge separates from the earlier down-left petal. Both curves turn before the low tip.

    Instructions for Drawing 4B — Draw the lower petal’s two curves

    1. Put a light dot about 8.3 cm across and 11.9 cm down from the top-left box corner. This tip should leave about 5.7 cm above the bottom line for the stem and leaves to fit below. Move the light dot before drawing the petal if that space is too small.
    2. At about 9.5 cm down from the box top, hold the ruler level. Mark its meeting with the right edge of the down-left petal. That dot is where the two outlines will divide.
    3. At 8.6 cm across the box top, look straight down to the bottom arc of the head. Dot the actual rim where it meets the upright ruler.
    4. Start at the dot on the down-left petal’s right edge. Draw freehand down from the dot. Ease slightly to the right as you descend, then bend more strongly right before curving back toward the plotted tip. Turn at the tip and sweep up-right in a broad arc. Curve up and left from its widest point to the dot on the bottom of the rim, then stop.
    5. The left edge leaves the earlier edge partway down its bow. The two contours divide gradually and are distinctly separated before the new tip.
    Next step — Build the petals above the head
  3. Step 5 of 17 · Pencil

    Build the petals above the head

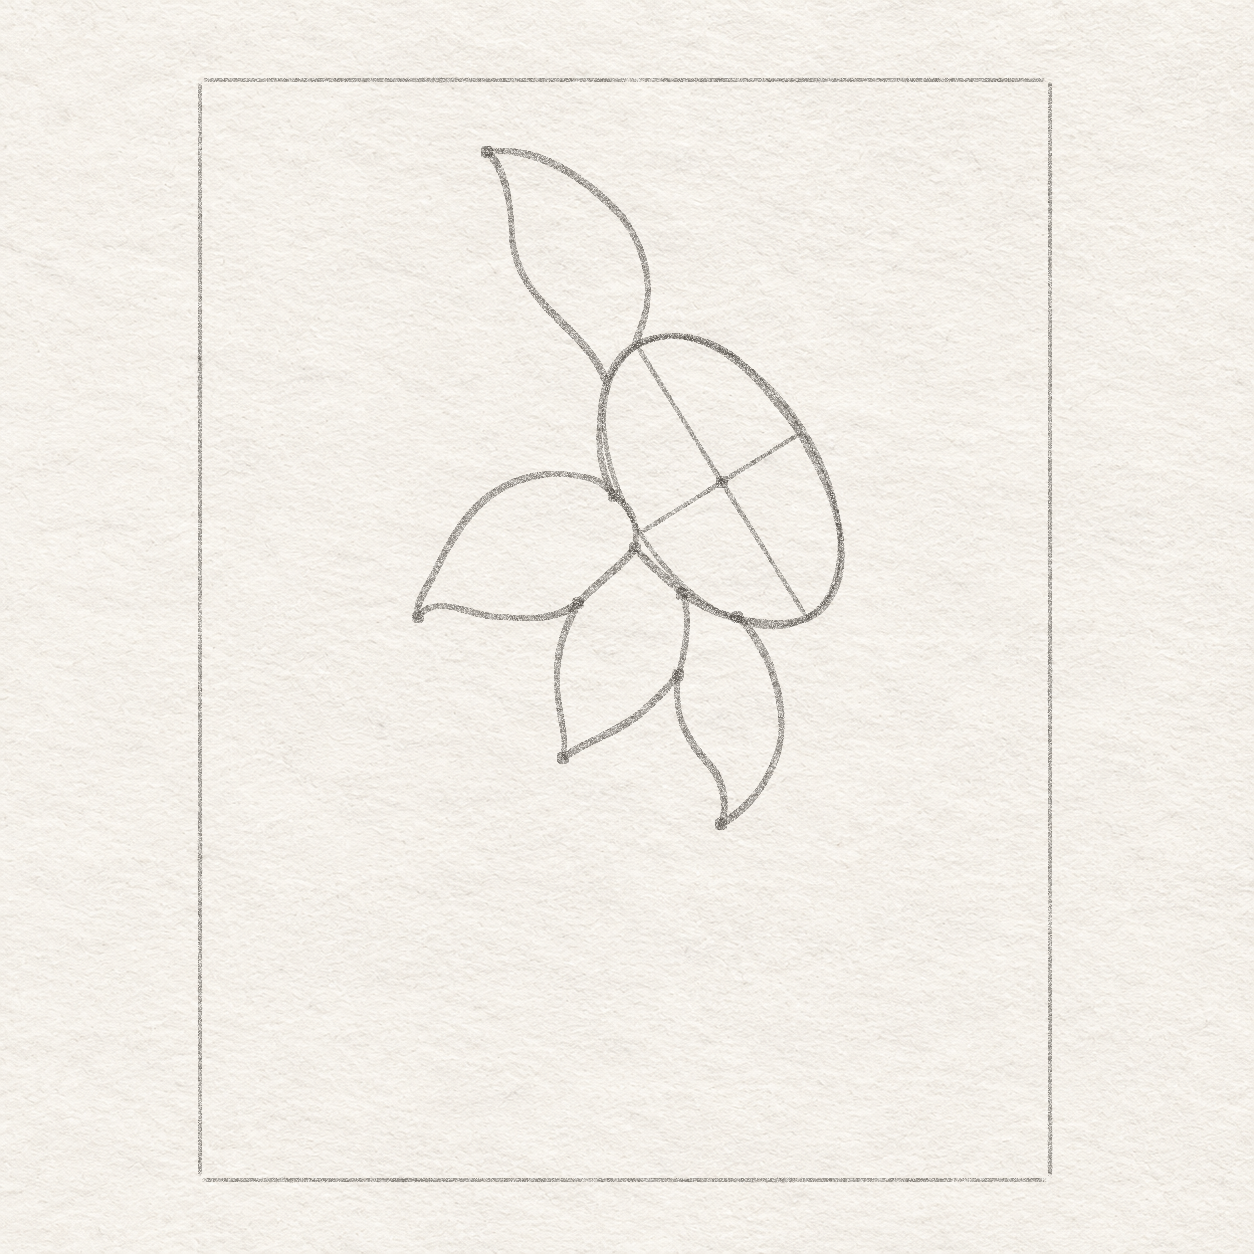
    A new upper-left petal is visible beside the earlier pencil outlines.
    Drawing 5A — Draw the upper-left petalView larger

    Instructions for Drawing 5A — Draw the upper-left petal
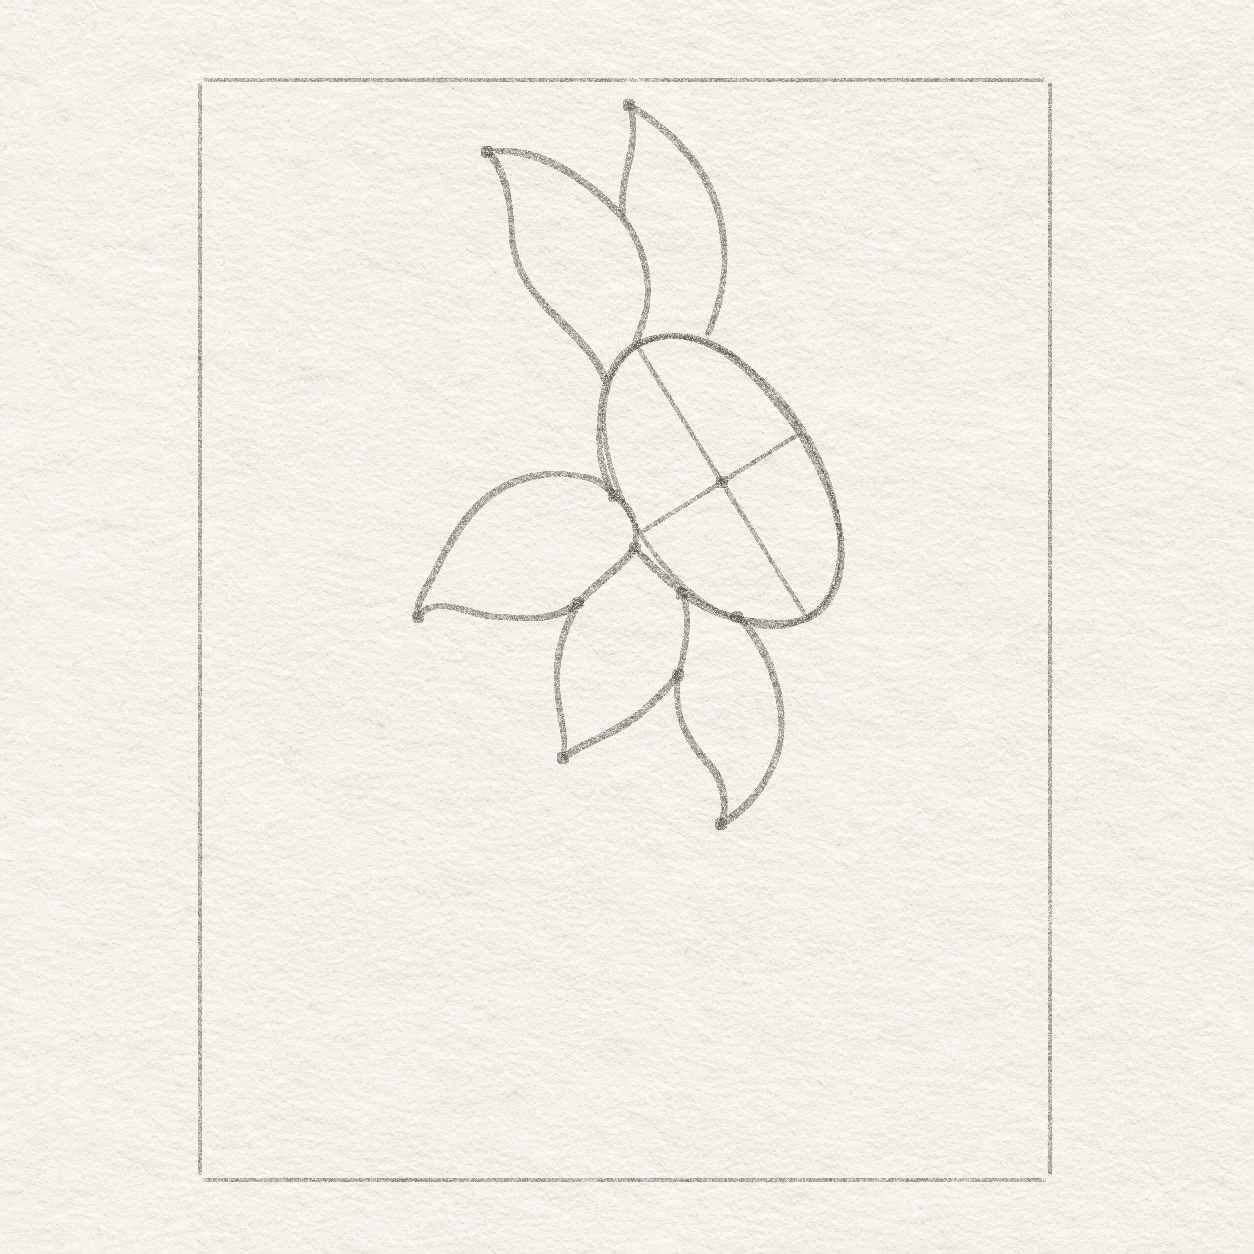
    1. Use the top-left corner of the box to place the next tip dot about 4.6 cm across and 1.2 cm down. It is the outer point for this one petal.
    2. At about 4.9 cm down from the box top, hold the ruler level and start where it meets the upper-left rim. Draw freehand left and up, then turn more upright to reach the plotted tip. From the tip, bow right and then down into a rounded shoulder. At about 1 cm below the tip, aim for a shoulder about 2 cm right of it. Check by eye without adding a dot. Bring the edge down to the upper rim where the upright ruler at 6.9 cm across the box top crosses it.
    3. Both edges meet the actual upper-left rim. The right shoulder has room for the next petal to start partway down it. Keep the outer tip pointed.
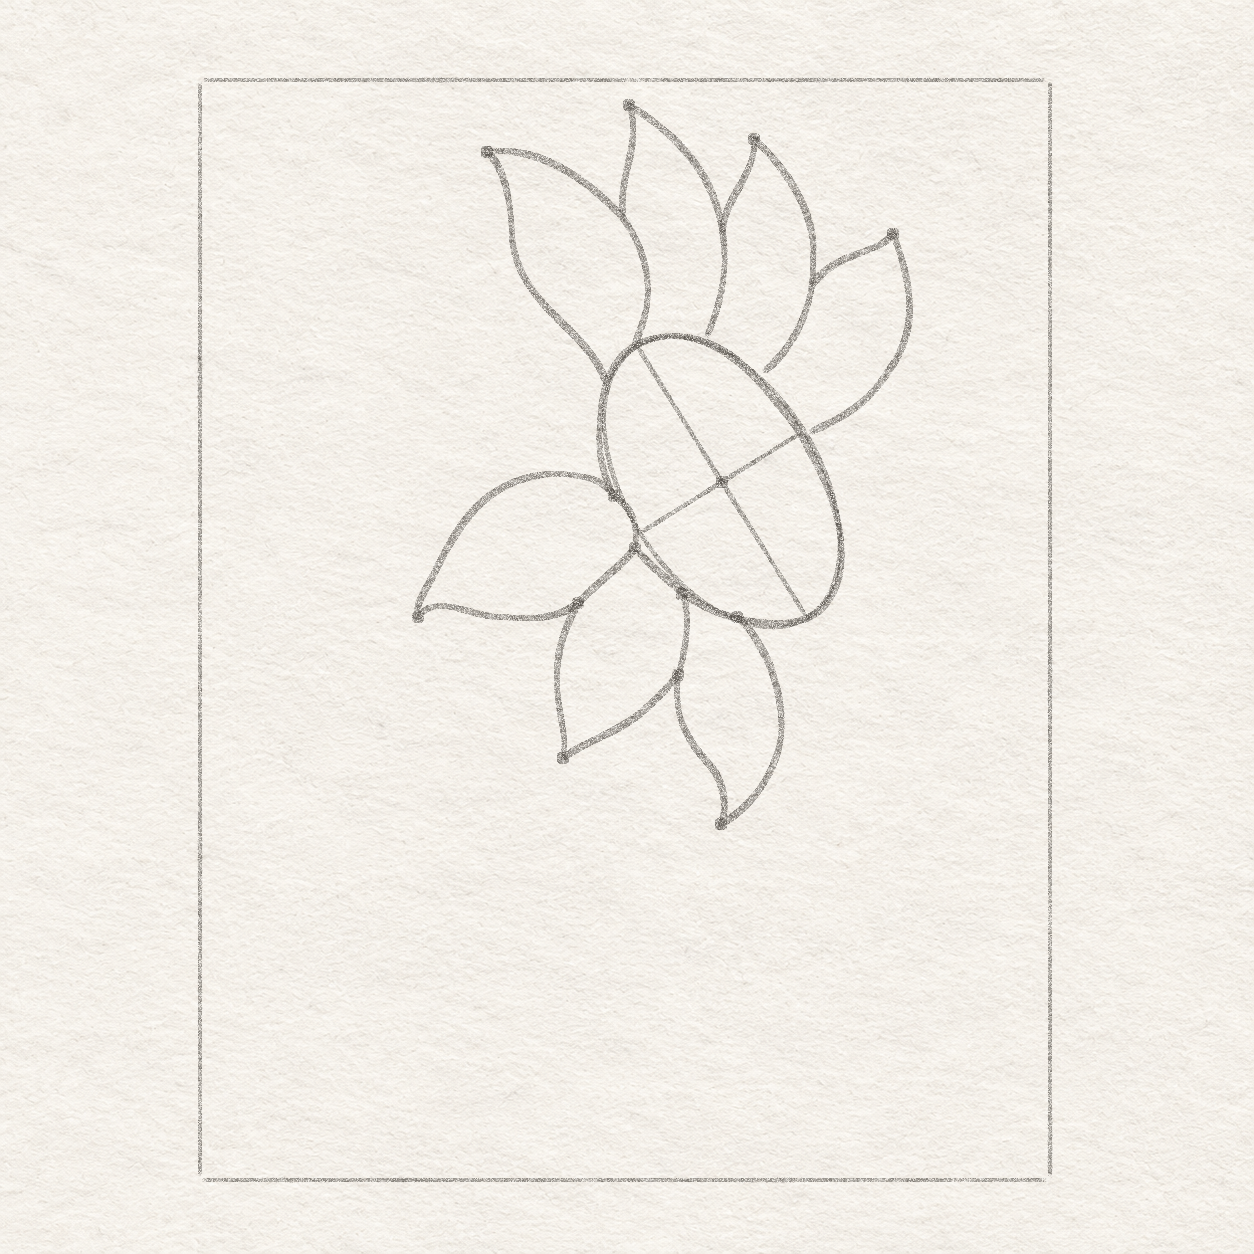
    A new highest petal is visible beside the earlier pencil outlines.
    Drawing 5B — Draw the highest petalView larger

    Instructions for Drawing 5B — Draw the highest petal
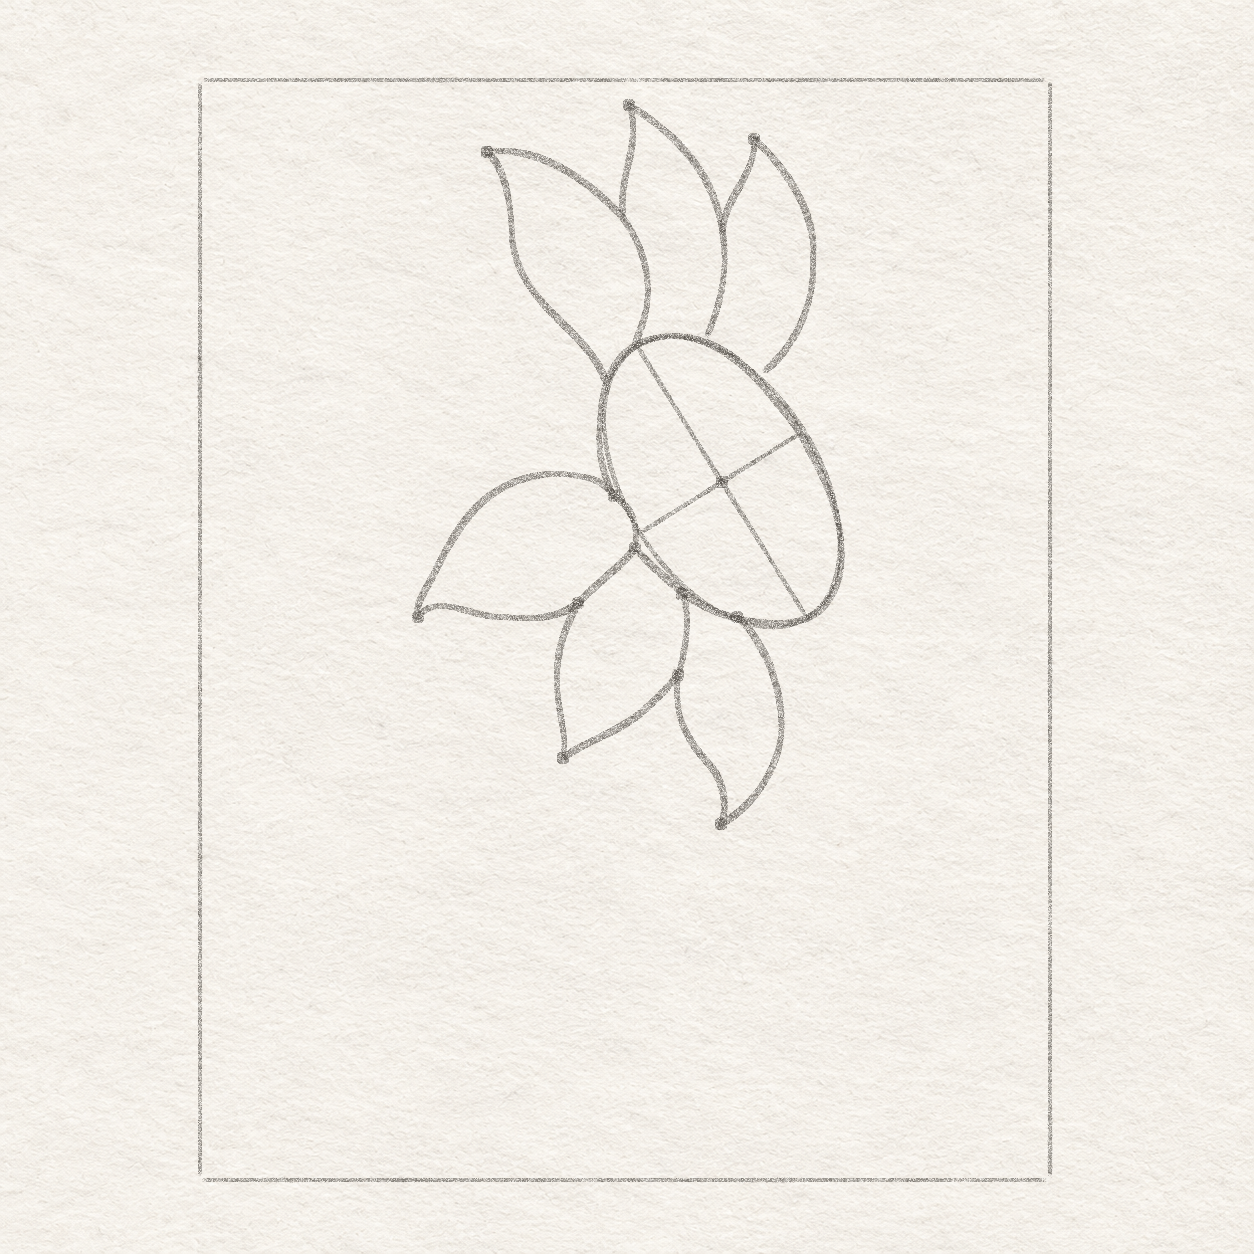
    1. Use the top-left corner of the box to place the next tip dot about 6.9 cm across and 4 mm down. It is the outer point for this one petal.
    2. At about 2.2 cm down from the box top, hold the ruler level. Start where it meets the right shoulder of the upper-left petal. Curve freehand up toward the marked high tip, aiming a little right of it before turning back into it. Sweep down-right from the tip to make a rounded outer bow. Aim back down-left toward the top of the head, where the upright ruler at 8.1 cm across the box top crosses the rim. Stop a hair before the rim in pencil.
    3. The narrow edge touches the earlier shoulder. The longer round side leaves only a hairline of paper just before the rim, to be closed in ink.
    A new tall right petal is visible beside the earlier pencil outlines.
    Drawing 5C — Draw the tall right petalView larger

    Instructions for Drawing 5C — Draw the tall right petal

    1. Use the top-left corner of the box to place the next tip dot about 8.9 cm across and 9 mm down. It is the outer point for this one petal.
    2. At about 2.5 cm down from the box top, hold the ruler level and find the right edge of the highest petal. Start at that meeting and bow up-right to the plotted tip freehand. From the tip sweep farther right, then turn down-left toward the upper-right rim. Use its crossing with the upright ruler at 9 cm across the box top to aim. Stop about 1 mm short of the rim in pencil.
    3. The first edge touches the earlier petal. The wide return stops close to the head rim without crossing it.
    Next step — Build the upper-right petals
  4. Step 6 of 17 · Pencil

    Build the upper-right petals

    A new right diagonal petal is visible beside the earlier pencil outlines.
    Drawing 6A — Draw the right diagonal petalView larger

    Instructions for Drawing 6A — Draw the right diagonal petal
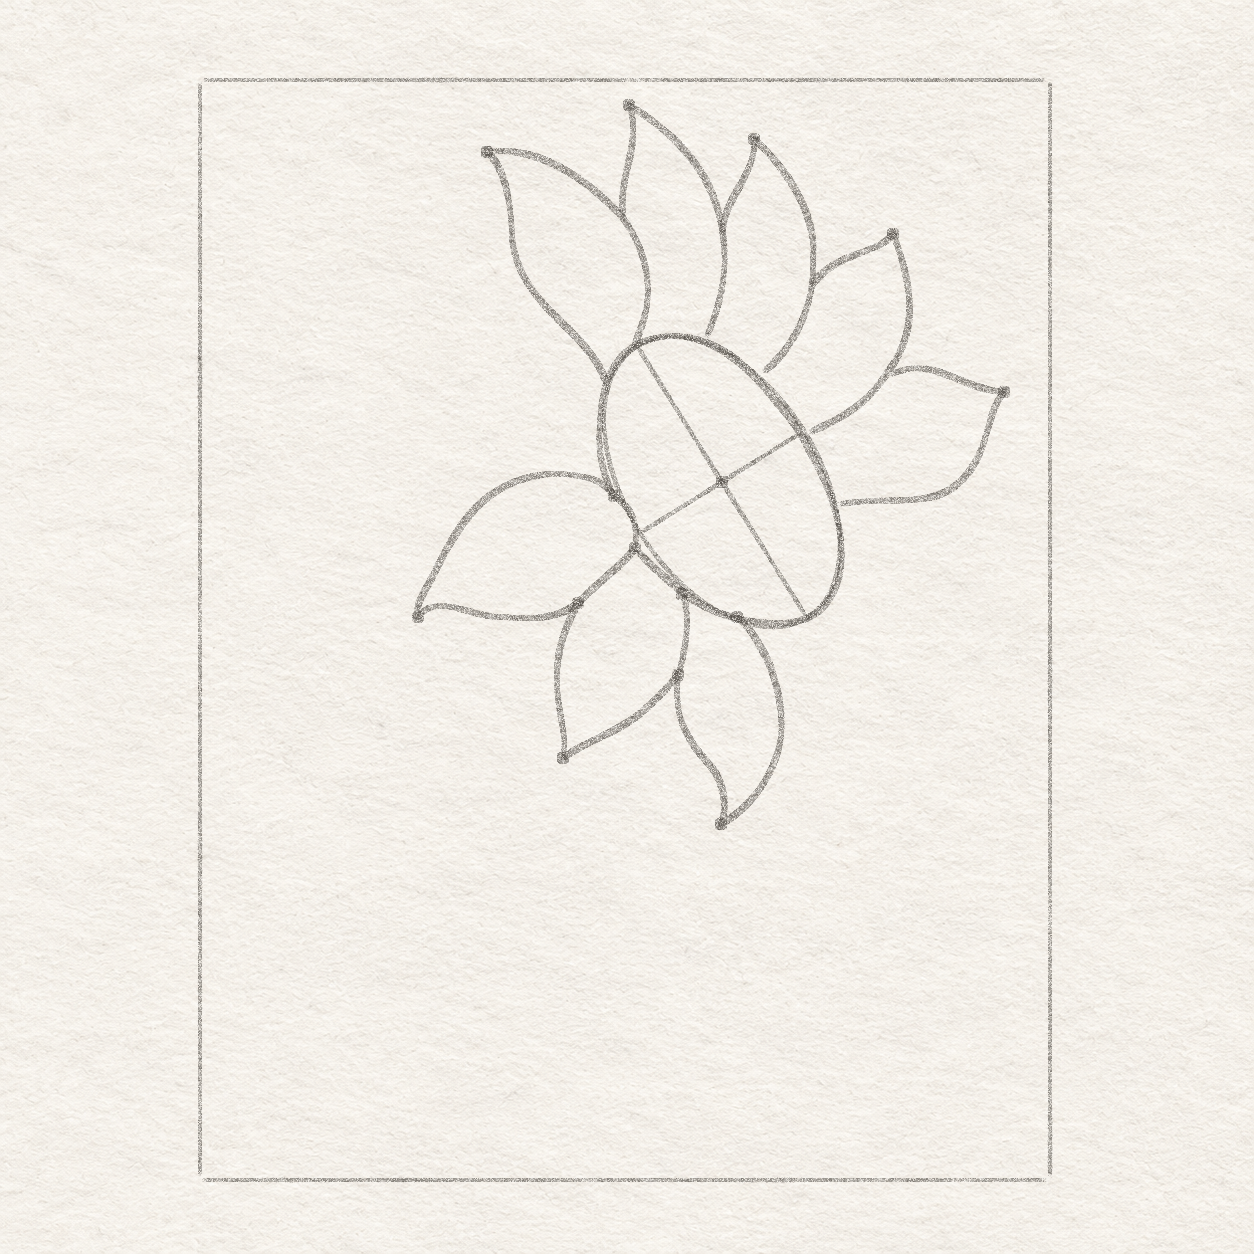
    1. Use the top-left corner of the box to place the next tip dot about 11.1 cm across and 2.5 cm down. It is the outer point for this one petal.
    2. At about 3.3 cm down from the box top, hold the ruler level. Start where it meets the outer right edge of the tall petal you just drew. Sweep up-right freehand to the tip dot, making a small inward turn before the point. Round down the outer right side, then return left toward the right rim at about 5.6 cm down. Use your actual rim at that height to aim and stop about 1 mm short in pencil.
    3. The tip sits above and right of the start. The return points down-left to the rim and stops just before it until ink.
    A new right-facing petal is visible beside the earlier pencil outlines.
    Drawing 6B — Draw the right-facing petalView larger

    Instructions for Drawing 6B — Draw the right-facing petal
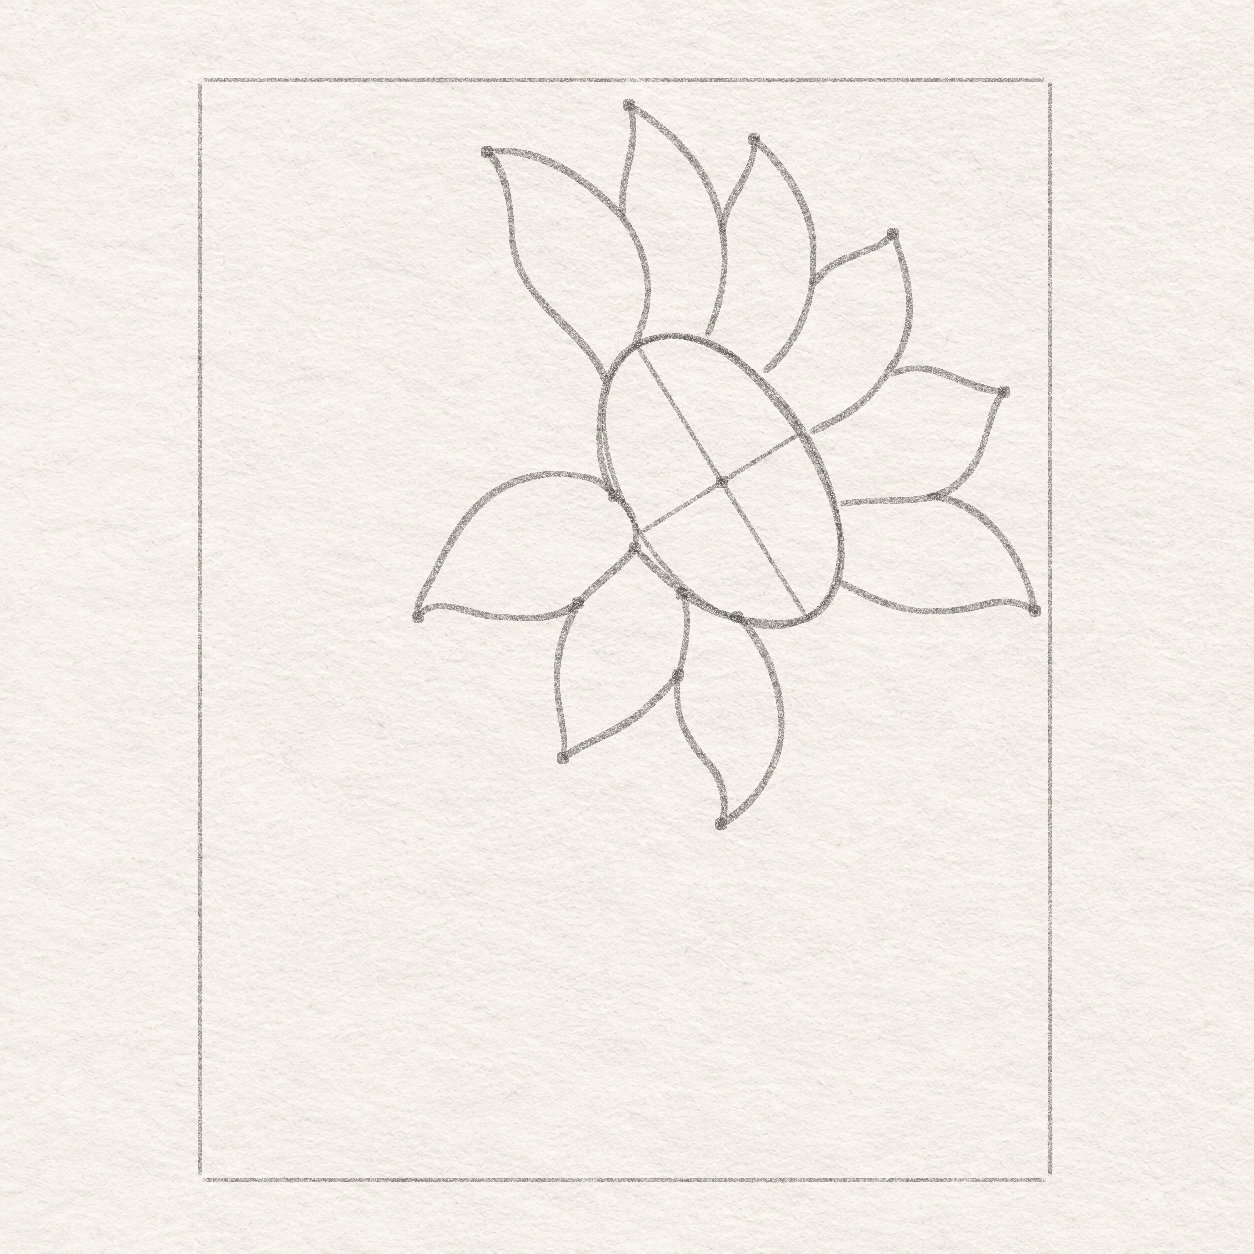
    1. Use the top-left corner of the box to place the next tip dot about 12.9 cm across and 5 cm down. It is the outer point for this one petal.
    2. At about 4.7 cm down from the box top, hold the ruler level and start where it meets the diagonal petal’s outer right edge. Bow freehand gently up and right, then flatten the sweep into the tip. Return down-left through the deep outer curve and aim for the right rim at about 6.8 cm down. Leave a hairline of paper before the actual rim.
    3. The outer edge dips lower before it returns toward the head. The pencil end stops close to the unbroken rim.
    A new farthest-right petal is visible beside the earlier pencil outlines.
    Drawing 6C — Draw the farthest-right petalView larger

    Instructions for Drawing 6C — Draw the farthest-right petal

    1. Use the top-left corner of the box to place the next tip dot about 13.4 cm across and 8.5 cm down. It is the outer point for this one petal.
    2. Measure 11.6 cm across the box top and hold the ruler straight down. Find where it meets the lower edge of the right-facing petal. Start there, curve freehand down-right to the new tip and turn left into a shallow bow. Let the lower edge climb left until it meets the lower-right rim at about 8 cm down. Use the actual rim at that level.
    3. The new tip lies lower than all of the adjacent right-facing edge. Leave the inside of both petals open.
    Next step — Finish the two low-right petals
  5. Step 7 of 17 · Pencil

    Finish the two low-right petals

    A new low-right petal is visible beside the earlier pencil outlines.
    Drawing 7A — Draw the low-right petalView larger

    Instructions for Drawing 7A — Draw the low-right petal
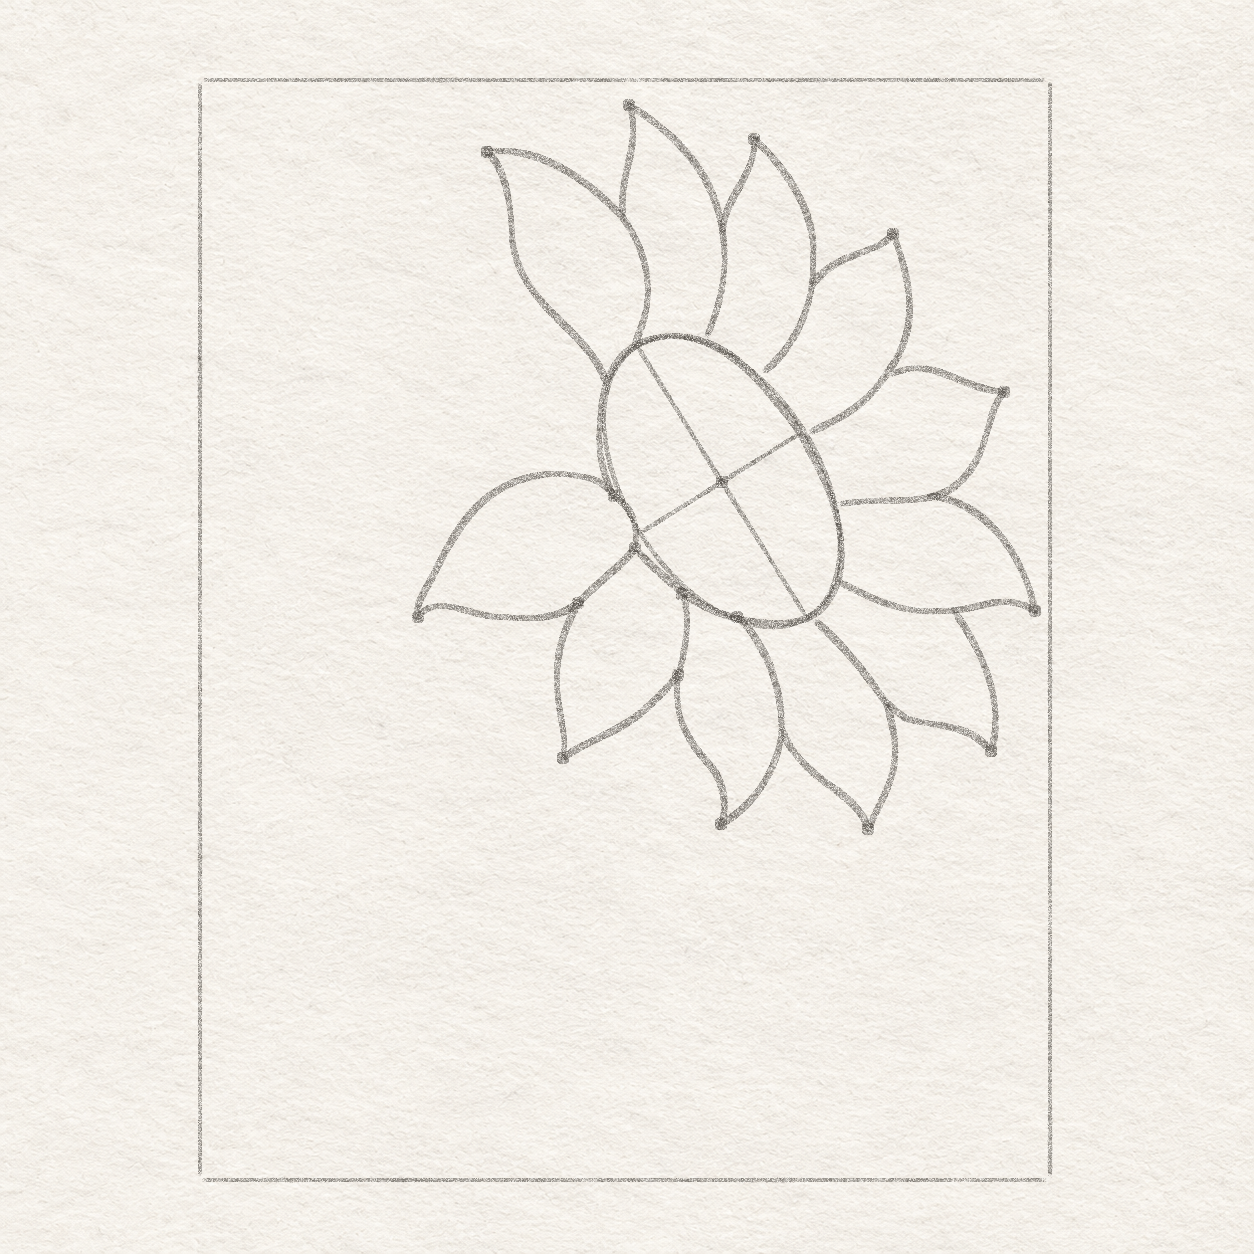
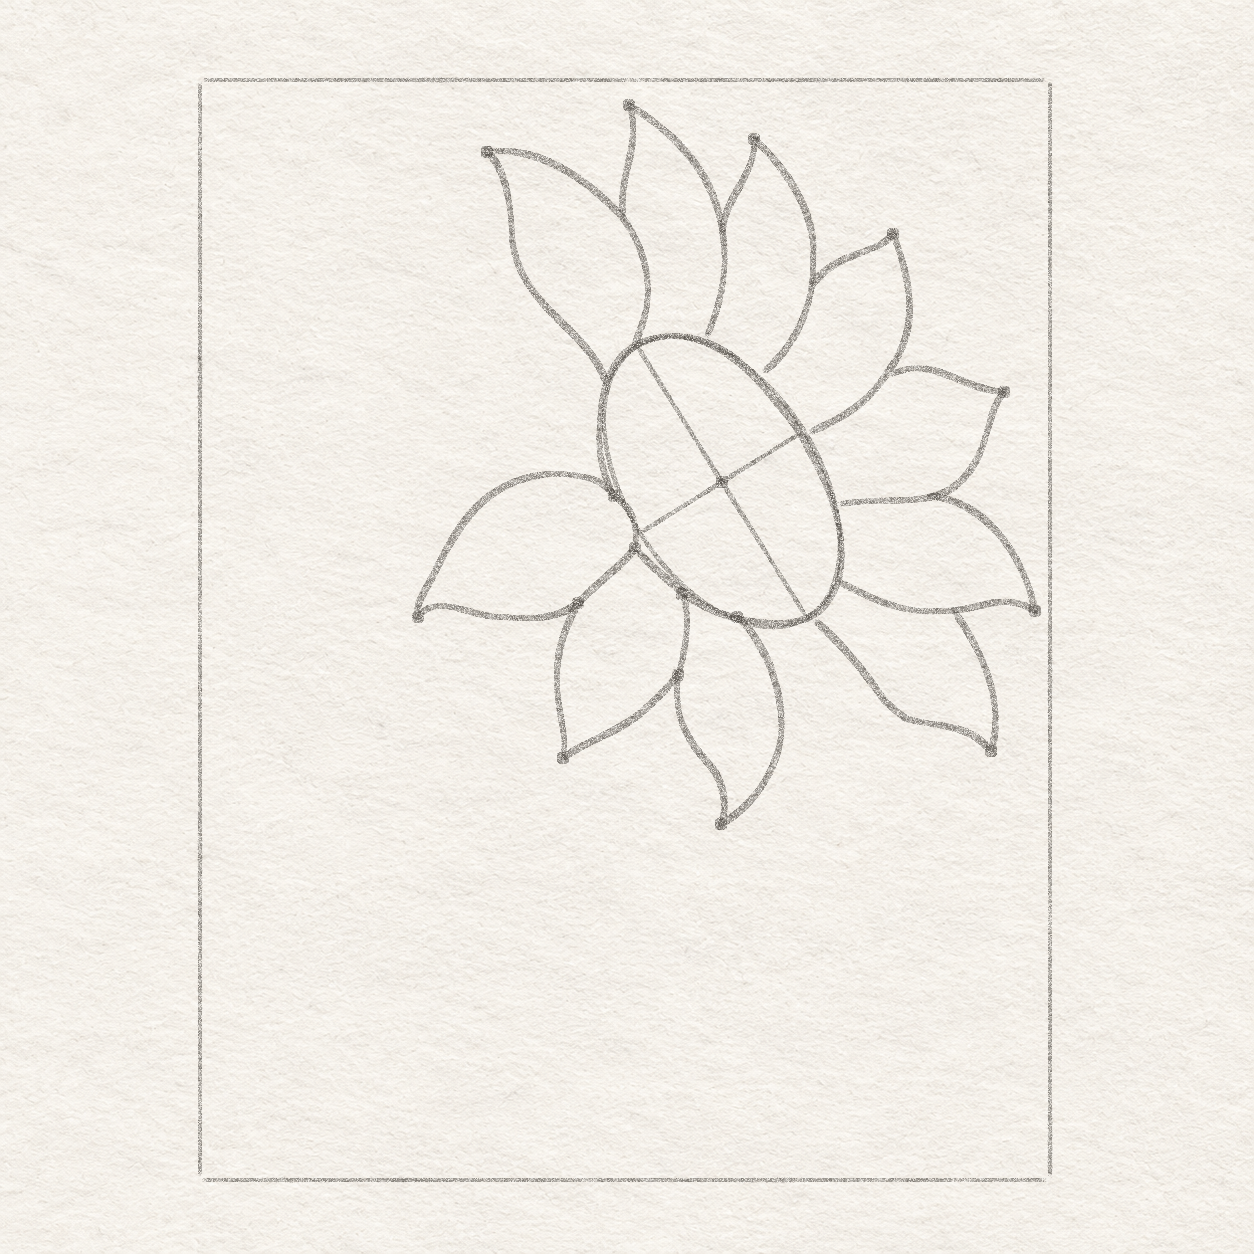
    1. Use the top-left corner of the box to place the next tip dot about 12.7 cm across and 10.7 cm down. It is the outer point for this one petal.
    2. At about 12.1 cm across the box top, hold the ruler straight down. Start where it meets the lower edge of the petal you just drew. Curve freehand down-right and then inward toward the new tip. Return up-left to a shallow bend at about 10.9 cm across and 9.9 cm down from the box corner. Continue toward the lower rim where the upright ruler at 9.8 cm across crosses it. Stop a hair before it in pencil.
    3. The shallow bend gives the next petal a real stop. Keep the short return from that bend visible. Leave a hairline at the rim until ink.
    A new pointed lower-right petal is visible beside the earlier pencil outlines.
    Drawing 7B — Draw the pointed lower-right petalView larger

    Instructions for Drawing 7B — Draw the pointed lower-right petal

    1. Use the top-left corner of the box to place the next tip dot about 10.7 cm across and 12 cm down. It is the outer point for this one petal.
    2. At about 10.4 cm down from the box top, hold the ruler level and start where it meets the bottom petal’s right outline. Curve freehand down-right through the marked low tip. Turn up-right and bow outward, then bend up-left to the visible turn on the low-right petal’s lower edge. Stop on the turn you drew in the previous drawing.
    3. The new edge stops where it meets the low-right petal. Keep the earlier line from that join up to the seed-head rim.
    Next step — Draw the two left-facing petals
  6. Step 8 of 17 · Pencil

    Draw the two left-facing petals

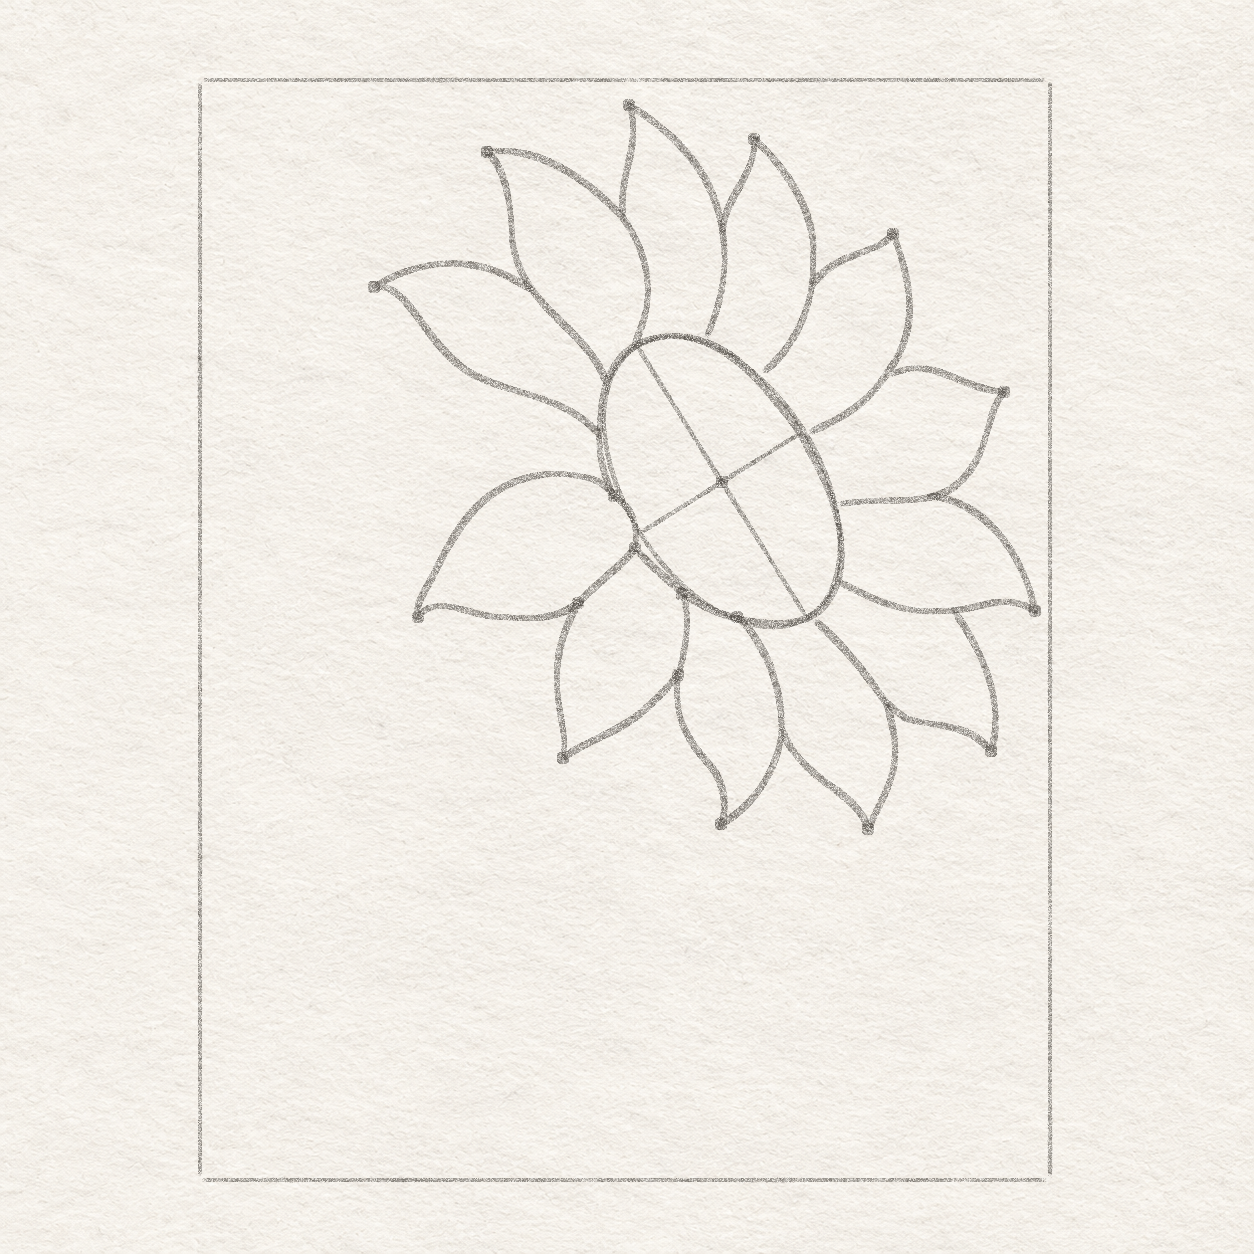
    A new left diagonal petal is visible beside the earlier pencil outlines.
    Drawing 8A — Draw the left diagonal petalView larger

    Instructions for Drawing 8A — Draw the left diagonal petal
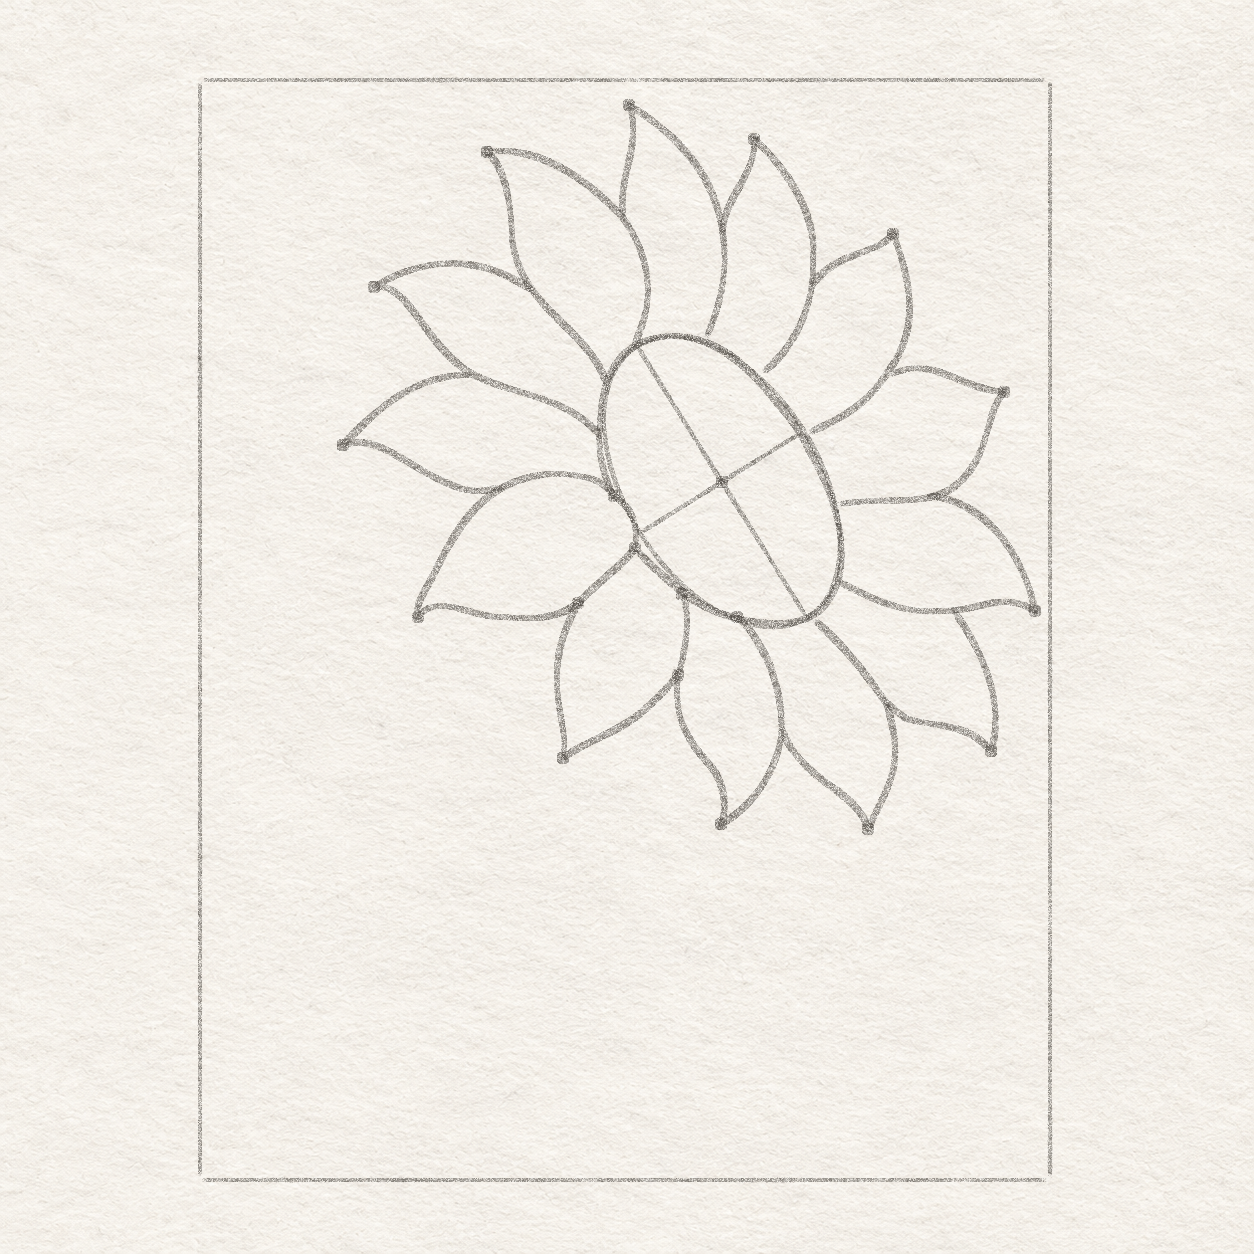
    1. Use the top-left corner of the box to place the next tip dot about 2.8 cm across and 3.3 cm down. It is the outer point for this one petal.
    2. At about 3.4 cm down from the box top, hold the ruler level and start where it meets the upper-left petal’s left edge. Curve freehand up-left, bow over the shoulder and descend a little to the marked left tip. Return down-right, steepen into the long bend and meet the actual left rim at about 5.7 cm down.
    3. The new edge is attached at the shoulder above and at the rim below. Both earlier contours remain visible.
    A new wide left petal is visible beside the earlier pencil outlines.
    Drawing 8B — Draw the wide left petalView larger

    Instructions for Drawing 8B — Draw the wide left petal

    1. Use the top-left corner of the box to place the next tip dot about 2.3 cm across and 5.8 cm down. It is the outer point for this one petal.
    2. At 4.4 cm across the box top, look straight down with the ruler to the lower edge of the left diagonal petal. Start where they meet and bow freehand to the marked left tip. Curl gently down-right into the round lower edge. Bring it back up to the top outline of the broad front petal where the upright ruler at 4.9 cm across meets that outline.
    3. The open petal face contains no fold line at this stage. Its outer edges meet only the two named earlier petals.
    Next step — Draw the stem and leaf outlines

Chapter 3 — Add the stem, leaves and seeds

2 steps · 6 progress drawings · Pencil
  1. Step 9 of 17 · Pencil

    Draw the stem and leaf outlines

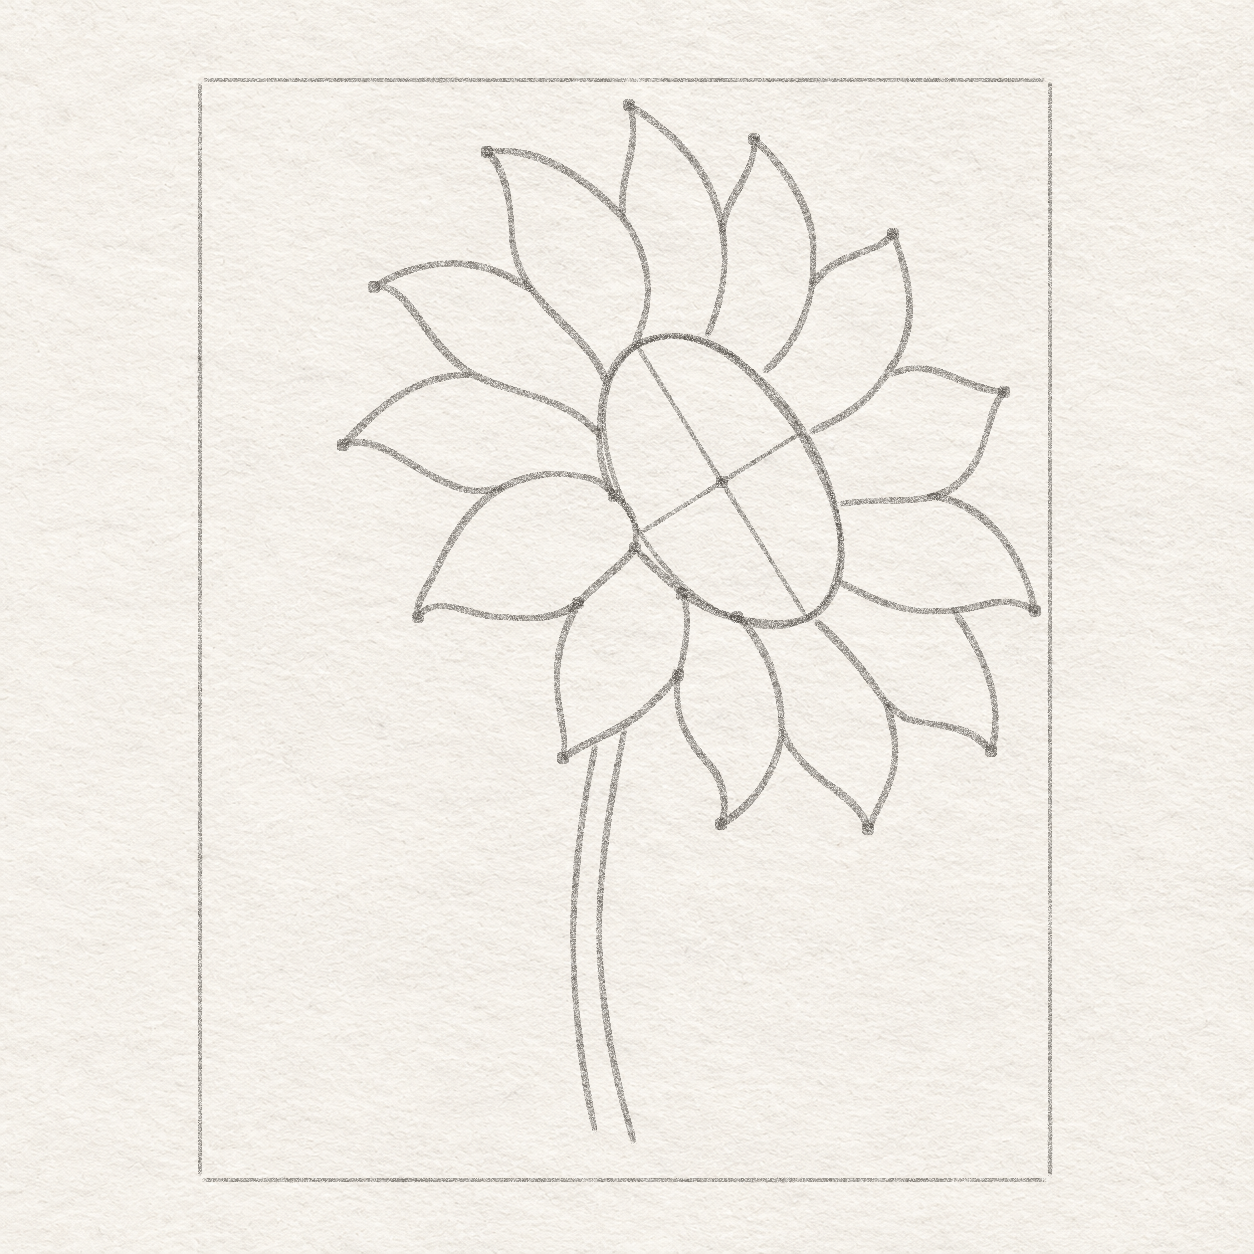
    Two slightly bowed pencil stem edges emerge separately from beneath the long down-left petal.
    Drawing 9A — Select the two stem bordersView larger

    Instructions for Drawing 9A — Select the two stem borders
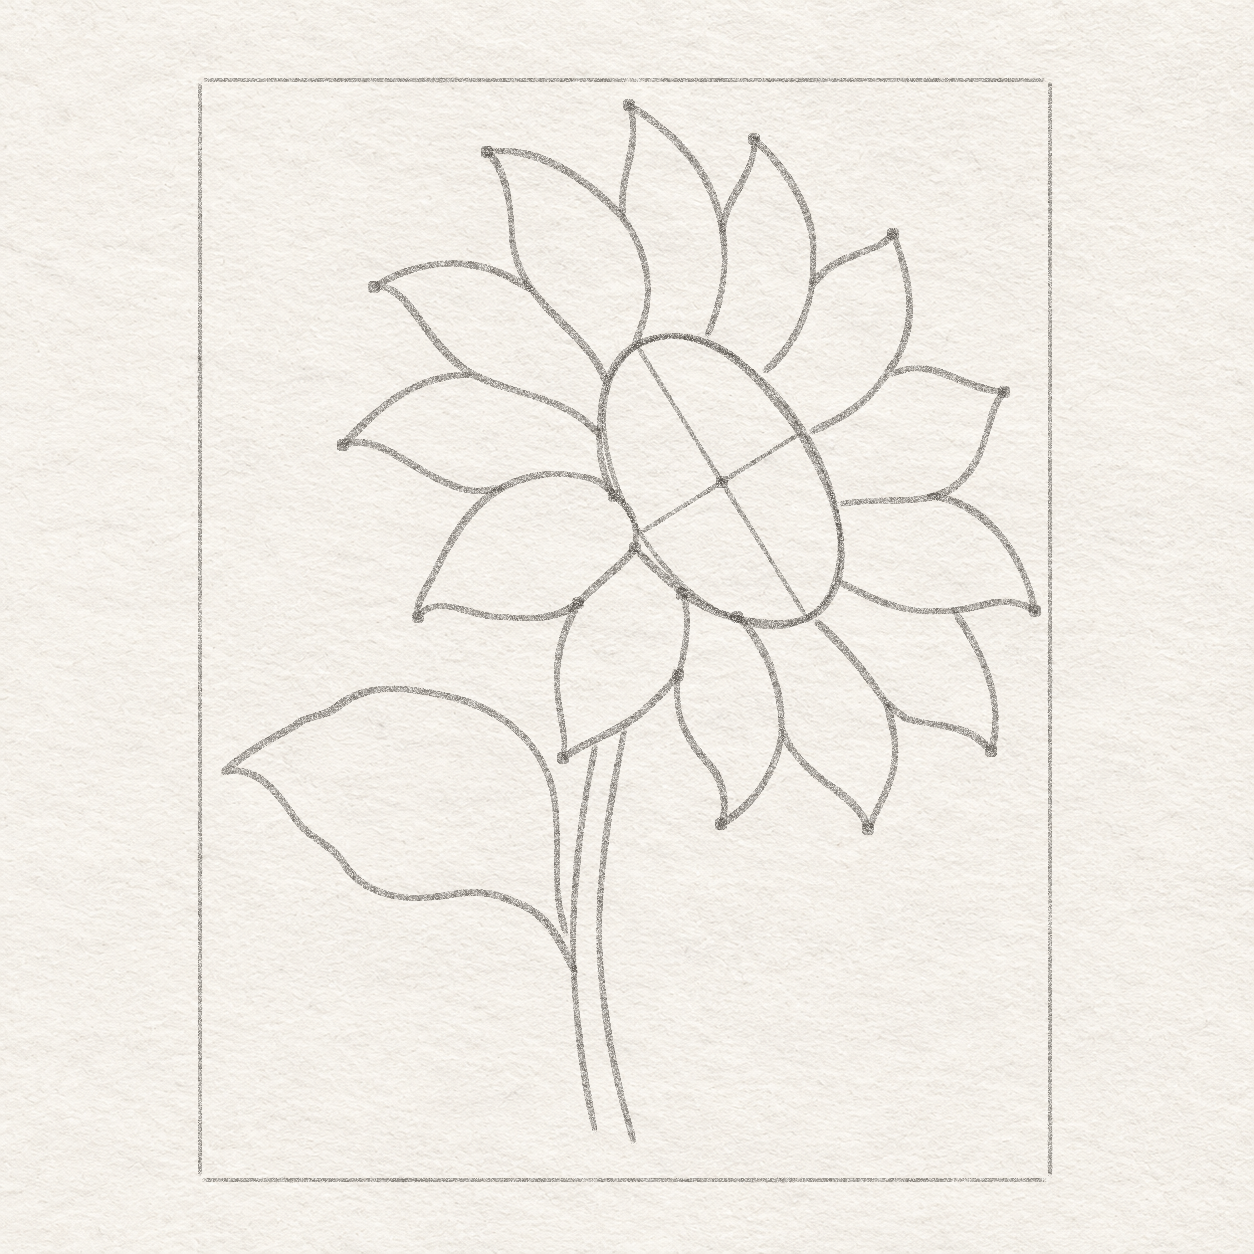
    1. Hold the ruler straight down at 6.3 cm across the box top and find the return edge of the long down-left petal. Start a hair below that edge. Draw freehand down-left in a shallow sweep, reaching a bend about 6 cm across and 13.7 cm down from the box corner. Curve back down-right to a stop about 6.3 cm across and 16.8 cm down.
    2. Hold the ruler straight down at 6.8 cm across the box top. Start just below the same return edge, a little above and to the right of the first start. Curve freehand down-left beside the first edge, leaving about 4 mm of paper between them halfway down. Sweep down-right to a stop about 7 cm across and 17 cm down.
    3. The two starts remain distinct below the petal. Ink will close any hairline space above them. Keep their lower ends open and slightly slanted right.
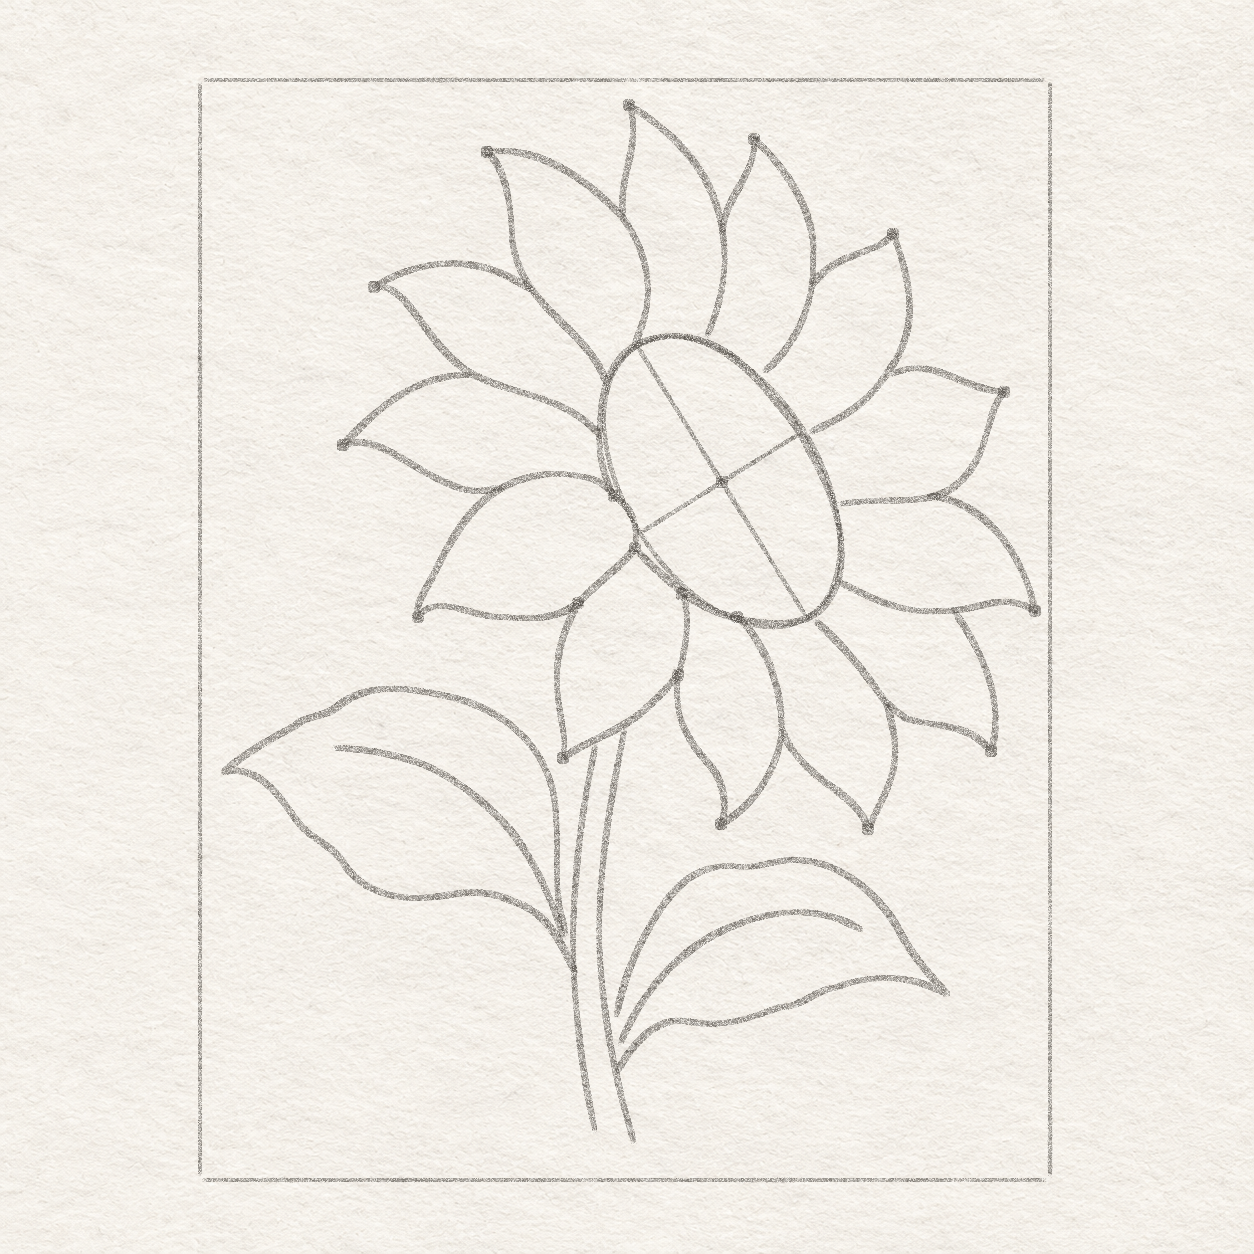
    The left leaf curves out from the stem and comes back at two levels. The higher pencil end stops just before the stem.
    Drawing 9B — Curve out the left leafView larger

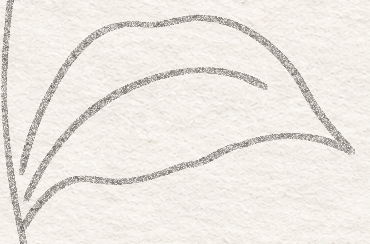
    Instructions for Drawing 9B — Curve out the left leaf
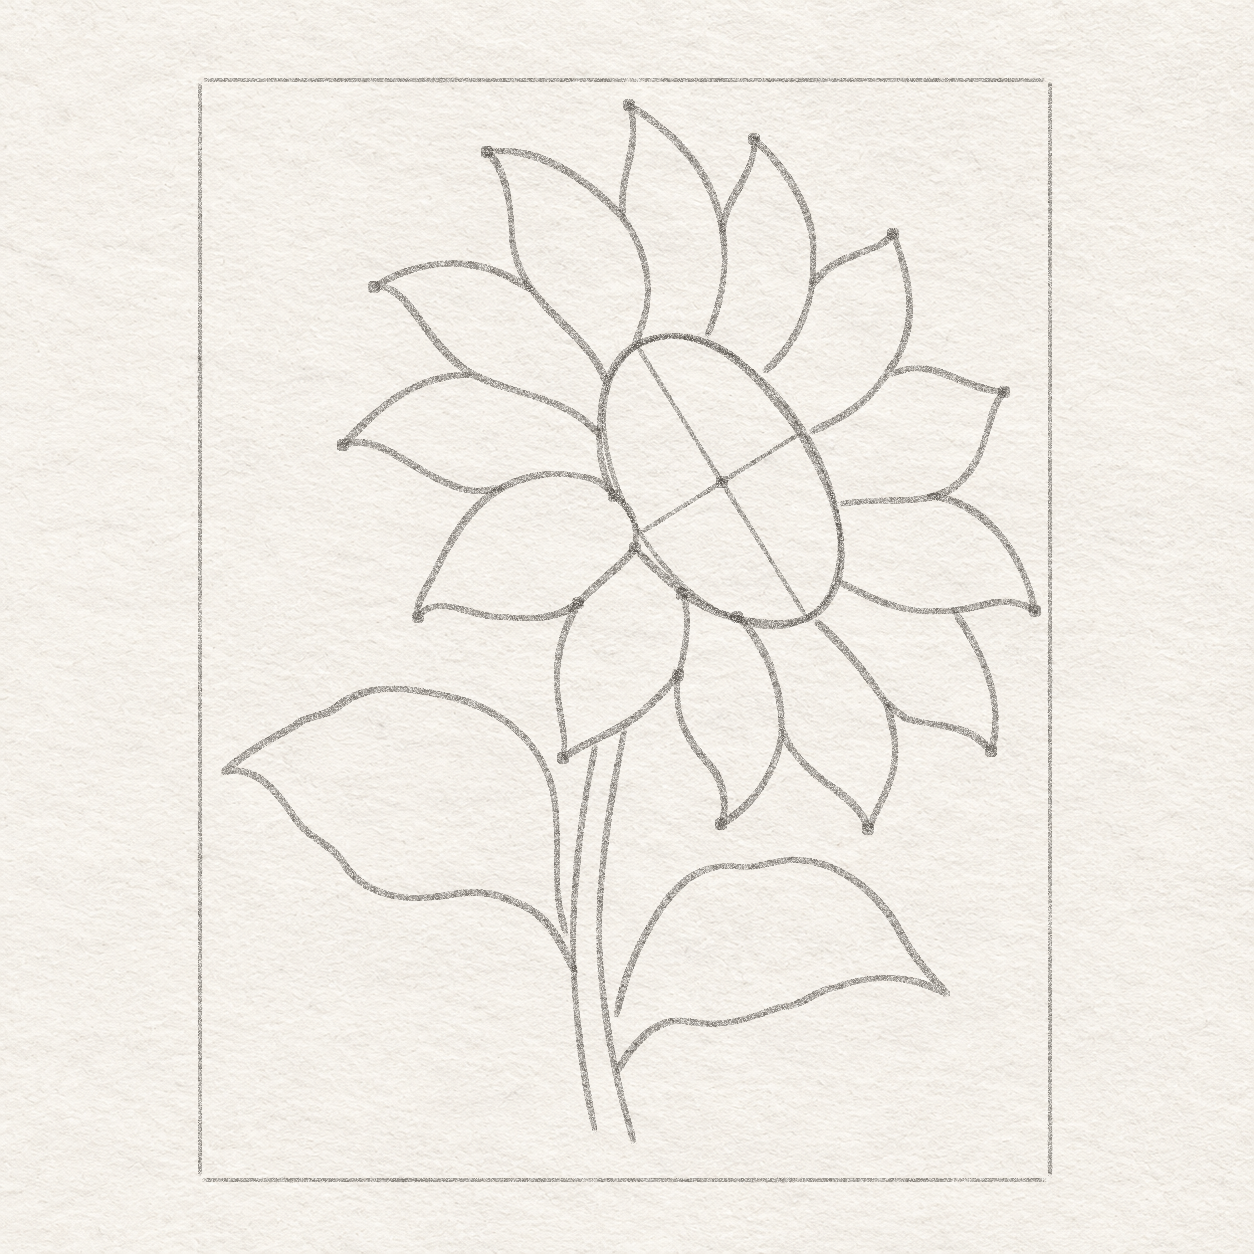
    1. At about 14.3 cm down from the box top, hold the ruler level and start on the left stem edge. Curve freehand up-left into a shallow dip, then sweep up to a tip about 4 mm across and 11.1 cm down from the box corner. From the tip sweep up-right through a shoulder about 2.9 cm across and 9.8 cm down. Bow right and then down toward the left stem edge at about 13.7 cm down. Stop a hair short of the stem in pencil. Leave the two root levels separate.
    2. The lower leaf edge meets the stem first. At the higher root, leave only a hairline of paper before the stem. The ink will close that tiny gap.
    The low right leaf has a pointed outside end. Its lower root meets the stem and its higher pencil end stops short.
    Drawing 9C — Curve out the lower right leafView larger

    Instructions for Drawing 9C — Curve out the lower right leaf

    1. At about 15.9 cm down from the box top, hold the ruler level and start on the right stem edge. Draw freehand up-right through a low round bend to a tip about 12 cm across and 14.6 cm down from the box corner. Return up-left through a wide shoulder about 9.5 cm across and 12.5 cm down. Bend down-left toward the stem at about 15 cm down. Stop about 2 mm short of the stem in pencil.
    2. The right tip sits farther right and lower than the left tip. The lower right root touches the stem, and the higher right root stays just short until ink.
    Next step — Draw the veins and six small seeds
  2. Step 10 of 17 · Pencil

    Draw the veins and six small seeds

    Two interior pencil veins start between the leaf contacts and taper out inside their respective leaves.
    Drawing 10A — Select the two principal veinsView larger
    Pencil close-up of the left vein just inside the leaf, with a hairline gap between the higher leaf end and the stem.
    Detail 10A.1 — Left vein beside the higher pencil rootBegin just inside the left leaf, a little left and below its higher pencil root. The short fan strokes come later.
    Pencil close-up of the low right leaf, with one root touching the stem, one slightly short and a vein that ends before the tip.
    Detail 10A.2 — Right vein stops inside the leafStart between the two root levels. Check that the thin end fades in open paper inside the leaf, well before its outer tip.

    Instructions for Drawing 10A — Select the two principal veins
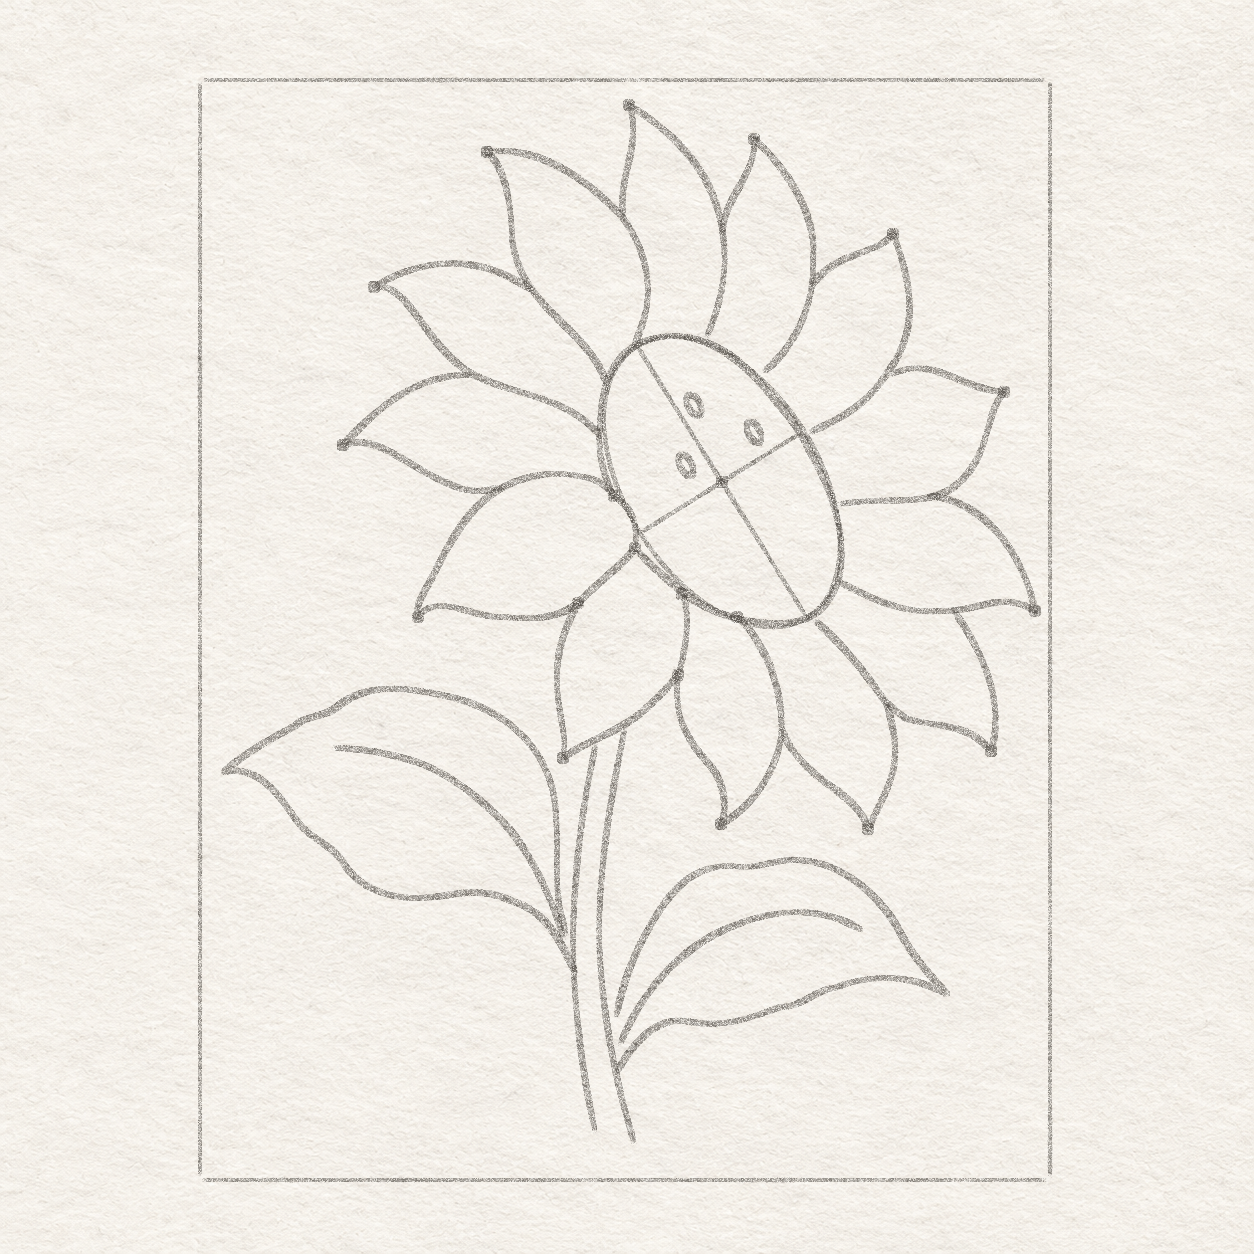
    1. Start inside the left leaf, just left of and below the higher pencil root. Curve freehand up-left through the broad middle, then turn farther left. Taper about three quarters of the way toward the leaf tip and stop well inside the outline.
    2. Start just inside the right leaf, midway between the levels of its two pencil roots. Curve freehand up-right and then flatten the bow through the upper half of the leaf. Taper about three quarters of the way to the tip and stop in clear paper inside the leaf.
    3. The left line starts below the higher pencil root. The right line starts between the two root levels. Both thin ends stop in open paper.
    Three individually placed narrow pencil ovals slope down-right inside the upper half of the seed head.
    Drawing 10B — Place the three upper seedsView larger

    Instructions for Drawing 10B — Place the three upper seeds
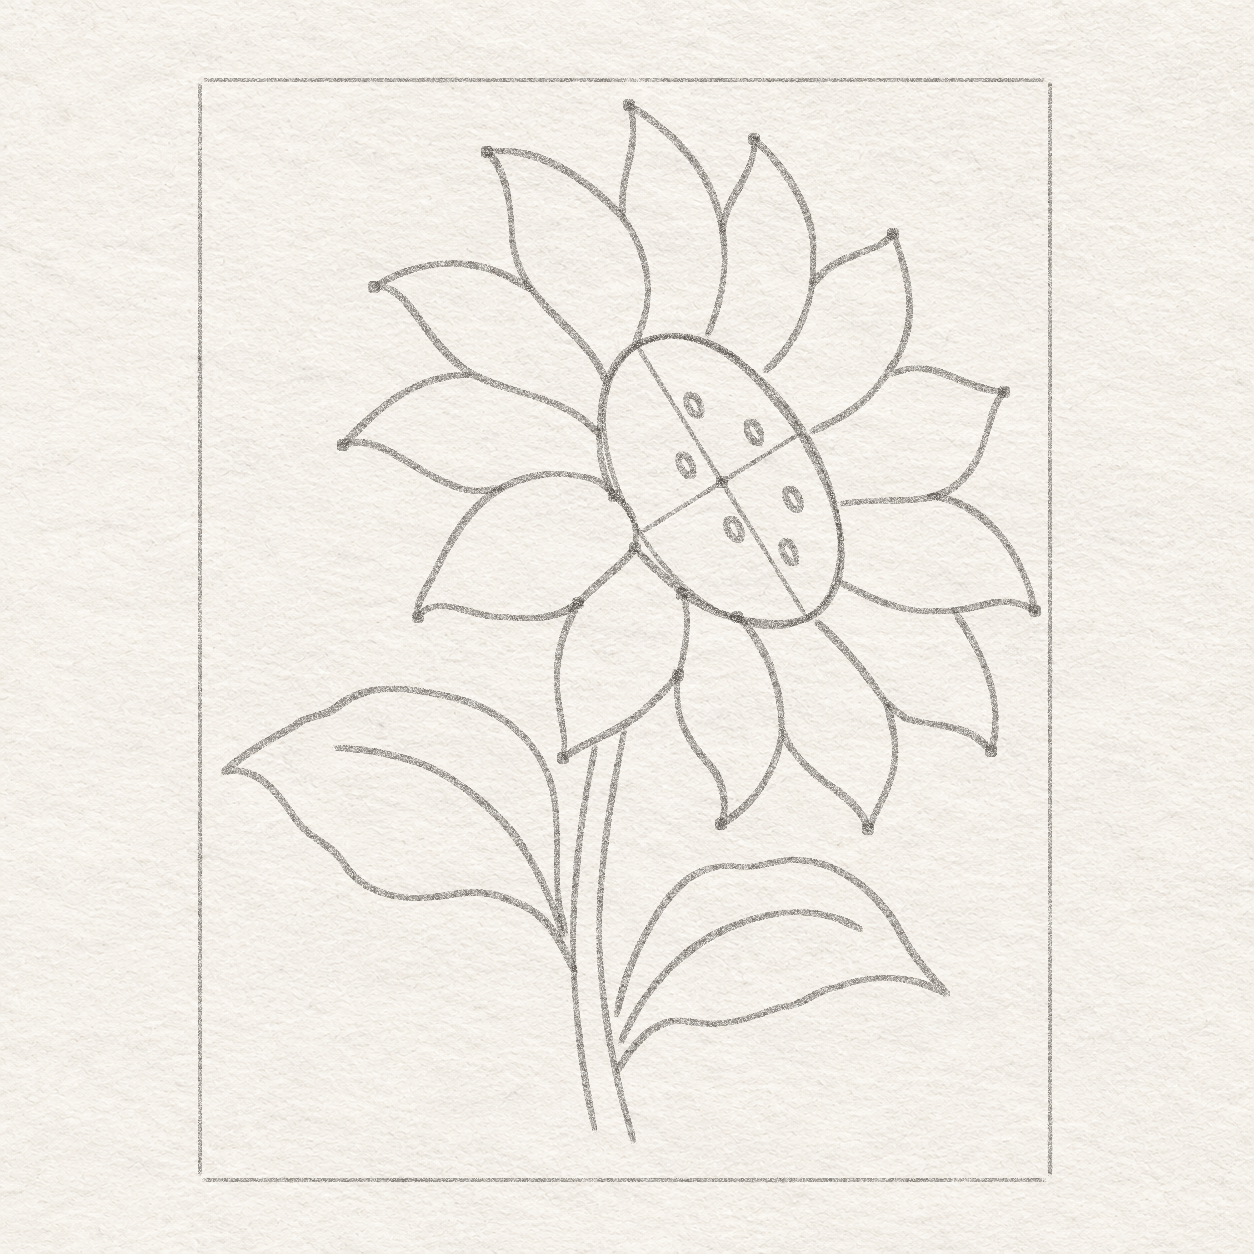
    1. Locate the middle of one seed about 7.9 cm across and 5.2 cm down from the box’s top-left corner. Aim one end about 2 mm up-left of that spot and the other end about 2 mm down-right. Freehand one side from end to end, bowing out about 1 mm at the middle. Bow the other side the same amount the other way, join both ends and leave the inside open.
    2. Locate the middle of one seed about 8.8 cm across and 5.6 cm down from the box’s top-left corner. Aim one end about 2 mm up-left of that spot and the other end about 2 mm down-right. Freehand one side from end to end, bowing out about 1 mm at the middle. Bow the other side the same amount the other way, join both ends and leave the inside open.
    3. Locate the middle of one seed about 7.8 cm across and 6.2 cm down from the box’s top-left corner. Aim one end about 2 mm up-left of that spot and the other end about 2 mm down-right. Freehand one side from end to end, bowing out about 1 mm at the middle. Bow the other side the same amount the other way, join both ends and leave the inside open.
    4. Look for the high left seed, a second seed down-right, and a third below the first. The three ovals stay separate with paper showing inside and between them.
    Three further tilted ovals sit in the lower half of the head with blank paper around all six seeds.
    Drawing 10C — Place the three lower seedsView larger

    Instructions for Drawing 10C — Place the three lower seeds

    1. Locate the middle of one seed about 9.5 cm across and 6.7 cm down from the box’s top-left corner. Aim one end about 2 mm up-left of that spot and the other end about 2 mm down-right. Freehand one side from end to end, bowing out about 1 mm at the middle. Bow the other side the same amount the other way, join both ends and leave the inside open.
    2. Locate the middle of one seed about 8.5 cm across and 7.2 cm down from the box’s top-left corner. Aim one end about 2 mm up-left of that spot and the other end about 2 mm down-right. Freehand one side from end to end, bowing out about 1 mm at the middle. Bow the other side the same amount the other way, join both ends and leave the inside open.
    3. Locate the middle of one seed about 9.4 cm across and 7.6 cm down from the box’s top-left corner. Aim one end about 2 mm up-left of that spot and the other end about 2 mm down-right. Freehand one side from end to end, bowing out about 1 mm at the middle. Bow the other side the same amount the other way, join both ends and leave the inside open.
    4. The lowest two sit left and right of one another. Leave more open paper toward the right edge of the head and keep each oval distinct.
    Next step — Draw the folds above and to the left

Chapter 4 — Add folds and pencil shadows

5 steps · 11 progress drawings · Pencil
  1. Step 11 of 17 · Pencil

    Draw the folds above and to the left

    Inner folds curve toward the head in three upper-left petals. The very short tip marks are separate.
    Drawing 11A — Curve folds inside the upper-left petalsView larger

    Instructions for Drawing 11A — Curve folds inside the upper-left petals
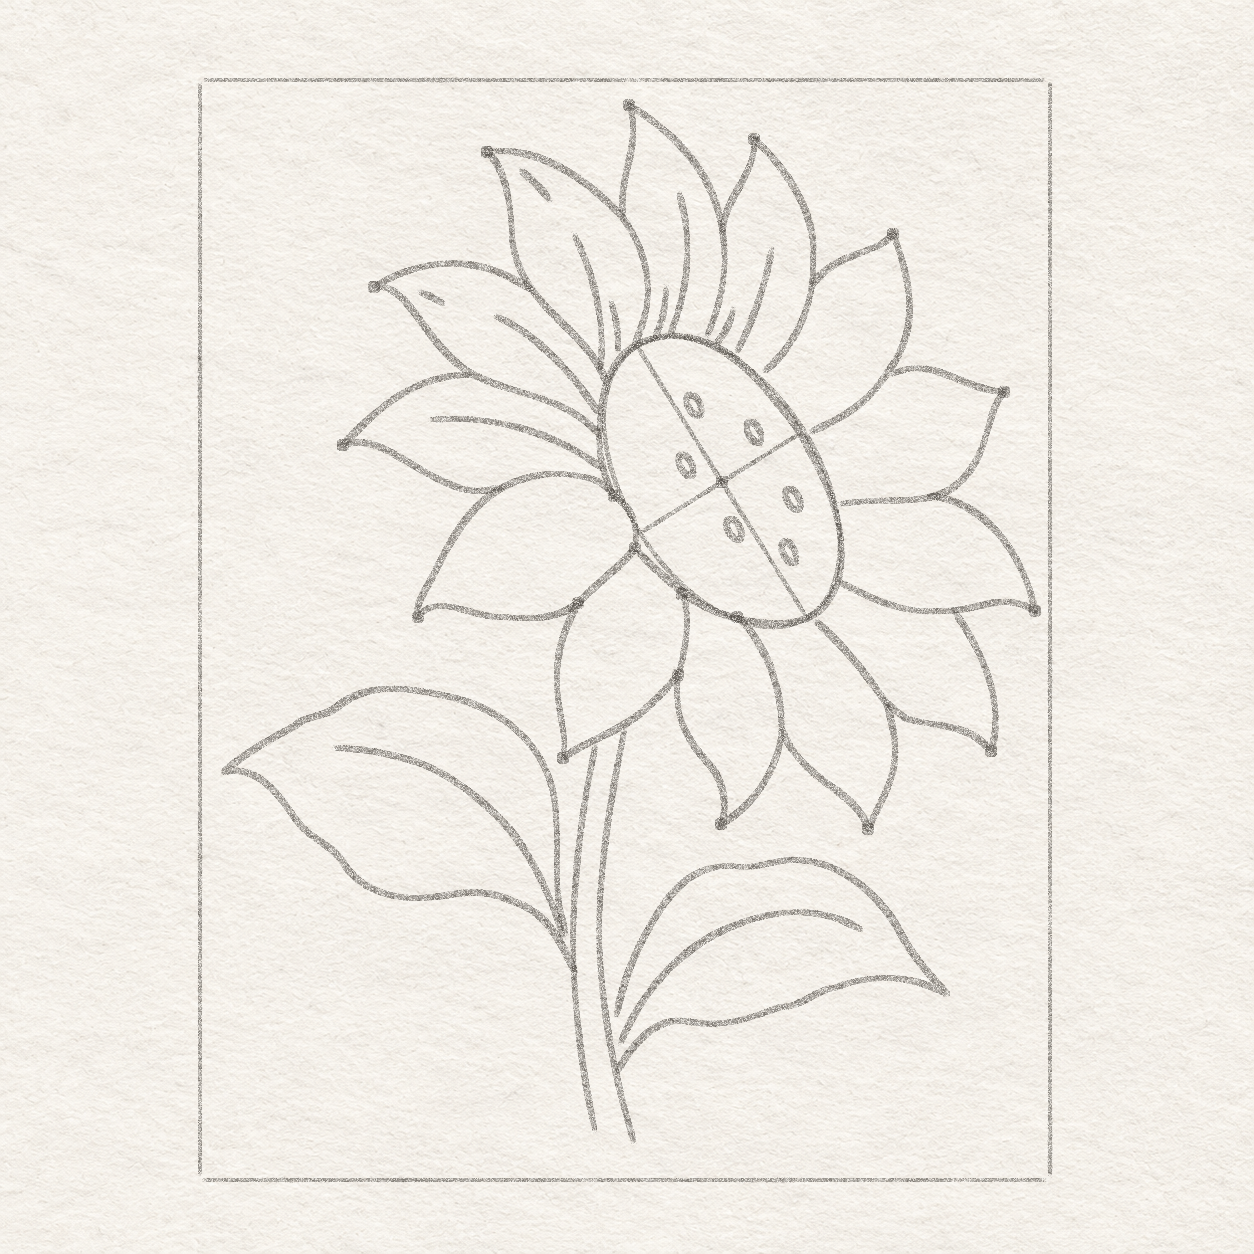
    1. Start just inside the pointed upper-left petal, a few millimetres down-right of its tip. Freehand a fine dash down-right toward its middle. Aim for about 6–8 mm, shortening it if needed to keep both ends in open paper.
    2. Find where the upper-left petal narrows near the left rim. Freehand a long crease from the inside of that narrow end, bowing up and left. Taper about two thirds of the way toward the tip. Beside it, add a finer flick from the same lower area and stop it about one third of the way up. Leave clear paper before the separate tip dash.
    3. Just inside the tip of the left diagonal petal, freehand a fine 4–5 mm dash down-right toward the center. Keep it detached from the outline and near the tip.
    4. At the narrow inner end of the left diagonal petal, freehand a crease up-left along its middle. Let it flatten and taper about halfway toward the tip. Leave clear paper before the tip dash.
    5. Start just inside the narrow end of the wide left petal. Freehand one line left and slightly up through the middle, then flatten it and taper about two thirds of the way to its tip. Follow the petal’s middle without touching its edges.
    6. All three petal faces keep large open areas. The detached dashes in the two left petals stop in open paper.
    The two tall petals above the head each gain a long fold and a much shorter thin turn near the attached end.
    Drawing 11B — Add the long folds above the headView larger

    Instructions for Drawing 11B — Add the long folds above the head

    1. At the bottom of the highest petal, find the two places along the rim about 7.3 and 7.5 cm across from the box corner. Start from the right place and bow freehand up-right, then back a little left, tapering partway toward the petal tip. From the left place flick upward beside it and stop after about 9 mm.
    2. Just inside the tall right petal, start the long fold a few millimetres right of its lower-left corner at the rim. Sweep freehand up-right, growing steeper into the petal’s middle and taper about halfway to its point. Start a short flick a few millimetres to the left on the same rim and stop before it reaches the middle.
    3. Keep the two main curves inside their own petals. Their shorter companions start a little to the left at the rim and taper early.
    Next step — Draw the remaining petal folds
  2. Step 12 of 17 · Pencil

    Draw the remaining petal folds

    Shorter curves and detached fine marks sit within the three right-facing petals without crossing their edges.
    Drawing 12A — Follow the creases in the right-facing petalsView larger

    Instructions for Drawing 12A — Follow the creases in the right-facing petals
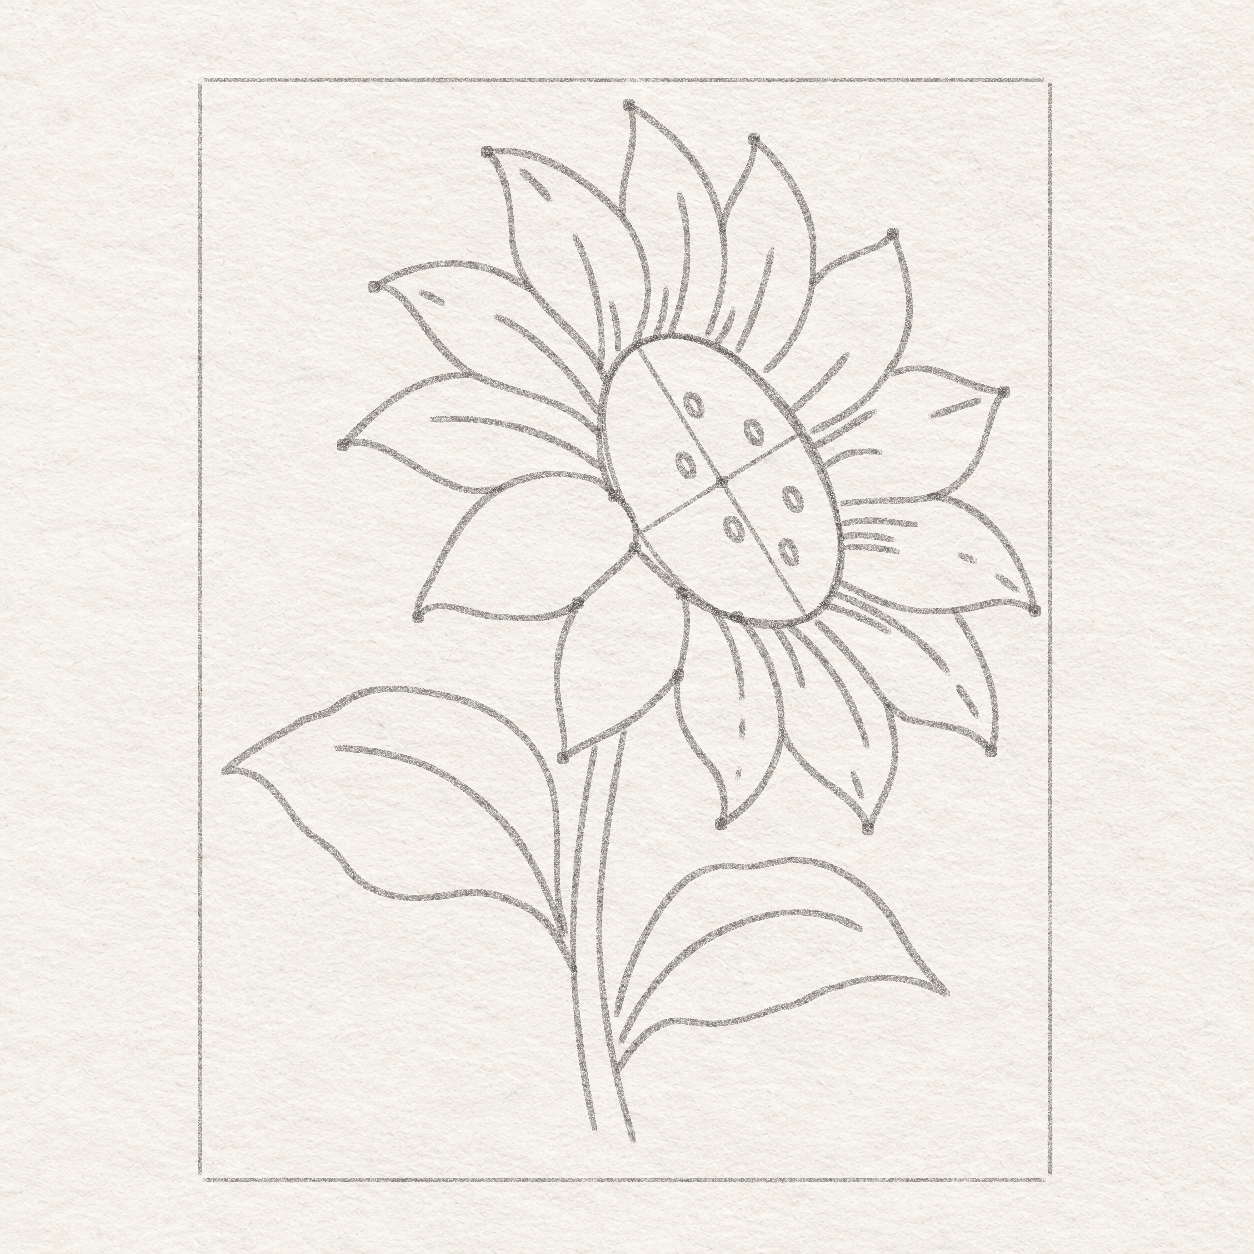
    1. In the petal that points up-right, start at the rim just inside its narrow end. Curve freehand up-right and fade in the open middle. Aim for about 1.4 cm along the curve, shortening it if necessary to stay inside the petal.
    2. In the upper of the two sideways right petals, pull one freehand flick up-right from the narrow inner end. Start another just below it and bend right, stopping in the inner half. Around two thirds of the way to the tip, add a detached fine dash in the open middle, slanting up-right. Leave paper around it.
    3. In the lower of the two sideways right petals, place three fine strokes along the rim a couple of millimetres apart. Freehand short bows to the right, each ending in the inner half. Add two detached faint dashes in the open outer half, one near its middle and the other farther down-right toward the tip. Slant both dashes gently down-right and leave paper around them.
    4. The marks in each petal stop inside its own outline. Keep the outer dashes disconnected from the folds near the seed head.
    Fine inward folds fill the two right petals that slope down and a broken taper appears on the lowest petal.
    Drawing 12B — Curve folds inside the lower-right petalsView larger

    Instructions for Drawing 12B — Curve folds inside the lower-right petals
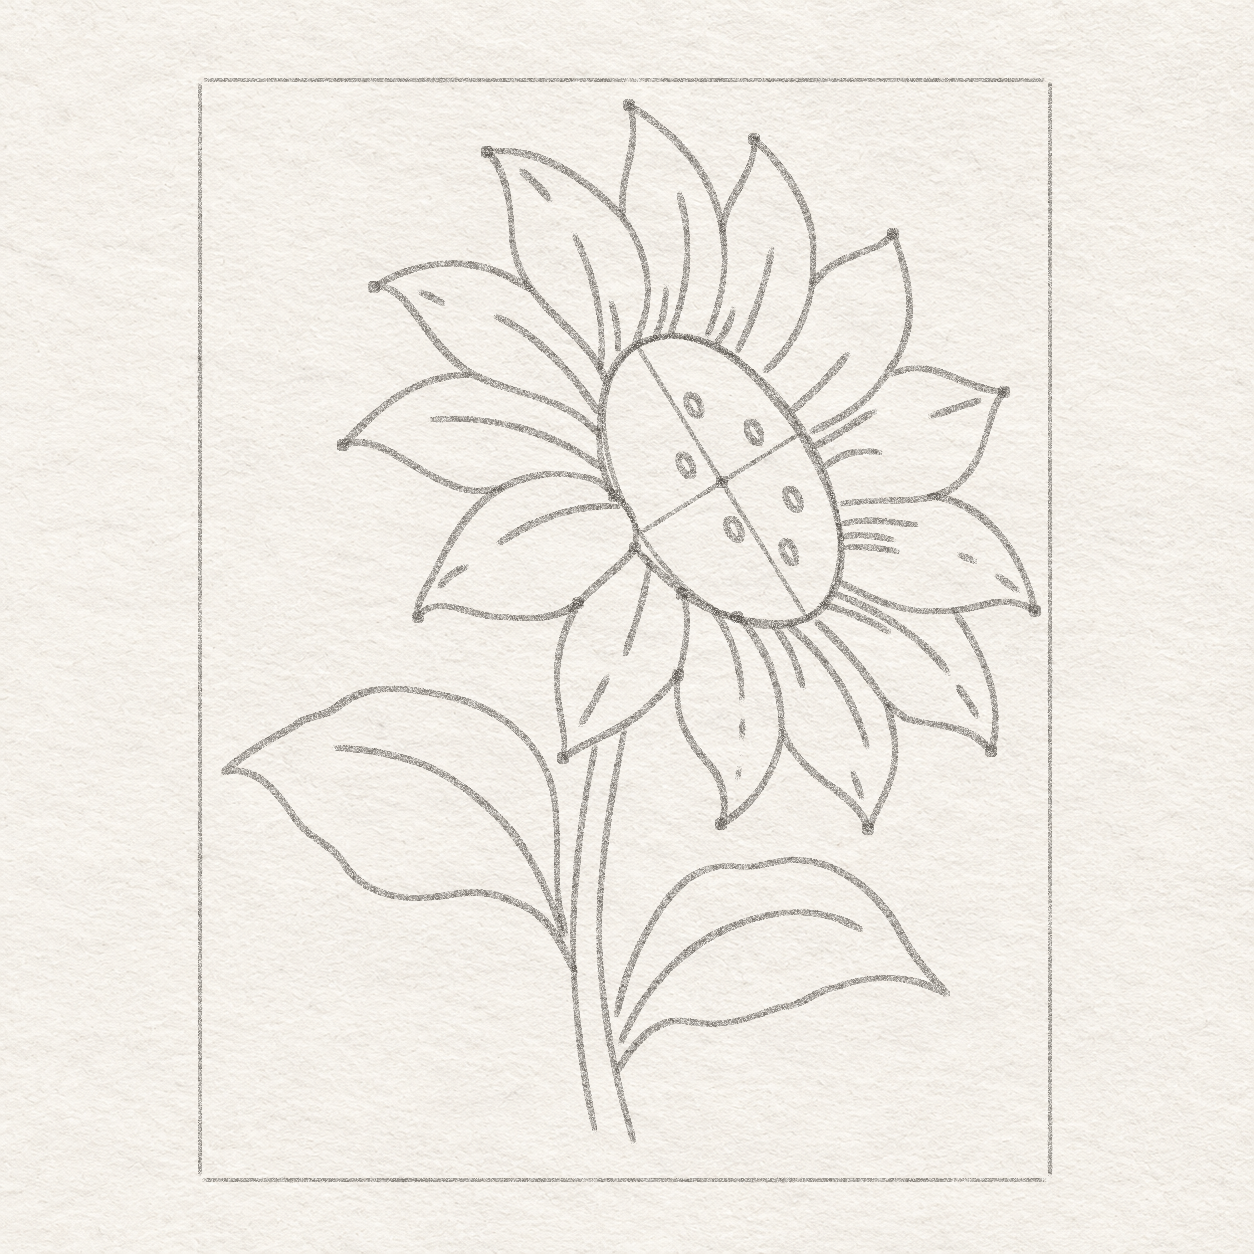
    1. In the upper of the two down-right petals, start two freehand folds near the rim a few millimetres apart. Bend them down-right, keeping one about twice as long as the other. In the open area nearer the point, draw a detached crease about 7 mm long. Bend it down-right and shorten it if needed to stay clear of the outline.
    2. Find the bottom rim between the bottom petal’s right-hand dot and the place just above the low-right petal’s short pencil end. Start the shorter crease halfway along that rim stretch. Start the longer one about 2 mm to its right on the same rim. Freehand both down-right into the lower pointed petal. Taper the short crease after about 1 cm and let the longer one go about twice as far, if there is room. Near the low tip add a separate faint 5 mm flick down and slightly right. Keep all three ends inside the petal.
    3. Find the right-hand dot where the petal that points almost straight down meets the bottom rim. Start the crease on that rim about 4 mm left of the dot. Freehand a fine curve down-right and then down the middle of the petal. End the first part as it straightens. Continue with three short fading pieces, each lower on the same path and separated by a sliver of paper.
    4. The finest lines stay well inside each edge. Three small lengths are visible at the end of the narrow bottom crease, separated by paper.
    Two irregular petal faces gain light curves and separate shorter marks inside their edges.
    Drawing 12C — Add the folds to the two front-left petalsView larger

    Instructions for Drawing 12C — Add the folds to the two front-left petals

    1. Inside the broad front-left petal, start near its narrow end beside the head. Bow freehand left and down gently and taper toward the middle. Just inside and above the hooked tip, add a detached faint crease up-right about 6 mm long. Leave blank paper between the two.
    2. Start just inside the down-left petal by its upper end at the seed-head rim. Sweep freehand down-left and let it fade about halfway toward the tip. Farther down in the same open middle, add a detached light flick down-left. Stop it inside the outline.
    3. One front-left crease points back toward the head. Its short outer mark leaves a gap, and the fold in the longer petal leaves a broad white tip.
    Next step — Draw the exposed stem strip and leaf root marks
  3. Step 13 of 17 · Pencil

    Draw the exposed stem strip and leaf root marks

    A narrow separately drawn stem strip appears beside the crossing petal with its tip short of the left leaf.
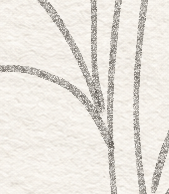
    Drawing 13A — Trace the narrow strip beside the upper stemView larger

    Instructions for Drawing 13A — Trace the narrow strip beside the upper stem
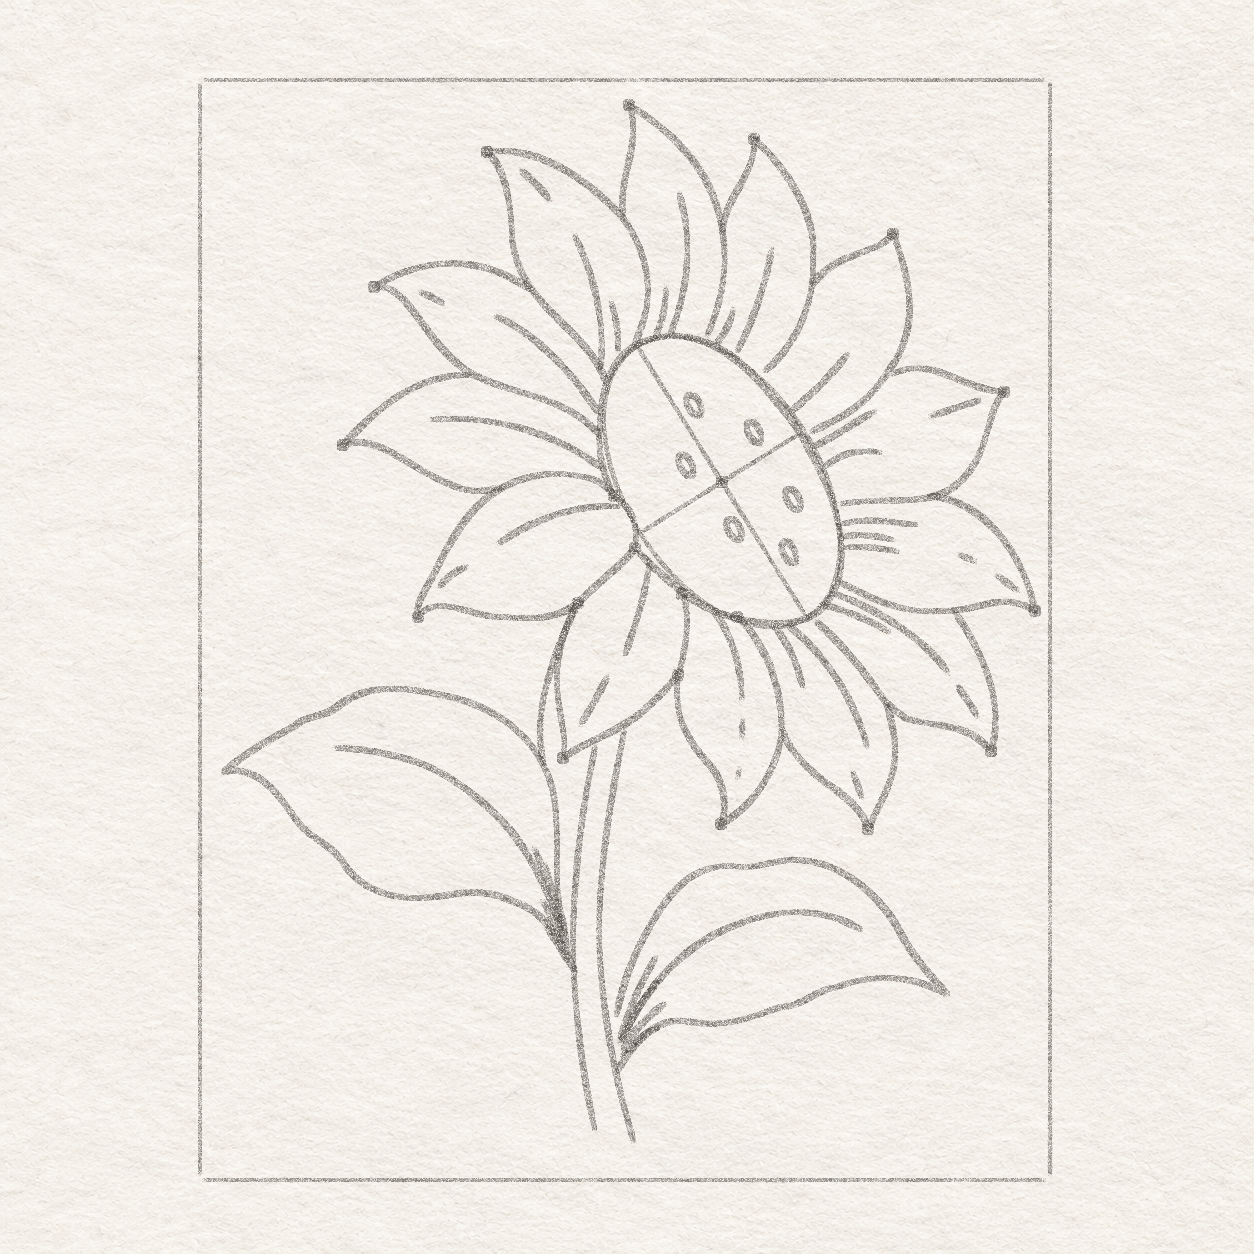
    1. Start next to the little dot where the broad front petal’s lower edge meets the down-left petal. Draw a shallow arc freehand down-left, staying just outside the down-left outline. Ease it to the right and taper a little above the nearby left leaf edge. Leave paper between the tip of the strip and the leaf.
    2. The strip lies to the left of the main stem and tapers by the crossing petal. Leave its lowest point separate from the nearby leaf edge.
    Each main vein begins among thin, fanning pencil strokes that end early in otherwise open leaves.
    Drawing 13B — Fan a few fine lines at the leaf rootsView larger

    Instructions for Drawing 13B — Fan a few fine lines at the leaf roots

    1. Where the left vein starts beside the stem, freehand four thin flicks up-left inside the leaf. Start them within a few millimetres of the vein root, angle them apart like a small fan and taper before the middle of the leaf. Spread their lengths from about 6 mm to 1.6 cm.
    2. At the start of the vein in the right leaf, freehand four light flicks into the leaf, pointing up-right. Keep their bases close to the vein’s root. Curve their ends away from one another and stop after about 6 mm to 1.5 cm, before any leaf edge.
    3. Leave most of both leaves bare. The curls and fanned lines stay separate from the two long leaf perimeters.
    Next step — Keep the seed highlights and shade the head
  4. Step 14 of 17 · Pencil

    Keep the seed highlights and shade the head

    Pencil builds along one edge of six small seed ovals while a narrow strip of bare paper remains visible inside every one.
    Drawing 14A — Darken one side of each seedView larger
    Pencil close-up of six tilted ovals. Two short strokes sit along one side of each and leave a pale strip inside.
    Detail 14A.1 — Leave one light strip in each seedTwo light strokes follow the lower-left side of each seed. Compare the pale diagonal strip on the other side.

    Instructions for Drawing 14A — Darken one side of each seed
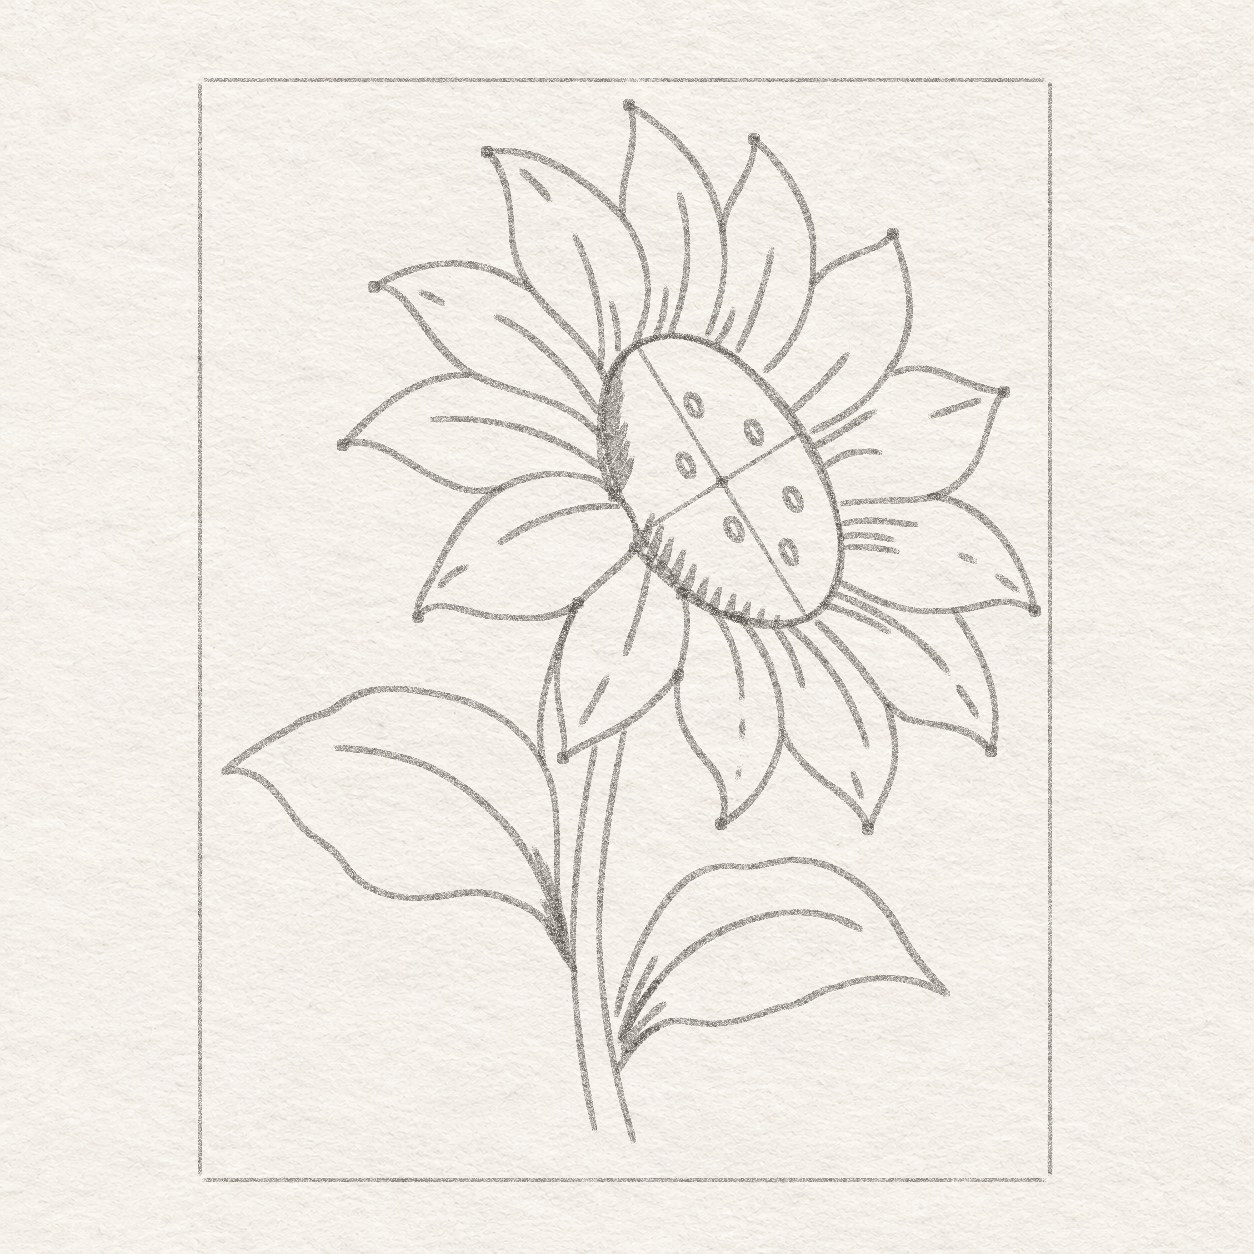
    1. Leave a clear diagonal strip of paper just inside the upper-right side of each of the three upper ovals. Start just inside the lower-left side and draw two light, short pencil strokes down-right along that edge. Keep both strokes on the same side of the seed. Leave the other side as bare paper.
    2. Repeat in the three lower ovals. Start near the lower-left side of each one and give it two light, short pencil strokes angled down-right. End the strokes inside the oval and leave the upper-right strip clear.
    3. Check that you can see a light strip in all six seeds. If the graphite crosses into the strip, lift it with the corner of your eraser before adding ink.
    Fine diagonal pencil hatching follows the left and lower seed-head rim, fading toward the seeds and breaking at the foreground petal.
    Drawing 14B — Hatch along the shaded side of the seed headView larger

    Instructions for Drawing 14B — Hatch along the shaded side of the seed head

    1. At the head’s upper-left curve, pull short light pencil lines diagonally up-right from the rim into the head. Follow the left edge down, lengthening the strokes to about 5 mm where there is room. Let the actual rim and seeds set their length, and keep paper before every seed. Stop at the broad front petal’s upper edge.
    2. Pick up the hatching only where the rim reappears below the broad front petal. Angle the strokes up-right as before, then shorten them around the rounded bottom until they disappear near the middle of the lower rim. Leave the head’s right side and the inside of the petals clear.
    3. The bare band near the seeds should still look broad. The broad front petal remains unshaded where it interrupts the head rim.
    Next step — Shade the petal joins and stem
  5. Step 15 of 17 · Pencil

    Shade the petal joins and stem

    A few dark, narrow pencil wedges sit only in the existing joins between the petals and around the head.
    Drawing 15A — Find the small shaded joins between petalsView larger

    Instructions for Drawing 15A — Find the small shaded joins between petals
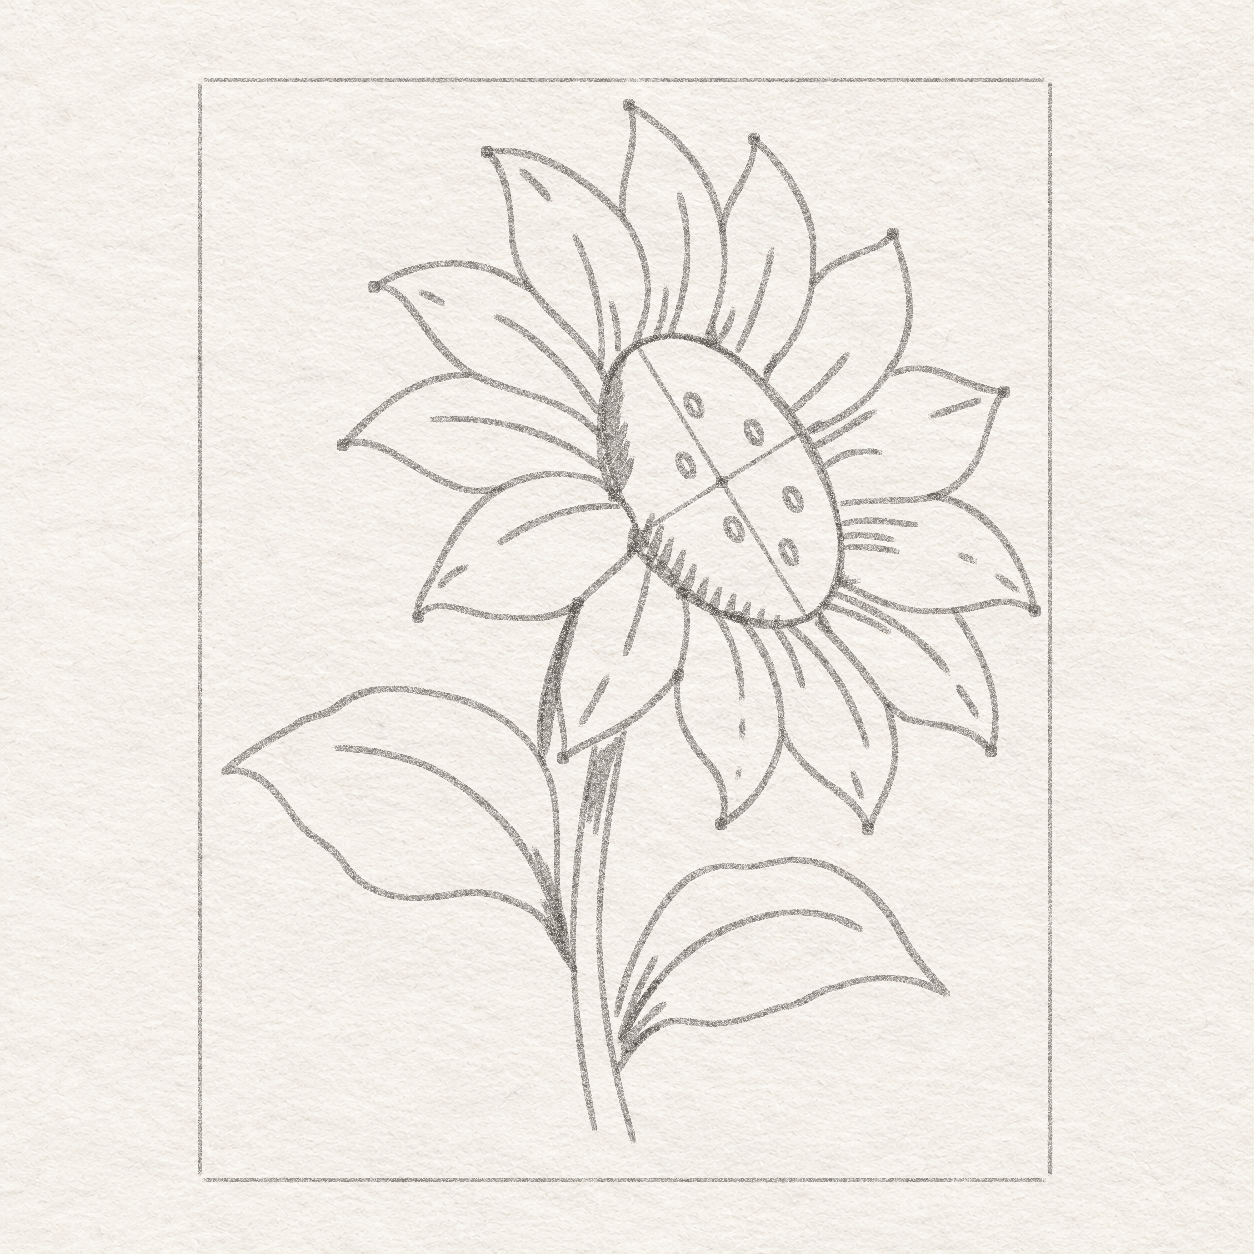
    1. Find the three little spaces beside the pencil ends of the highest, tall right and right diagonal petals. At each end, start just to its right where it points into the rim. Place three or four short pencil strokes spreading out from that narrow space. Lift before the space widens into the petal face.
    2. Add a small pencil wedge at the narrow inner turn of the broad front petal, running down toward its lower stop. At the lower-right rim, find the thin spaces beside the stops for the low-right petal and the outer sideways petal. Start in each tight space and stop the short strokes before the surrounding paper widens.
    3. The wedges stop before the petal faces open out. Keep the large petal interiors light.
    Pencil lines follow the two narrow stem shadow areas just below the petal crossings.
    Drawing 15B — Shade the narrow exposed stem stripsView larger

    Instructions for Drawing 15B — Shade the narrow exposed stem strips

    1. Use the shallow strip arc and the left edge of the crossing down-left petal as the two sides of this narrow space. Put a few pencil strokes down and slightly left between them. Shorten them where the space narrows and lift before the nearby left leaf.
    2. Just below the down-left petal, start three fine pencil strokes inside the upper part of the main stem, near its right edge. Follow the shallow bend down-left, letting each stroke fade before the left leaf’s root. Keep an open lane to the left of the group.
    3. Leave an unshaded path down the main stem. Both leaves remain open around their veins.
    Next step — Ink the flower, stem and leaves

Chapter 5 — Ink and clean up

2 steps · 4 progress drawings · Fineliner
  1. Step 16 of 17 · Fineliner

    Ink the flower, stem and leaves

    The visible head rim, overlapping petal edges, inner folds and short flower shadows are now inked. The seed interiors and lower plant remain in pencil.
    Drawing 16A — Ink the flower over its pencil linesView larger

    Instructions for Drawing 16A — Ink the flower over its pencil lines
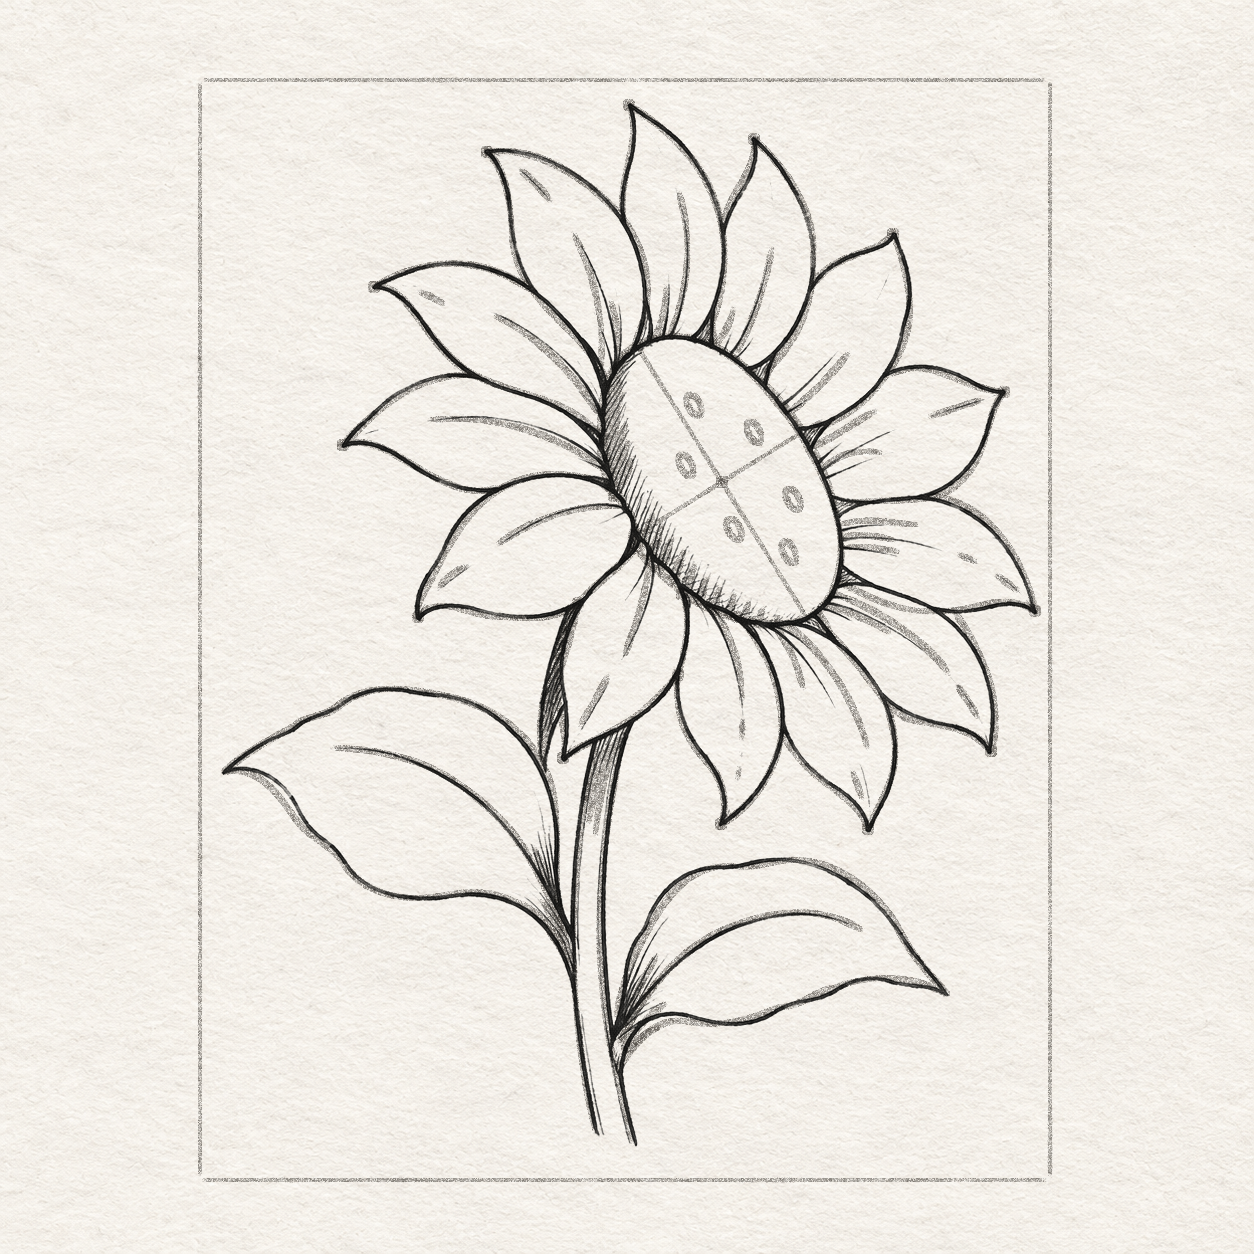
    1. Test a fine black pen on matching scrap. Trace the visible rim and lift where the broad front petal covers it. Ink every visible petal outline, including the wide left petal and the broad front petal. Trace shared edges once. Lift wherever another petal hides the line. At the highest, tall right, right diagonal, right-facing and low-right petals, bridge any pencil gap to the rim. Stop at the join if it already touches. Trace the folds lightly and keep their gaps. Repeat the pencil hatches at the head and petal bases. Where the down-left petal passes over the narrow strip and the main stem, add tiny pen flicks from its left and lower sloping edges into those pencil shadows. Keep these flicks close to the petal edges.
    2. Check that the wide left outline is inked and that the five short petal ends now meet the rim. Keep the long strip and stem lines, leaves and seeds in pencil. The broad front petal still hides the left rim.
    Dark ink now meets the stem at both root levels of each leaf. The small seeds are still graphite.
    Drawing 16B — Ink the stalk and leavesView larger

    Instructions for Drawing 16B — Ink the stalk and leaves

    1. Trace the two bowed stem sides up to the long down-left petal. Bridge any hairline gap that remains. Trace the separate strip and stop at its pencil end above the left leaf. Ink each leaf edge up to its two root levels. Continue either higher root to the stem if a pencil gap remains. Ink the long left center vein and the shorter right one. Keep the right vein’s tapered end inside its leaf. Trace the short fans and the longer strokes in the two pencilled stem shadows. Stop those strokes at the small pen flicks already next to the down-left petal.
    2. The main stem starts touch the petal and have paper between them. Both leaves meet the stem at their two separate root levels. The right vein stops short of the point. Keep all remaining pencil marks until cleanup.
    Next step — Finish the seeds and lift the guides
  2. Step 17 of 17 · Fineliner

    Finish the seeds and lift the guides

    The six dark seed ovals retain one thin light strip each. Light pencil aids remain around the ink.
    Drawing 17A — Ink around the six light seed stripsView larger
    Fineliner close-up of six dark seed marks, each with one pale strip along its slanted interior.
    Detail 17A.1 — Six ink edges around six light stripsThe dark ink follows the sides of the six tilted seeds. A thin line of bare paper remains in each.

    Instructions for Drawing 17A — Ink around the six light seed strips
    1. Trace the six narrow oval outlines with the tip of the fine pen. Before darkening each one, find its slender reserved strip on the upper-right side. Make short ink strokes on the left and lower side of that strip, following the pencil slant and stopping against the oval. Work one seed at a time.
    2. Count six pale strips, one inside each dark seed. Keep the graphite where it is so the ink can dry.
    A clean fineliner sunflower on textured paper with a tilted seed head, overlapping petals, curved stem and two large leaves.
    Drawing 17B — Clean fineliner sunflowerView larger

    Instructions for Drawing 17B — Clean fineliner sunflower

    1. Make a matching dark ink patch on scrap from the same paper. Touch it gently with the eraser. If the ink smears, wait and test again before touching the drawing. When the patch stays clean, lift the light box, axis lines, construction oval and measuring dots. Use light touches to erase every pencil mark still visible, including the lines and shading between or beside the ink. Check the petal outlines and folds, the seed outlines and shading, and the stem edges, leaf outlines and veins. Work slowly at the joins, keep the ink lines intact and brush away the crumbs.
    2. Look for any remaining pencil beside the ink. Keep the petal joins, dark seed edges, thin white strips, fine folds and vein ends as they were in the previous ink drawing.
    Back to the chapters

If something looks off

The head looks round and upright

While the pencil is light, check that both ruler lines pass through the same center dot. The long guide leans down to the right. Draw the oval freehand through its four ends again.

The petals cross each other

While the pencil is light, return to the broad foreground edge and then to the down-left petal. Match the small bottom petal at the side of that earlier outline, then let the two edges separate as they descend.

A petal join seems to float beside the edge

While the pencil is light, set the ruler at the one distance in that instruction. Use where it meets your actual petal edge. If the named edge does not reach the ruler, gently correct the earlier shoulder or curve first. The new line should meet that edge without leaving a gap or crossing it.